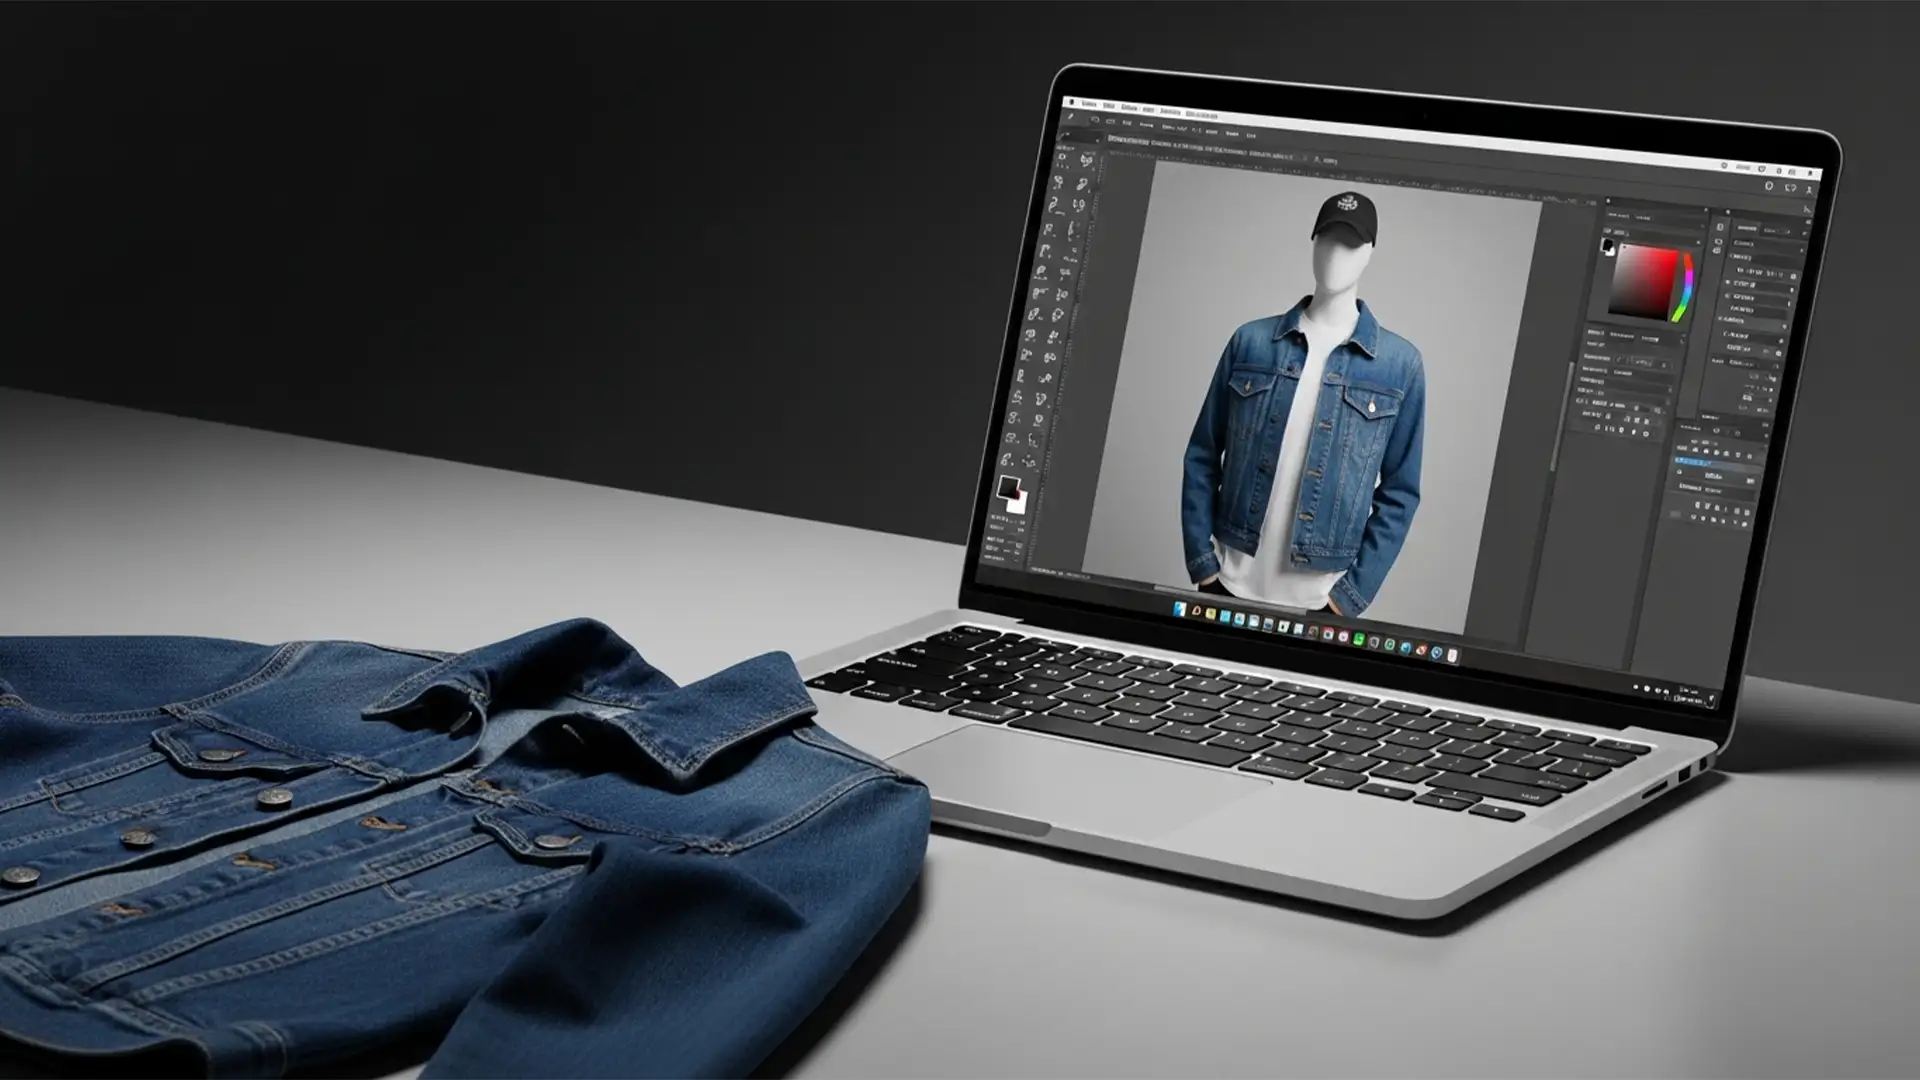
You are editing a stunning fashion editorial in Photoshop v25.x. You need to extend a tailored tweed jacket or remove a distraction from a knit sweater. You lasso the area, hit Generative Fill, and wait for the magic. But instead of crisp fabric, you get a blurry, plasticky, smoothed-out mess.
This is the dreaded Generative Fill clothing texture loss. It ruins garment fidelity and screams poor retouching. Why does this happen? The culprit is Adobe Firefly’s strict generation limits. If you are tired of pixel interpolation ruining your high-end apparel edits, here is exactly how to bypass the limitations and restore razor-sharp fabric textures.
Understanding the 1024px Limitation in Adobe Firefly
To fix the problem, you must first understand why Photoshop is smoothing out your garments.
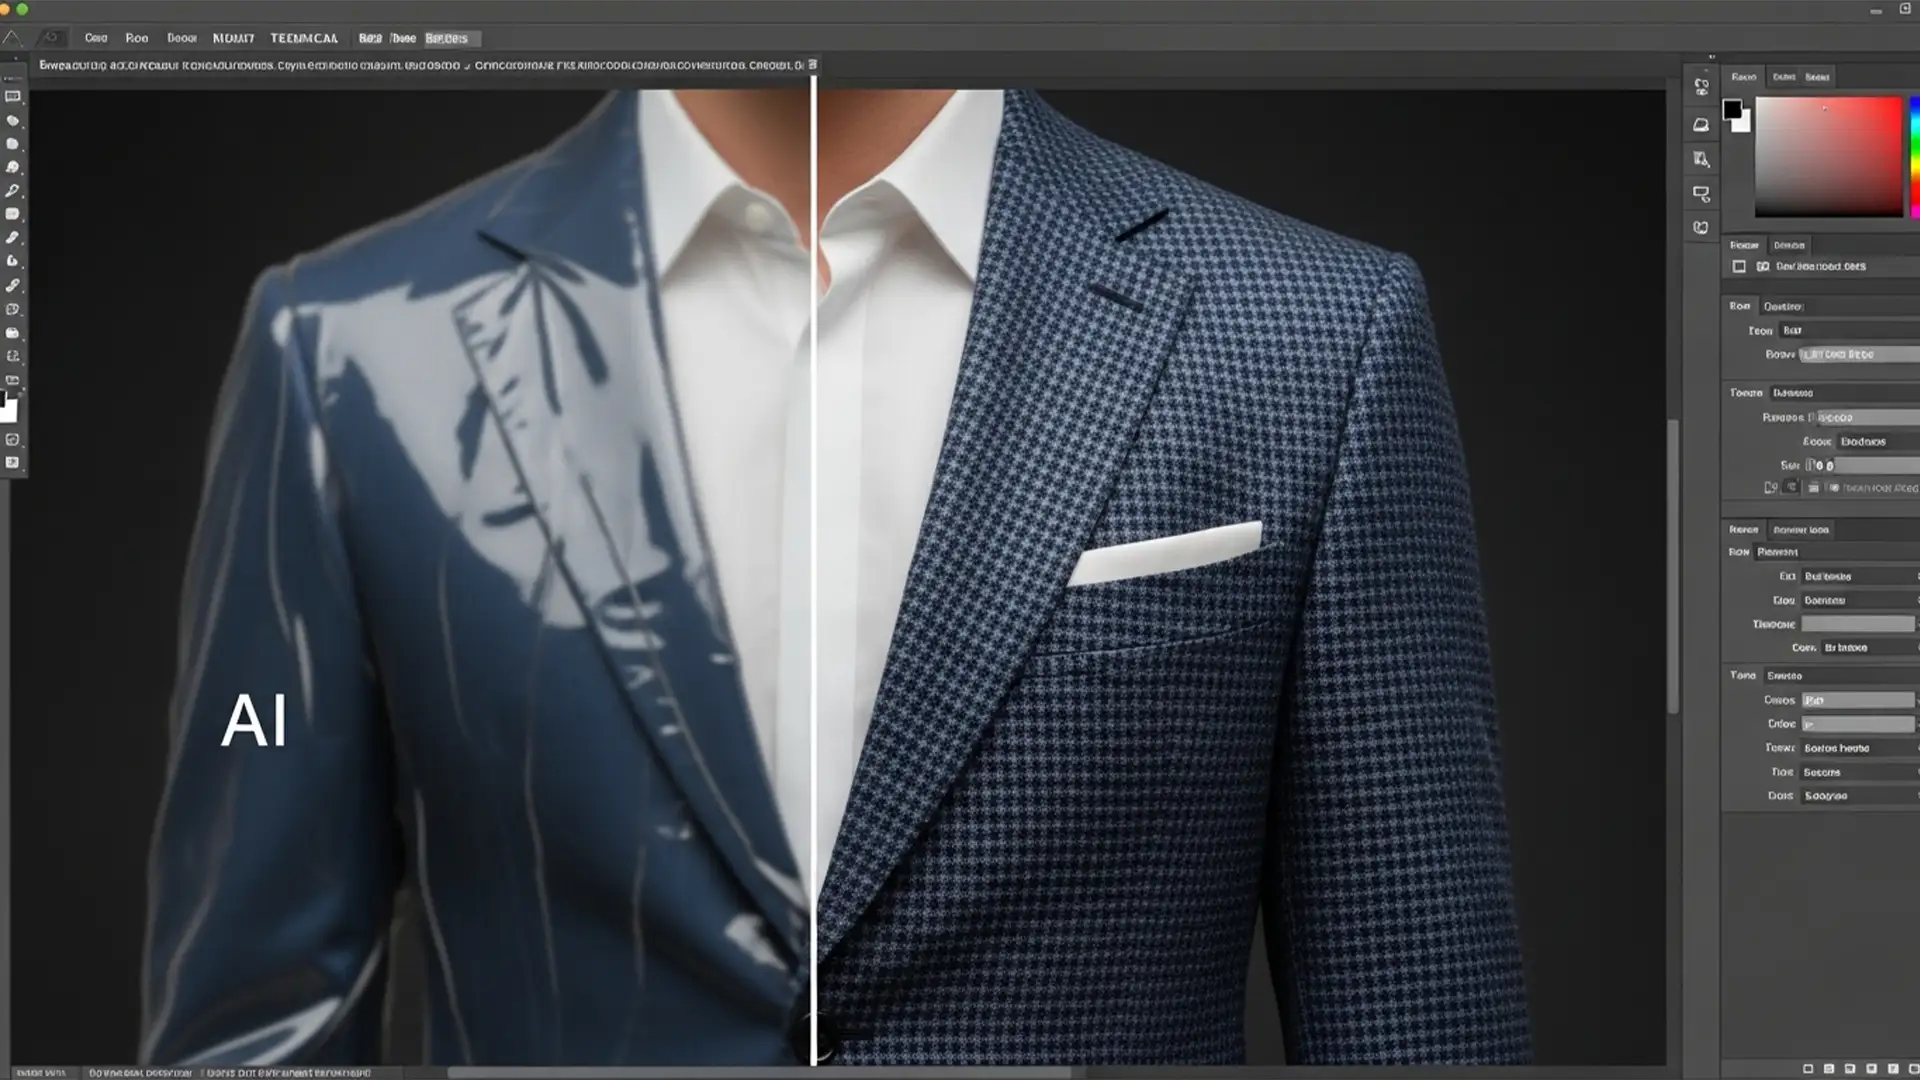
In Adobe Photoshop v25.x and newer, the Generative Fill feature-powered by the Adobe Firefly engine-restricts generation resolution to a maximum of 1024×1024 pixels per prompt.
When you select a large area, such as a full dress, a business suit, or expansive knitwear, Photoshop still only generates a 1024px patch. It then forcibly stretches that small patch to fit your massive bounding box. This stretching causes severe pixel interpolation. The software has to guess the missing pixel data, resulting in the blurred, soft, and plasticky textures that destroy fabric fidelity.
Fortunately, professional retouchers have developed three distinct workflows to bypass this limitation.
3 Methods to Fix Generative Fill Clothing Texture Loss
Method A: The Quick Fix (1024px Chunking)
The most straightforward way to prevent texture loss is to stop Photoshop from stretching the generation in the first place. Instead of selecting the entire garment at once, you will generate the clothing piece by piece to maintain a native 1:1 pixel generation.
Step-by-Step:
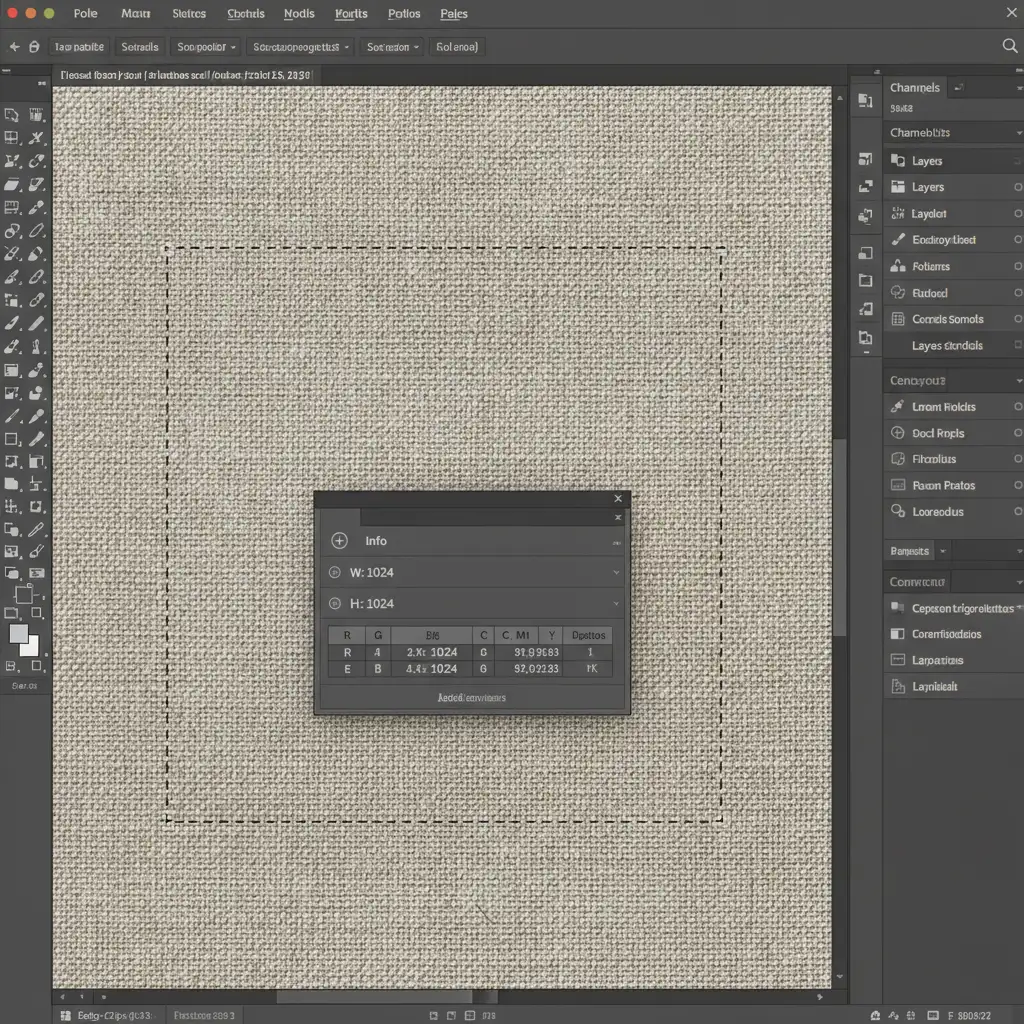
- Open the Info Panel in Photoshop (Window > Info).
- Select the Rectangular Marquee Tool.
- Draw your selection over the clothing, but watch the Info Panel closely. Ensure your selection dimensions (Width and Height) never exceed 1024 pixels.
- Activate Generative Fill via the Contextual Task Bar and generate your patch.
- Repeat this process in overlapping “chunks” until the entire garment is covered.

Method B: The Pro Workaround (High Pass Texture Blending)
If chunking takes too long, you can generate a large area and manually inject the missing texture back into the AI-generated patch. This method borrows principles from frequency separation.
Step-by-Step:
- Make your large selection and use Generative Fill. Let it stretch and become blurry.
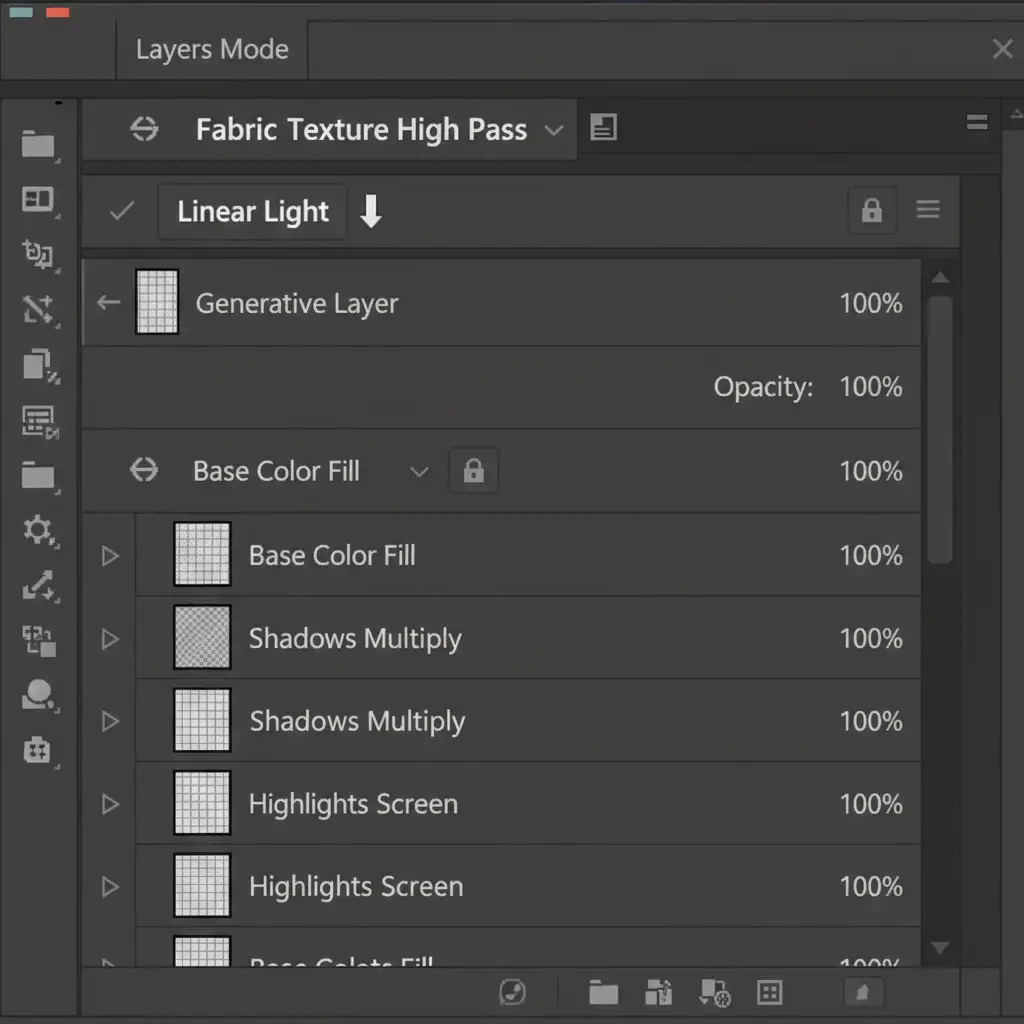
- Target a clean, highly textured area of the original clothing. Duplicate this original texture onto a new layer and place it above your Generative layer.
- With the new texture layer selected, navigate to Filter > Other > High Pass.
- Set the radius to 2-4px (just enough to see the fabric weave, but not the color) and click OK.
- Change the blend mode of this High Pass layer to Linear Light.
- Hold Alt (or Option on Mac) and click between the High Pass layer and the Generative Layer to create a clipping mask.
The original fabric weave will now flawlessly overlay the smooth AI-generated fill, restoring perfect texture.

Method C: The Technical Deep-Dive (Smart Object Upscaling)
For the highest level of control, especially when working on massive high-res fashion composites, you can leverage advanced upscaling algorithms instead of relying on standard pixel interpolation.
Step-by-Step:
- Generate your Generative Fill on a smaller, 1024px document or selection.
- Right-click the Generative Layer and select Convert to Smart Object.
- Double-click the Smart Object thumbnail to open it in a new tab.
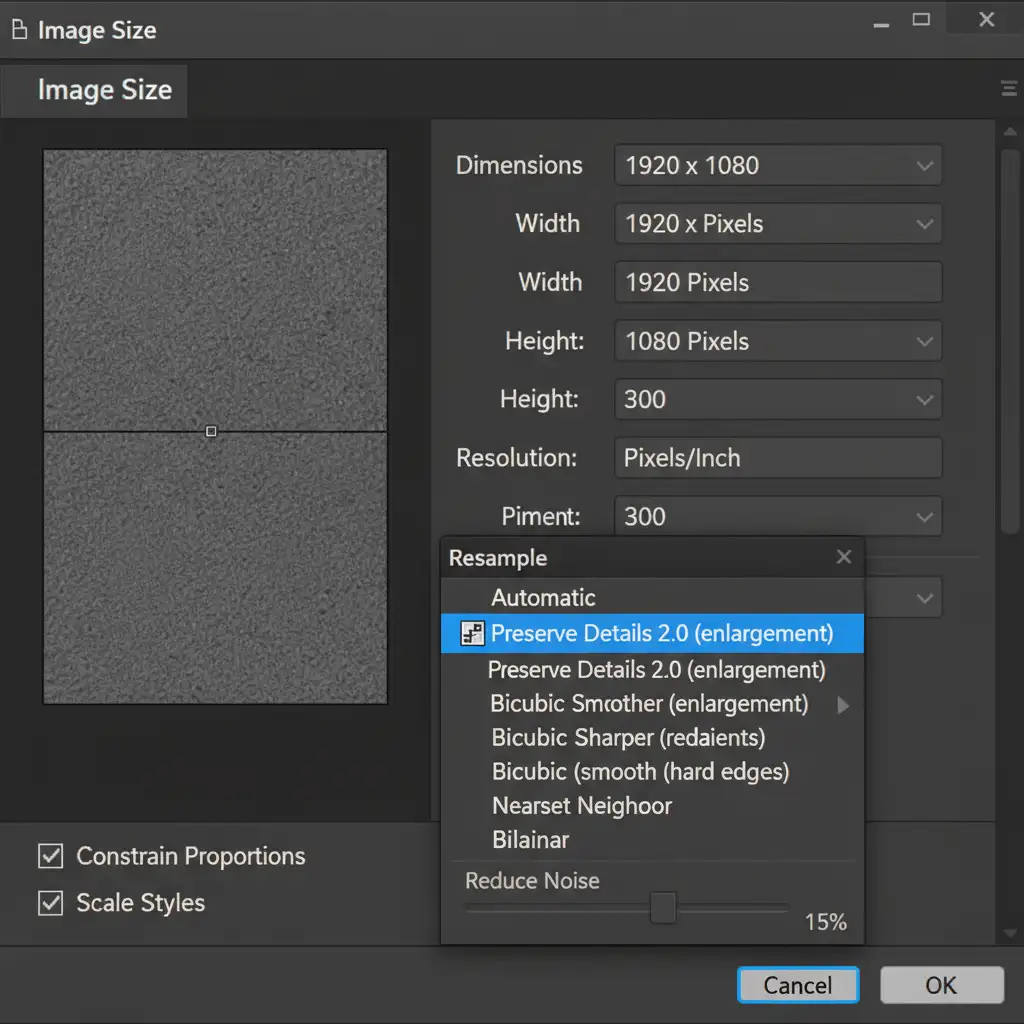
- Navigate to Image > Image Size.
- Under the Resample dropdown, select Preserve Details 2.0.
- Increase the resolution to match your master document, adjusting the “Reduce Noise” slider to retain the fabric grit.
- Save and close the Smart Object. Back in your main document, use a Layer mask to blend the newly upscaled, texture-rich patch flawlessly.
Flawless Fashion Retouching with Image Work India
While these techniques effectively solve Generative Fill clothing texture loss, executing them across a high-volume fashion catalog requires immense time, precision, and technical expertise. When you are managing a major e-commerce launch or an editorial campaign, spending hours tweaking High Pass filters and managing 1024px limitations simply isn’t viable.
Need pixel-perfect fashion imagery without the AI artifacts? The experts at Image Work India and Cloud Retouch specialize in high-end apparel retouching. We ensure crisp fabric textures, flawless edits, and perfect color accuracy every single time, allowing you to scale your visual content without sacrificing quality.
Contact Image Work India today to elevate your fashion imagery and let our professional retouching team handle the heavy lifting.