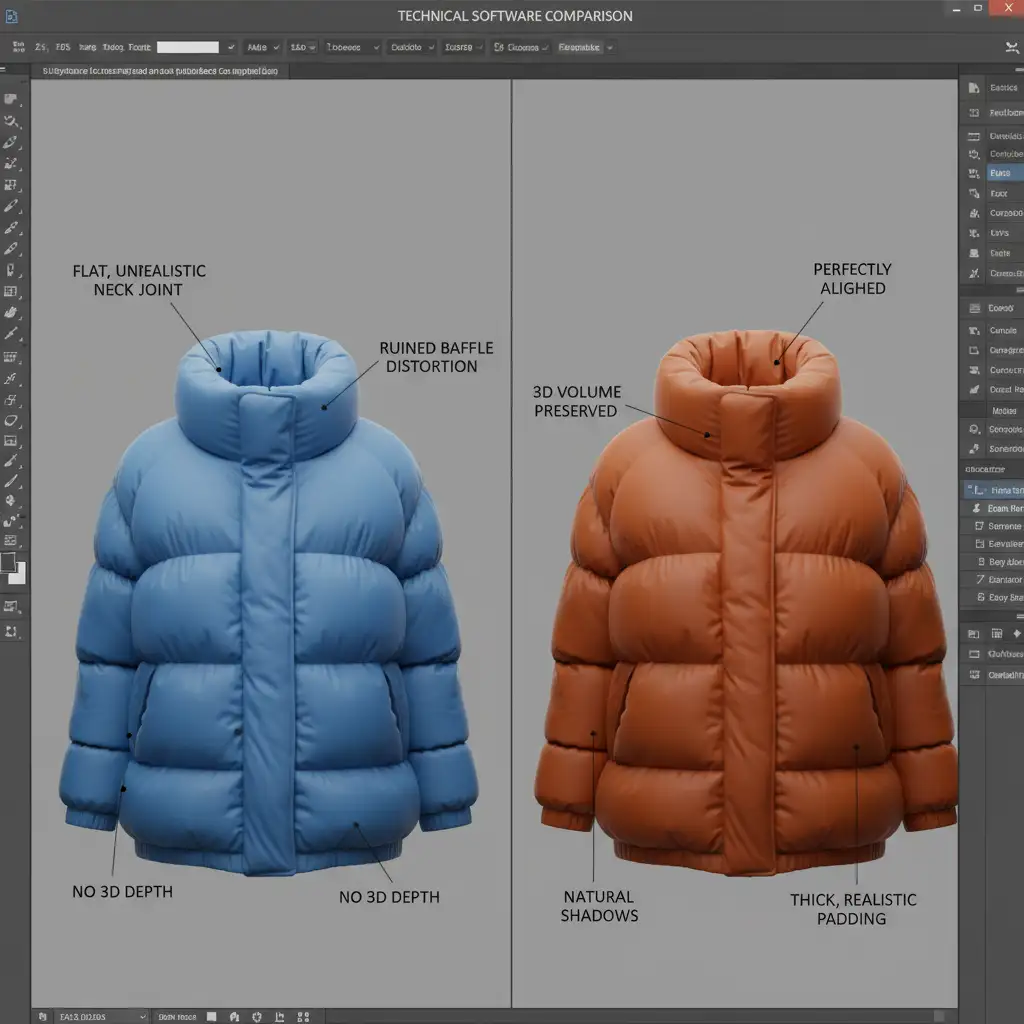
E-commerce photo editors know the struggle: you finish a flawless clipping path on a heavy winter coat, drop in the inner collar, and suddenly, the garment looks completely flat. Standard ghost mannequin techniques destroy the volumetric depth of padded down baffles, resulting in a disjointed, unrealistic transition between the back-neck area and the puffy front shell.
If you are battling oversized puffer jacket neck joint alignment in Adobe Photoshop v25.x, simple 2D scaling won’t cut it. You need advanced spatial distortion to maintain that bulky streetwear aesthetic. Here is exactly how to preserve 3D volume without compromising structural integrity.
Why Standard Clipping Paths Fail on Heavy Outerwear
When editing standard t-shirts or light jackets, a basic clipping path and standard transform tools are usually sufficient to marry the inner neck insert with the front garment. However, oversized puffer jackets present a unique spatial challenge.
The heavy curvature of the padded down baffles requires spatial distortion. If you simply paste the inner neck tag layer behind the front shell, you trigger severe baffle distortion, making the jacket look like a deflated balloon rather than premium winter wear. To fix this, we must move away from flat composites and treat the garment as a 3D object.
Step-by-Step: Perfecting Oversized Puffer Jacket Neck Joint Alignment
To achieve a seamless, realistic ghost mannequin effect, professional retouchers rely on a three-tier workflow involving spatial grids, fluid distortion, and targeted shading.
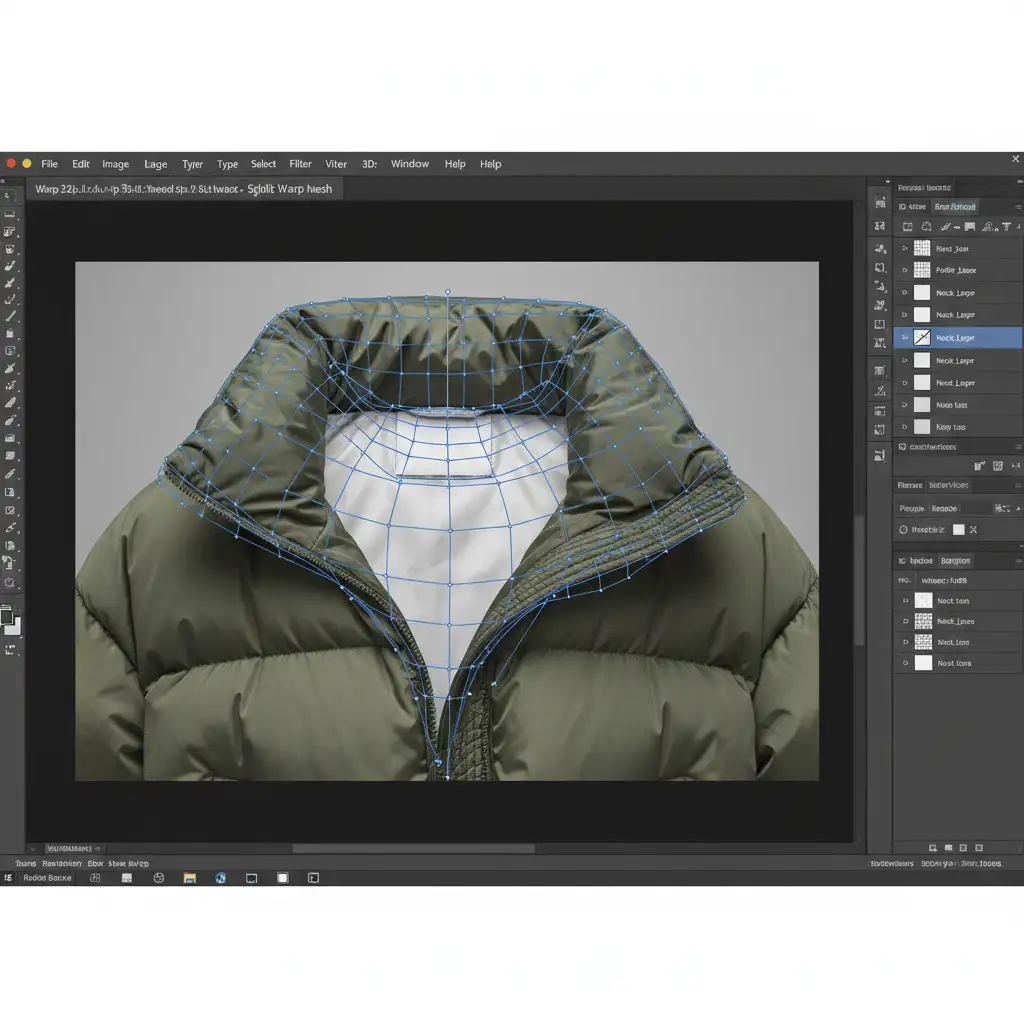
Method A: The Quick Fix with Split Warp Grids
For minor misalignments where the collar simply needs to tuck naturally behind the front shell, the Split Warp tool in Adobe Photoshop v25.x is your most efficient option.
- Isolate your inner neck layer and press Ctrl+T (Free Transform).
- Right-click and select Warp.
- Instead of using the standard 3×3 grid, use the Split Warp grid feature to add custom horizontal and vertical grid lines exactly where the inner neck tag layer meets the thick outer collar.
- Gently pull the grid points to contour the inner collar along the natural curve of the jacket, ensuring you do not stretch or distort the stitched baffles.
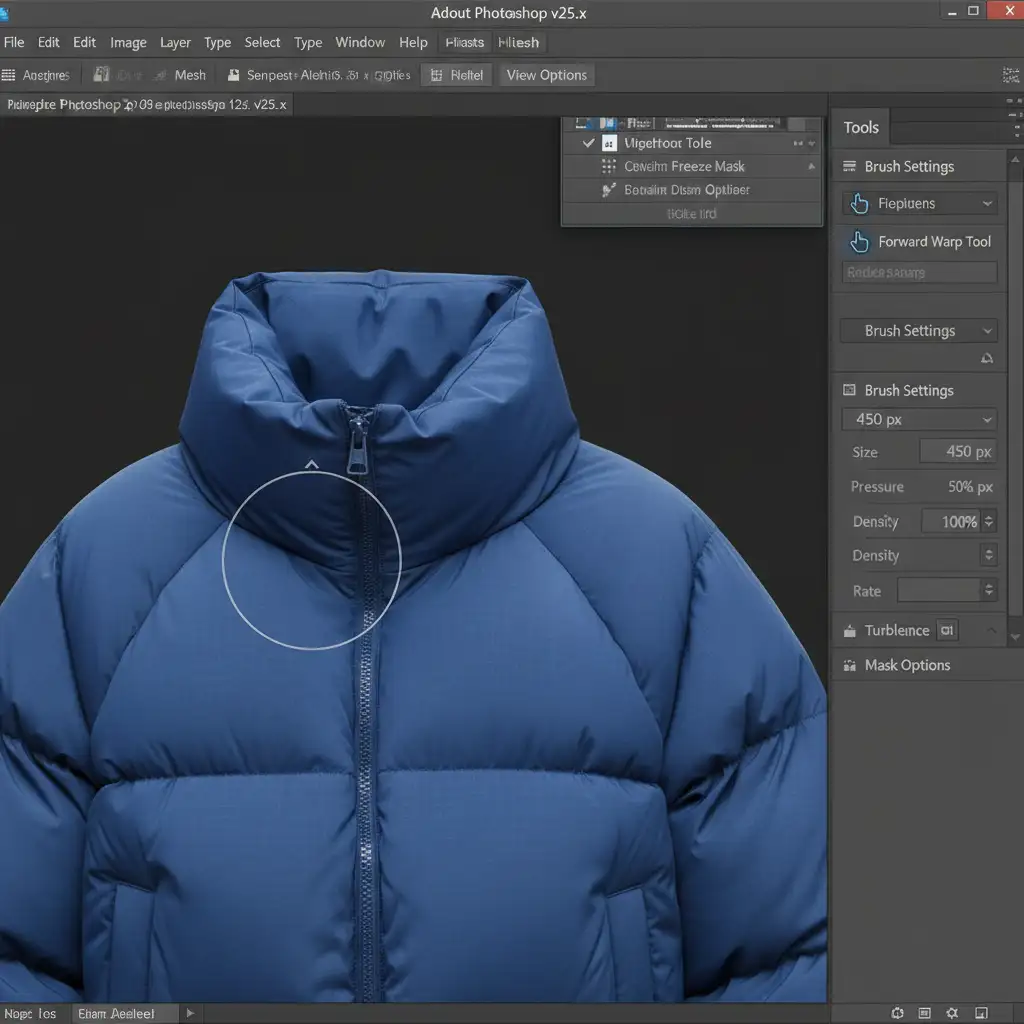
Method B: The Pro Workaround using Smart Objects & Liquify
When dealing with extreme volume in oversized streetwear, the Warp tool can sometimes stretch fabric textures unnaturally. The Liquify tool offers superior control for pushing heavy padding into place.
- Right-click your inner neck layer and select Convert to Smart Object. This ensures your adjustments remain non-destructive.
- Navigate to Filter > Liquify.
- Select the Forward Warp tool.
- Set your brush to a large size with a very low pressure (around 10-15%).
- Gently push the bulky padding into a natural circular shape. The large brush ensures the puffy 3D effect of the baffles moves uniformly, preventing sharp, unnatural pinches in the fabric.
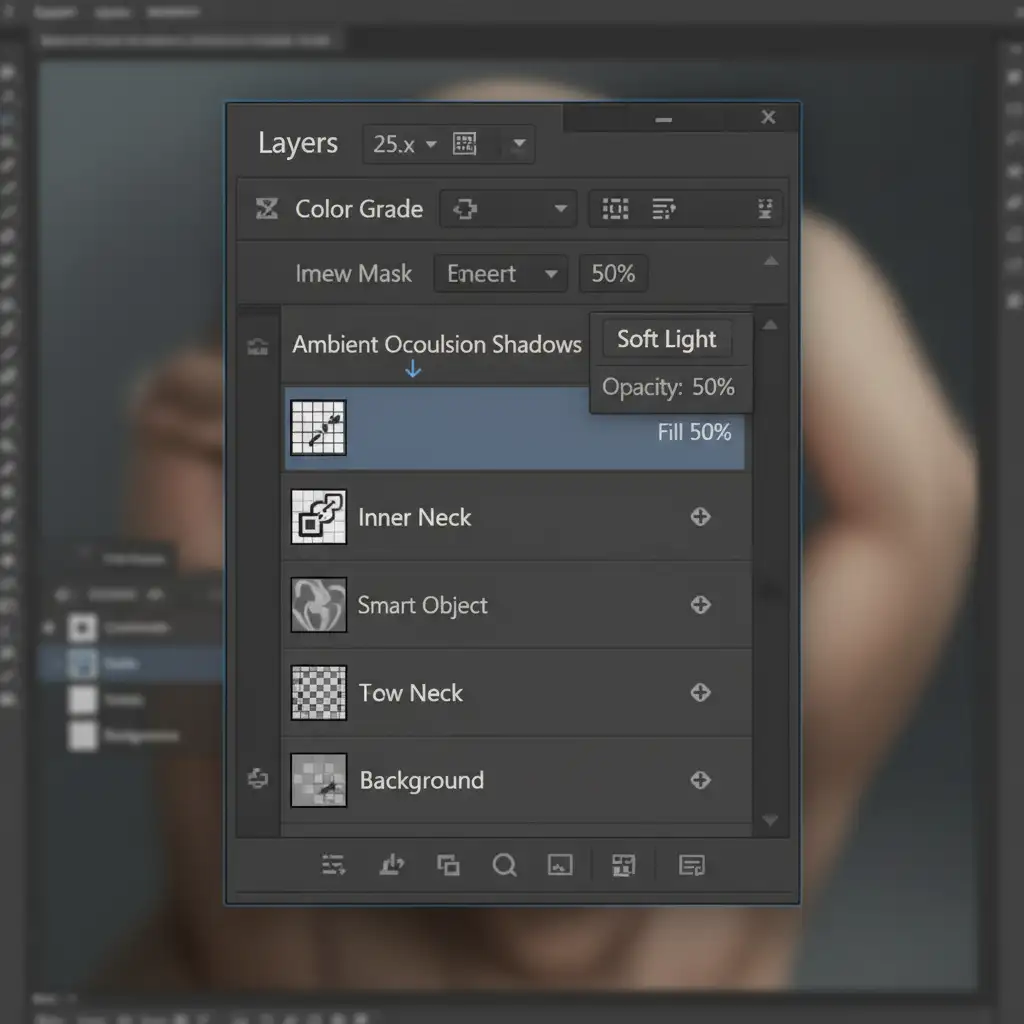
Method C: The Technical Deep-Dive into Volumetric Lighting
Perfect alignment is only half the battle. Heavy oversized jackets cast deep shadows. Without proper volumetric lighting, the neck joint will still look like a flat composite.
- Create a new layer above your neck joint and fill it with 50 percent gray.
- Change the layer blend mode to Soft Light.
- Using the Dodge and Burn tools, hand-paint ambient occlusion shadows exactly where the inner neck meets the heavy outer shell.
- Deepen the shadows directly under the front collar lip to recreate the illusion of spatial depth and 3D volume.
Advanced Considerations for E-Commerce Retouching
Once your oversized puffer jacket neck joint alignment is structurally sound, you may notice minor texture inconsistencies caused by the spatial distortion.
- Frequency Separation: If pushing the baffles caused minor fabric wrinkles, use frequency separation to smooth out the lighting and color variations on the low-frequency layer without destroying the high-frequency fabric weave texture.
- Displacement Maps: If the inner collar features a printed logo or sizing text, standard warping might make the text look flat. Apply a displacement map to the text layer so it wraps realistically around the newly warped, 3D-volume baffles.
Stop Fighting Baffle Distortion-Let the Experts Handle It
Mastering oversized puffer jacket neck joint alignment requires a deep understanding of spatial distortion, lighting, and advanced Photoshop workflows. When you are processing hundreds of garments for a seasonal e-commerce launch, spending 20 minutes meticulously warping and burning a single collar simply isn’t scalable.
Struggling with complex winter wear? Outsource your heavy outerwear ghost mannequin edits to Image Work India and Cloud Retouch. Our expert retouching teams specialize in high-volume, premium e-commerce editing. We guarantee flawless clipping paths, perfect 3D-volume preservation, and realistic ambient occlusion on every single garment. Focus on capturing stunning photography, and let us handle the technical heavy lifting.