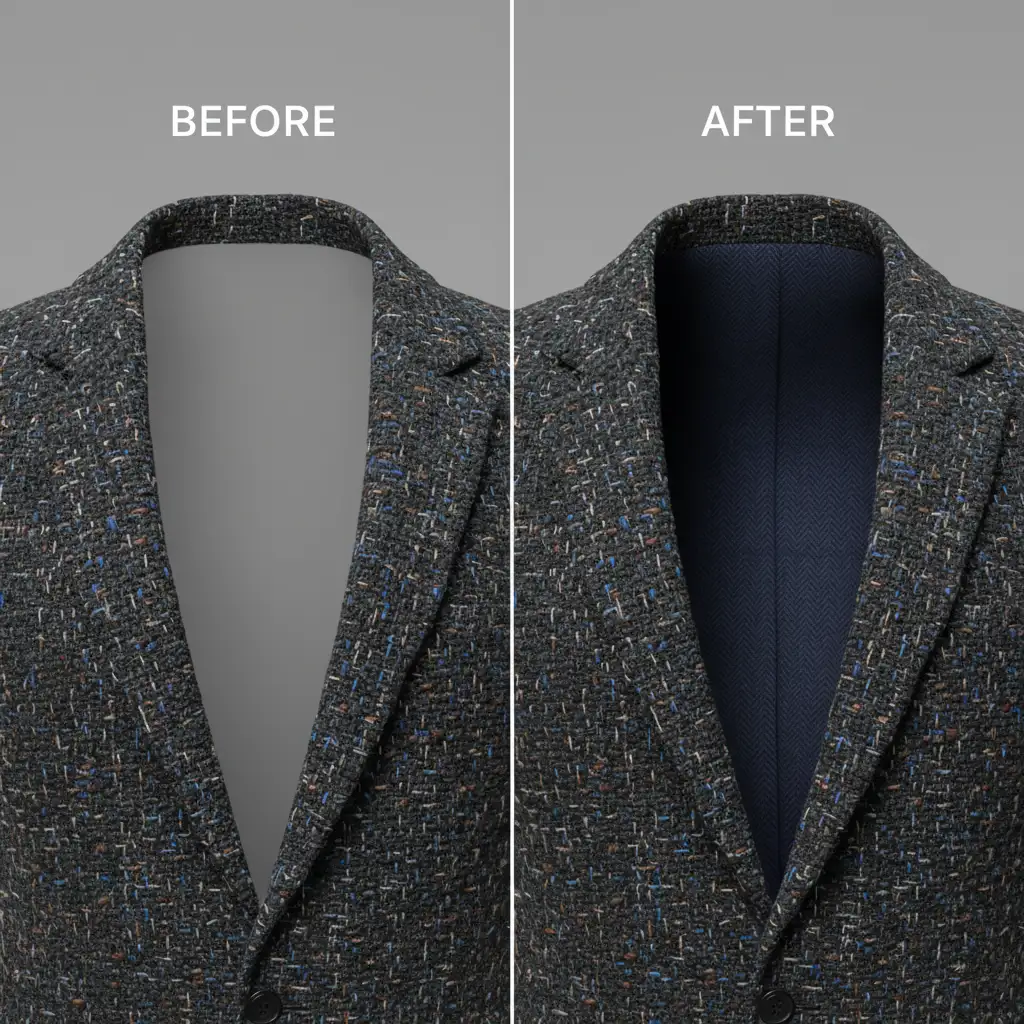
E-commerce retouching is evolving, but if you rely on Photoshop v25.0+ Generative Fill for ghost mannequin edits, you have likely hit a frustrating wall. The AI is incredible at hallucinating lighting and structure, but it completely drops the ball on high-frequency detail.
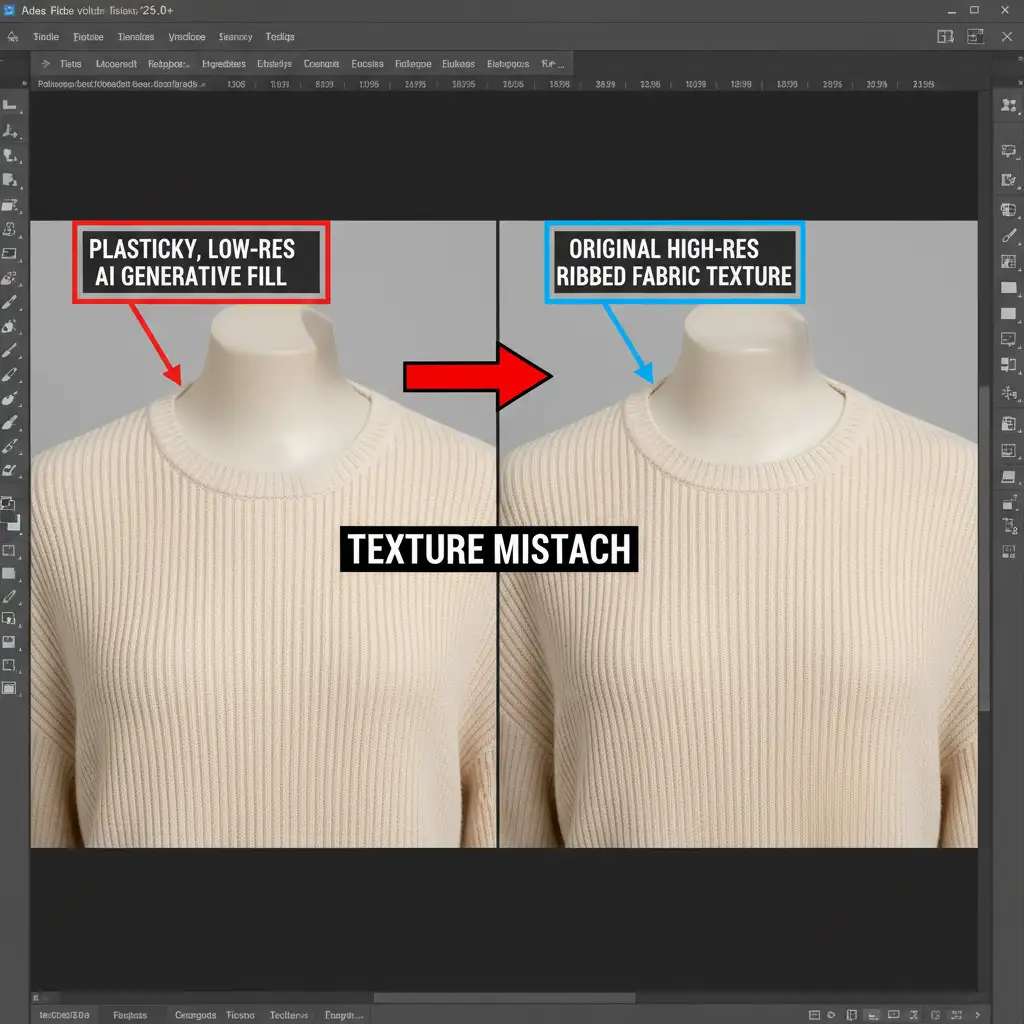
When working with complex garments like ribbed cotton, tweed, or woven wool, Generative Fill often produces a smooth, plasticky texture for the inner neck joint. This “AI texture gap” creates a glaring, artificial seam that clashes with the high-resolution garment, leading to immediate client rejections. If your generated neck joints look fake, here is the definitive guide to executing an AI ghost mannequin texture mismatch fix using professional retouching techniques.
The Core Problem: Why Generative Fill Fails on Complex Fabrics
Adobe’s Generative Fill models prioritize overall image coherence, lighting, and structure. However, when generating the inside of a collar (the neck joint) for a ghost mannequin edit, the AI struggles to replicate the exact micro-contrast of the source material.
The result is a low-resolution, painted-on look that sits right next to a razor-sharp, high-definition photograph. To fix this, we have to manually reintroduce the high-frequency detail back into the AI-generated pixels.
Method 1: The Quick Fix – Pattern Overlay
If you are dealing with a relatively flat garment with a repeating weave, the Pattern Overlay method is the fastest way to bridge the AI texture gap.
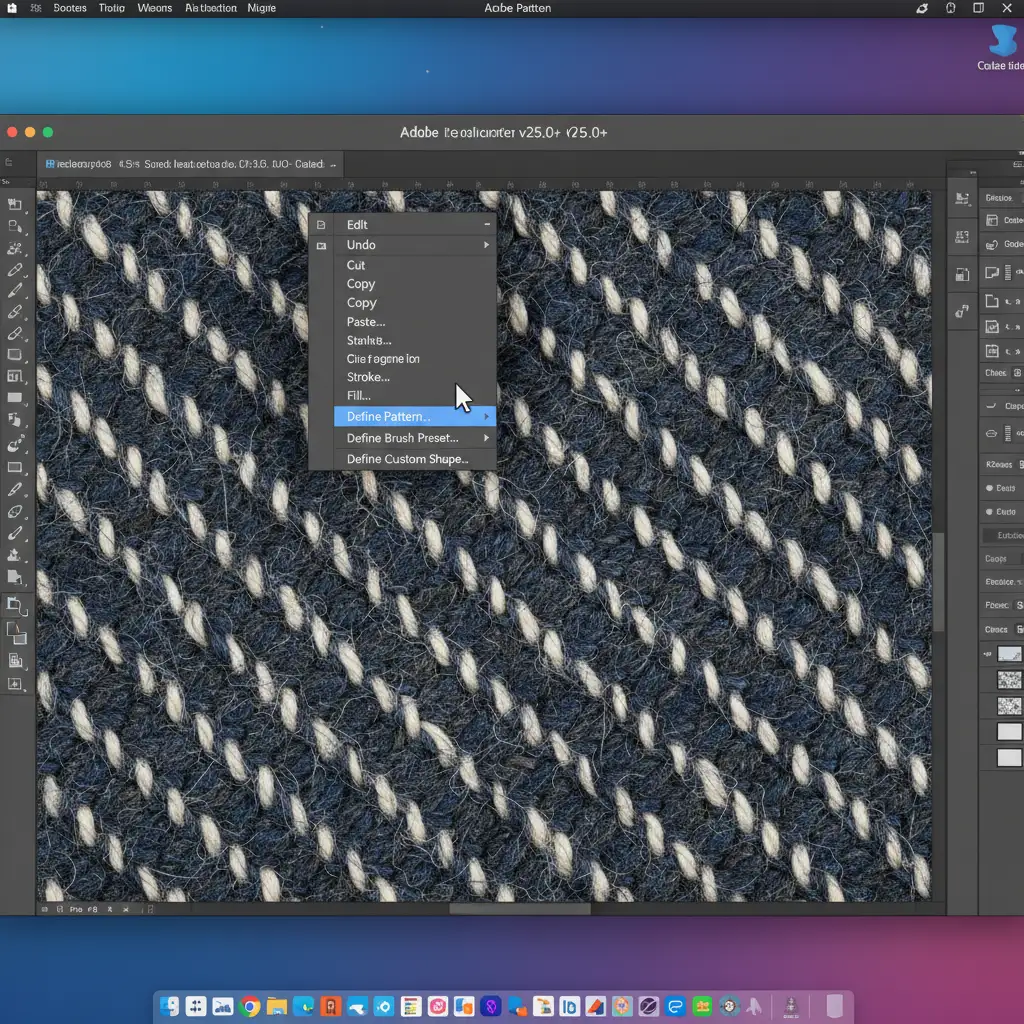
- Select the Source Texture: Use the Marquee Tool to select a clean, well-lit section of the original fabric.
- Define the Pattern: Navigate to Edit > Define Pattern and save your selection.
- Apply the Overlay: Double-click your Generative Fill layer to open the Layer Styles panel. Check Pattern Overlay, select the pattern you just created, and change the Blend Mode to Multiply or Overlay.
- Adjust Opacity: Drop the opacity to 20-30% until the grain matches the surrounding fabric without darkening the AI-generated shadows.
Method 2: The Pro Workaround – Frequency Separation
For complex lighting or uneven textures, a simple pattern won’t cut it. Frequency Separation allows you to copy the physical texture of the original garment without ruining the perfect shadows and lighting generated by the AI.
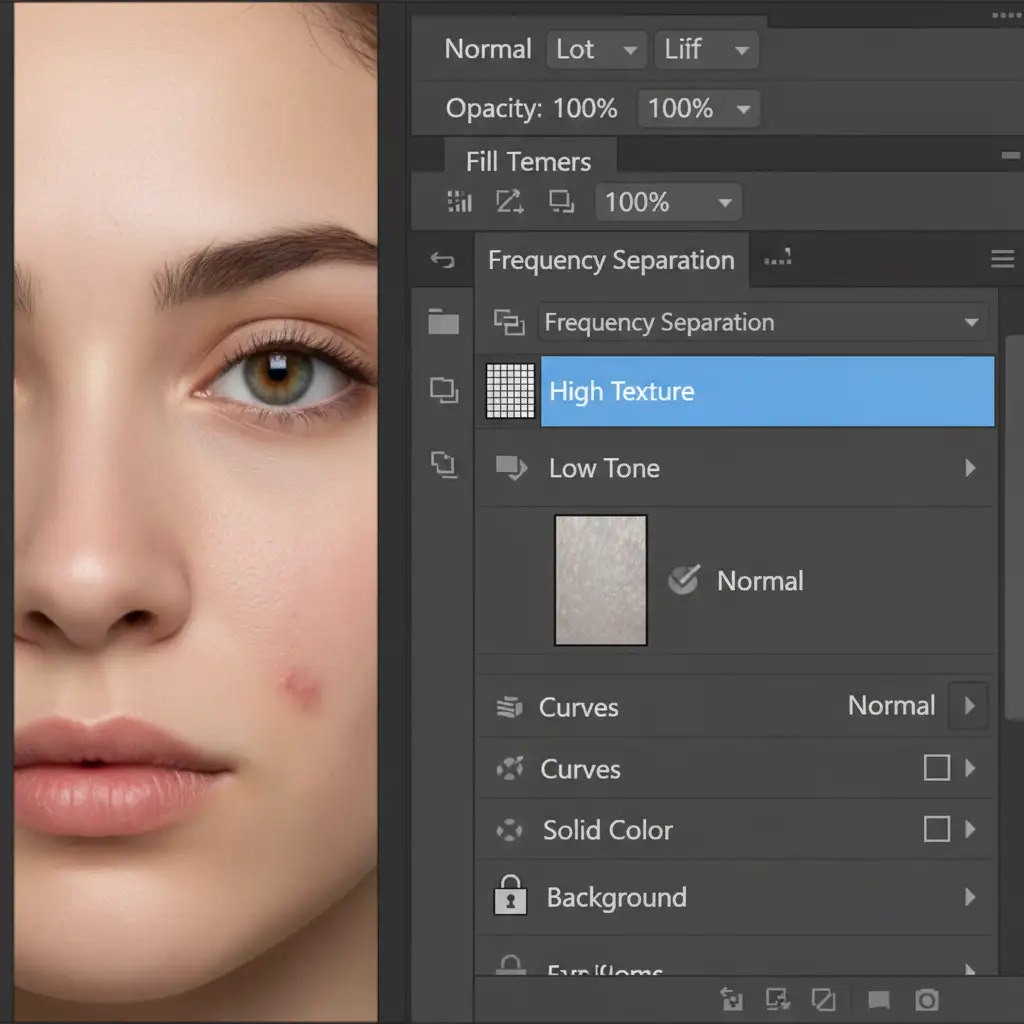
Step 1: Set Up Frequency Separation
Merge your AI-generated neck joint and original garment onto a new layer. Run your standard Frequency Separation action to split the image into a Low Tone layer (color and light) and a High Texture layer (micro-contrast and details).
Step 2: Clone the High-Frequency Detail
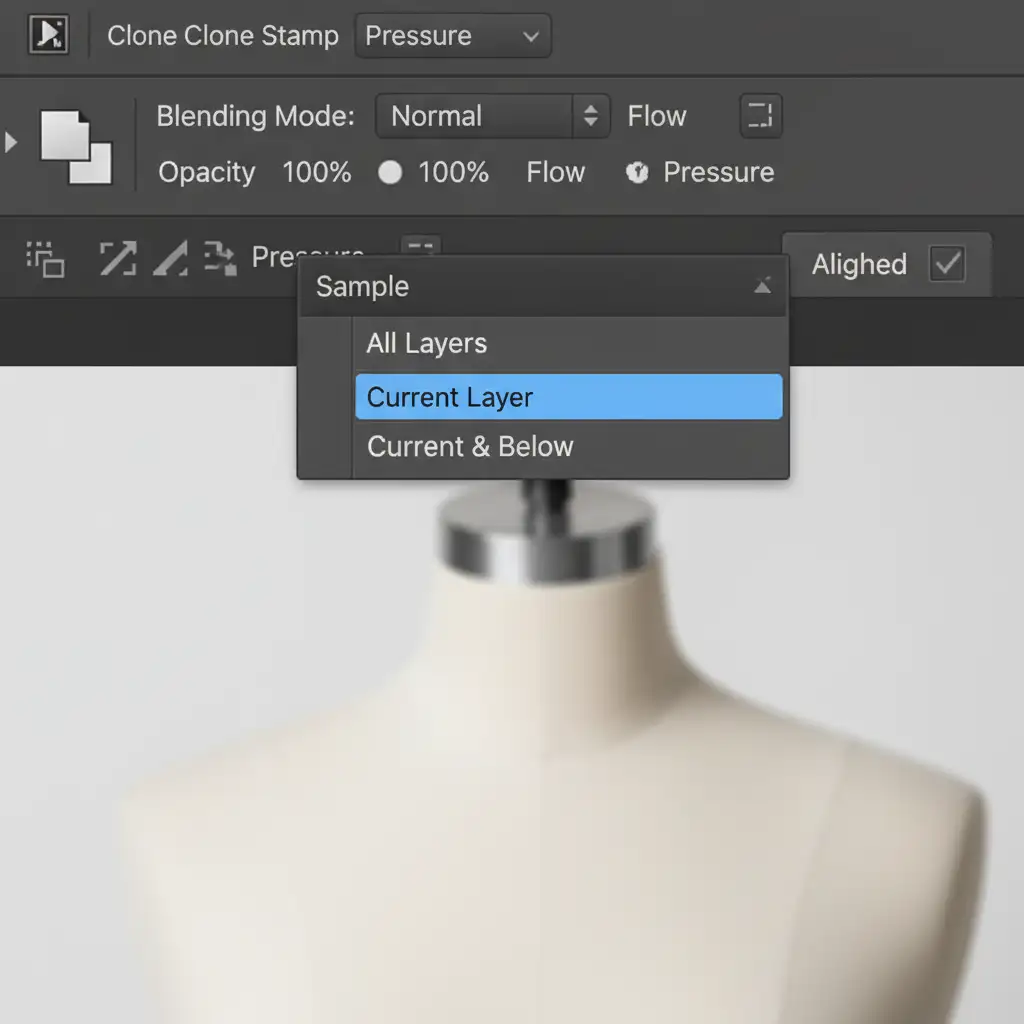
Select the Clone Stamp tool and ensure your settings are exact. You only want to clone the physical weave, not the color.
- Opacity: 100%
- Flow: 100%
- Sample: Current Layer (Crucial: Do not sample All Layers)
Sample a clean area of the original high-resolution fabric from the High Texture layer. Carefully paint over the plasticky AI-generated neck joint. Because you are only painting on the High layer, the Generative Fill lighting remains perfectly intact, but the fabric weave is seamlessly restored.
Method 3: The Technical Deep-Dive – Noise & High Pass Blending
When working on ultra-high-resolution e-commerce retouching for luxury brands, the camera sensor grain and micro-contrast must match perfectly. This additive method guarantees a flawless blend.
- Match Sensor Grain: Create a new layer filled with 50% gray and set the Blend Mode to Soft Light. Go to Filter > Noise > Add Noise. Add monochromatic noise that matches the exact ISO grain of the raw photograph. Mask this noise solely to the AI-generated area.
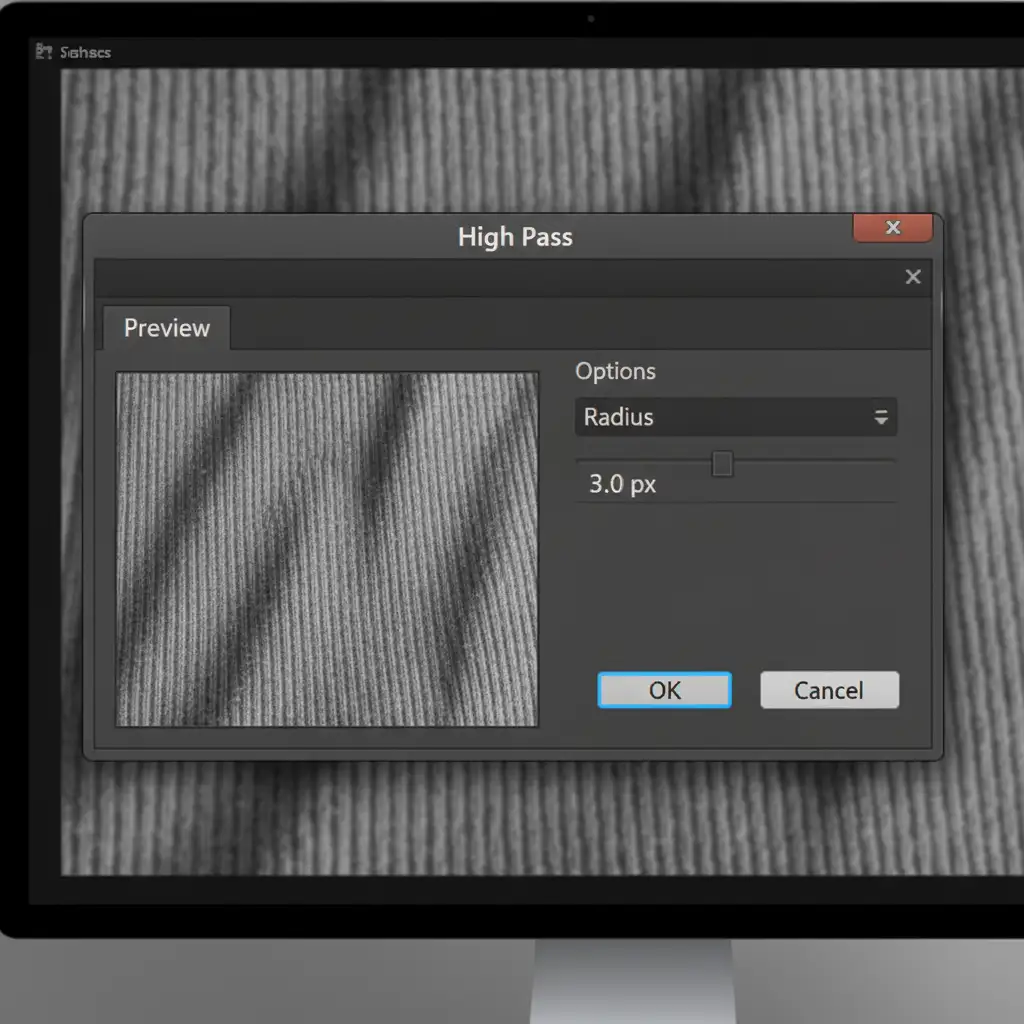
- Extract Micro-Contrast: Duplicate the original fabric layer. Go to Filter > Other > High Pass. Set the Radius between 2.0px and 4.0px—just enough to reveal the fabric threads.
- Blend and Mask: Set this High Pass layer to Linear Light. Mask it directly over the generative fill area. This forces the original physical micro-contrast directly into the AI pixels, completely eliminating the texture mismatch.
Scale Your E-Commerce Retouching with the Experts
Fixing an AI ghost mannequin texture mismatch fix on a single image is manageable. Doing it across a catalog of 5,000 seasonal SKUs? That requires a dedicated team.
At Image Work India and Cloud Retouch, we specialize in high-volume, pixel-perfect e-commerce retouching. Our post-production experts combine the speed of AI with the precision of advanced techniques like Frequency Separation and High Pass blending to guarantee flawless fabric textures and hyper-realistic neck joints.
Stop losing time to AI texture gaps and client rejections. Let us handle the technical heavy lifting so you can focus on growing your brand. Contact Image Work India and Cloud Retouch today for a free trial on your next ghost mannequin batch!