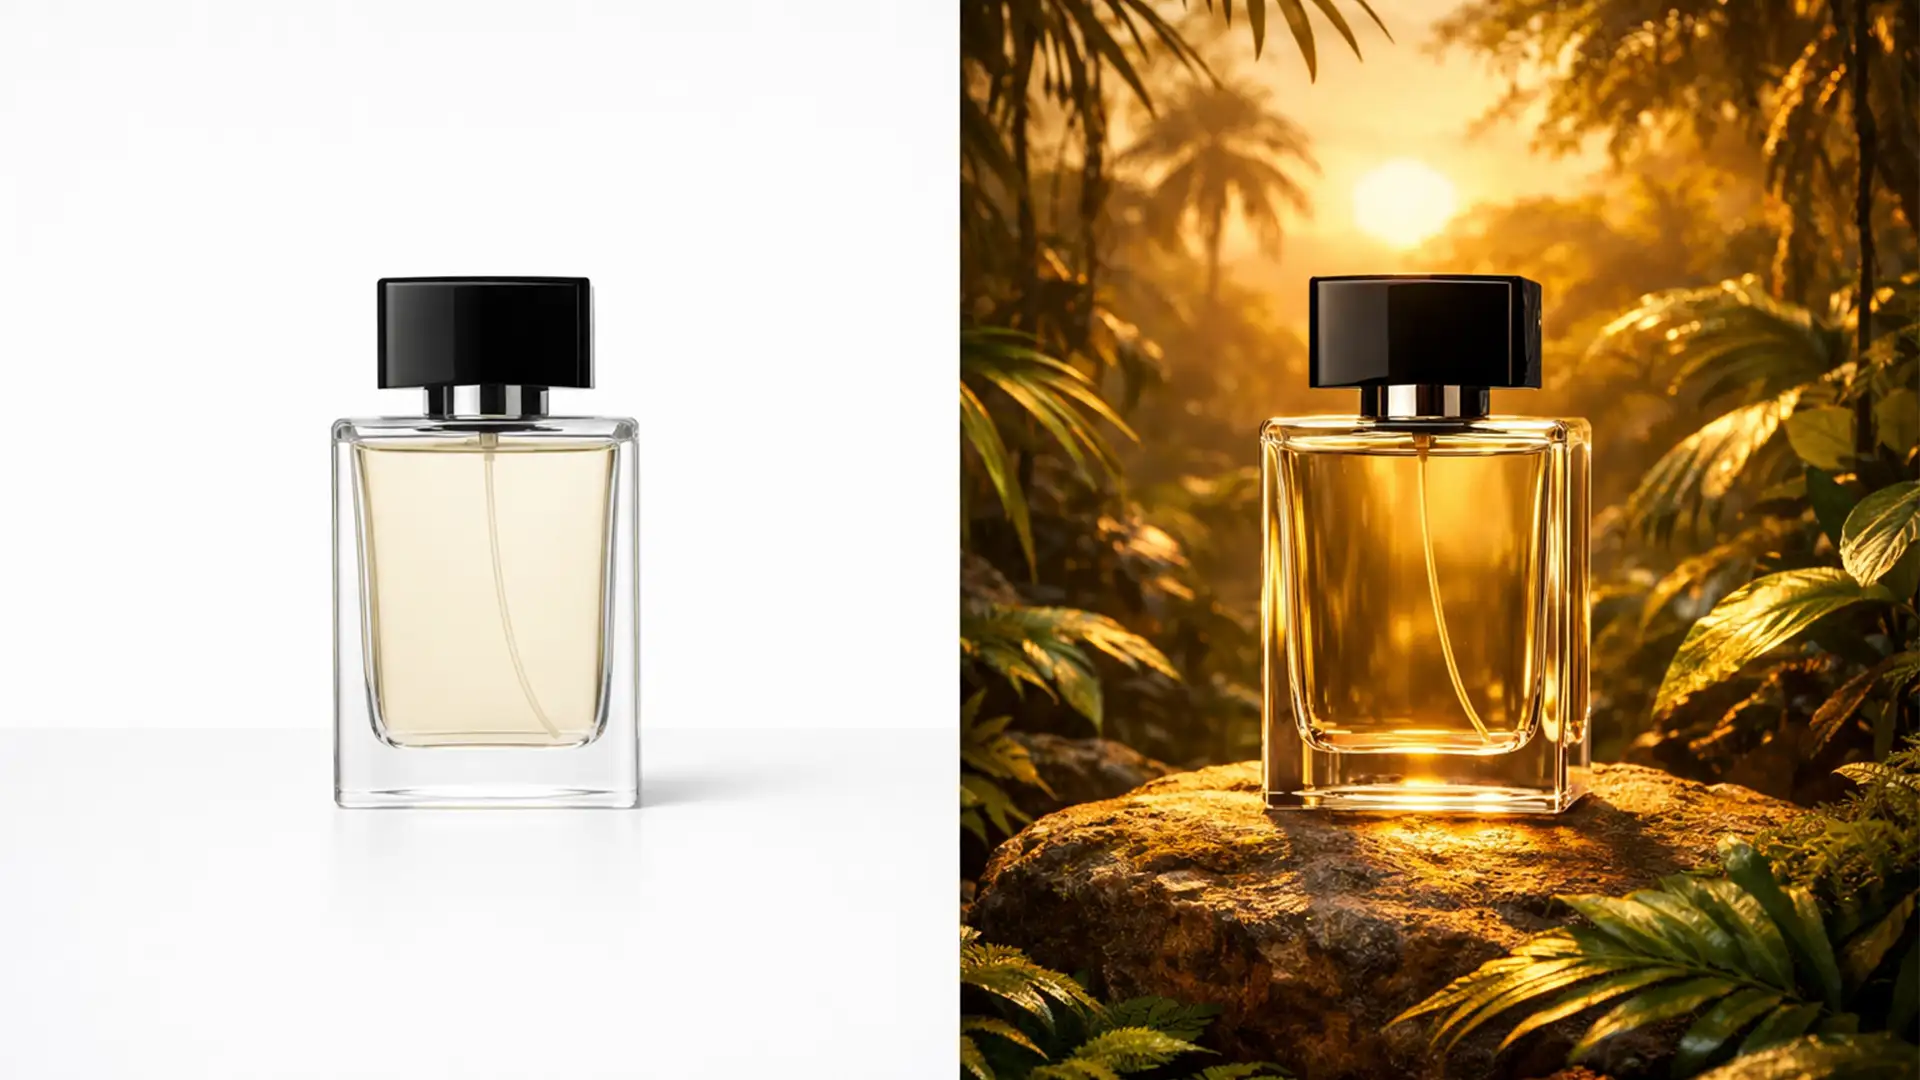
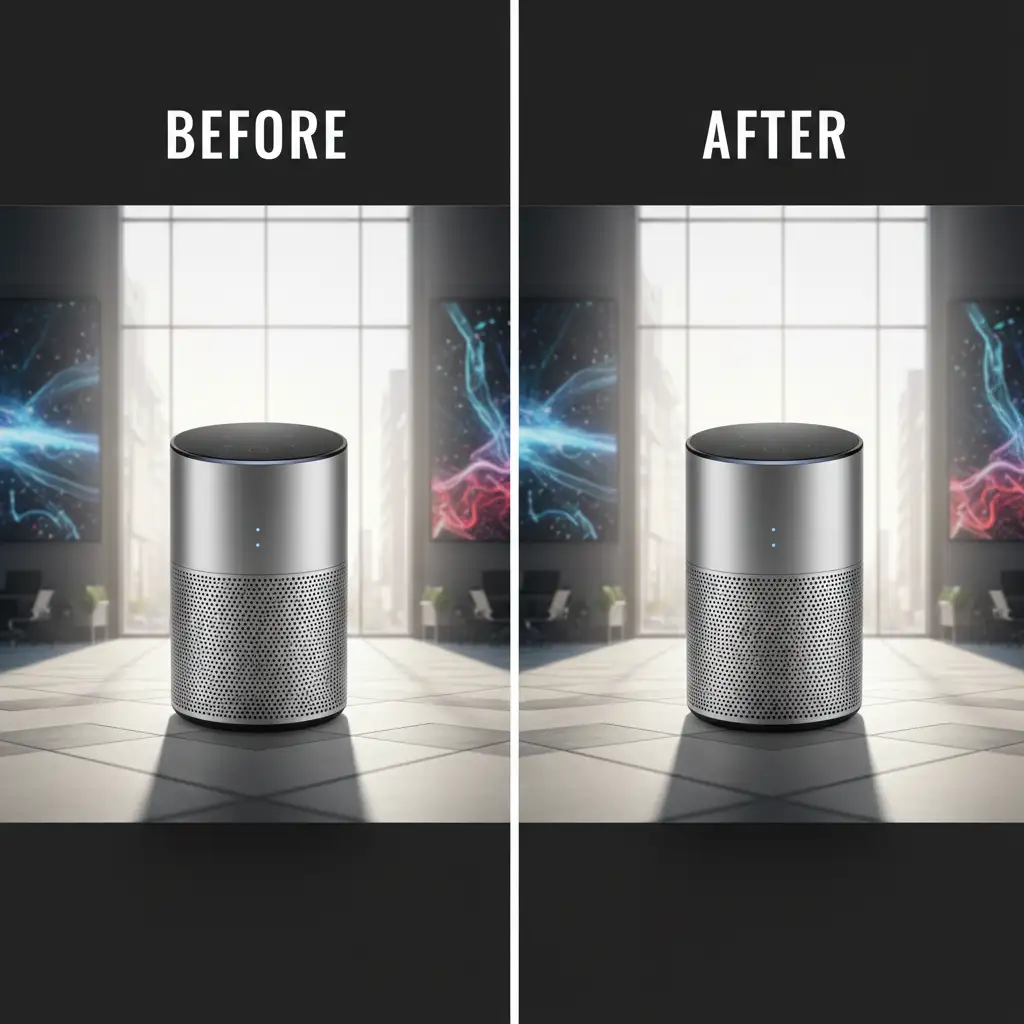
You’ve just generated the perfect Midjourney background for your latest product campaign. It features dramatic, golden-hour lighting and incredible depth. But when you drop your studio-lit product onto the canvas, the illusion breaks immediately. The product looks pasted on, flat, and completely disconnected from the environment.
This is known as “floating product syndrome,” and it happens because your 5500K studio strobes are fighting the 3200K sunset of your AI background. If you want to match studio lighting to AI generated backgrounds and create seamless, photorealistic composites, you need to master light direction, shadow falloff, and color temperature. Here is exactly how to fix it.
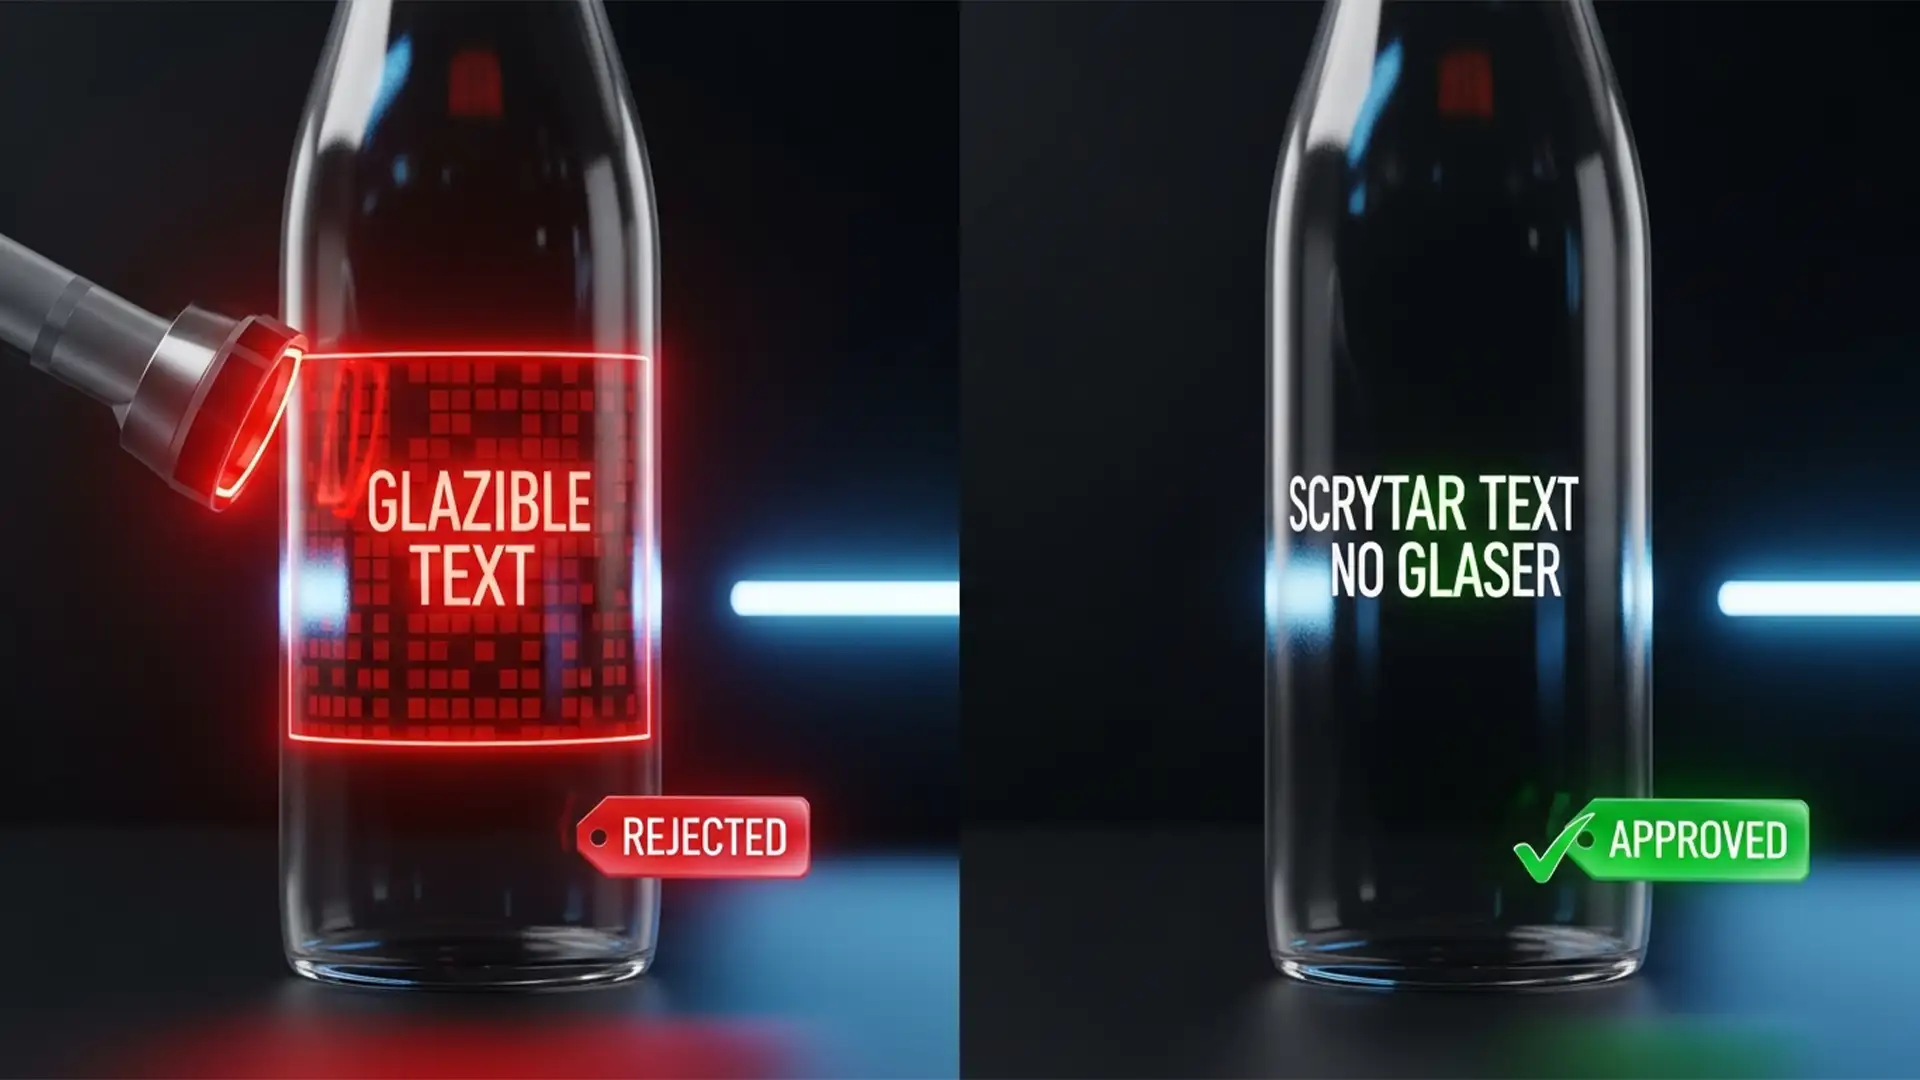
The Core Problem: Why Your AI Composites Look Fake
When integrating standard e-commerce photography with advanced Generative Fill or Midjourney environments, editors face three distinct technical disconnects:
- Mismatched Color Temperature: Studio flashes typically output neutral daylight (around 5500K). AI backgrounds often feature stylized lighting, such as warm sunsets (3200K) or cool moody blues (7000K+).
- Conflicting Light Direction: Studio shots usually utilize flat, even lighting to show product details. AI environments have specific light sources. Placing a flatly lit product into a scene with a strong directional light source creates contradictory shadow falloff.
- Lack of Global Illumination: In reality, objects reflect their environments. A studio shot lacks the ambient light and environmental reflections (bounce light) present in the AI-generated space.
To achieve a photorealistic composite, we must address all three vectors.
Step-by-Step Methods to Unify Lighting and Color
Depending on your timeline and quality requirements, there are three distinct workflows for blending your product with an AI background in Photoshop.
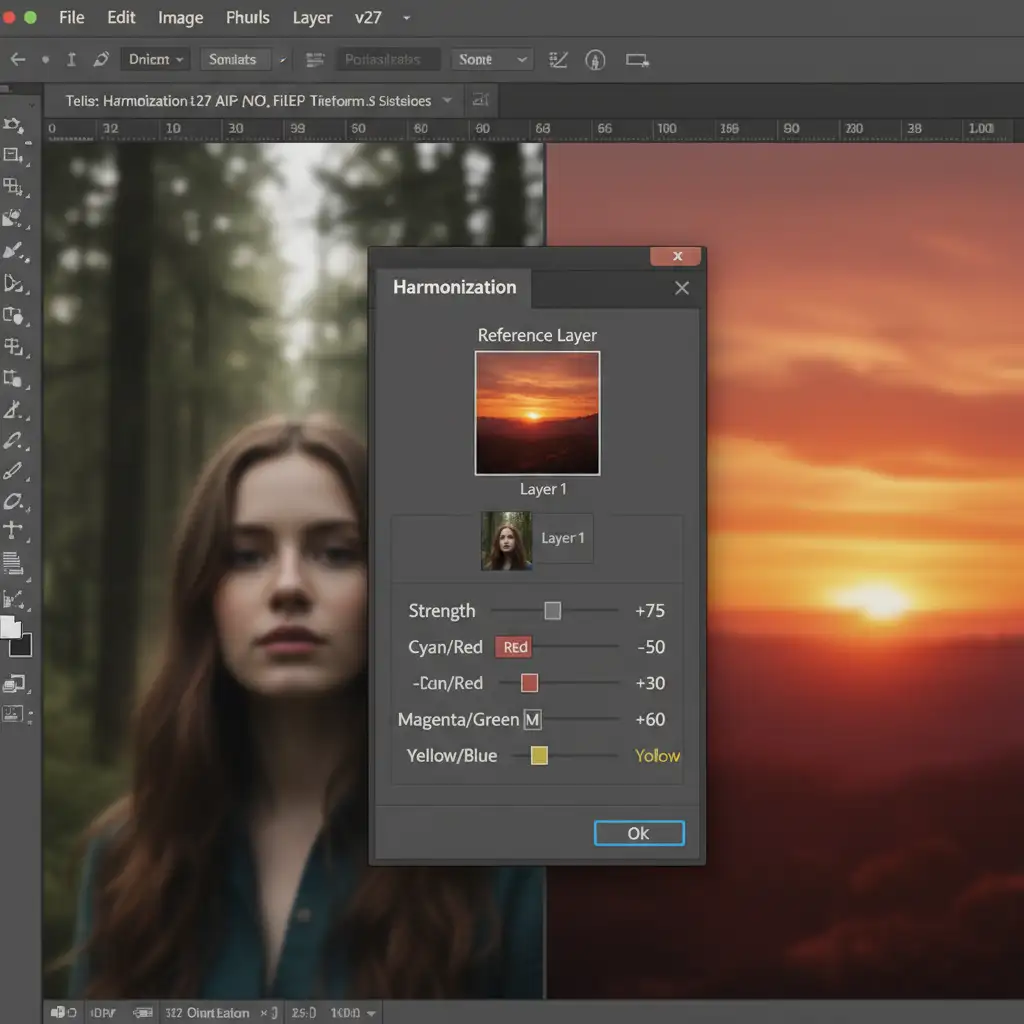
Method 1: The Quick Fix (Photoshop Harmonization Neural Filter)
If you need a rapid baseline color match, Adobe’s AI-driven tools in Photoshop v25.x+ offer an excellent starting point.
- Open your composite in Photoshop, ensuring your product is isolated on its own layer above the AI background.
- Select the product layer and navigate to Filter > Neural Filters.
- Toggle on the Harmonization Neural Filter.
- In the settings panel, select your AI background as the reference layer.
- Adjust the strength slider to automatically match the color palette and luminosity of the background.
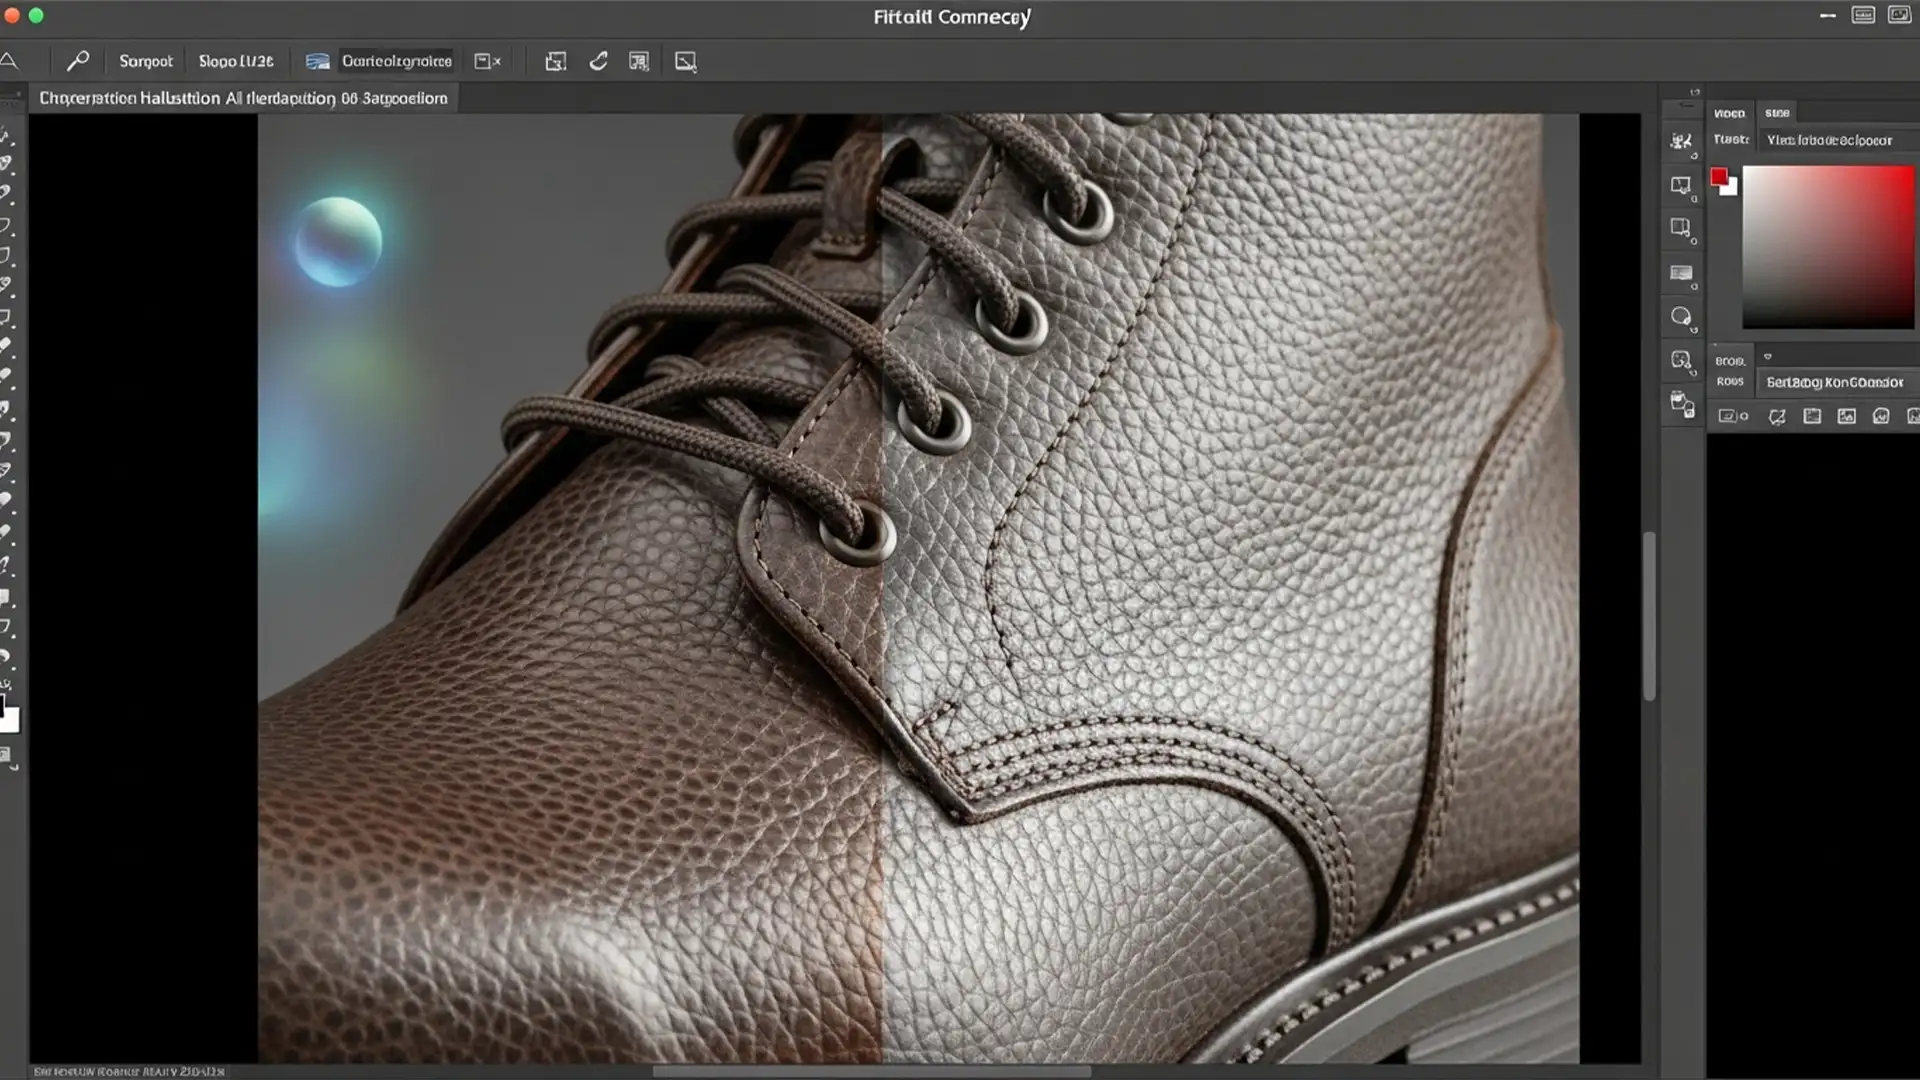
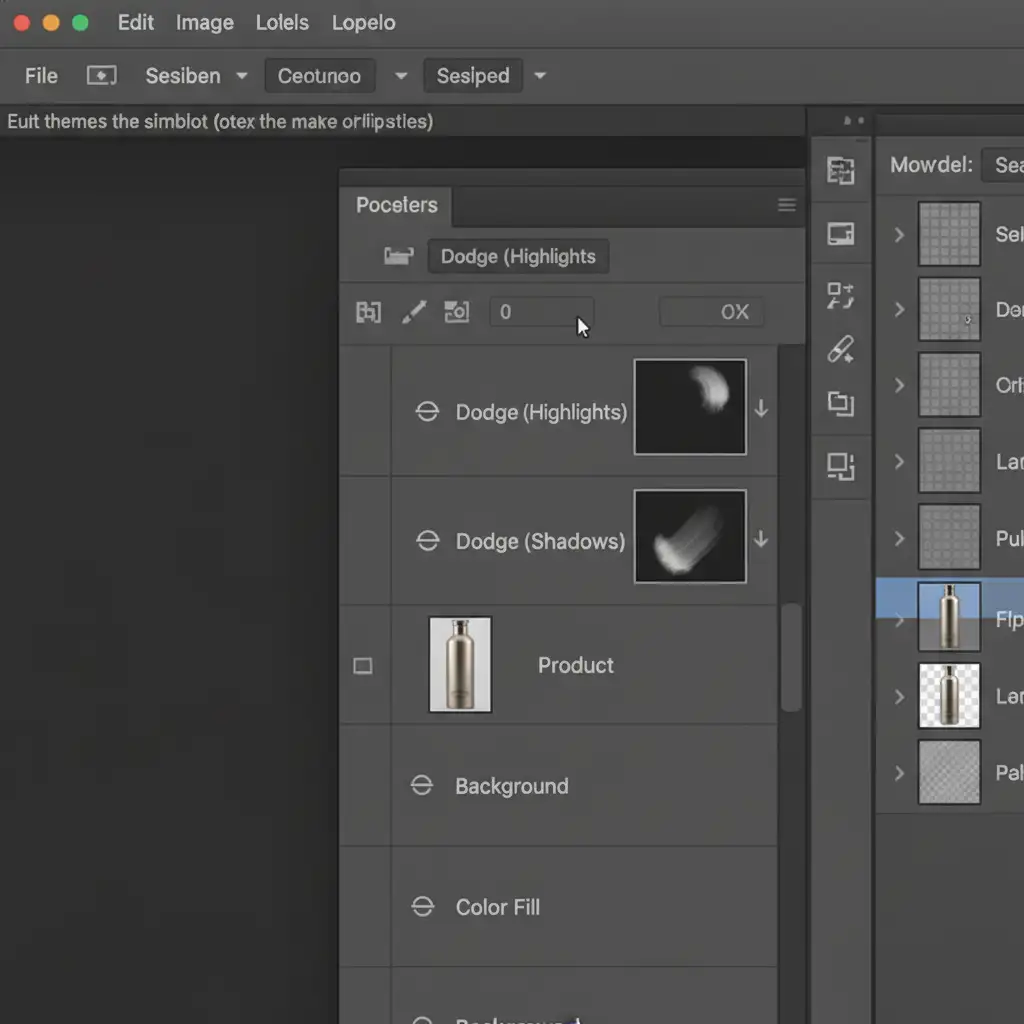
Method 2: The Pro Workaround (Manual Dodge, Burn, and Shadows)
Harmonization fixes color, but it doesn’t fix light direction. To recreate the AI environment’s light direction on your product, you must manually sculpt the light using a non-destructive Dodge and Burn workflow.
Sculpting Directional Light:
- Create two Curves Adjustment Layers directly above your product layer.
- Pull the curve down on the first layer to darken it (label this “Burn”). Pull the curve up on the second layer to lighten it (label this “Dodge”).
- Turn both into a Clipping Mask by holding Alt/Option and clicking between the adjustment layers and the product layer.
- Invert both layer masks to black (Ctrl/Cmd + I).
- Using a soft white brush at a low opacity (10-15%), paint on the Dodge mask to highlight the side of the product facing the AI light source. Paint on the Burn mask to darken the opposite side, creating realistic shadow falloff.
Grounding the Product: Next, you must anchor the product to the floor using a Perspective Distort drop shadow.
- Duplicate your isolated product layer and place it beneath the original.
- Fill this duplicated layer entirely with black.
- Go to Edit > Transform > Distort.
- Drag the top anchor points down and away from the AI light source to match the perspective of the floor.
- Apply a Gaussian Blur and lower the opacity to blend it seamlessly.
Method 3: The Technical Deep-Dive (High-End Color Grading)
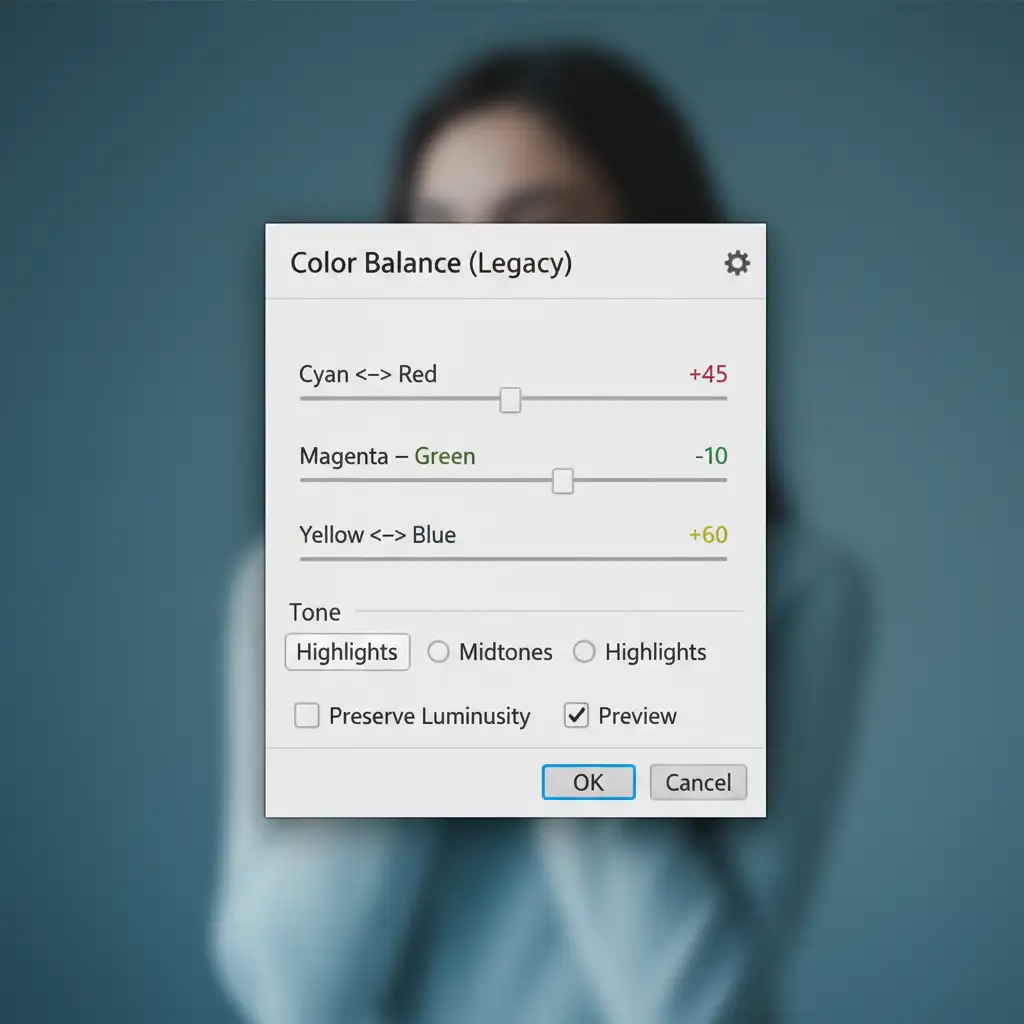
For true photorealism, high-end retouchers rely on Luminosity Masks and targeted color grading to simulate ambient light and global illumination.
- Inject Ambient Highlights: The brightest parts of your product should reflect the color of the primary light source. Create a Color Balance adjustment layer and clip it to your product. Select “Highlights” in the properties panel and push the sliders toward the color of the AI light source (e.g., adding Red and Yellow for a sunset).
- Protect the Shadows: Use Luminosity Masks to restrict this Color Balance adjustment only to the brightest pixels, keeping the core product colors intact in the midtones.
- Global Illumination Pass: To globally unify the lighting engine, add a Gradient Map adjustment layer above your product layer. Sample the darkest and lightest colors directly from the AI background. Clip this Gradient Map to your product, change the blend mode to ‘Soft Light’, and reduce the opacity to 15-20%. This acts as a cohesive atmospheric glaze.
Bring Your Products to Life with Image Work India
Successfully matching studio lighting to AI generated backgrounds requires a deep understanding of color theory, spatial awareness, and advanced Photoshop techniques. Even with the right workflow, achieving flawless global illumination and perspective-perfect shadows is incredibly time-consuming.
Struggling to make your AI product composites look photorealistic? Save hours of editing time and boost your e-commerce conversion rates by letting the expert retouchers at Image Work India and Cloud Retouch handle it for you. Our team specializes in high-end image blending, custom shadow creation, and precise color matching to ensure your products look flawless in any digital environment.
Contact us today to elevate your product photography and scale your visual campaigns without the technical headache.