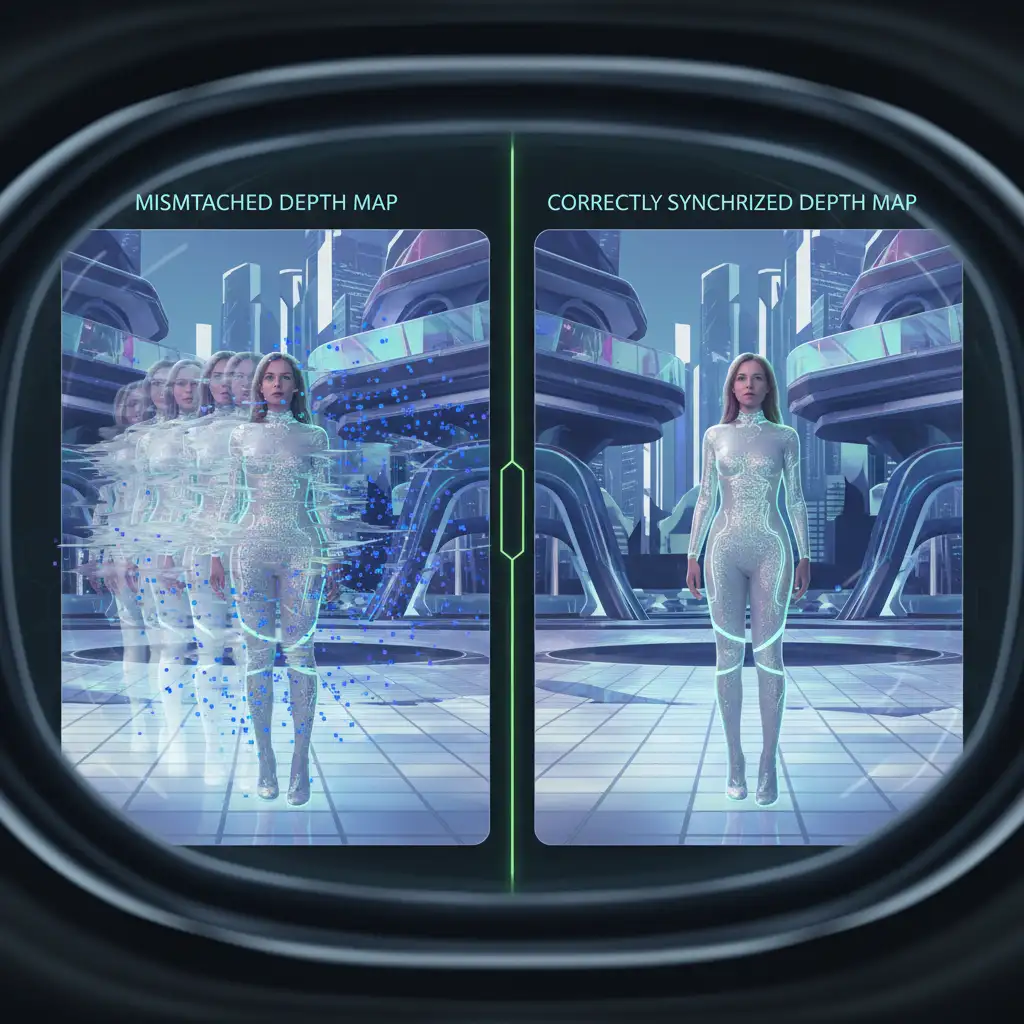
You just finished a flawless retouch on a spatial photo shot on the iPhone 15 Pro. The colors pop, the blemishes are gone, and it looks perfect on your monitor. But the moment you view it in an Apple Vision Pro, disaster strikes. You are met with floating pixels, nauseating ghosting, and stereoscopic tearing. Why? Because while you perfected the visible RGB image layer, you completely ignored the hidden Z-axis data.
Welcome to the complex world of spatial photo depth map retouching photoshop workflows. If you want to fix these VR artifacts and maintain flawless 3D parallax, you need a synchronized workflow that edits both color and depth simultaneously. Here is the professional guide to getting it right.
Understanding the MV-HEVC Format and the Z-Axis Dilemma
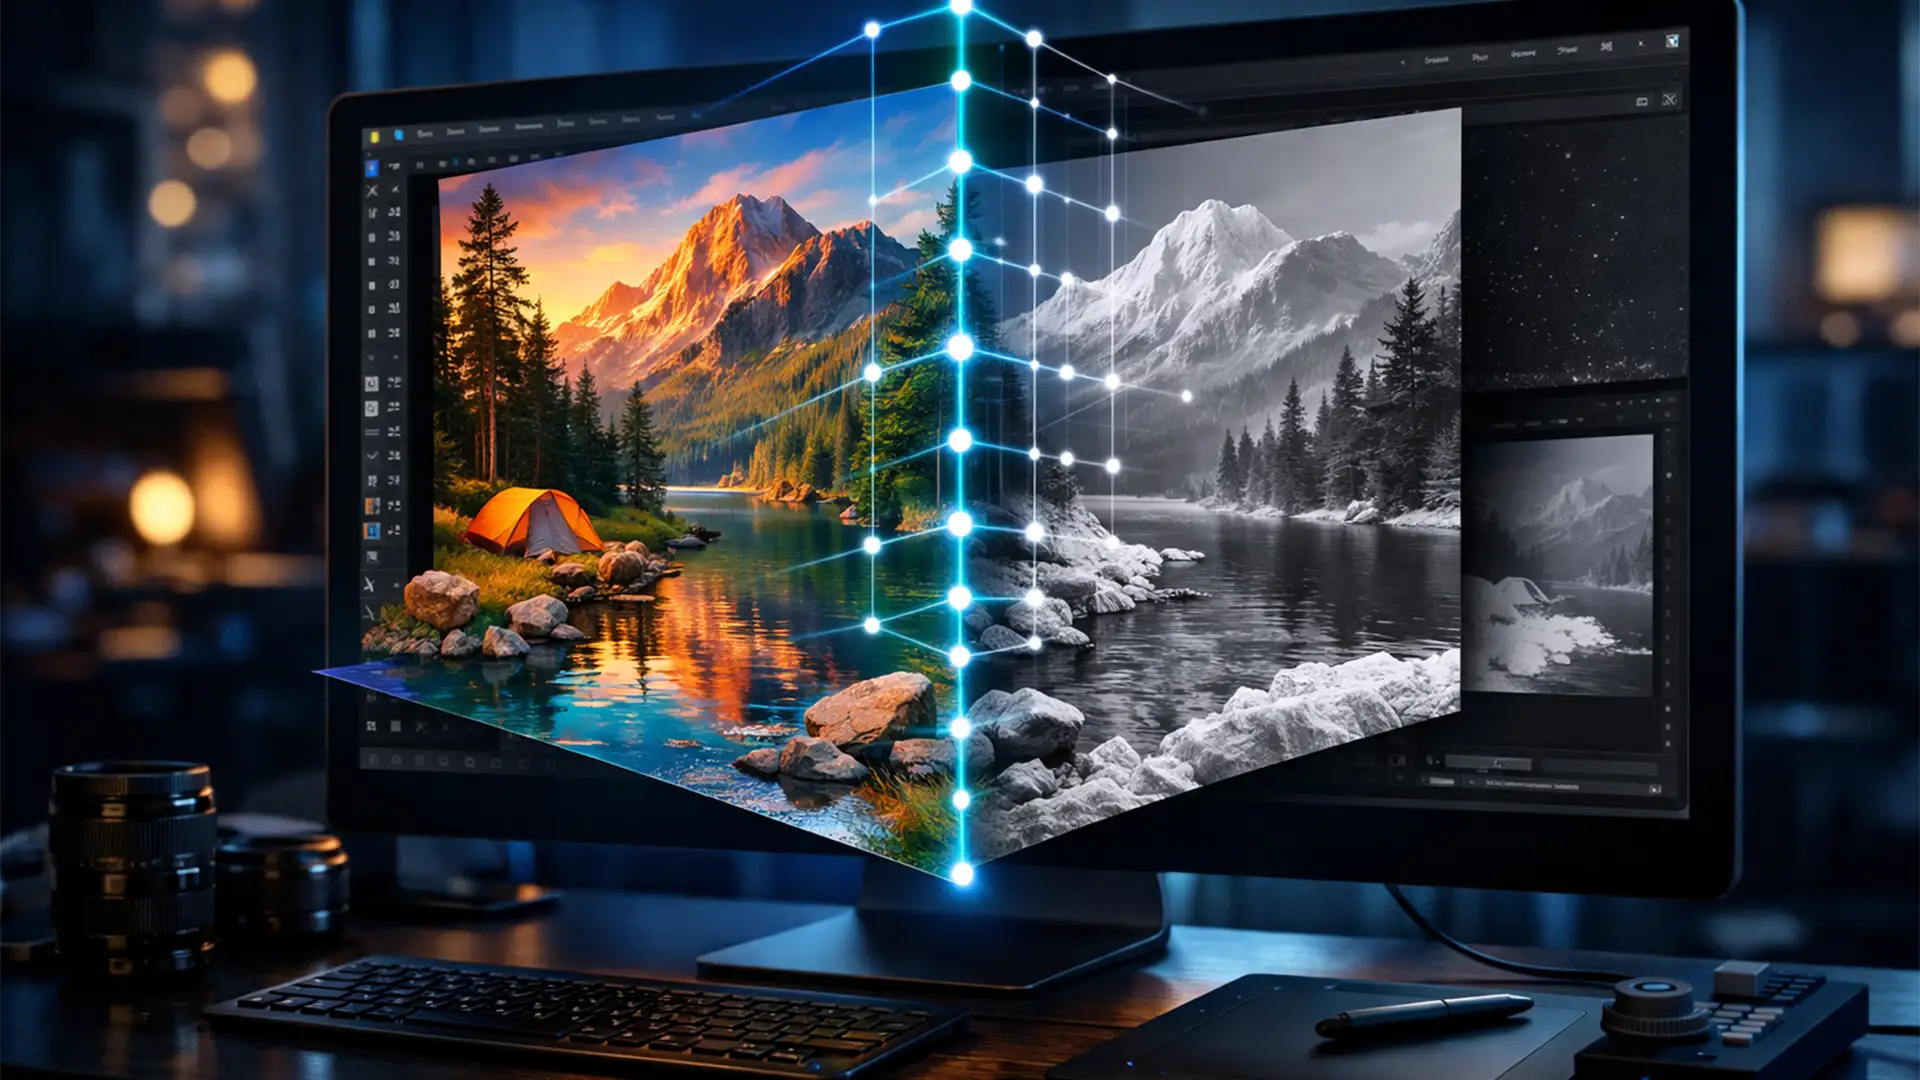
Spatial photos rely on the MV-HEVC format. Unlike a standard JPEG, this format combines a standard RGB visual data layer with a hidden grayscale depth map. This depth map contains crucial Z-axis data that tells a VR headset how far forward or backward a pixel should sit in 3D space.
The core problem occurs in Photoshop v25.x and later when editors use standard retouching tools like the Healing Brush or Generative Fill on the visible RGB layer but neglect to alter the depth map. Because the cloned or removed pixels no longer share the same spatial coordinates as the original grayscale mask, the headset renders a broken displacement map.
3 Methods for Spatial Photo Depth Map Retouching in Photoshop
Depending on the complexity of your edits, there are three primary ways to handle spatial photo depth map retouching in Photoshop.
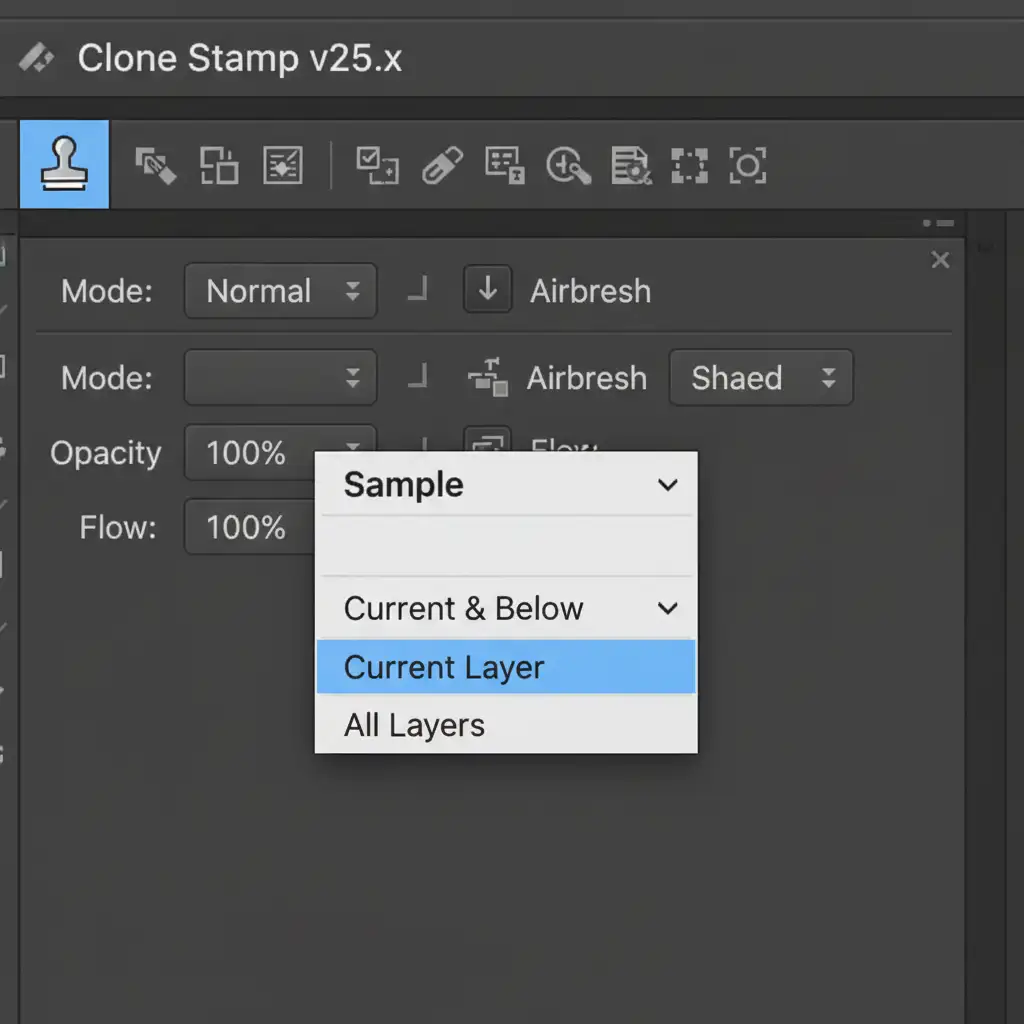
Method A: The Quick Fix (Simultaneous Cloning)
For minor blemish removal and dust spotting, the easiest approach is to manually keep both layers in sync using Photoshop’s Clone Stamp tool.
- Extract the spatial depth map from your MV-HEVC file (using third-party spatial extraction tools) and place it as a separate layer directly next to your RGB layer in the Layers panel.
- Group the two layers together.
- Select the Clone Stamp tool.
- Configure your Sample settings to ensure you are stamping both layers identically.
By cloning the exact same coordinates on both the RGB image layer and the grayscale mask, the 3D coordinate mesh remains intact, preventing ghosting.
Method B: The Pro Workaround (Neural Filter Depth Regeneration)
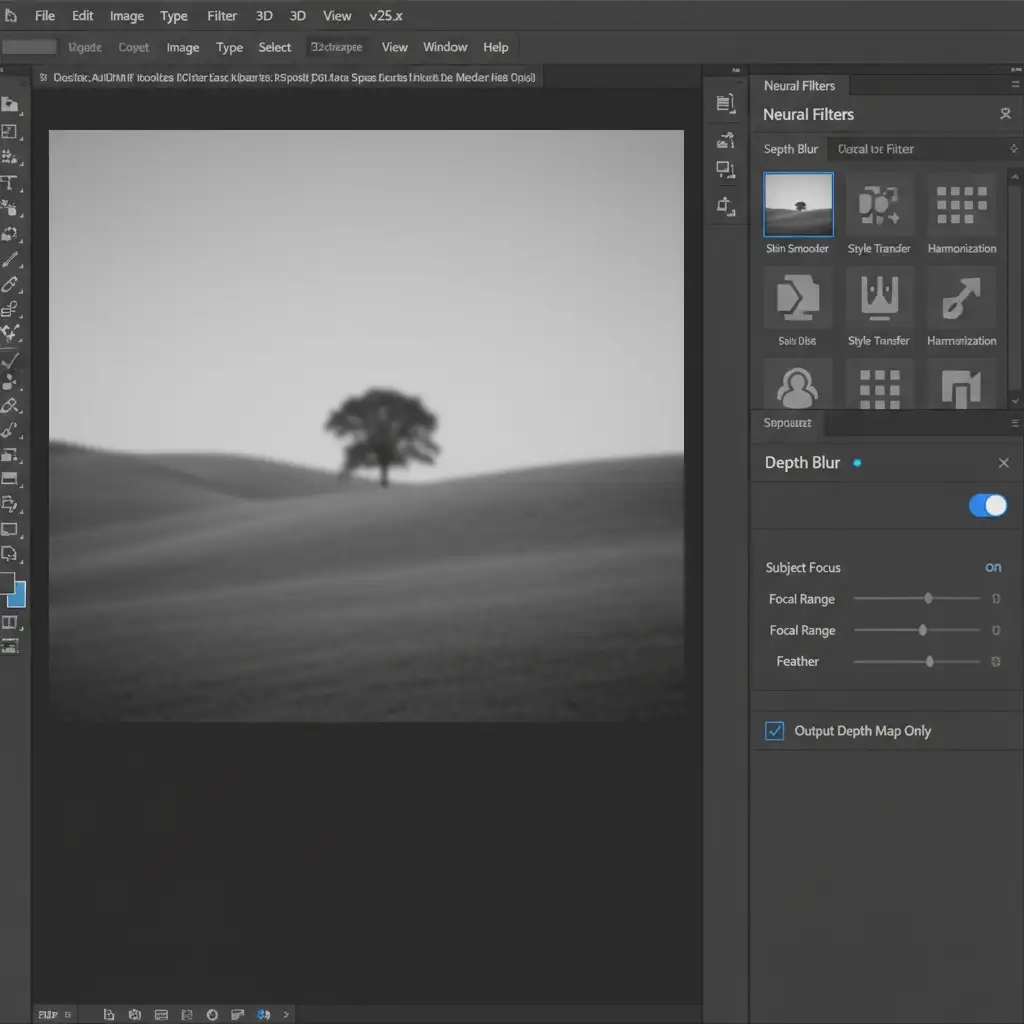
When making large, transformative edits-such as using Generative Fill to add or remove entire objects on the RGB layer-the old depth map becomes completely obsolete. Manually cloning the depth map for a newly generated object is nearly impossible. Instead, you must regenerate it.
- Complete all your Generative Fill and structural edits on the RGB layer.
- Flatten your newly edited RGB image.
- Navigate to Filter > Neural Filters > Depth Blur.
- Scroll down in the Neural Filters panel and check the box for Output Depth Map Only.
- Photoshop’s AI will calculate a brand new grayscale depth map based on your freshly retouched composite, perfectly matching the new Z-axis data to your edited pixels.
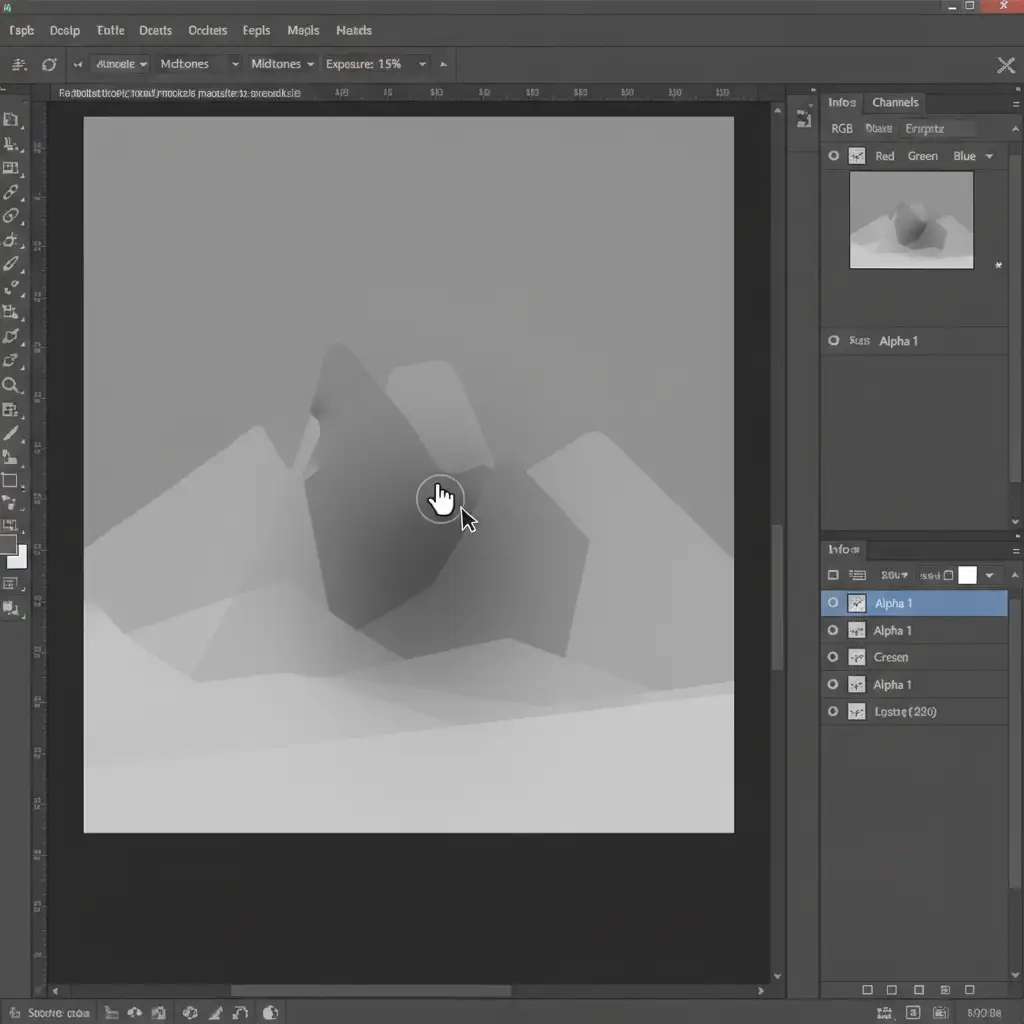
Method C: The Technical Deep-Dive (Alpha Channel Masking and Z-Axis Shifting)
For high-end product retouching where precision is non-negotiable, professionals manipulate the depth map directly through Alpha Channels. This allows you to manually push objects forward or backward in 3D space.
- Load your extracted depth map into an Alpha Channel in the Channels panel, sitting alongside your Red, Green, and Blue channels.
- Select the Alpha Channel.
- Use the Dodge and Burn tools directly on this mask.
- Burn (Darken): Pushes retouched objects backward in 3D space.
- Dodge (Lighten): Pulls retouched objects forward in 3D space.
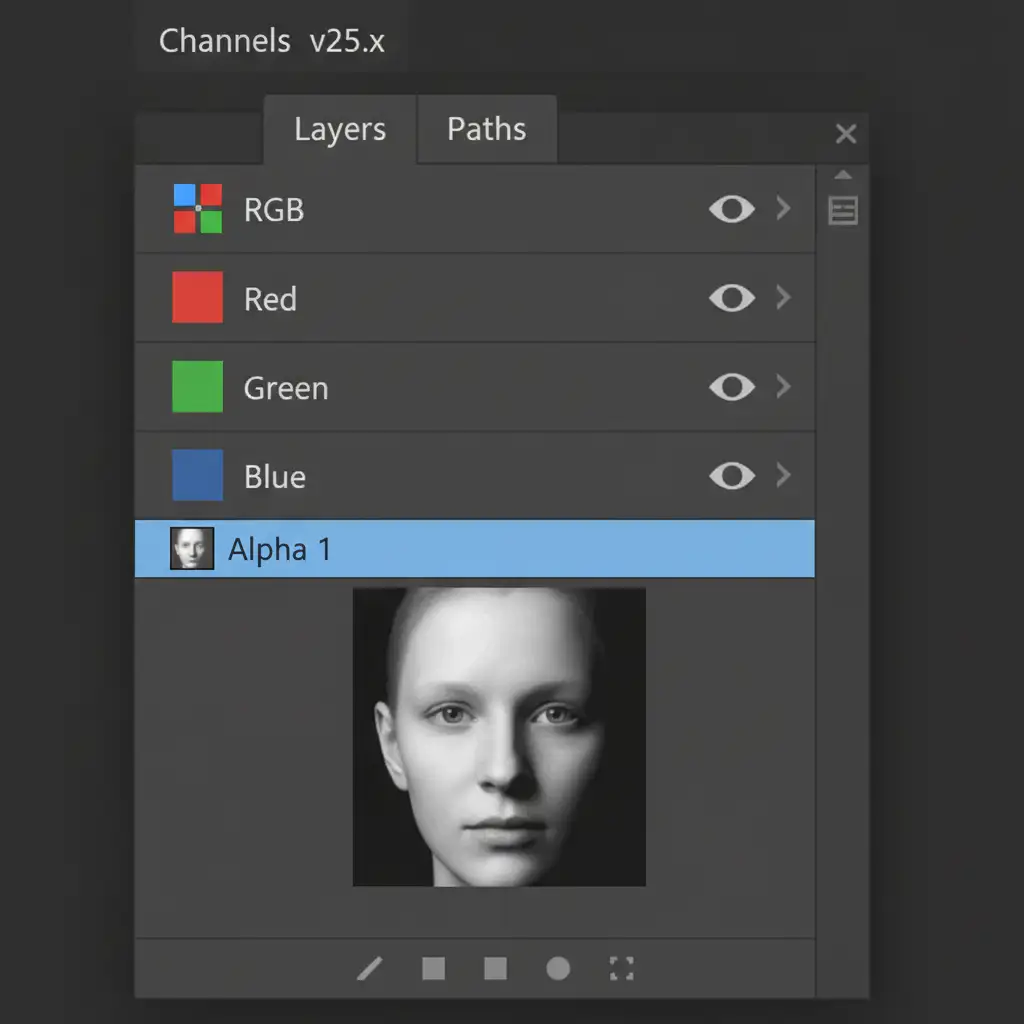
By carefully dodging and burning the Alpha Channel, you can precisely control the parallax effect of specific elements without altering the visual RGB data.
Rebuilding the Spatial File
Once your RGB image layer and your grayscale mask are perfectly synchronized, you cannot simply save the file as a JPEG. You must export the final RGB image and the Alpha map separately. Finally, recombine them using EXIF metadata injection software (like Spatialify or dedicated command-line tools) to safely rebuild the spatial MV-HEVC file. Only then will it render flawlessly in an Apple Vision Pro or Meta Quest.
Skip the Technical Headache: Let the Experts Handle It
Mastering spatial photo depth map retouching photoshop techniques requires pixel-perfect depth synchronization, a deep understanding of Z-axis data, and advanced 3D spatial awareness. A single misaligned pixel in your grayscale mask can ruin the immersive experience, causing nausea-inducing VR artifacts.
You don’t have to navigate this complex workflow alone. Guarantee a flawless, artifact-free VR experience by hiring the experts at Image Work India and Cloud Retouch. Our specialized team of high-end retouchers understands the precise mathematics of MV-HEVC formats and depth map regeneration. Whether you are prepping spatial product photos for an immersive e-commerce catalog or refining 3D real estate tours, we deliver picture-perfect, stereo-accurate results.
Contact Image Work India and Cloud Retouch today to elevate your spatial imagery to the professional standard.