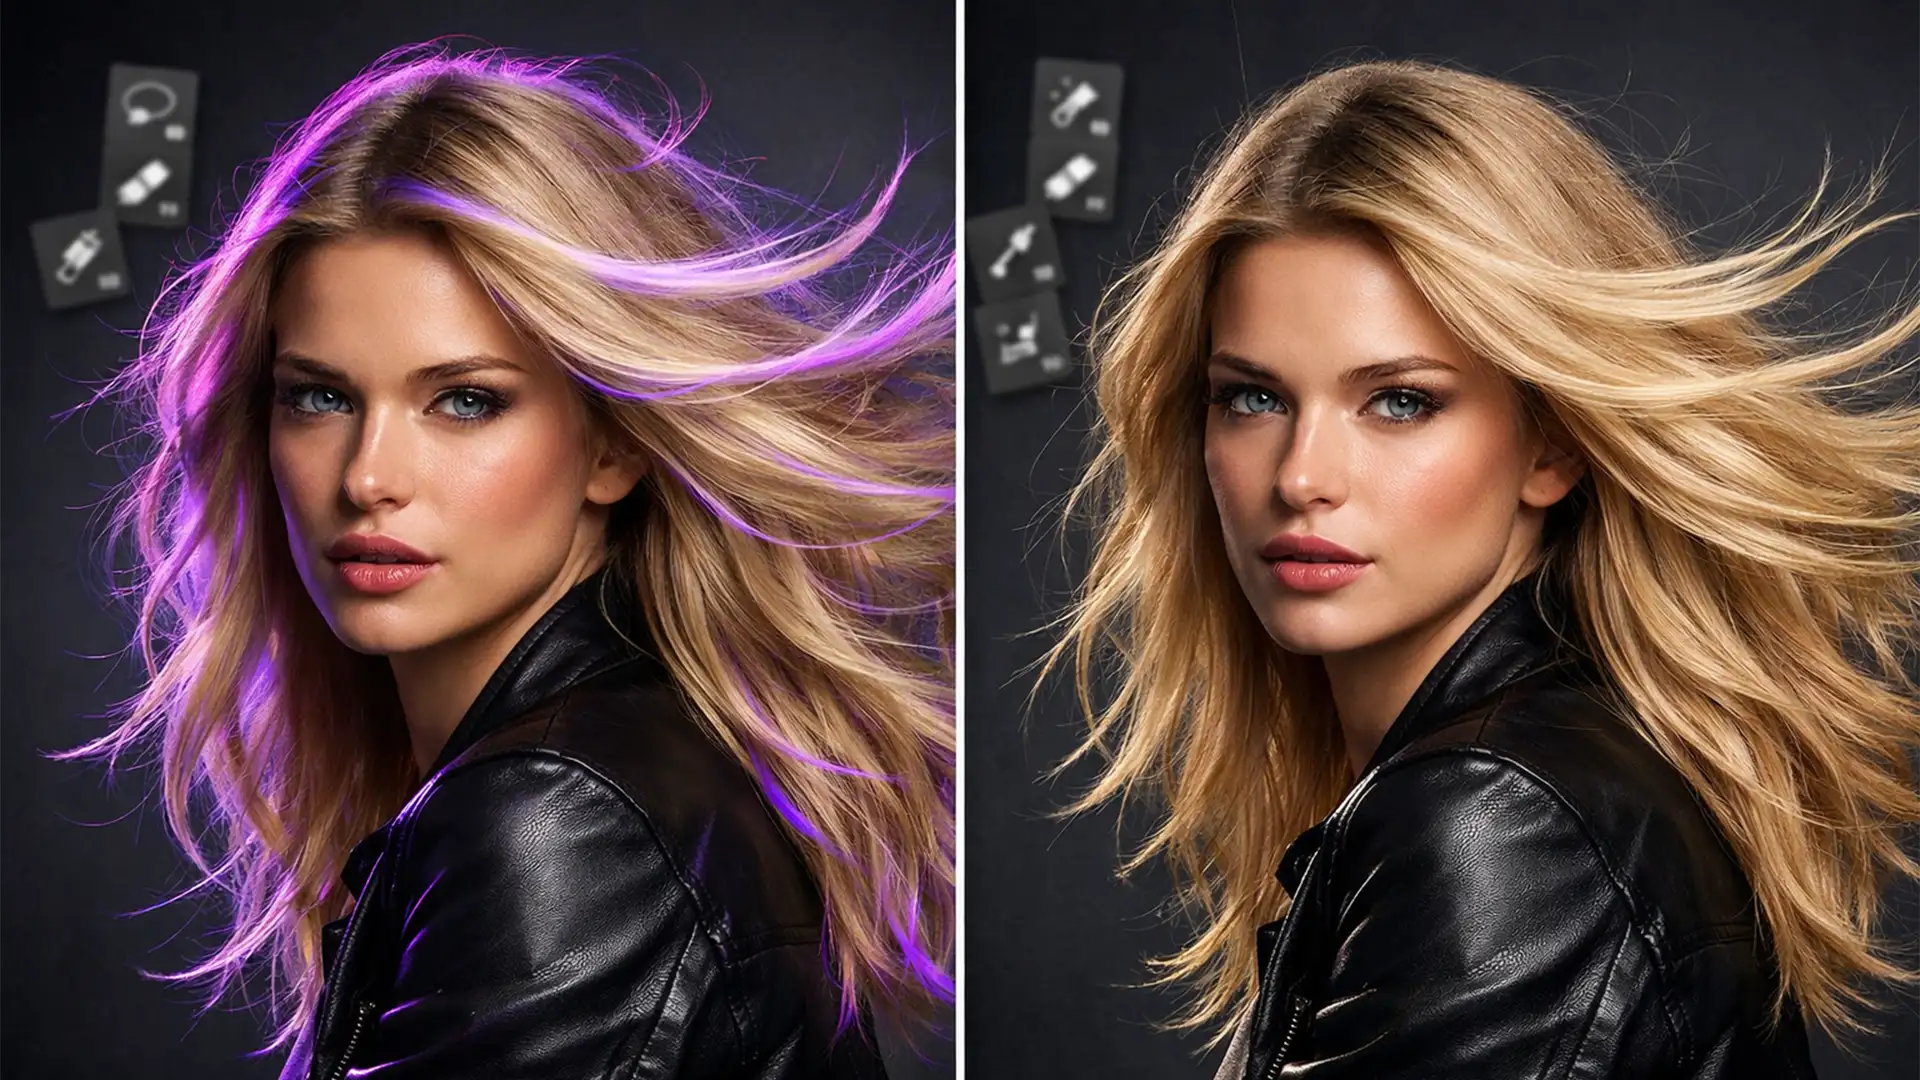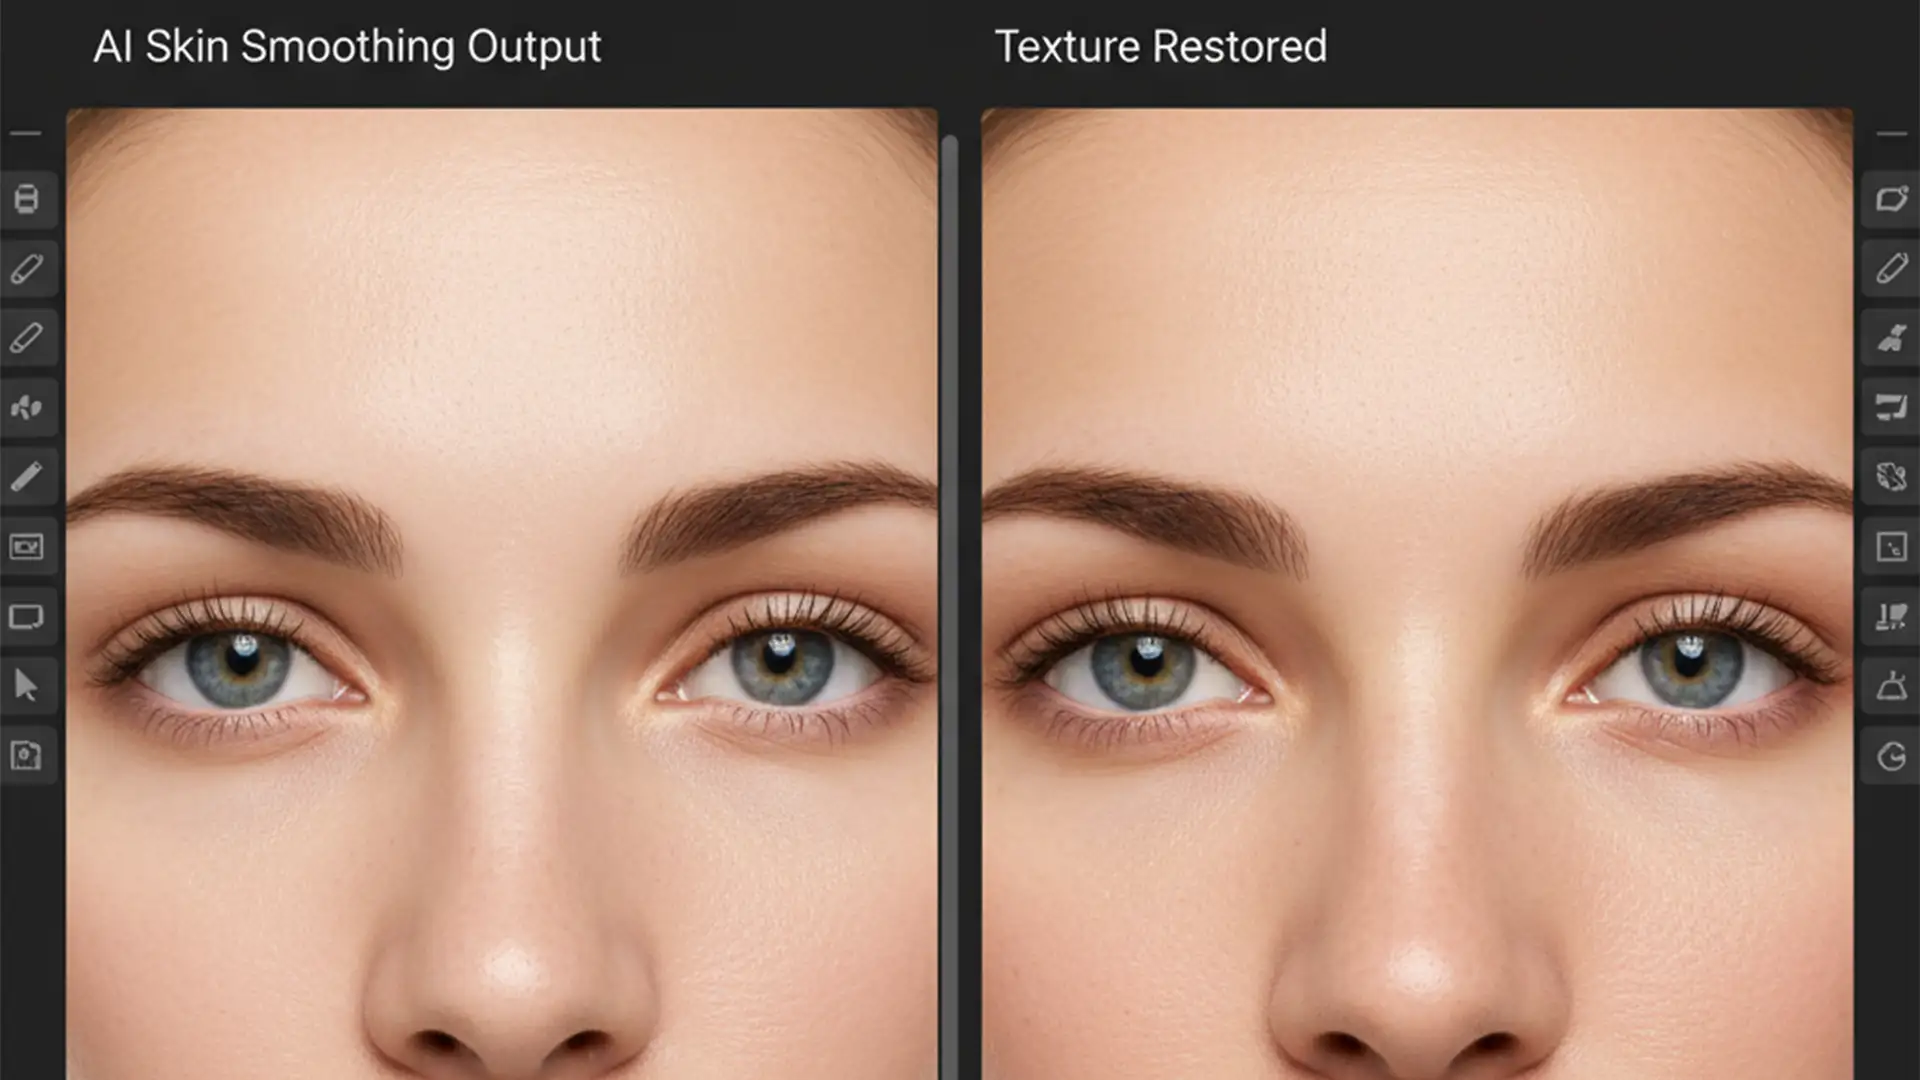
You just ran your latest portrait through Photoshop’s Neural Filters, hoping to save hours on manual skin retouching. But instead of a polished professional image, your subject looks like a wax mannequin.
If you are struggling to remove the AI plastic skin look in Photoshop, you are not alone. In recent versions of Photoshop (v24.x to v25.x+), AI tools like Skin Smoothing and Generative Fill rely on aggressive noise reduction algorithms. While these tools excel at evening out skin tones, they completely flatten micro-contrast, destroying natural pore detail and creating an artificial, uncanny valley effect.
Fortunately, you do not have to abandon AI tools entirely. By intercepting the AI output and isolating texture frequencies, you can restore photorealism. Here is the definitive guide to fixing over-processed skin and keeping your retouching workflow strictly professional.
Why Photoshop’s AI Destroys Pore Detail
AI skin smoothing operates by analyzing the face and applying targeted blur to areas with varying tonal values. However, the AI cannot always differentiate between an unwanted blemish and essential, natural skin texture. The result is a destructive process where high-frequency data—the tiny bumps, pores, and fine lines that make skin look human—is obliterated.
To achieve high-end, non-destructive editing, retouchers must manually intervene. We can do this by blending the original grain back into the image or bypassing the AI’s destructive texture blurring entirely.
3 Ways to Remove the AI Plastic Skin Look in Photoshop
Depending on your time constraints and the required quality of the final image, there are three proven methods to restore natural texture to an AI-smoothed portrait.
Method 1: The Quick Fix (Opacity & Noise Simulation)
If you are batch-processing images and need a rapid solution, you can mitigate the plastic effect by dialing back the AI and simulating lost texture.
- Run the Neural Filter: Apply the AI Skin Smoothing filter and ensure the output is set to a “New Layer.”
- Reduce Opacity: Immediately lower the opacity of this new AI layer to 40-50%. This allows the original, underlying skin texture to show through the artificial blur.
- Simulate Pores: To mask the remaining plastic look, add a new blank layer above your smoothed layer. Fill it with 50% gray and set the blending mode to Overlay. Go to Filter > Noise > Add Noise. Use a low value (1-2%) and ensure “Monochromatic” is checked. This introduces a uniform grain that mimics natural pore detail.
Method 2: The Pro Workaround (High Pass Texture Recovery)
For a more accurate restoration, you can extract the exact pore detail from your original image and lay it back over the AI-smoothed layer. This utilizes the High Pass filter to isolate micro-contrast.
- Duplicate the Original: Take your original, unedited background layer and duplicate it (Ctrl/Cmd + J). Move this duplicate to the very top of your layer stack, above the AI-smoothed layer.
- Change Blending Mode: Set this top layer’s blending mode to Linear Light. The image will temporarily look harsh and over-sharpened.
- Apply High Pass: Go to Filter > Other > High Pass. Adjust the radius to a very low setting, typically between 1.0 and 2.5 pixels. You only want to see the finest pore details in the preview window, not the underlying color or shadows.
- Masking: Clip this High Pass layer directly to your AI-smoothed layer, or apply a black layer mask and selectively paint with white only over the areas that look too plastic.

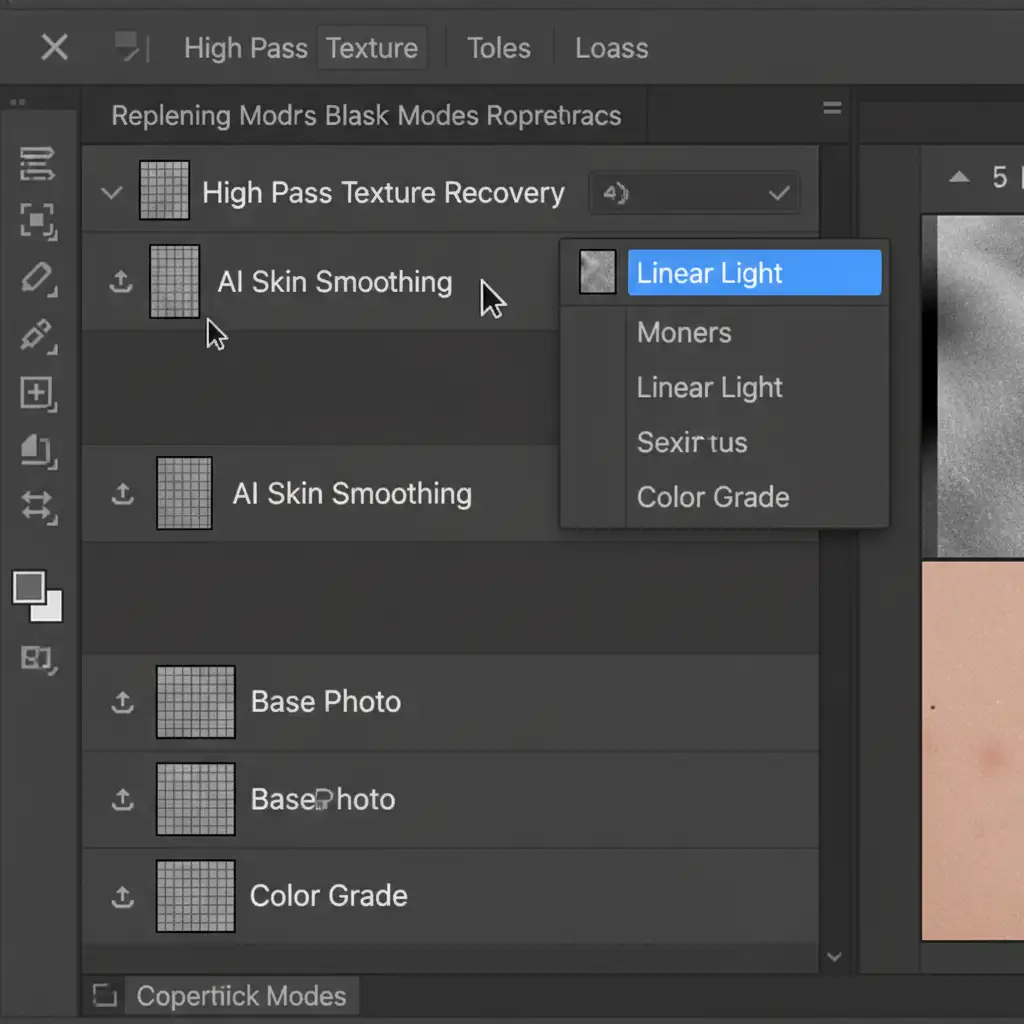
Method 3: The Technical Deep-Dive (Hybrid Frequency Separation)
This is the ultimate method for high-end beauty and fashion retouching. It combines the speed of AI tonal correction with the flawless texture preservation of traditional Frequency Separation.
By separating your image into a Low-Frequency (color/tone) layer and a High-Frequency (texture) layer, you can force the AI to only affect the color transitions, leaving the pores completely untouched.
- Setup Frequency Separation: Create two copies of your background layer. Name the bottom one “Low-Frequency” and the top one “High-Frequency.”
- Blur the Low-Frequency: Select the Low-Frequency layer and apply a Gaussian Blur just until the fine pores disappear (usually 4-6 pixels).
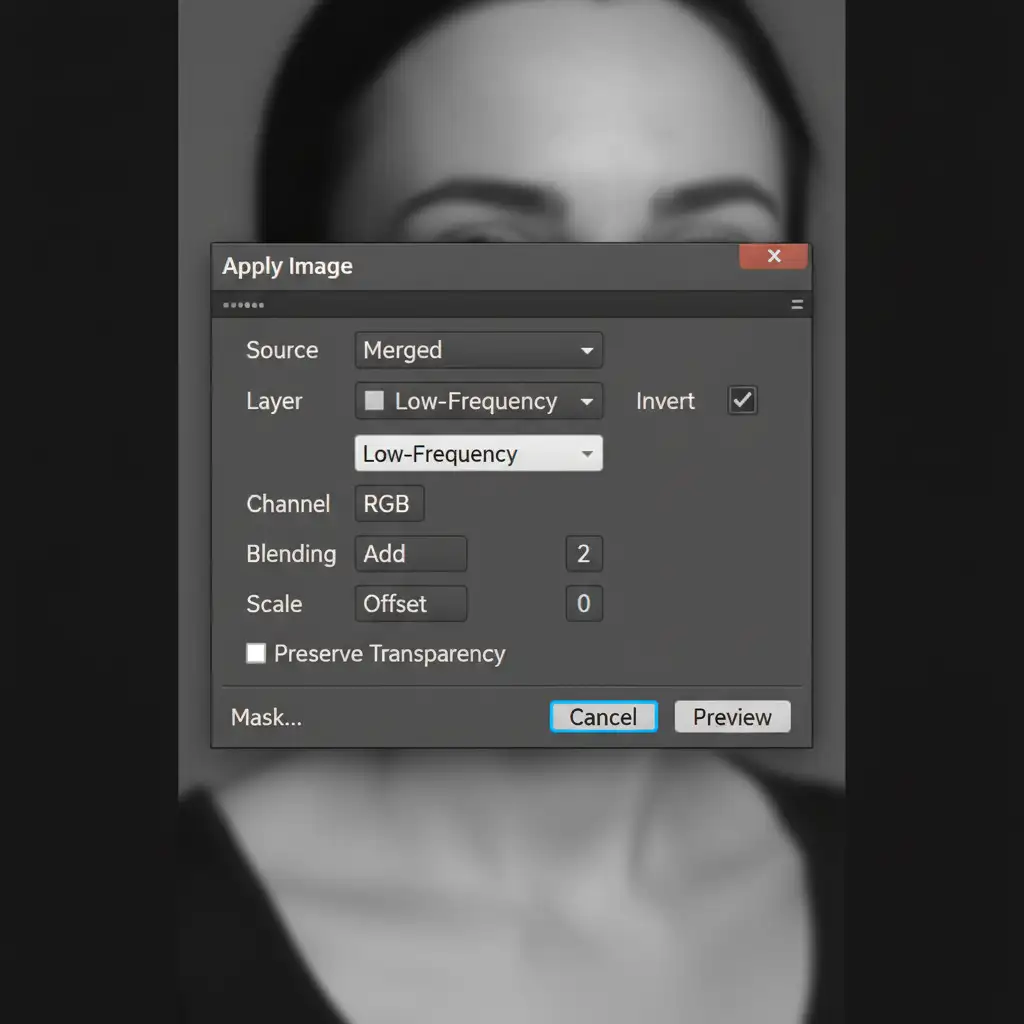
- Extract Texture: Select the High-Frequency layer. Go to Image > Apply Image.
- For 16-bit images: Select the Low-Frequency layer as your source. Check “Invert”. Set Blending to “Add”, Scale to 2, and Offset to 0.
- For 8-bit images: Select the Low-Frequency layer as your source. Uncheck “Invert”. Set Blending to “Subtract”, Scale to 2, and Offset to 128.
- Blend: Set the High-Frequency layer’s blending mode to Linear Light.
- Apply AI Strategically: Here is the magic step. Select your Low-Frequency layer and apply the Neural Filter Skin Smoothing directly to it.
Because the AI is only acting on the blurred color layer, your original high-frequency pore data sitting on the top layer perfectly protects the skin’s texture. You get the flawless tonal transitions of AI without any of the destructive plastic side effects.
Alt Text: Photoshop Apply Image dialogue box showing exact settings for 16-bit frequency separation texture extraction.

Stop Fighting the AI: Let the Experts Handle Your Retouching
Learning to remove the AI plastic skin look in Photoshop is essential for maintaining a high-quality portfolio. However, executing High Pass texture recovery and Hybrid Frequency Separation on hundreds of images per week is incredibly time-consuming.
If you are struggling to achieve natural-looking skin in high-volume portrait batches, you don’t have to sacrifice your time or your image quality.
Let the expert editing teams at Image Work India and Cloud Retouch handle your heavy lifting. We specialize in high-end, non-destructive retouching that guarantees flawless, photorealistic results—completely bypassing the plastic AI look. Focus on shooting and growing your photography business, and let us deliver perfectly textured, magazine-ready portraits to your clients.
Contact Image Work India and Cloud Retouch today to streamline your post-production workflow.