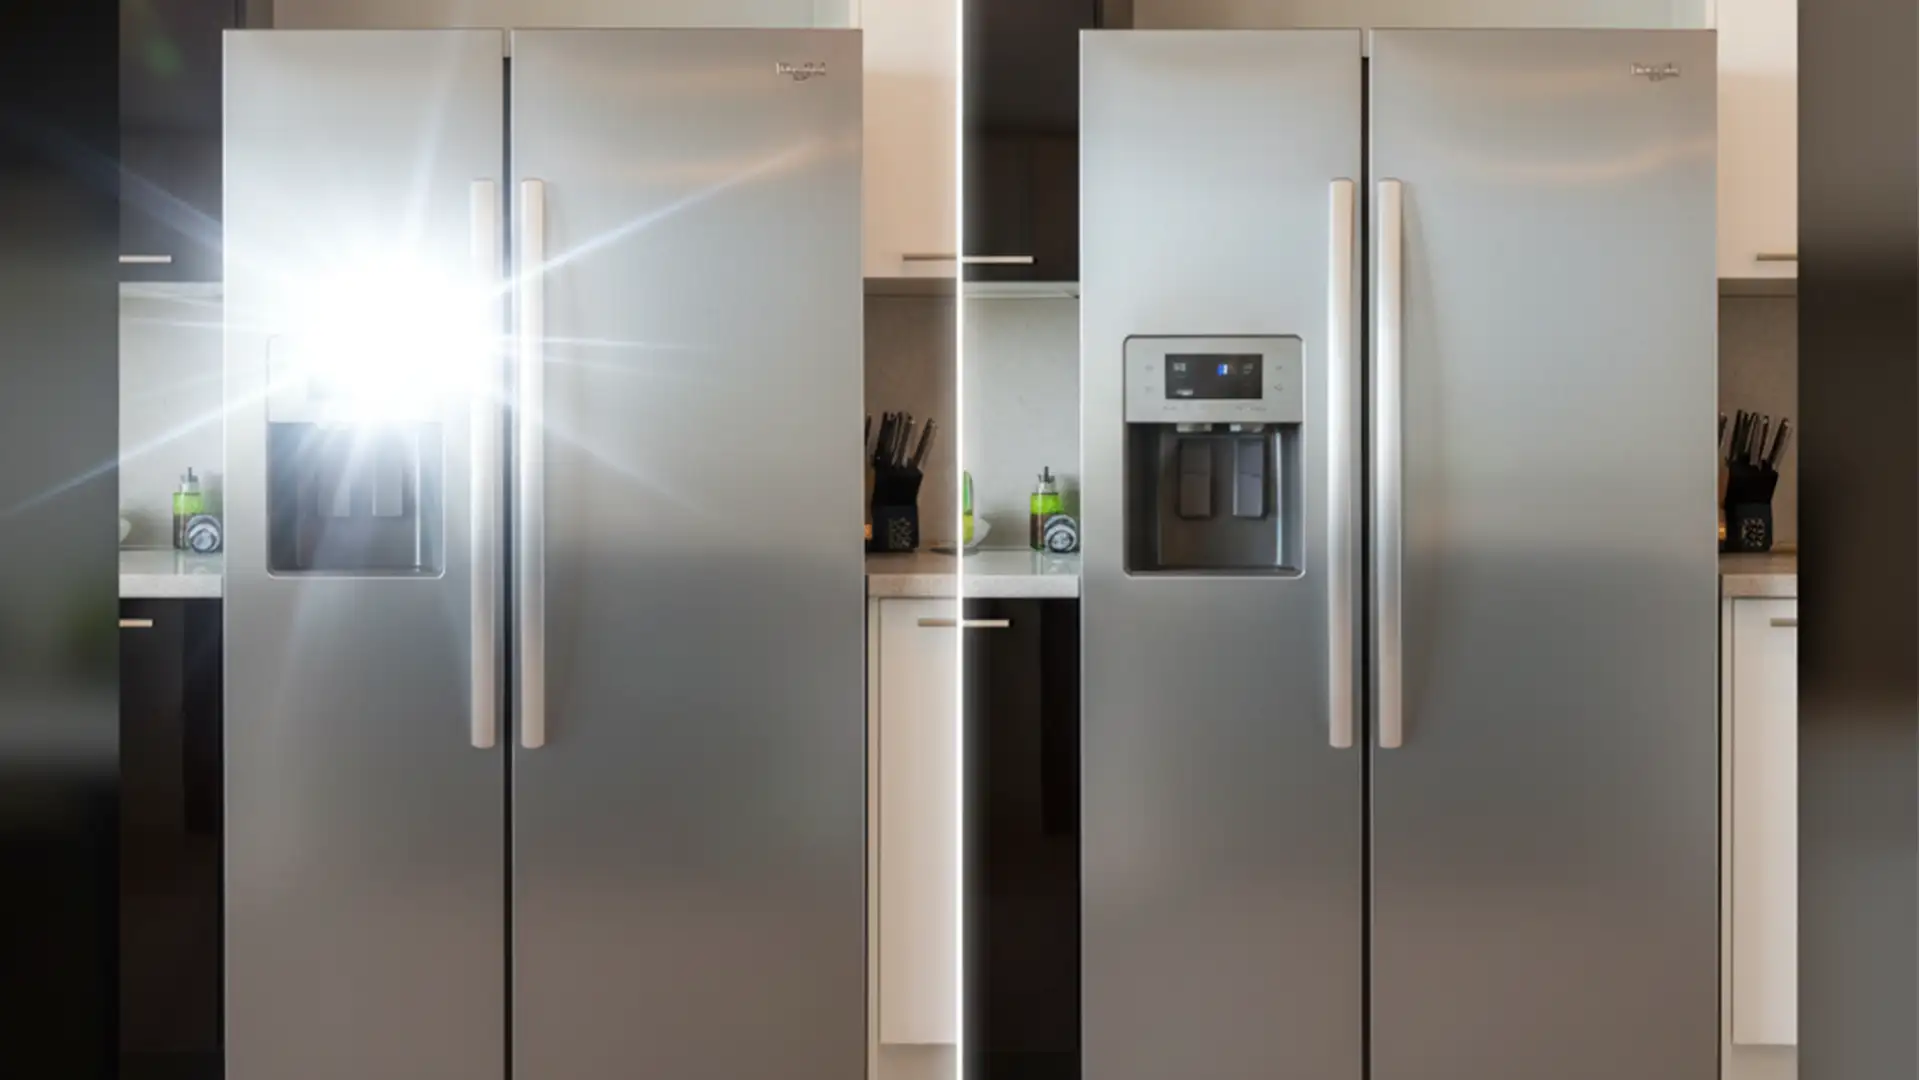
Nothing ruins a high-end property listing faster than a massive flash hotspot on a stainless steel refrigerator or the photographer’s reflection caught in a bathroom mirror. If you’ve ever tried to fix these glaring errors using the Clone Stamp tool, you already know the frustrating result: a muddy, smudged mess that destroys the natural texture of the material.
Retouching reflective surfaces in real estate photography requires more than quick patches. To maintain the physical depth and natural specular highlights of glass and metal, you need precise workflows. In this technical guide, we break down exactly how to eliminate unwanted camera glare in Adobe Photoshop v24.x and v25.x using advanced exposure stacking and texture separation techniques.
The Challenge of Reflective Surfaces in Property Photos
Large glass windows, polished countertops, and brushed metal appliances are staples in modern homes, but they act like mirrors during a shoot. They bounce flash lighting back into the lens, creating harsh white gradients that flatten the image. True resolution requires manipulating multiple exposures or separating the image data to restore accurate lighting gradients without degrading the material’s premium feel.
Nothing ruins a high-end property listing faster than a massive flash hotspot on a stainless steel refrigerator or the photographer’s reflection caught in a bathroom mirror. If you’ve ever tried to fix these glaring errors using the Clone Stamp tool, you already know the frustrating result: a muddy, smudged mess that destroys the natural texture of the material.

Retouching reflective surfaces in real estate photography requires more than quick patches. To maintain the physical depth and natural specular highlights of glass and metal, you need preciseNothing ruins a high-end property listing faster than a massive flash hotspot on a stainless steel refrigerator or the photographer’s reflection caught in a bathroom mirror. If you’ve ever tried to fix these glaring errors using the Clone Stamp tool, you already know the frustrating result: a muddy, smudged mess that destroys the natural texture of the material.
Retouching reflective surfaces in real estate photography requires more than quick patches. To maintain the physical depth and natural specular highlights of glass and metal, you need precise workflows. In this technical guide, we break down exactly how to eliminate unwanted camera glare in Adobe Photoshop v24.x and v25.x using advanced exposure stacking and texture separation techniques.
The Challenge of Reflective Surfaces in Property Photos
Large glass windows, polished countertops, and brushed metal appliances are staples in modern homes, but they act like mirrors during a shoot. They bounce flash lighting back into the lens, creating harsh white gradients that flatten the image. True resolution requires manipulating multiple exposures or separating the image data to restore accurate lighting gradients without degrading the material’s premium feel.
Method 1: The Quick Fix (Content-Aware & Generative Fill)
For minor camera reflections on bathroom mirrors or small, isolated glares on windows, automated tools in Adobe Photoshop v24.x and v25.x can save you significant time.
- Select the Lasso Tool and carefully draw a selection around the affected area. Ensure you leave a slight margin so Photoshop can sample the surrounding pixels.
- Navigate to Edit > Content-Aware Fill to let the software calculate and blend the patch.
- Alternatively, if you are using Photoshop v25.x, click on the Generative Fill button on the contextual taskbar. Leave the prompt box completely empty and hit Generate. This forces the AI to seamlessly blend the surrounding pixels, effectively erasing minor reflections while maintaining the environmental context.
Method 2: The Pro Workaround (Flambient Blending)
When dealing with large flash hotspots on appliances and windows, automated fills often fail. The industry-standard solution is flambient blending—a technique that combines the crispness of a flash shot with the natural lighting of an ambient shot.
Setting Up the Stack
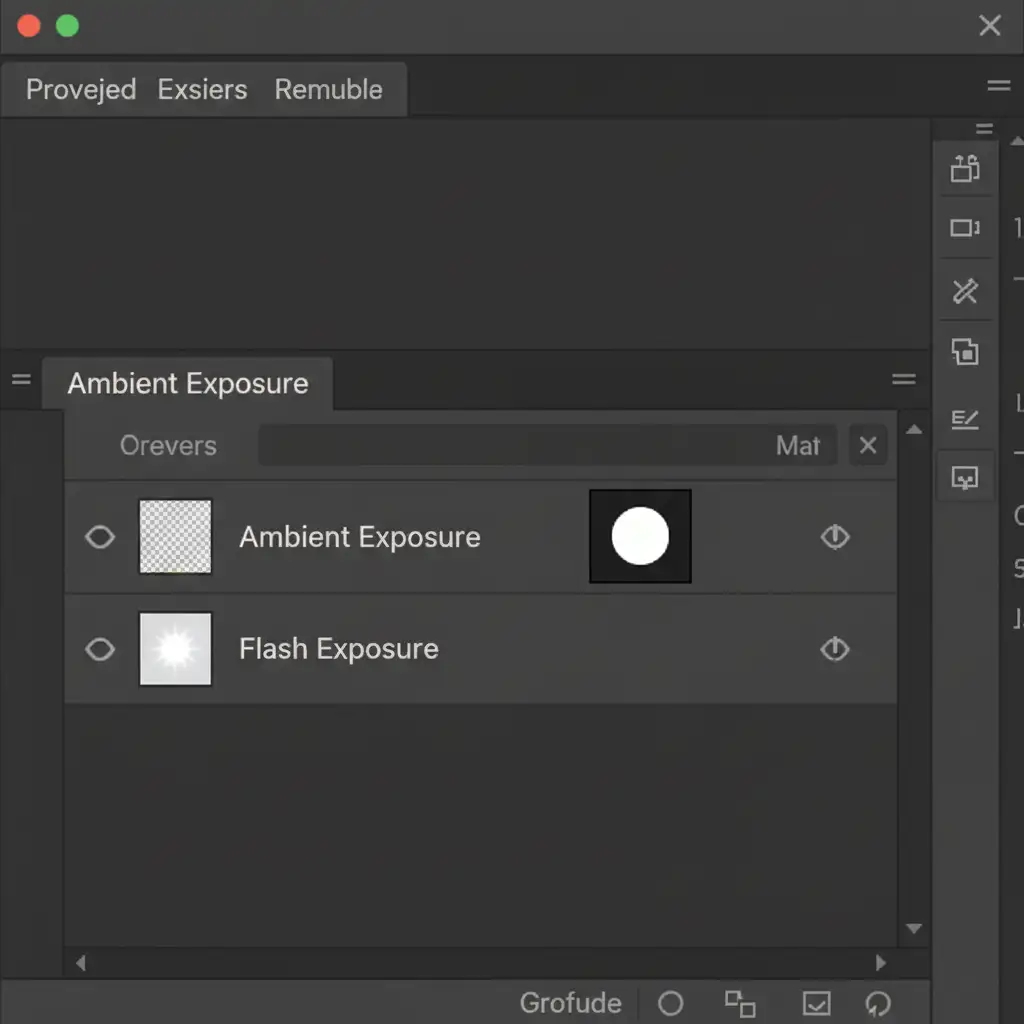
Bring your exposures into Photoshop as a layered document. You need a Flash base layer and an Ambient exposure layer. Place the Ambient layer on top of the Flash layer.
Masking the Glare
- Add a black, inverted Layer mask to your top Ambient exposure layer (Hold Alt/Option + click the Layer Mask icon). This hides the ambient layer completely.
- Select the Brush Tool.
- Set your foreground color to white.
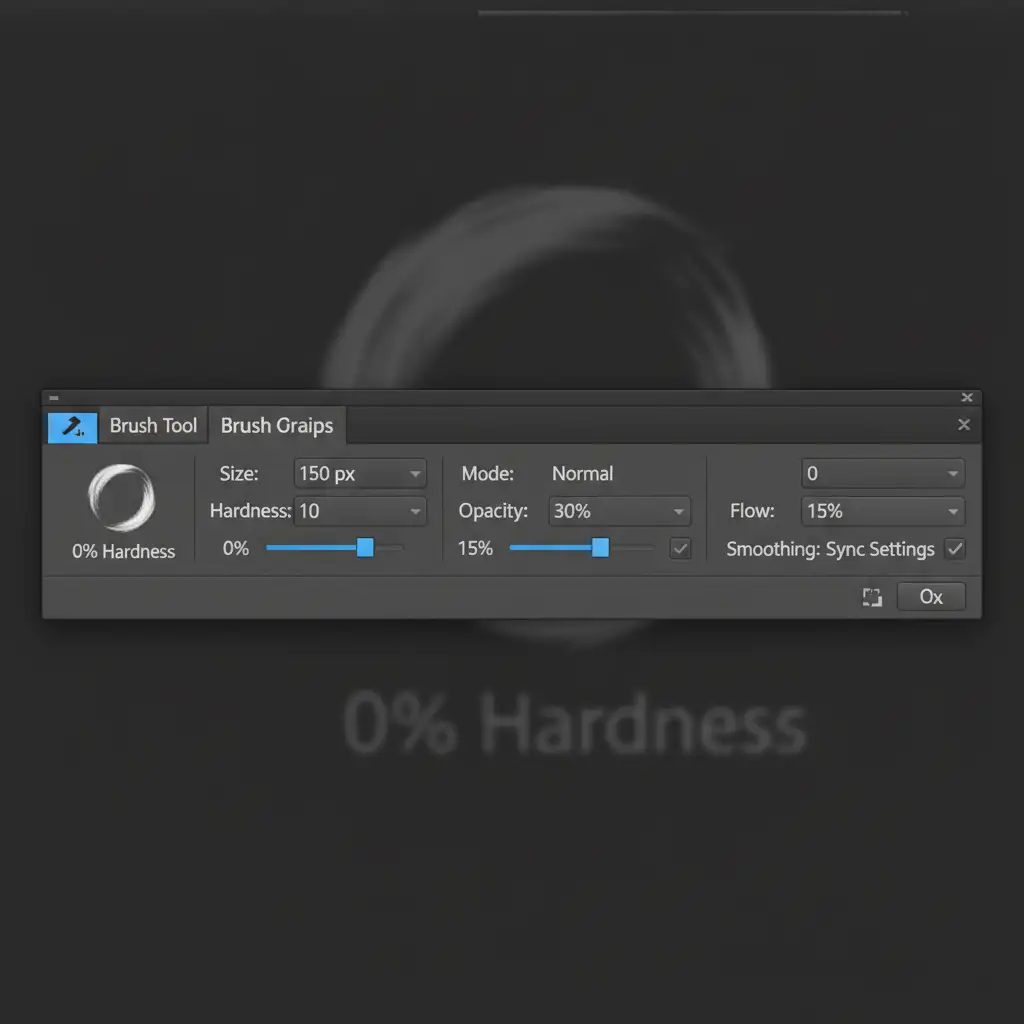
To ensure the transition isn’t harsh, you must dial in your brush settings.
Method 3: Technical Deep-Dive (Frequency Separation for Texture Retention)
Flambient blending requires bracketed exposures. But what if you only have a single image with a harsh flash hotspot on brushed metal or textured glass? You must use Frequency Separation.
This technique separates the image into two layers: color/light (Low Frequency) and texture/detail (High Frequency). This allows you to smooth out the harsh light gradient without destroying the metallic grain.
Step 1: Create the Frequency Layers
- Duplicate your base layer twice. Name the bottom duplicate “Low Frequency” and the top duplicate “High Frequency”.
- Turn off the visibility of the High Frequency layer and select the Low Frequency layer.
- Go to Filter > Blur > Gaussian Blur. Increase the radius just until the texture of the metal or glass disappears, diffusing the glare.
Step 2: Isolate the Texture
- Turn the High Frequency layer back on and select it.
- Go to Image > Apply Image.
Method 3: Technical Deep-Dive (Frequency Separation for Texture Retention)
Flambient blending requires bracketed exposures. But what if you only have a single image with a harsh flash hotspot on brushed metal or textured glass? You must use Frequency Separation.
This technique separates the image into two layers: color/light (Low Frequency) and texture/detail (High Frequency). This allows you to smooth out the harsh light gradient without destroying the metallic grain.
Step 1: Create the Frequency Layers
- Duplicate your base layer twice. Name the bottom duplicate “Low Frequency” and the top duplicate “High Frequency”.
- Turn off the visibility of the High Frequency layer and select the Low Frequency layer.
- Go to Filter > Blur > Gaussian Blur. Increase the radius just until the texture of the metal or glass disappears, diffusing the glare.
Step 2: Isolate the Texture
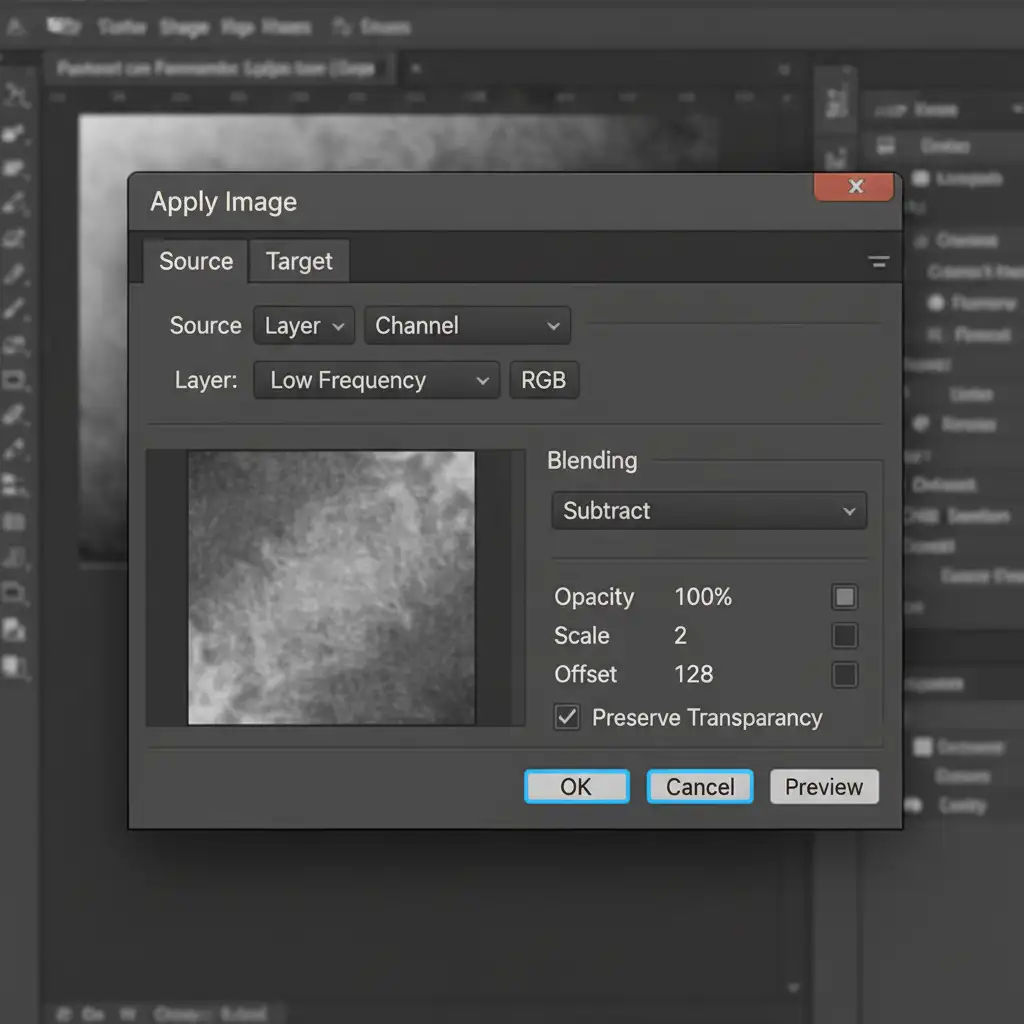
- Turn the High Frequency layer back on and select it.
- Go to Image > Apply Image.
- Once applied, change the Blend modes of the High Frequency layer to Linear Light. Your image will now look exactly like the original, but the data is separated.
Step 3: Blend the Hotspot
Select the Low Frequency layer. Choose the Mixer brush tool (ensure it is set to sample a clean, empty brush after every stroke). Gently brush over the hotspot gradient. Because you are only affecting the Low Frequency layer, the harsh lighting will blend away smoothly, while the High Frequency layer preserves the exact texture and specular highlight of the reflective surface.
Stop Wasting Time on Complex Reflections
Retouching reflective surfaces in real estate photography is a meticulous process. While mastering flambient blending and frequency separation will elevate the quality of your portfolio, executing these techniques across hundreds of property photos is incredibly time-consuming.
You shouldn’t have to spend hours zooming in on refrigerator doors and bathroom mirrors. Outsource your high-volume real estate photo editing to Image Work India and Cloud Retouch. Our team of professional retouchers specializes in advanced exposure blending, hotspot removal, and texture preservation. Send us your bracketed shots or single exposures, and we’ll deliver flawless, magazine-quality results overnight.
Focus on shooting your next luxury property, and let us handle the pixels.