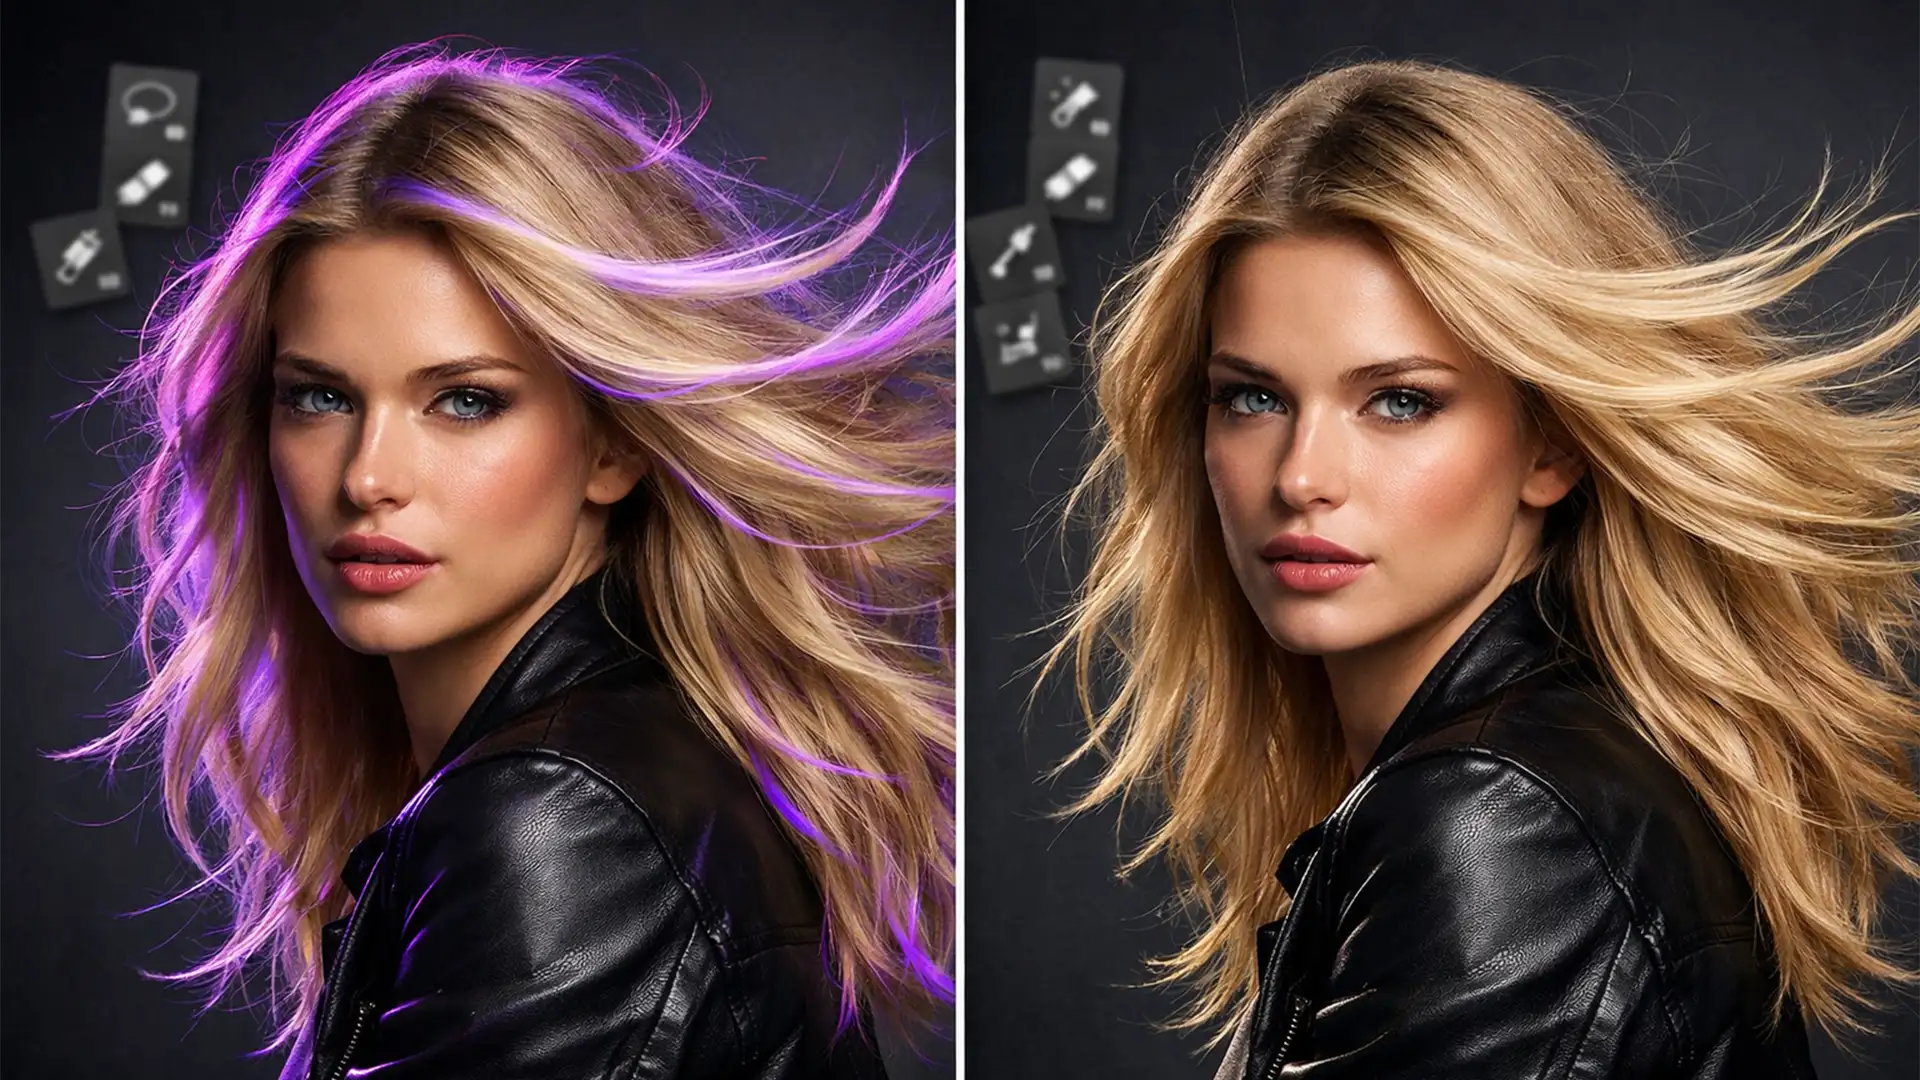
Have you ever run a beautiful portrait through a modern AI tool, expecting a flawless finish, only to end up with a subject that looks like a mannequin? You are not alone. Retouching AI skin texture loss is one of the most frustrating pain points for modern photographers. When tools like Photoshop’s Neural Filters (v24.x-v25.x), Evoto, or Luminar Neo apply their algorithms, they often strip away the vital micro-contrast that makes skin look human. The result is a waxy, plastic appearance that screams “amateur edit.”
In this comprehensive guide, we will break down exactly why AI destroys skin texture and provide three professional workflows to restore natural pores, peach fuzz, and realism to your over-processed portraits.
Why AI Creates “Plastic” Skin (The Technical Flaw)
To fix the problem, you need to understand the technical failure behind it. AI retouching plugins rely on complex algorithms to identify blemishes, discoloration, and uneven tones. However, these algorithms frequently misidentify high-frequency skin details-like pores and fine facial hair-as digital noise.
When the AI encounters these details in the spatial frequency domain, it applies aggressive Gaussian blur equivalents. This effectively wipes out the high-frequency data while leaving the underlying color and tone (low-frequency data) intact. The loss of this high-frequency micro-contrast is what causes the dreaded “wax figure” effect.
Fortunately, through non-destructive editing techniques, we can simulate or graft authentic texture back onto the image.
3 Methods to Fix Retouching AI Skin Texture Loss
Whether you need a rapid fix for a high-volume batch or a pixel-perfect restoration for a beauty editorial, here are three proven methods to recover lost skin texture.
Method 1: The Quick Fix (Synthetic Noise Overlay)
If you need to quickly restore a sense of realism to flat, AI-smoothed skin, simulating pores using Photoshop’s native noise engine is highly effective.
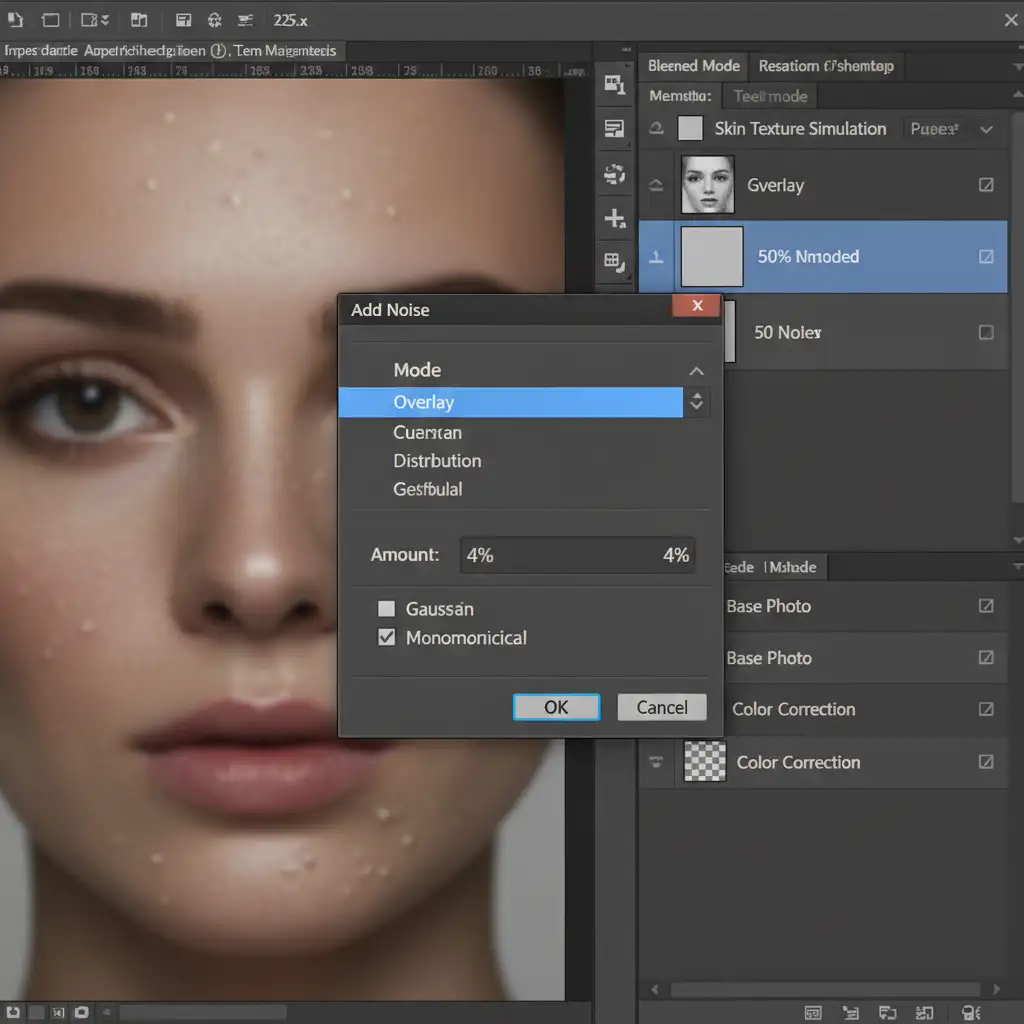
- Create a new layer above your smoothed AI portrait.
- Fill the layer with 50% Gray (Edit > Fill > 50% Gray).
- Change the layer’s Blend Mode to Overlay or Soft Light.
- Go to Filter > Noise > Add Noise. Select Monochromatic and Gaussian, adjusting the amount until it matches the scale of natural pores.
- Apply a slight Gaussian Blur (0.1px to 0.5px) to soften the sharp digital edges of the noise, making it look like organic texture.
- Mask the layer so the texture overlay only affects the skin, avoiding the eyes, lips, and hair.
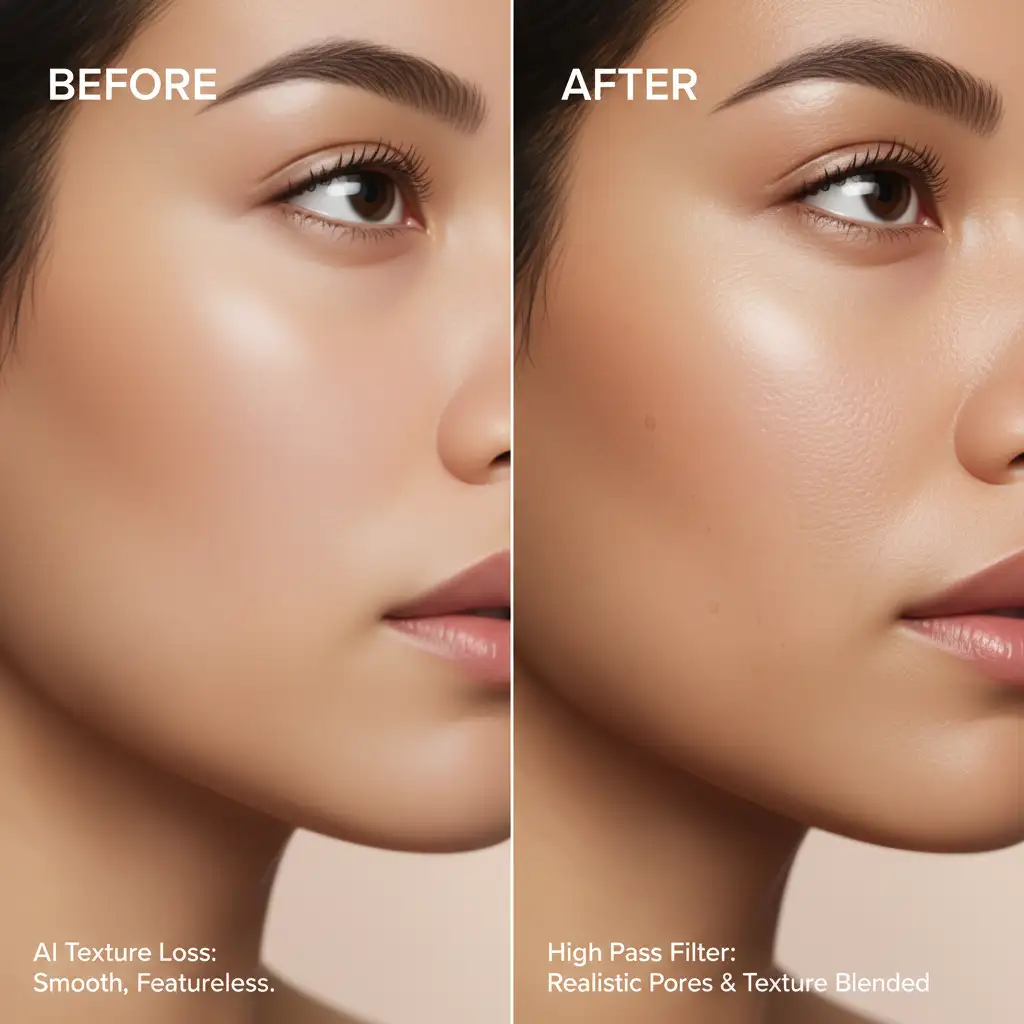
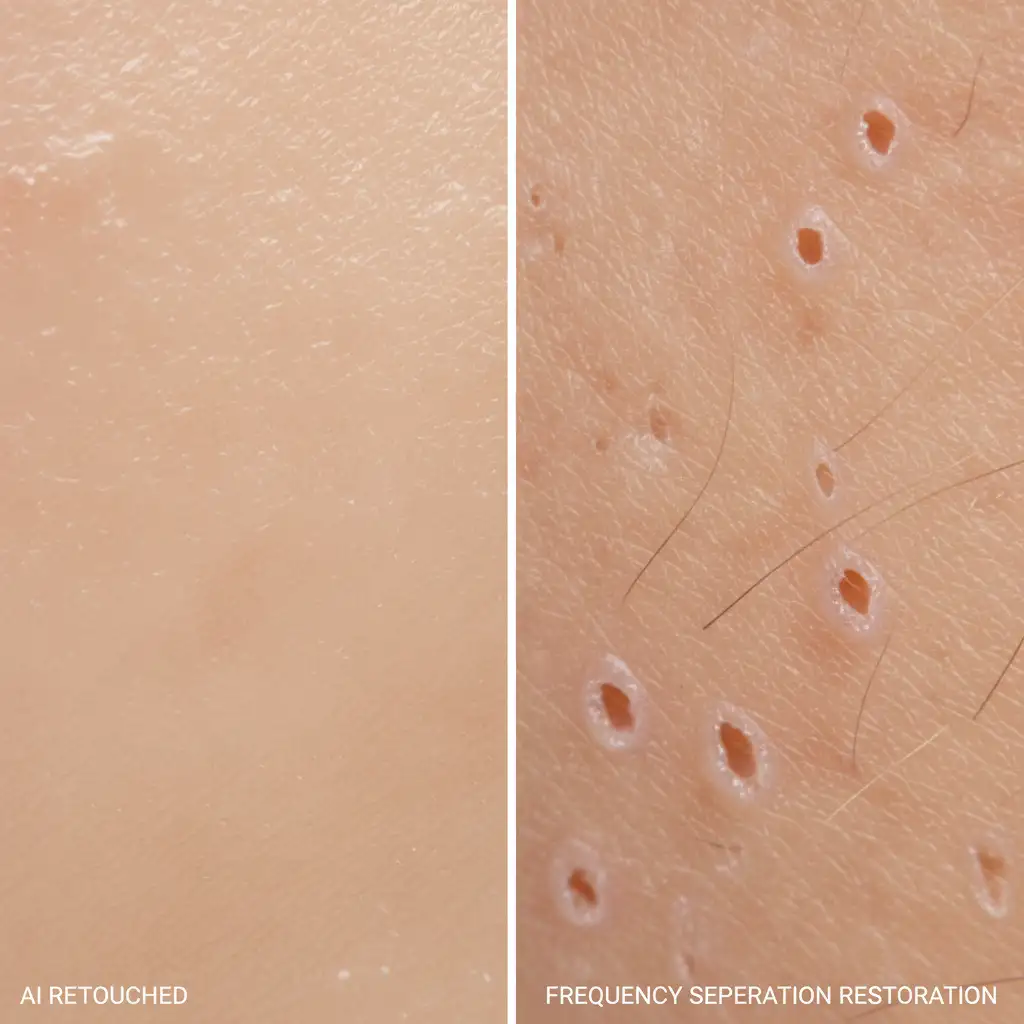
Method 2: The Pro Workaround (Frequency Separation Grafting)
When synthetic noise isn’t realistic enough, the best approach is to steal real skin from a healthy area and graft it over the plastic AI areas. This utilizes the principles of Frequency Separation.
- Find an area of the subject’s skin (or a completely different high-res portrait) that has excellent, untouched pore detail.
- Duplicate that skin patch onto a new layer.
- Apply the High Pass Filter (Filter > Other > High Pass). Adjust the radius (usually between 2px and 6px) until only the fine pores and texture are visible in gray, with no color or tone bleeding through.
- Change the blend mode to Linear Light.
- Use the Clone Stamp or Healing Brush on this specific high-frequency layer to create a repeating texture pattern over the overly smoothed AI areas.
- Use Layer Masks to blend the grafted pores seamlessly.
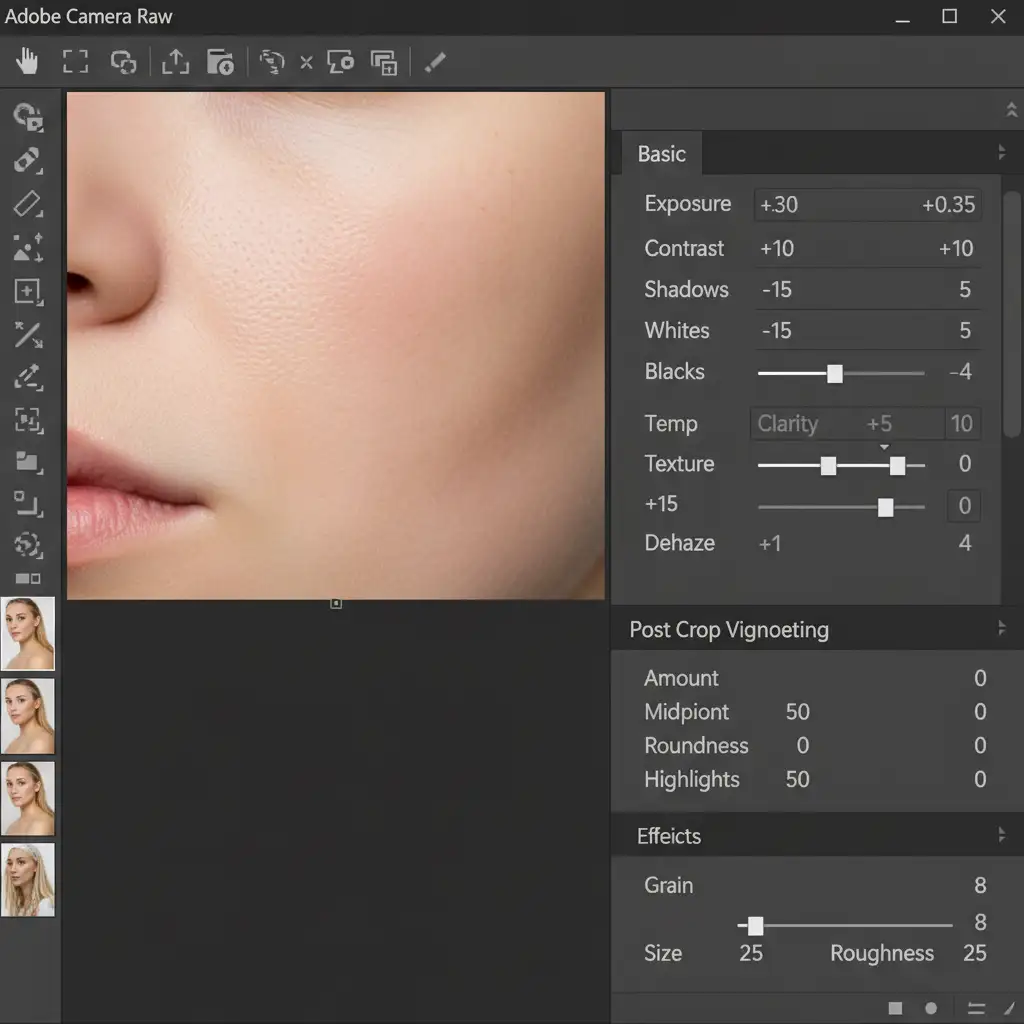
Method 3: The Technical Deep-Dive (Luminance Masking & Camera Raw)
For ultimate control, we can leverage localized micro-contrast adjustments combined with custom brushwork to target the exact tonal ranges where AI failed.
- Targeted Micro-Contrast: Open your smoothed layer in the Camera Raw Filter. Instead of applying global sharpness, use the ‘Texture’ and ‘Clarity’ sliders. Texture enhances medium-frequency details (perfect for pores), while Clarity affects broader mid-tone contrast.
- Luminance Masking: To prevent these adjustments from creating halos around edges or adding crunchiness to shadows, apply the Camera Raw filter via a Smart Object and use Luminance Masking to restrict the texture enhancement strictly to the skin’s mid-tones.
- The Pore Brush: For areas where the AI completely obliterated all data (like the tip of the nose or forehead highlights), use a custom Pore Brush. Sample a color slightly darker than the skin tone and gently stamp micro-texture back into the highlights.
Stop Fighting AI-Let the Experts Handle Your Retouching
Fixing retouching AI skin texture loss requires a deep understanding of spatial frequencies, blending modes, and advanced masking. While these methods are highly effective, they are also incredibly time-consuming. When you are processing hundreds of wedding photos, a commercial beauty campaign, or high-volume e-commerce headshots, you simply don’t have the hours to manually rebuild skin texture on every single image.
That is where we come in.
At Image Work India and Cloud Retouch, our team of professional retouchers specializes in high-end, non-destructive portrait editing. We don’t rely on one-click AI filters that ruin your images; we use meticulous, industry-standard frequency separation and micro-dodging/burning to ensure your subjects look flawless, yet 100% human.
Stop wrestling with plastic skin and let us deliver the pixel-perfect realism your clients demand. Contact Image Work India and Cloud Retouch today to outsource your retouching workflow and elevate the quality of your portfolio.