You’ve carefully traced your subject, clicked “Generative Fill,” and tried to upload a reference file, only to hit a wall. Whether the icon is completely grayed out, the AI is stubbornly ignoring your uploaded image, or a server error is blocking your progress, dealing with the Photoshop Generative Fill Reference Image not working is incredibly frustrating.
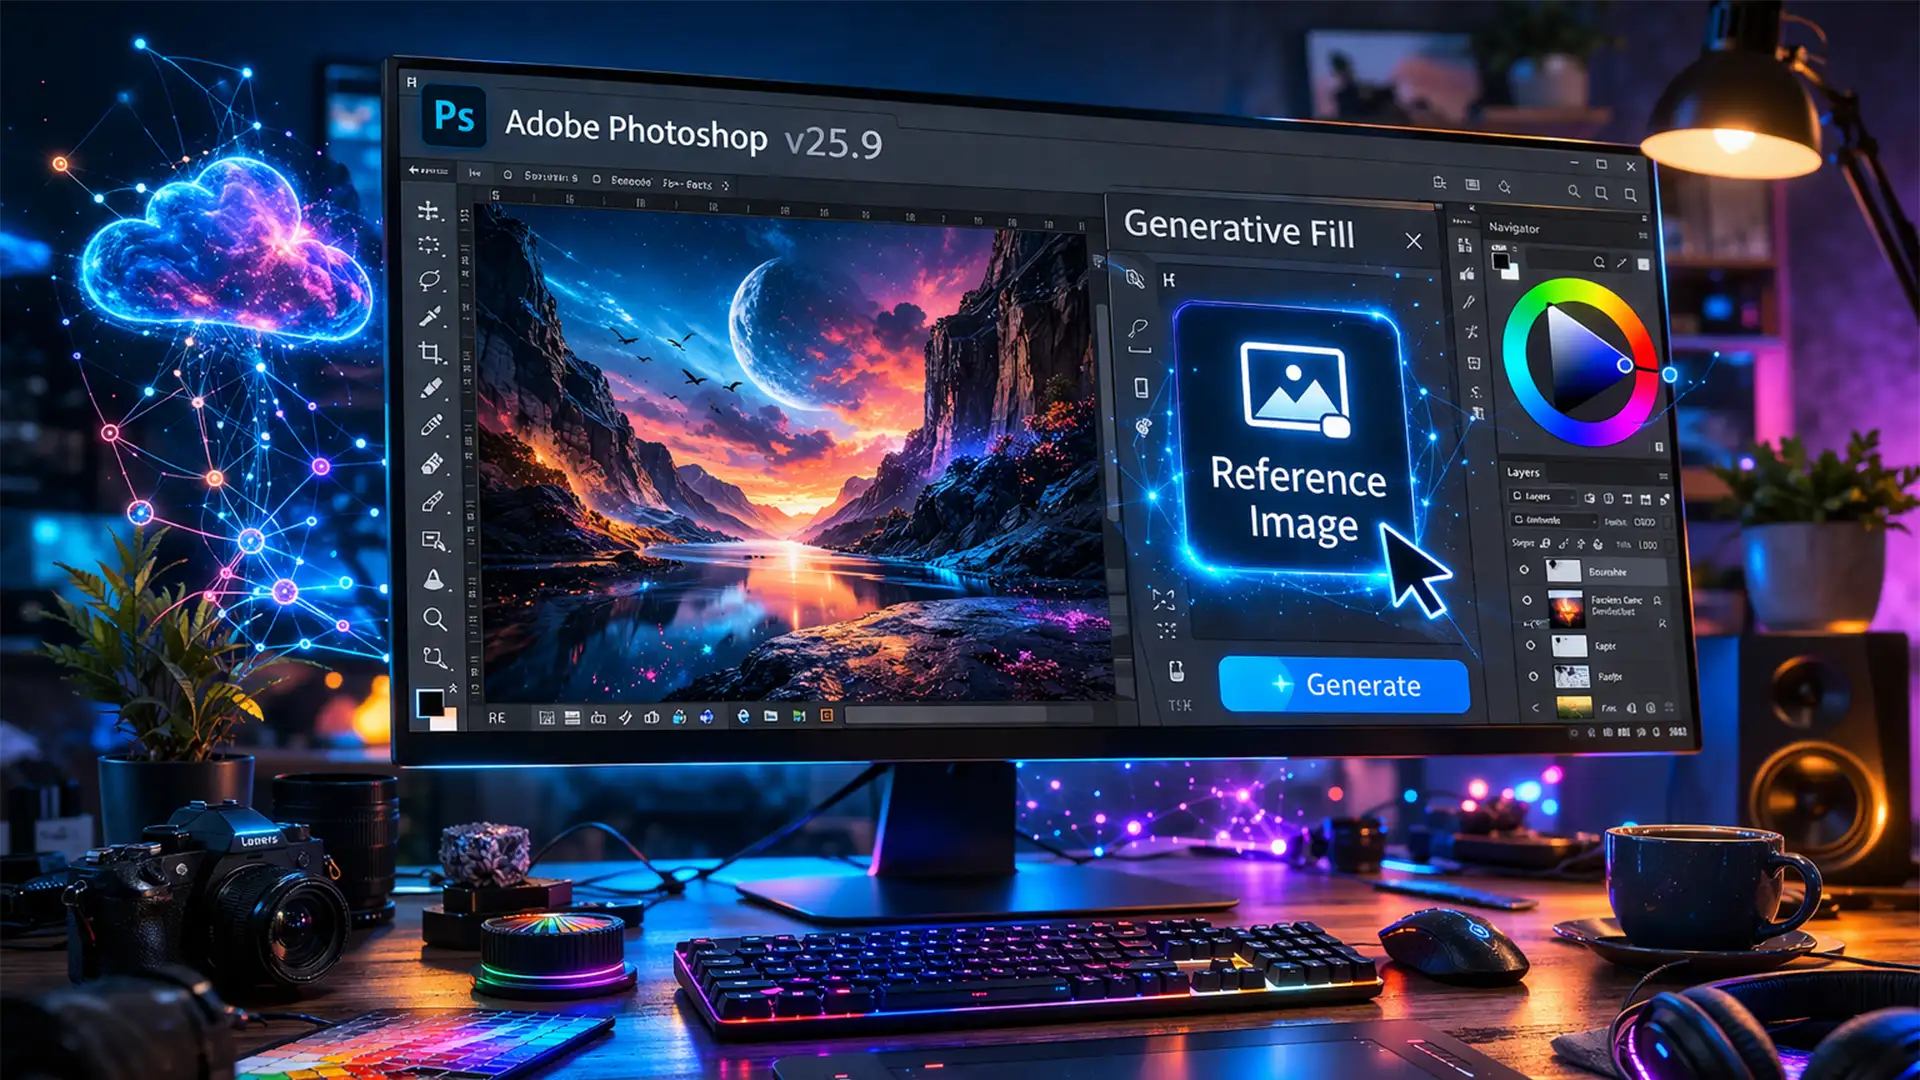
Since its beta debut and official rollout in Photoshop v25.9, this Adobe Firefly-powered feature has revolutionized compositing. However, strict server guidelines, UI quirks, and cloud-syncing bugs can easily derail your workflow. If you are tired of fighting with the AI, this comprehensive troubleshooting guide will help you fix the errors and get back to creating.
Why is the Generative Fill Reference Image Failing?
Before diving into the fixes, it helps to understand how the feature actually operates. Unlike traditional local rendering, Generative Fill relies entirely on cloud-based rendering via Adobe Firefly. When the Reference Image feature fails, it usually boils down to one of four technical root causes:
- Outdated Software: Your version of Photoshop lacks the necessary API hook to communicate with the Reference Image servers.
- Unsupported File Formats: You are trying to upload a TIFF, PSD, or raw file instead of a supported format.
- Missing Active Selection: You haven’t established the “marching ants” on an unlocked pixel layer.
- Content Filtering: Your reference image triggered Adobe Firefly’s server-side blocking for copyrighted or NSFW material.
Let’s walk through the proven methods to resolve these issues.
Method 1: The Quick Fix (Verify Selection and File Type)
The most common reason the Reference Image icon is grayed out in the Contextual Task Bar is user error regarding layer setup and file types.
Step-by-Step Fix:
- Unlock Your Layer: Ensure the layer you are working on is a standard, unlocked pixel layer. If you are working on a locked Background layer, click the padlock icon to unlock it. If it is a Smart Object, you may need to rasterize it first depending on your exact workflow.
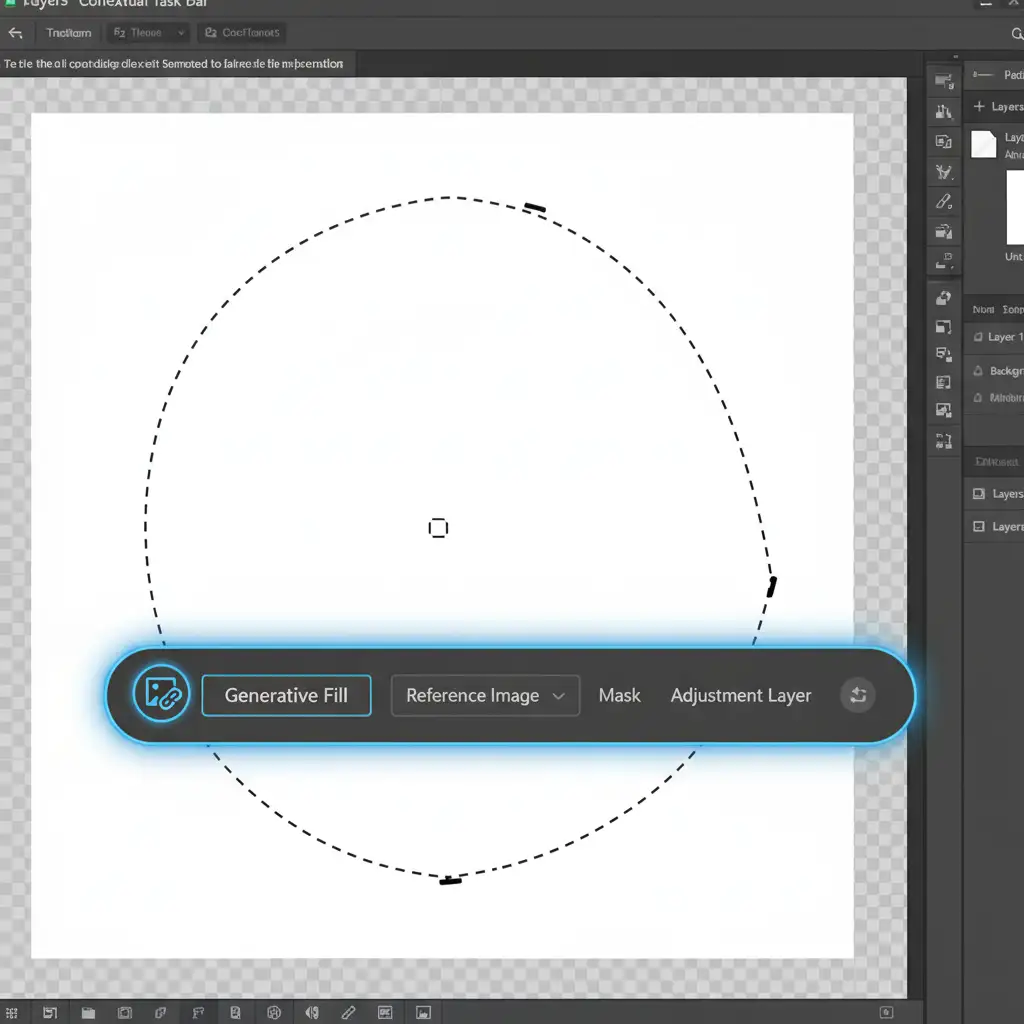
- Create an Active Selection: You must have an active selection (the blinking “marching ants”) on your canvas. Use the Lasso Tool or Marquee Tool to define where you want the new generation to appear.
- Check Your Reference File: Click the Reference Image icon. Ensure the image you are uploading is strictly a standard RGB JPEG, PNG, or WEBP file. It must also be under 10MB in size.
Method 2: The Pro Workaround (Manual Pre-Compositing)
Sometimes, Adobe Firefly simply ignores your reference image, generating something completely unrelated. When the AI refuses to cooperate, professional retouchers use a manual pre-compositing workaround to force the system’s hand.
Step-by-Step Fix:
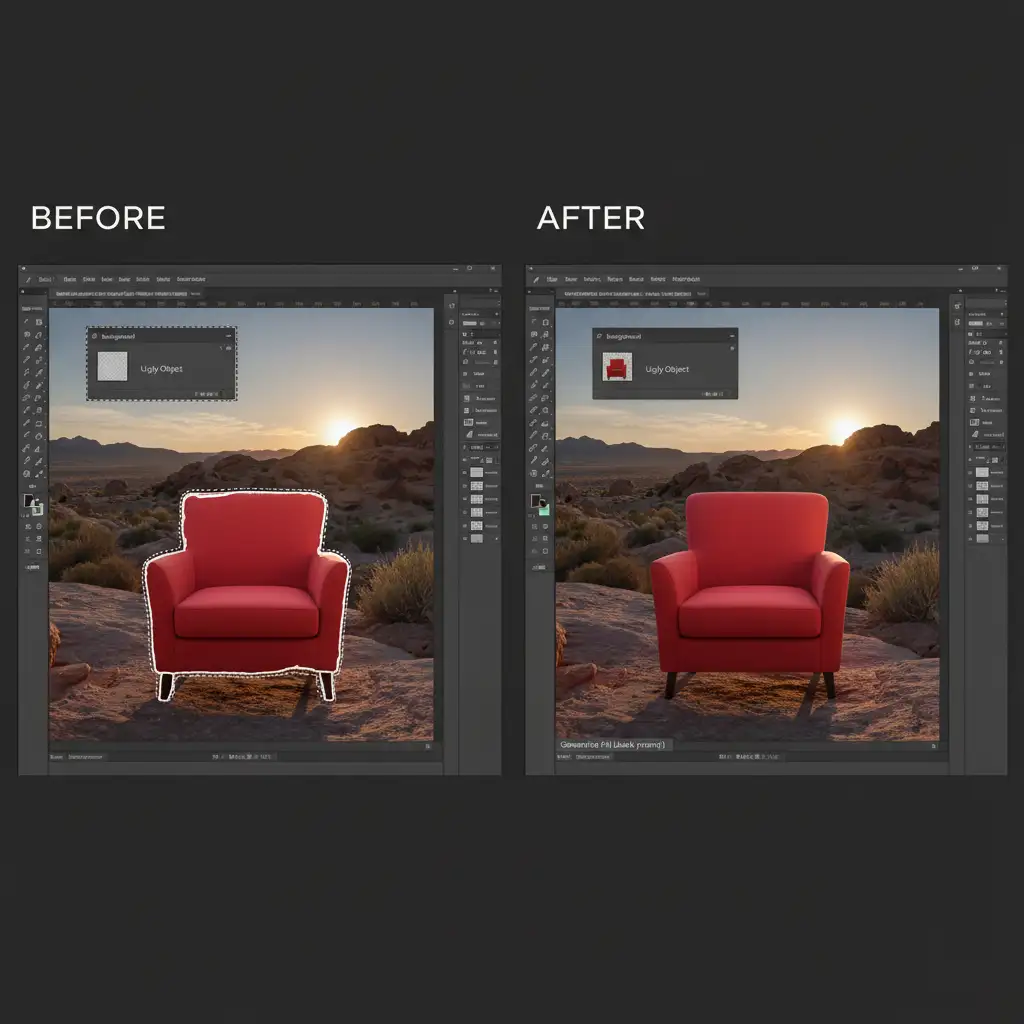
- Place the Image Manually: Instead of using the Reference Image button, drag and drop your reference image directly into your Photoshop document as a new layer.
- Scale and Position: Transform (Ctrl/Cmd + T) the image to the exact size and perspective you want it to appear in the final composition.
- Merge and Select: Merge this new element with a copy of your background layer. Then, make a loose selection around the edges of the placed object (leaving the center untouched).
- Run a Blank Prompt: Click Generative Fill on the Contextual Task Bar, leave the text prompt completely blank, and hit Generate. Firefly will seamlessly blend the harsh edges of your placed image into the background, giving you perfect control over the reference.
Method 3: The Technical Deep-Dive (Force Adobe Firefly Sync)
If your file types are correct and your selections are flawless, but you are still encountering errors or a missing API hook, you need to force a reset of the Creative Cloud desktop app and the Firefly session cache.
Step-by-Step Fix:
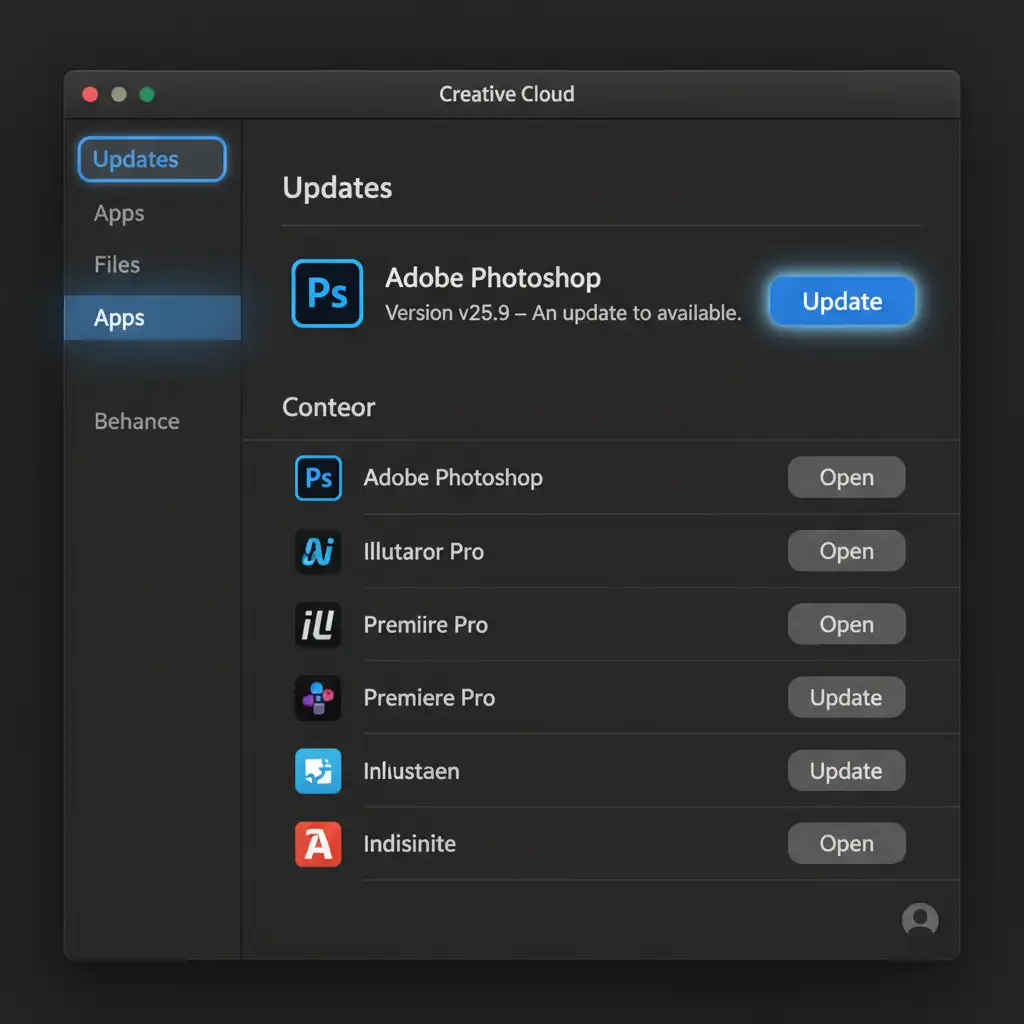
- Verify Version: Open the Creative Cloud desktop app. Navigate to the “Updates” tab on the left sidebar. Ensure your Photoshop is updated to at least version 25.9 (the version where Reference Image was widely rolled out).
- Force a Cloud Sync Reset: If you are already on the latest version, click your profile picture in the top right of the Creative Cloud app and select Sign Out.
- Restart and Clear Cache: Restart your computer to clear out temporary session data. Relaunch Creative Cloud, sign back in, and open Photoshop. This re-establishes a fresh connection for cloud-based rendering.
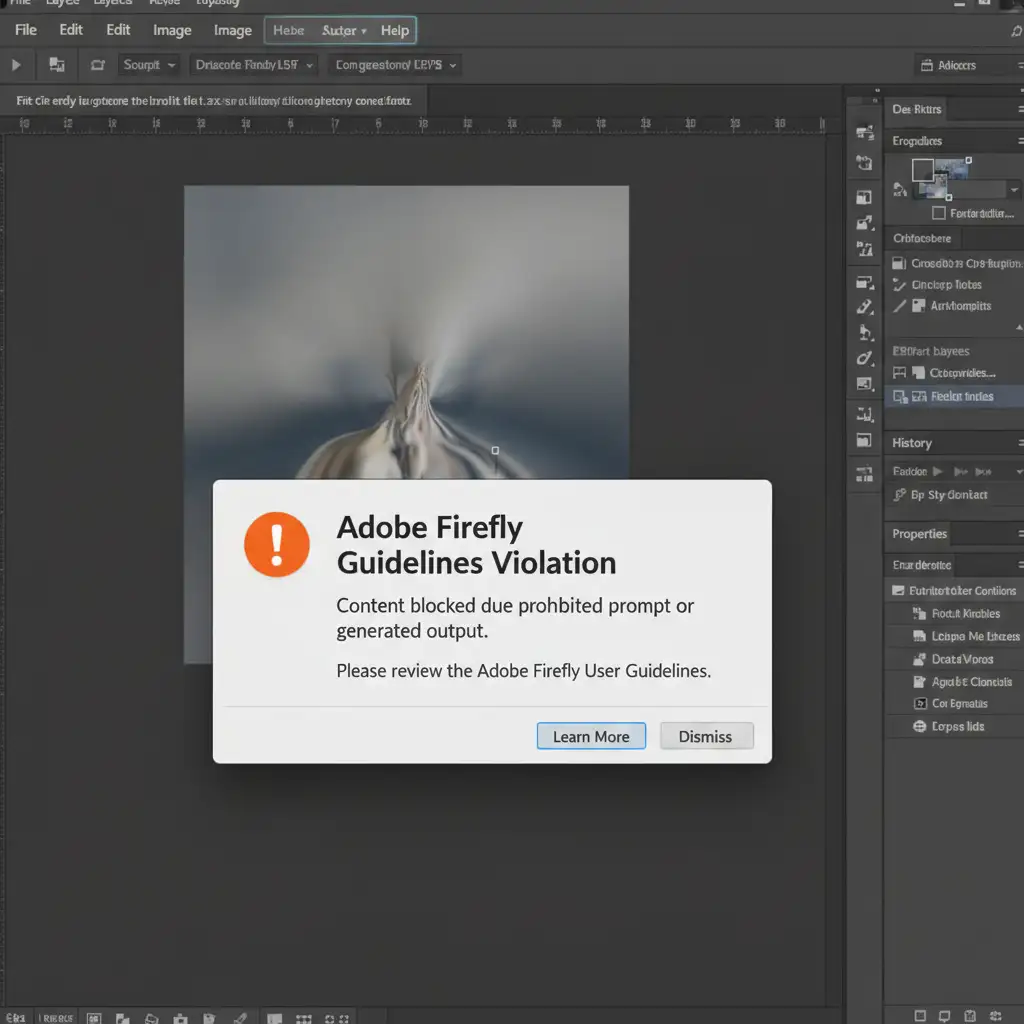
Dealing with Firefly Guideline Errors
If you receive a specific error message stating that your prompt or reference violates guidelines, Adobe’s automated filters have flagged your image. Firefly is strictly trained on Adobe Stock and public domain imagery. If your uploaded reference contains highly recognizable copyrighted characters, watermarks, or NSFW elements, the server will block the generation. You must use a different, copyright-free reference image.
Skip the AI Headaches with Image Work India & Cloud Retouch
While AI tools like Generative Fill are powerful, they are still prone to frustrating errors, server downtime, and unpredictable results. When you have strict client deadlines and need commercial-grade imagery, relying on finicky cloud-based rendering isn’t always the safest bet.
Need pixel-perfect composites without the AI headaches? Hire the professional retouching team at Image Work India and Cloud Retouch. Our expert retouchers provide flawless, manual compositing, advanced masking, and high-end photo manipulation that AI simply cannot match.
[Contact Image Work India today] to elevate your visual content with guaranteed, professional results!