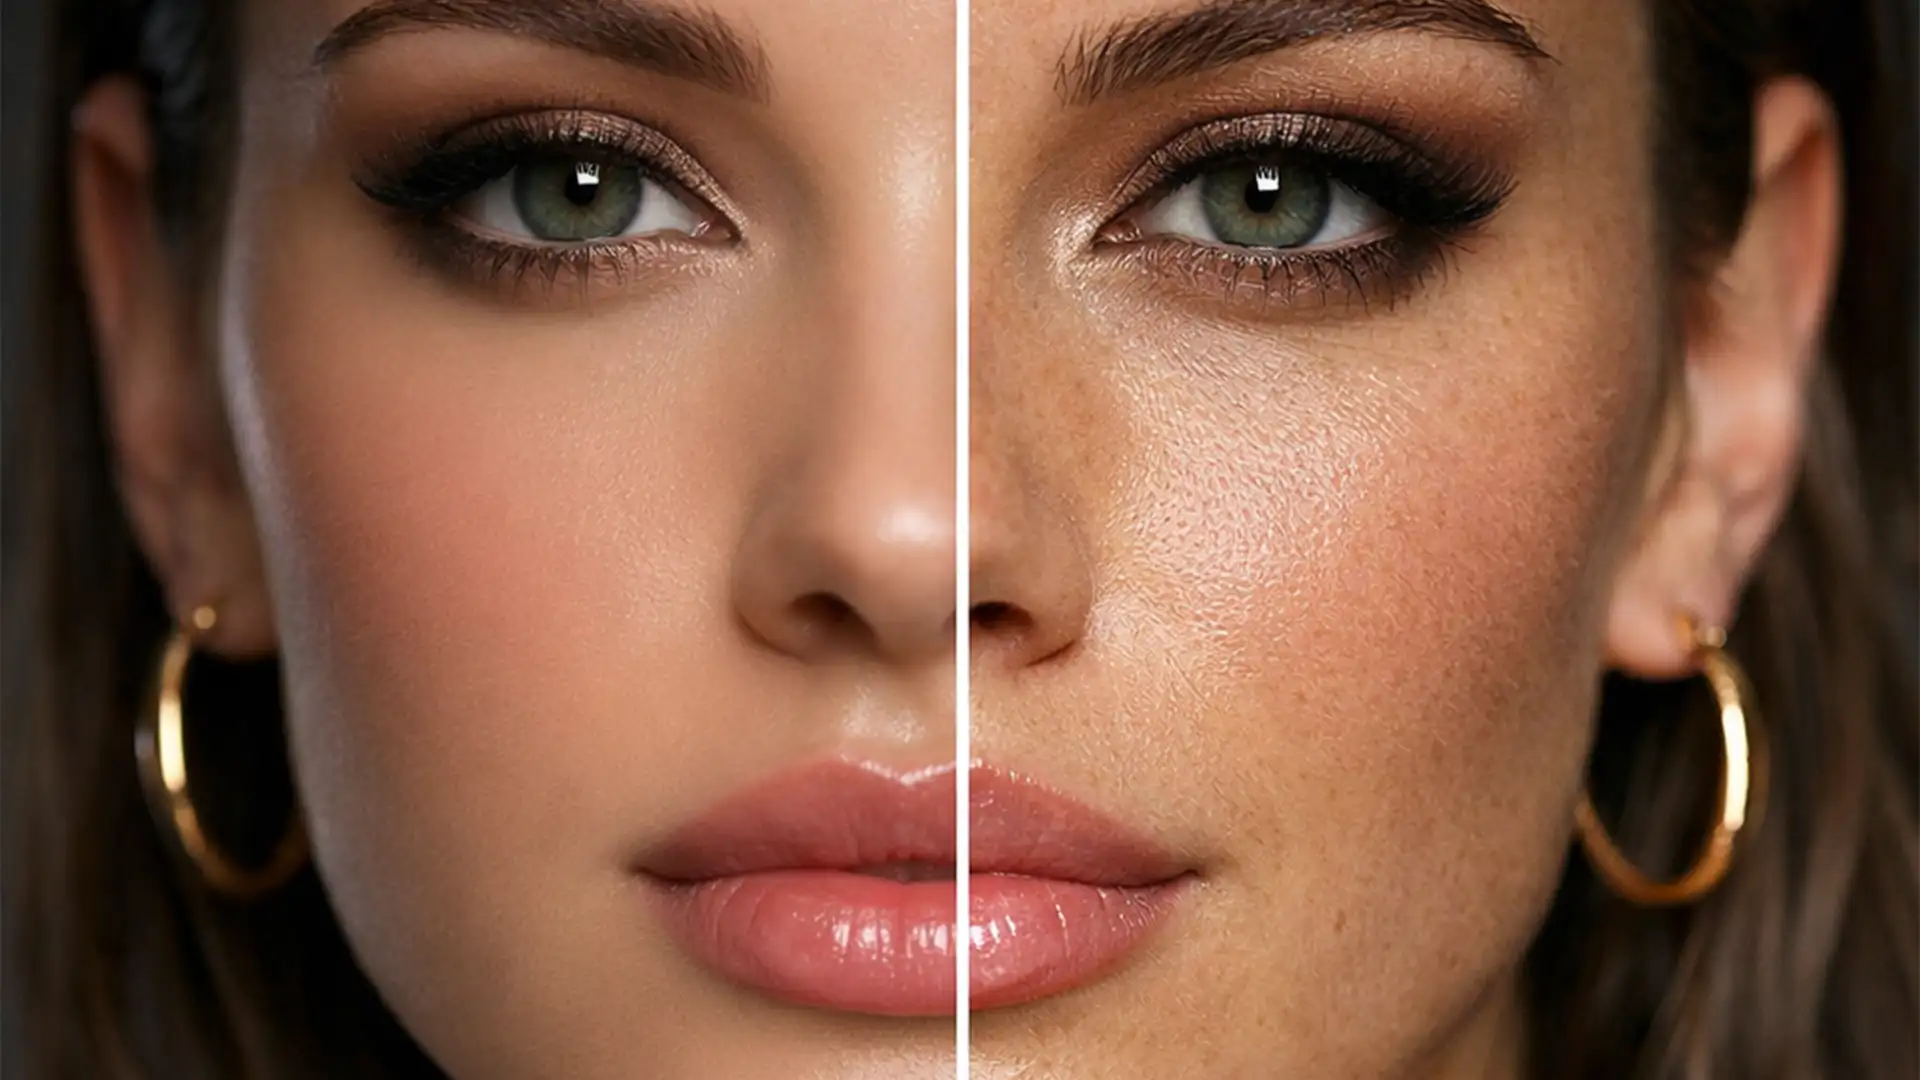
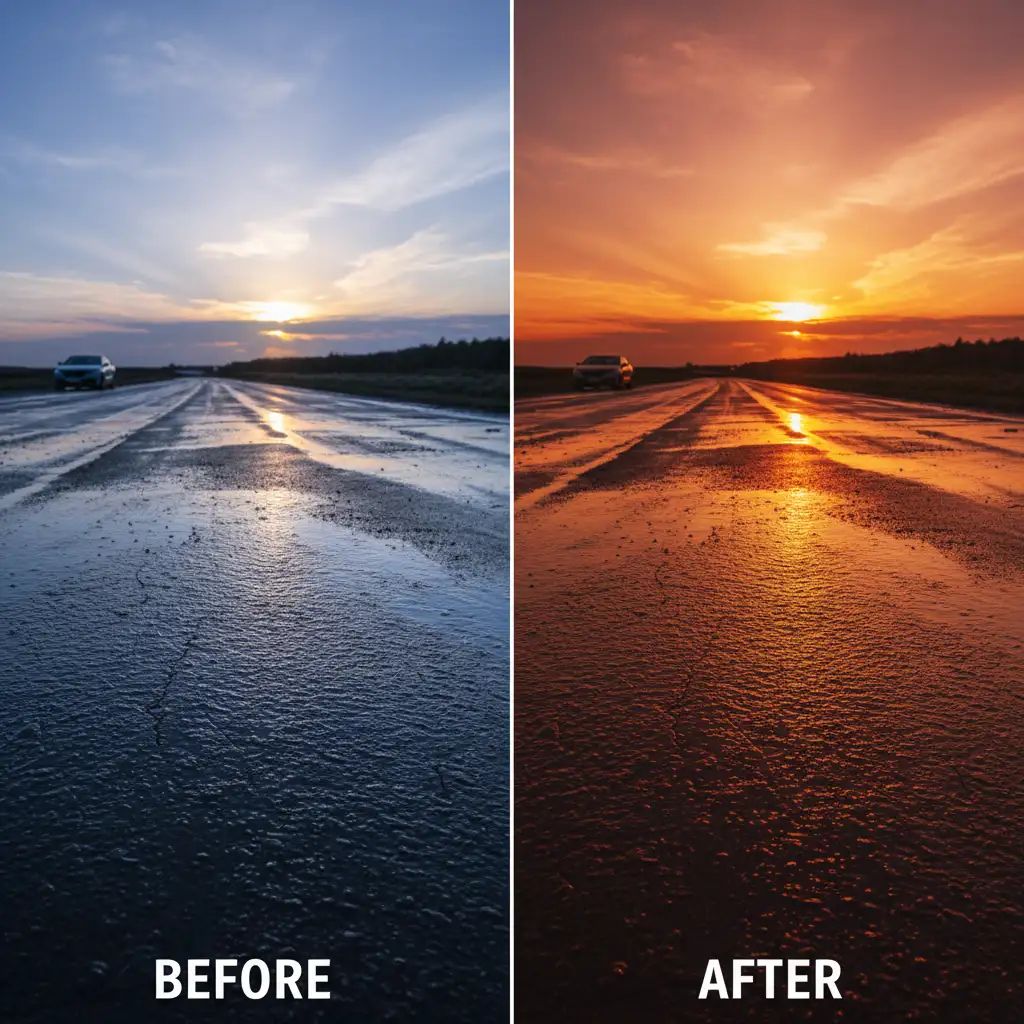
Photoshop’s native AI Sky Replacement tool is a massive time-saver, but it has a glaring flaw: it possesses zero spatial awareness regarding reflective materials in your foreground. Have you ever swapped a dull daytime blue sky for a vibrant orange sunset, only to realize the wet pavement below is still reflecting bright blue tones?
That instant disconnect ruins the realism of real estate and automotive photography composites. While Adobe Sensei handles horizon lines and edge fringes beautifully, it leaves ground reflections completely untouched.
If you want professional-grade results, you cannot rely on the algorithm alone. Here is exactly how to fix this mismatch and master the art of matching AI sky replacement reflections on wet pavement.
The Core Problem with Native AI Sky Replacement
In Adobe Photoshop v24.0 through v25.x, the Edit > Sky Replacement feature automatically calculates horizon lines and adjusts foreground lighting. However, if a daytime blue sky is swapped for a sunset, wet asphalt, glass, or water will retain the original environmental colors.
Resolving this requires manually mimicking specular highlights and environmental color grading. The true technical challenge lies in mapping a smooth, gradient-rich sky texture over a rough, granular surface like wet asphalt without making it look like a flat, artificial overlay.
Here are three methods, ranging from a quick fix to a high-end retouching workflow, to achieve perfect environmental harmony.
Method A: The Quick Fix (Flip and Blend)
When you are on a tight deadline and need a fast, passable result, this method utilizes basic Blend Modes and Layer Masking to create a mirrored reflection.
- Apply AI Sky Replacement: Run the native tool to generate your new sky.
- Duplicate and Merge: Duplicate the entire Sky Replacement Group in your Layers panel. Merge this duplicated group into a single raster layer.
- Flip Vertical: Press Ctrl/Cmd+T (Transform), right-click inside the bounding box, and select Flip Vertical.
- Position: Drag the flipped sky downward so it overlays the wet pavement.
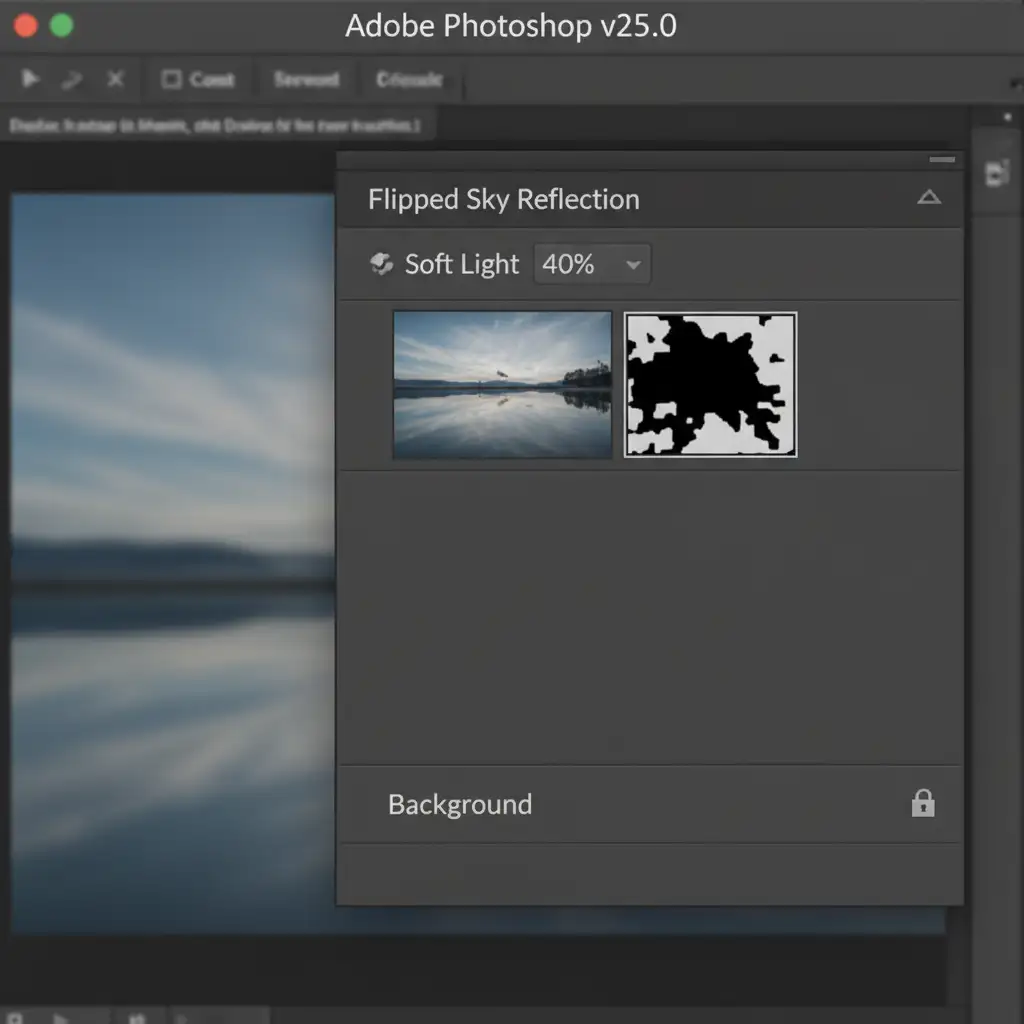
- Blend Modes: Change the layer’s Blend Mode to Soft Light or Overlay. Reduce the Opacity to roughly 40 percent.
- Layer Masking: Add a Layer Mask to this flipped layer. Use a soft black brush to manually paint away the reflection from dry areas of the pavement or objects that shouldn’t reflect the sky.
Method B: The Pro Workaround (Displacement Maps and Blend If)
Method A works for smooth surfaces, but wet pavement has bumps, cracks, and ripples. To make the reflection wrap realistically around these textures, we must introduce a Displacement Map and utilize Photoshop’s Blend If sliders.
- Create a Displacement Map: Save a high-contrast, black-and-white copy of your base image as a separate PSD file. This file will tell Photoshop exactly where the physical bumps and dips are on the pavement.
- Smart Objects: Prepare your flipped reflection layer (from Method A) and convert it to a Smart Object. This allows for non-destructive filtering.
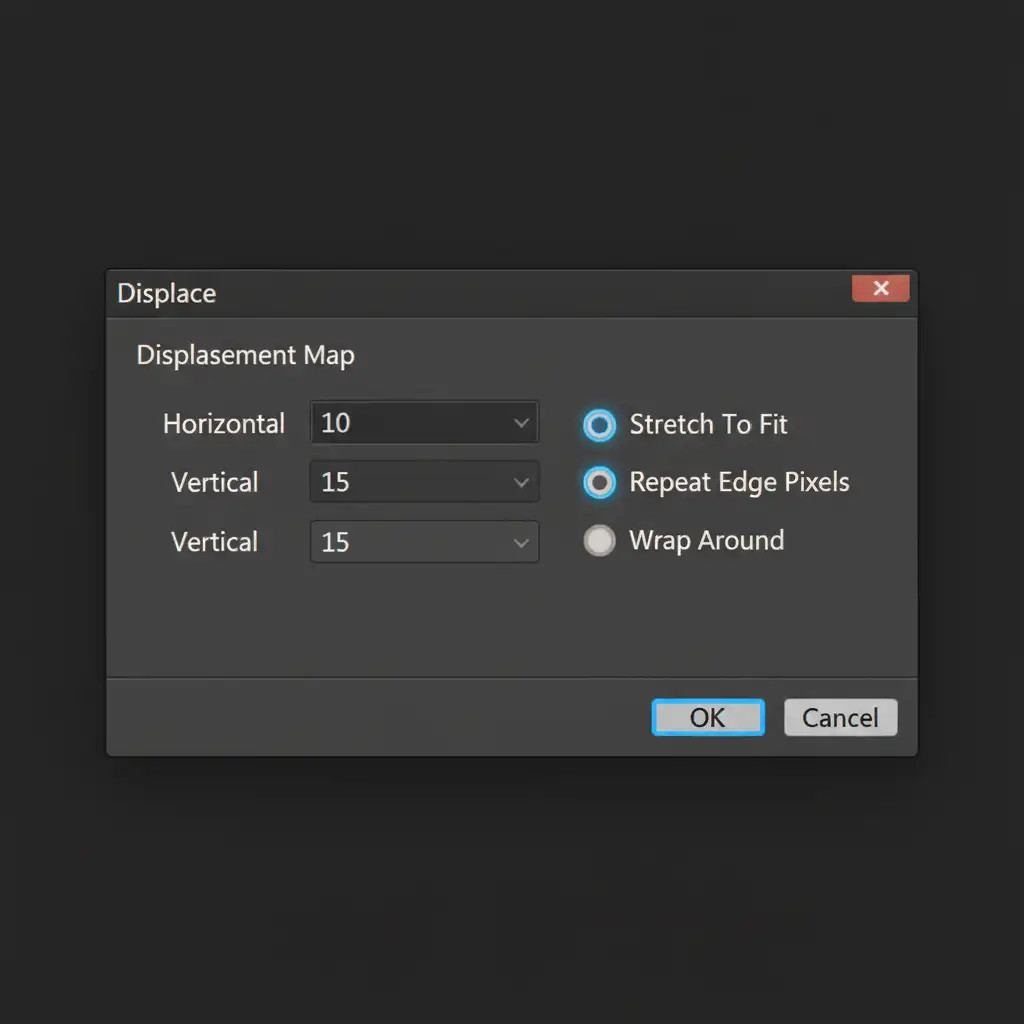
- Apply the Displacement Map: Go to Filter > Distort > Displace. Set the Horizontal and Vertical scale to 10–15. Select the black-and-white PSD you just saved. The reflection will instantly bend and warp to match the granular texture of the asphalt.
- Blend If Adjustments: Double-click the reflection layer to open the Layer Style dialog.
- Protect Shadows: In the Blend If section (Underlying Layer), hold Alt/Option and click the black slider to split it. Drag the right half towards the center. This forces the sky reflection to hide in the dark, dry asphalt shadows, allowing it to only appear on the raised, wet highlights.

Method C: The Technical Deep-Dive (Luminosity Masks and Color Syncing)
For high-end commercial, automotive, or real estate retouching, the reflection must be mathematically perfect. This method uses Channel Masking to isolate the exact wet glares of the pavement.
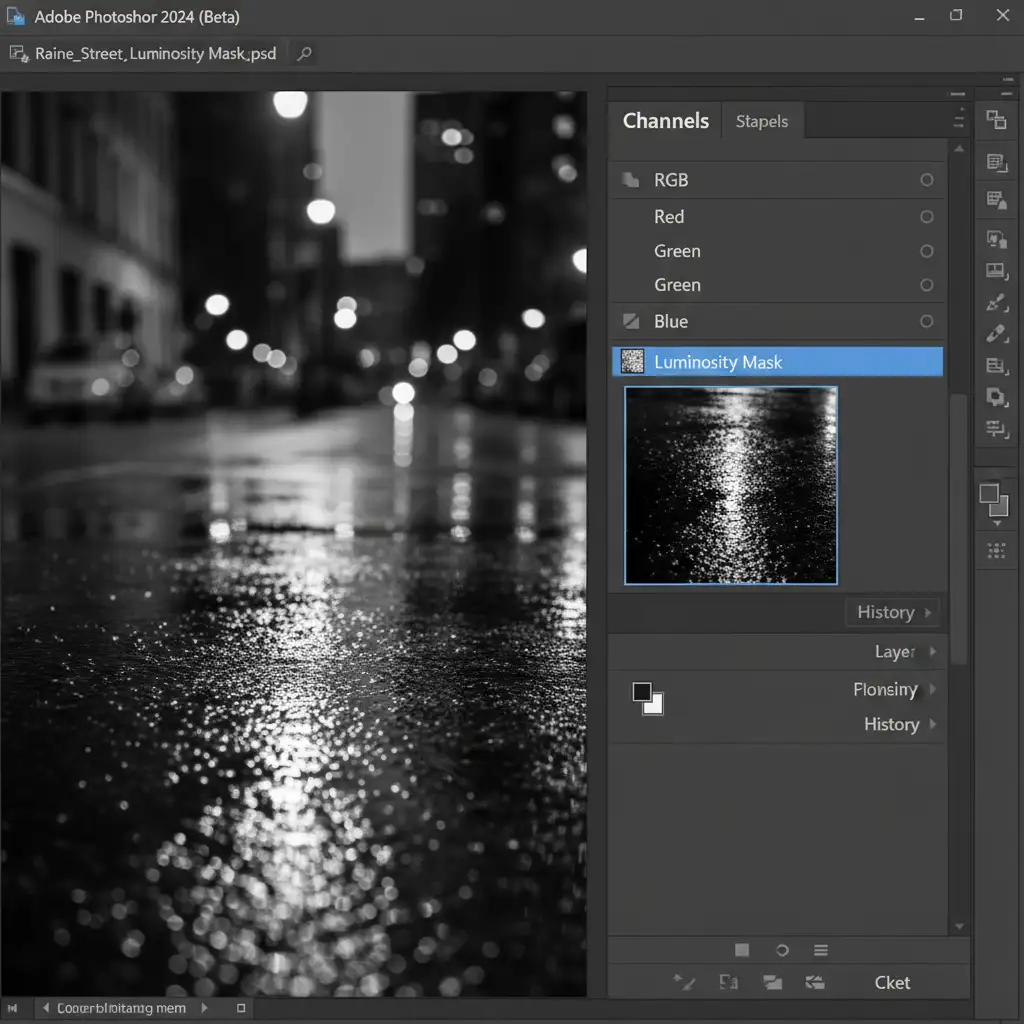
- Create a Luminosity Mask: Instead of manually painting a mask, go to your Channels panel. Duplicate the Blue channel (which usually holds the most contrast for skies and reflections). Apply a Levels adjustment directly to this duplicated channel to crush the blacks and boost the whites, isolating only the bright, wet glares of the pavement.
- Load the Selection: Ctrl/Cmd-click this new channel’s thumbnail to load it as an active selection.
- Apply the Mask: Return to your Layers panel and apply this precise selection as a mask to your flipped, displaced sky reflection (acting as a highly accurate Clipping Mask for the ground).
- Color Grading Sync: Above the ground layer, add a Curves adjustment layer.
- Sample and Map: Use the eyedropper tool within the Curves dialog to sample the exact shadow, midtone, and highlight values of your new AI sky. Map these values to the corresponding luminosity zones of the ground layer. This ensures absolute environmental color sync, tying the entire composite together.
Outsource Your High-End Retouching
Matching AI sky replacement reflections on wet pavement requires a deep understanding of light behavior, displacement mapping, and luminosity masking. When you are processing hundreds of images for a real estate listing or perfecting a hero shot for an automotive campaign, manual reflection syncing can drain hours from your day.
You don’t have to do it alone.
Image Work India and Cloud Retouch specialize in high-end commercial, real estate, and product retouching. Our team of expert retouchers handles the complex technical details-from flawless sky replacements and accurate environmental color grading to intricate reflection mapping-so you can focus on scaling your business.
Stop settling for mismatched composites. Contact Image Work India and Cloud Retouch today to elevate your photography with hyper-realistic, flawless image editing.