When it comes to image editing, color correction is one of the most important steps to ensure your photos look polished and professional. Whether you are a seasoned photographer or just starting out, getting your images to look their best often requires mastering techniques like Affinity Photo auto color correction. Affinity Photo offers a variety of powerful tools that help you automate the process of adjusting your photos’ colors, tones, and overall look. This step-by-step guide will walk you through the process of mastering Affinity Photo auto color correction, allowing you to achieve the perfect color balance and make your images stand out.
Why Use Affinity Photo Auto Color Correction?
Before diving into the specifics, let’s take a moment to understand why Affinity Photo auto color correction is a game-changer. Color correction is an essential aspect of editing that affects the overall mood and aesthetic of your photos. In many cases, photographers need to adjust the colors to match the scene’s lighting conditions or to fix color imbalances caused by camera settings. While doing this manually can be time-consuming and requires a lot of skill, Affinity Photo auto color correction can make the process faster and easier.
Affinity Photo uses advanced algorithms to analyze the image and automatically make adjustments based on the colors present in the photo. By leveraging this tool, you can achieve a natural and balanced look without spending hours fine-tuning each color channel. This is especially helpful for beginners or anyone who needs to quickly enhance their images before publication.
Understanding the Basics of Affinity Photo Auto Color Correction
Before you start using Affinity Photo auto color correction, it’s important to understand what color correction entails. At its core, color correction is the process of adjusting the colors in an image to make it appear more accurate or aesthetically pleasing. When you take a photo, the camera might not always capture the colors perfectly due to various factors like lighting, white balance, or exposure settings.
Affinity Photo helps you correct these issues by allowing you to adjust the red, green, and blue (RGB) channels individually or as a whole. Affinity Photo auto color correction works by analyzing the overall color distribution in the image and adjusting the levels to ensure that the colors look more natural. This includes fixing issues such as overexposure, underexposure, or unnatural color casts caused by artificial lighting.
Getting Started with Affinity Photo Auto Color Correction
To begin using Affinity Photo auto color correction, you first need to open your image in the software. Once your image is loaded, there are a few simple steps you can follow to activate the auto color correction feature. While Affinity Photo auto color correction is a straightforward tool, understanding how to fine-tune the adjustments it makes will give you even greater control over the final results.

Open the Photo in Affinity Photo
The first step is simple—open your image in Affinity Photo. You can do this by selecting “File” and then “Open” from the main menu. Browse to the location of your image, select it, and click “Open.” Your image will now appear in the workspace.

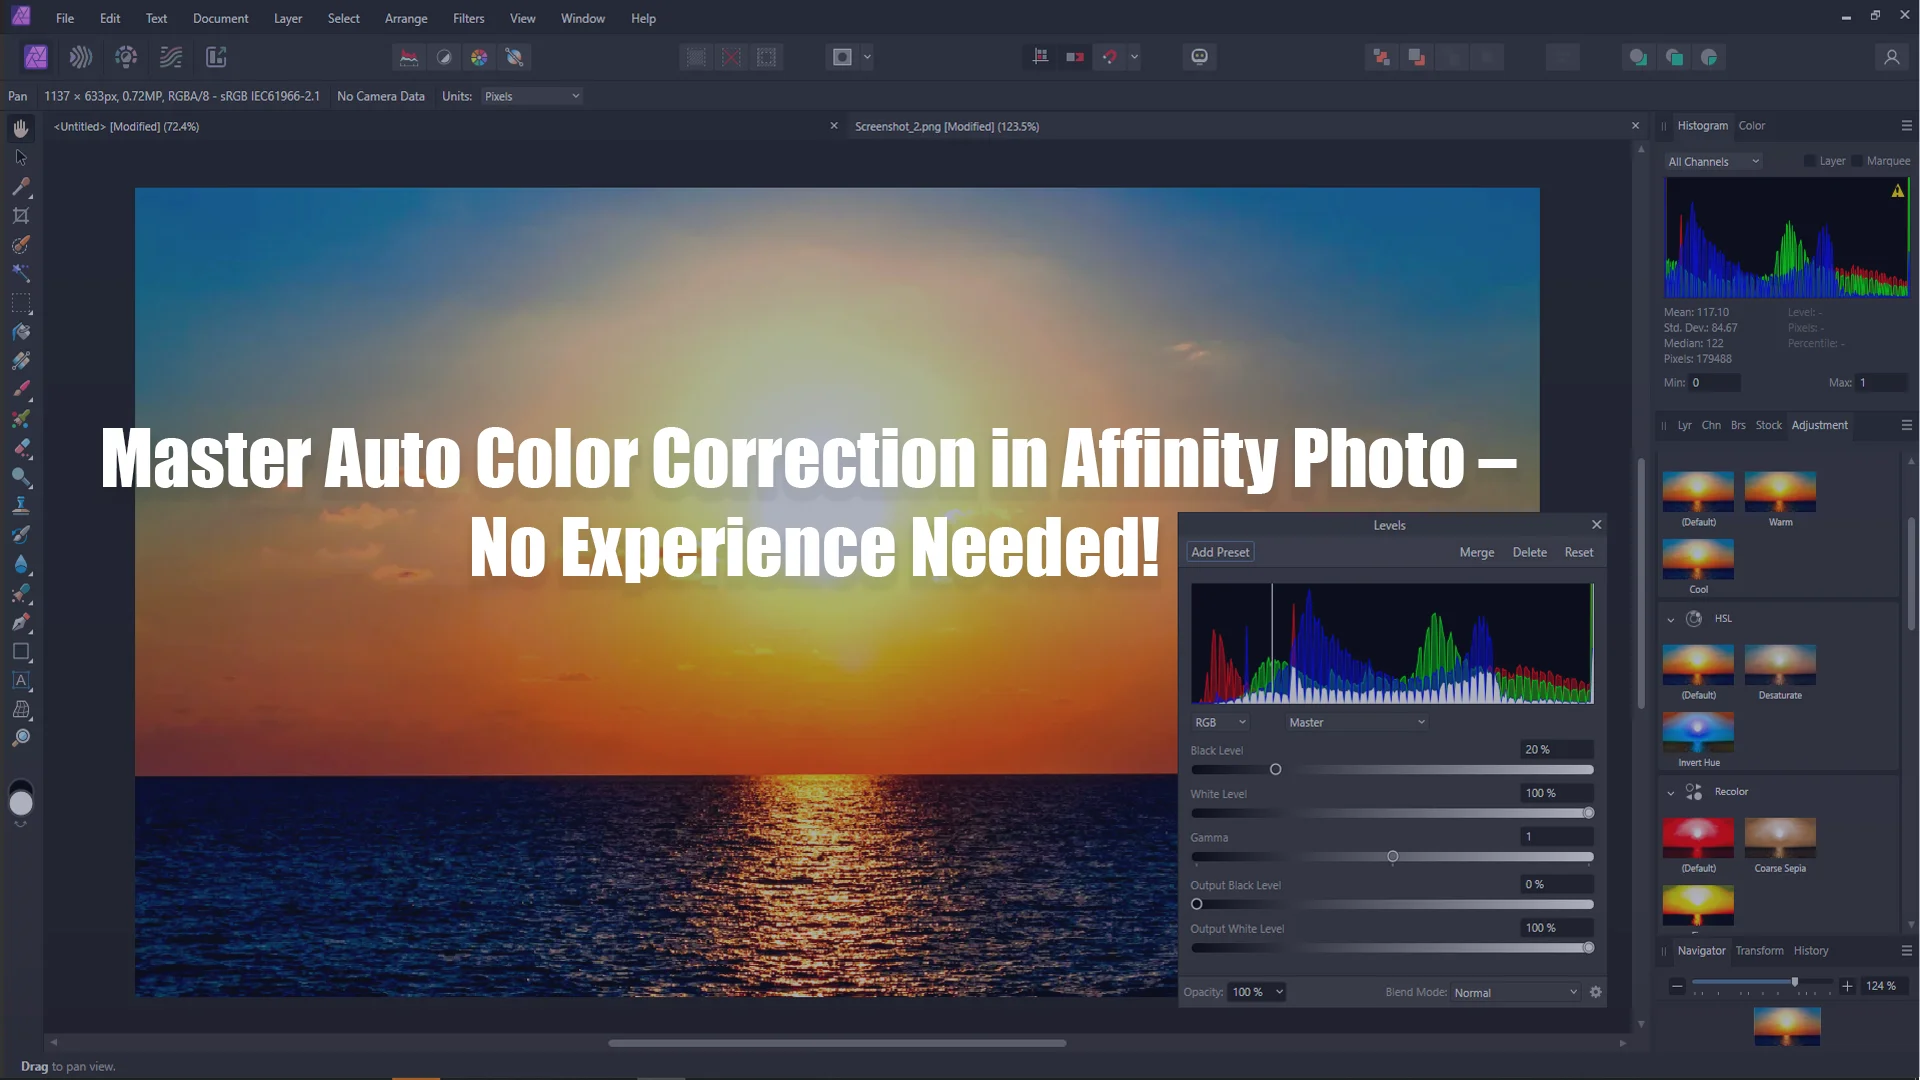
Locate the Auto Color Correction Tool
Once your image is open, navigate to the “Adjustments” panel. You can access this panel by going to the “Layers” menu and selecting “New Adjustment Layer,” or by using the shortcut (Ctrl+Alt+L). From there, look for the “Auto Color” option, which is part of the Affinity Photo auto color correction tools. Click on it, and the software will automatically analyze your image.

Allow Affinity Photo to Adjust Your Colors
When you click on “Auto Color,” Affinity Photo will use its built-in algorithms to adjust the color balance in your image. The tool will automatically tweak the exposure, contrast, and saturation to create a more balanced and visually appealing image. In most cases, the software’s adjustments will be sufficient, but there are options for further fine-tuning.
Fine-Tune the Results
Although the Affinity Photo auto color correction tool is powerful, sometimes you may want to adjust the settings further to get your desired look. You can use the sliders provided by the tool to modify the exposure, contrast, and other aspects of the image. This allows you to customize the results and make the colors pop without overdoing it. Take your time to experiment with the settings until you find the perfect balance.
Enhancing Your Images with Manual Adjustments
While Affinity Photo auto color correction is a great starting point, manual adjustments can give you even more control over your images. After using the automatic corrections, you might find that certain areas of the image need additional tweaking, such as adjusting shadows, highlights, or specific color channels. Here are some advanced techniques you can use to enhance your images further:

Curves Adjustment
The Curves tool allows you to make precise adjustments to the RGB channels individually. By manipulating the curves, you can fine-tune the brightness, contrast, and color balance in different areas of the image. For example, if you want to add warmth to your photo, you can adjust the red channel curve, giving the image a red or orange tint.

Selective Color Adjustments
In some cases, you may want to adjust specific colors without affecting the entire image. Affinity Photo auto color correction is a great starting point, but for more precise edits, you can use the HSL (Hue, Saturation, and Lightness) panel. This allows you to target specific colors and adjust their intensity or brightness.

White Balance
Another important aspect of color correction is ensuring the white balance is correct. White balance determines how accurate the colors are in relation to natural lighting. If your image has a blue or orange tint, adjusting the white balance can help restore the natural look of the scene. Affinity Photo provides a white balance tool that you can use to fine-tune the colors and make the image look more realistic.
Enhance Details with Sharpening
Once the colors are corrected, you can also improve the sharpness of the image to make details stand out. Use the sharpening tool in Affinity Photo to make edges appear more defined and enhance the overall clarity of the photo.
Troubleshooting Common Issues with Auto Color Correction
Even though Affinity Photo auto color correction does a great job most of the time, there are situations where the tool may not produce the desired results. Sometimes, the software might overcorrect certain areas or fail to adjust the image properly. Here are a few common issues and how to fix them:
Over-Saturation
In some cases, Affinity Photo auto color correction can result in oversaturated colors, making the image look unnatural. To fix this, simply reduce the saturation using the “Saturation” slider in the “Adjustments” panel. This will tone down the colors and give the image a more balanced look.
Unnatural Skin Tones
If you are working with portraits and notice that the skin tones look off after using the auto correction tool, you can use the selective color adjustments to tweak the reds and oranges in the image. This will help achieve more natural-looking skin tones.
Underexposure or Overexposure
Sometimes, the auto color correction tool may not fully compensate for issues with exposure. If the image is too dark or too bright, use the exposure sliders to adjust the highlights and shadows accordingly. This will help bring out more detail in the image and prevent it from looking washed out or too dark.

Conclusion: Achieving Perfect Color Balance with Affinity Photo
Mastering Affinity Photo auto color correction is an essential skill for anyone looking to enhance their photos quickly and effectively. With the powerful tools offered by Affinity Photo, you can easily adjust the colors in your images to make them look more vibrant and professional. Whether you’re a photographer, designer, or hobbyist, Affinity Photo auto color correction can help streamline your editing workflow and deliver stunning results.
By using the automatic color correction tool as a starting point, you can make further manual adjustments to fine-tune the image and achieve the perfect look. The key to success lies in understanding the basics of color correction and knowing how to use the available tools to your advantage.
If you need help with Affinity Photo auto color correction or any other image editing services, look no further than Image Work India. We specialize in providing professional image editing services, including color correction, retouching, and more. Visit our website Image Work India for more information and to see how we can help you perfect your images.