Underwater photography is a stunning way to capture the vibrant beauty of marine life and underwater environments. However, one of the most significant challenges underwater photographers face is color distortion due to the unique lighting conditions beneath the surface. Without proper adjustments, your images can look flat and lifeless, with colors washed out or overly blue. To bring out the natural beauty and clarity of your underwater shots, it’s crucial to know how to color correct underwater photos.
In this comprehensive guide, we’ll explore the techniques, tools, and tips for color correction, allowing you to transform your underwater photos into visually striking images. Whether you’re a professional photographer or a hobbyist, mastering this skill will make your underwater photos more vibrant, balanced, and true to life.
Why Color Correction for Underwater Photos is Essential
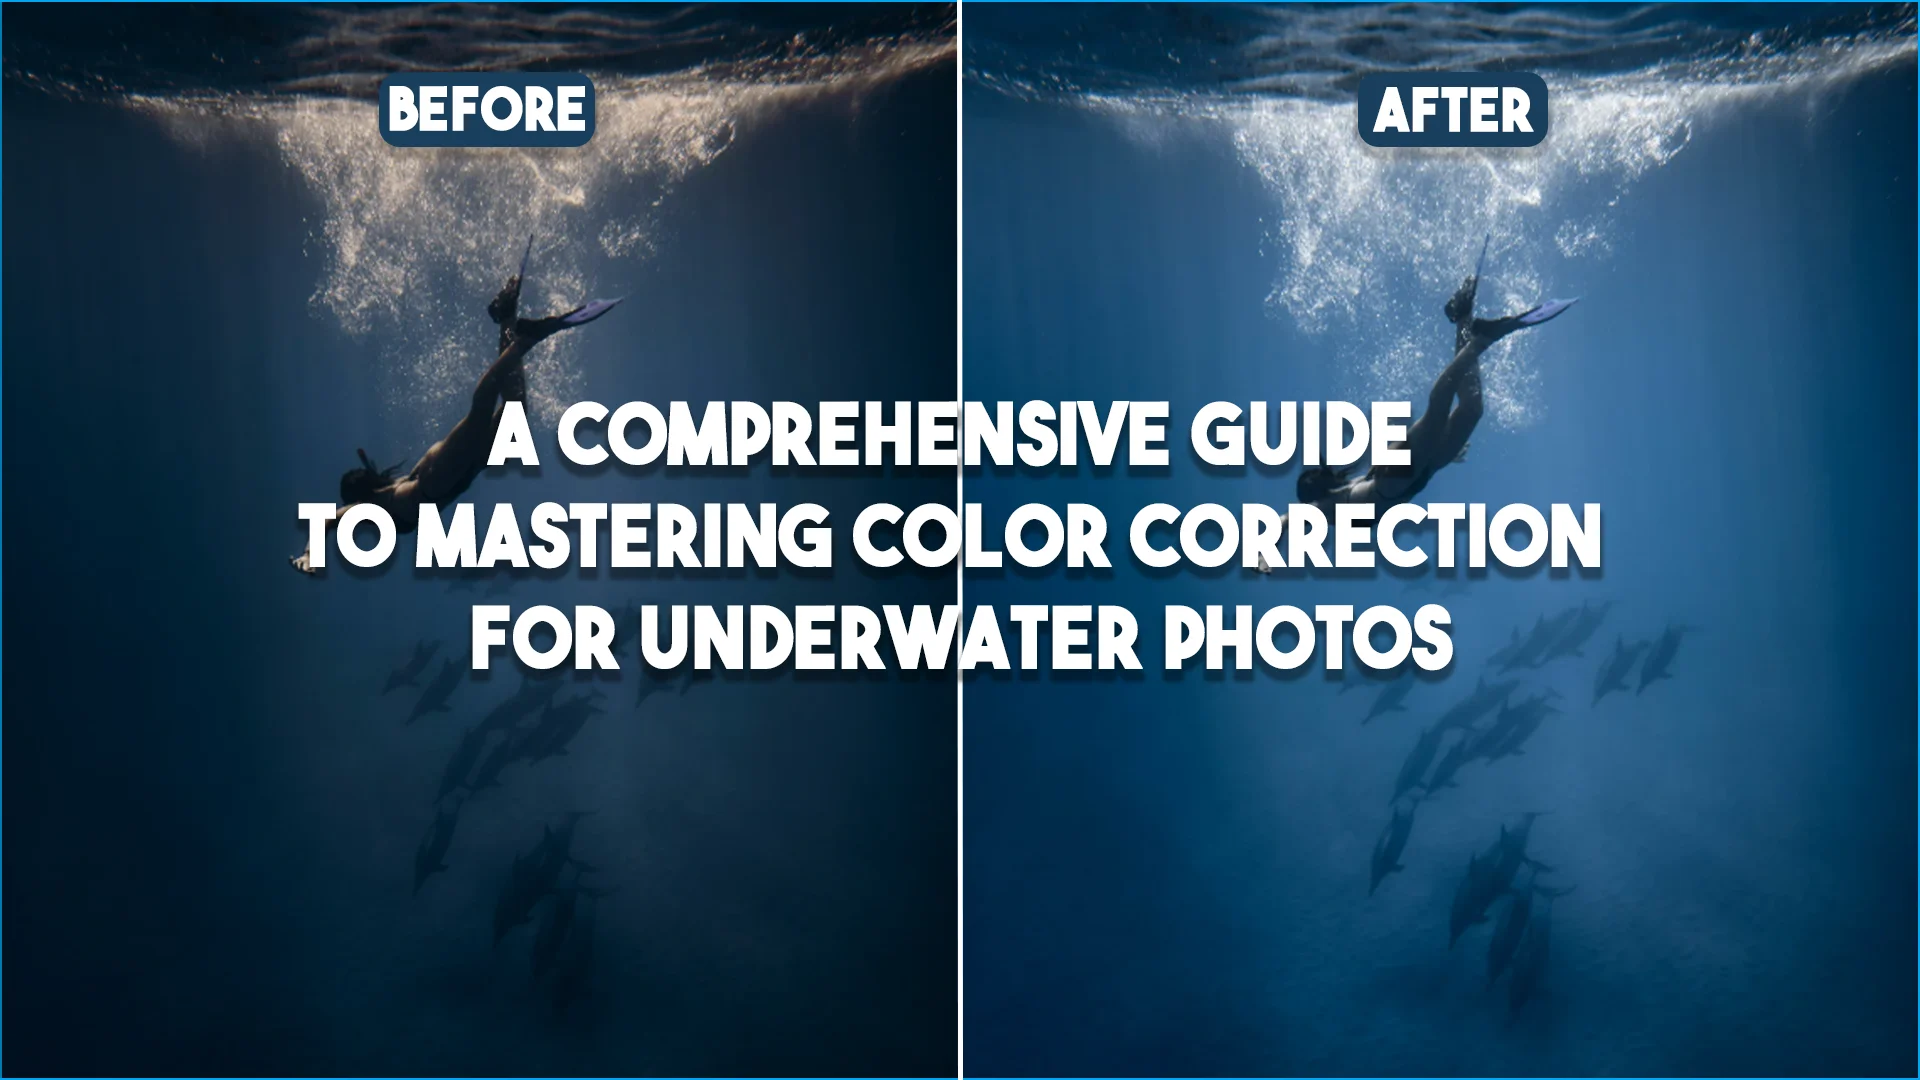
Underwater environments are notoriously tricky for photographers due to the way light behaves in water. The deeper you go, the more colors are filtered out of your images. Red, orange, and yellow tones are the first to vanish as they travel through the water, while blue and green tones dominate. This often results in photos that look overly blue or green with a lack of contrast and warmth.
Color correction helps restore the natural hues and lighting that are lost during your underwater shoot. With the right techniques, you can bring back the missing reds, oranges, and yellows, giving your photos a much-needed vibrancy. It also enhances the overall quality of the image, making your subjects pop against the backdrop of the ocean or pool. In short, color correction for underwater photos isn’t just a technical process – it’s the key to creating visually appealing, true-to-life images.

How to Color Correct Underwater Photos
Color correcting underwater photos can seem challenging, but with the right approach and tools, it becomes much easier. Below are some essential steps and techniques to help you get started with the color correction process.
1. Analyze Your Raw Image
The first step in color correcting underwater photos is to closely examine your raw image. Before making any adjustments, assess the overall tone of the photo. Does it look too blue or green? Are the colors washed out or overly saturated? This step is crucial because it helps you understand what kind of color correction your photo needs.
It’s also important to consider the lighting conditions under which the photo was taken. If you were shooting in shallow water with plenty of natural light, the color correction might be minimal. On the other hand, if you were deep diving or using artificial lighting, the photo may require significant adjustments.

2. Use White Balance to Fix the Color Cast
One of the most effective ways to color correct underwater photos is to adjust the white balance. White balance helps correct color casts that occur due to different lighting conditions. When shooting underwater, the light tends to shift toward the cooler (blue/green) side of the spectrum, which can leave your photos looking unnatural.
To correct this, adjust the white balance to bring back the missing warmth. Most photo editing software, such as Adobe Lightroom or Photoshop, offers white balance sliders that allow you to shift the temperature and tint of your photo. Moving the temperature slider toward the warmer (yellow/orange) side can counteract the blue or green color cast.
3. Adjust the Exposure and Contrast
Exposure and contrast are vital in underwater photography, as they can help enhance the details that might be lost due to low light. When underwater, the light is often diffused and weaker, leading to photos that appear flat or underexposed. By increasing the exposure slightly, you can brighten up your photo, allowing more details to come through.
After adjusting exposure, it’s also essential to increase the contrast. Boosting the contrast will help the colors stand out, creating a more vibrant and dynamic image. However, be careful not to overdo it, as excessive contrast can cause parts of your image to lose detail in the shadows or highlights.
4. Adjust the Saturation and Vibrancy
Once the basic adjustments are made, it’s time to focus on enhancing the colors in your underwater photos. The saturation and vibrancy controls allow you to boost the intensity of certain colors without affecting others. For example, if your underwater photo has lost its reds and oranges, you can selectively increase the saturation of those colors to restore their vibrancy.
The vibrancy control is especially useful because it increases the saturation of less saturated colors without making already saturated colors too intense. This is particularly important when color correcting underwater photos, as it prevents the photo from looking unnatural or overly edited.

5. Use HSL Sliders to Target Specific Colors
For more advanced color correction, you can use the HSL (Hue, Saturation, Luminance) sliders in your photo editing software. These sliders allow you to fine-tune individual colors in your image, making it easier to target specific hues that may be off in the photo.
For instance, if your photo has a greenish tint that makes the ocean look unnatural, you can adjust the hue slider to shift the green tones toward a more natural blue. Similarly, you can increase the saturation of specific colors like red or yellow to bring back the warmth that is often lost underwater.
6. Apply a Gradual Filter for the Water Surface
In many underwater photos, the water surface can appear darker than the subjects beneath. A gradual filter can help balance the exposure between the surface and the underwater portion of the image. This filter gradually adjusts the exposure and color temperature, making it easier to bring the entire image into balance.
To apply a gradual filter, select the area of the photo you want to adjust and use the filter tool to gradually change the exposure, contrast, and temperature. This technique is especially useful for underwater landscape photography, where the water surface can often appear too dark compared to the colorful marine life below.

Tools to Color Correct Underwater Photos
Several tools and software are available to help color correct underwater photos, and choosing the right one will depend on your specific needs and preferences. Here are some of the best tools for the job:
Adobe Lightroom
Adobe Lightroom is one of the most popular photo editing tools among photographers, including those working with underwater images. Lightroom offers a wide range of features, including white balance adjustment, exposure control, and HSL sliders, which are all essential for color correcting underwater photos. It also supports non-destructive editing, meaning your original photo remains intact while you experiment with different adjustments.
Adobe Photoshop
For more advanced photo manipulation, Adobe Photoshop is another powerful option. While it’s more complex than Lightroom, Photoshop offers a broader range of tools for color correction, including layer-based adjustments, advanced masking, and selective color editing. Photoshop is ideal for professional photographers who need more control over their images.
Capture One
Capture One is a professional-grade photo editing software that offers excellent color correction tools. It’s known for its powerful color grading features, which are ideal for underwater photography. Capture One allows you to work with RAW files and make precise adjustments to your photos, making it a great option for photographers who want to fine-tune their underwater shots.
GIMP
For those on a budget, GIMP is a free and open-source photo editing tool that offers many of the same features as Photoshop. It includes color correction tools like curves, levels, and HSL sliders, which can be used to color correct underwater photos. While it may not have the same advanced features as Lightroom or Photoshop, GIMP is a great option for photographers looking for a cost-effective solution.

Tips for Preventing the Need for Extensive Color Correction
While color correction is an essential skill for underwater photographers, there are steps you can take before, during, and after your dive to minimize the need for extensive editing.
- Use a Red Filter: One of the simplest ways to counteract the blue-green color cast of underwater photos is to use a red filter on your camera lens. This filter helps restore the lost red tones and can reduce the amount of color correction needed in post-processing.
- Shoot in RAW: Shooting in RAW format allows you to retain more color information and gives you greater flexibility when making adjustments during the editing process. RAW files are ideal for color correction because they preserve more details than JPEG files.
- Use Natural Light: Whenever possible, try to shoot in shallow water or in areas with good natural light. This can help reduce the amount of color loss and create images that require less post-processing.
- Avoid Overexposing: Overexposure can lead to a loss of details in your photos, making color correction more challenging. Be mindful of your exposure settings and use the histogram to ensure you’re not losing important details.
Conclusion
Mastering color correction for underwater photos is an essential skill for anyone looking to create stunning, professional-quality images. By understanding the principles of color correction, using the right tools, and employing effective techniques, you can transform your underwater photos into vibrant, true-to-life images that capture the beauty of the underwater world.
Whether you’re a professional photographer or an enthusiast, mastering how to color correct underwater photos will make a significant difference in your work. If you’re looking for expert assistance with editing your underwater shots, our team at Image Work India is here to help. With our advanced image editing services, we can take your photos to the next level and ensure they look their best, every time. Contact us today for a consultation or to get started with your image editing needs!