Introduction to DIY Product Photography
In the digital age, compelling visuals are essential for attracting customers and driving sales. Whether you’re a small business owner, an aspiring entrepreneur, or a social media influencer, mastering the art of product photography can significantly enhance your online presence. However, professional photography services can be expensive, especially for those just starting. That’s where do-it-yourself (DIY) product photography comes in handy.
Importance of Backdrops in Product Photography
The backdrop plays a crucial role in product photography, setting the stage for your subject and influencing the overall look and feel of your images. A well-chosen backdrop can enhance the visual appeal of your products, create a cohesive brand aesthetic, and make your photos stand out from the competition.
Factors to Consider When Choosing Backdrops
Material
The material of your backdrop can significantly impact the outcome of your photos. Opt for materials that are durable, wrinkle-resistant, and easy to clean, such as muslin, paper, or fabric.
Color
Choose backdrop colors that complement your products and evoke the desired mood or atmosphere. Neutral colors like white, gray, and black are versatile options that work well for most products, while vibrant colors can add a pop of excitement.
Texture
Texture adds depth and visual interest to your photos. Experiment with different textures, such as smooth, matte, or textured backdrops, to see which best enhances your products.
DIY Backdrop Ideas
White Poster Board
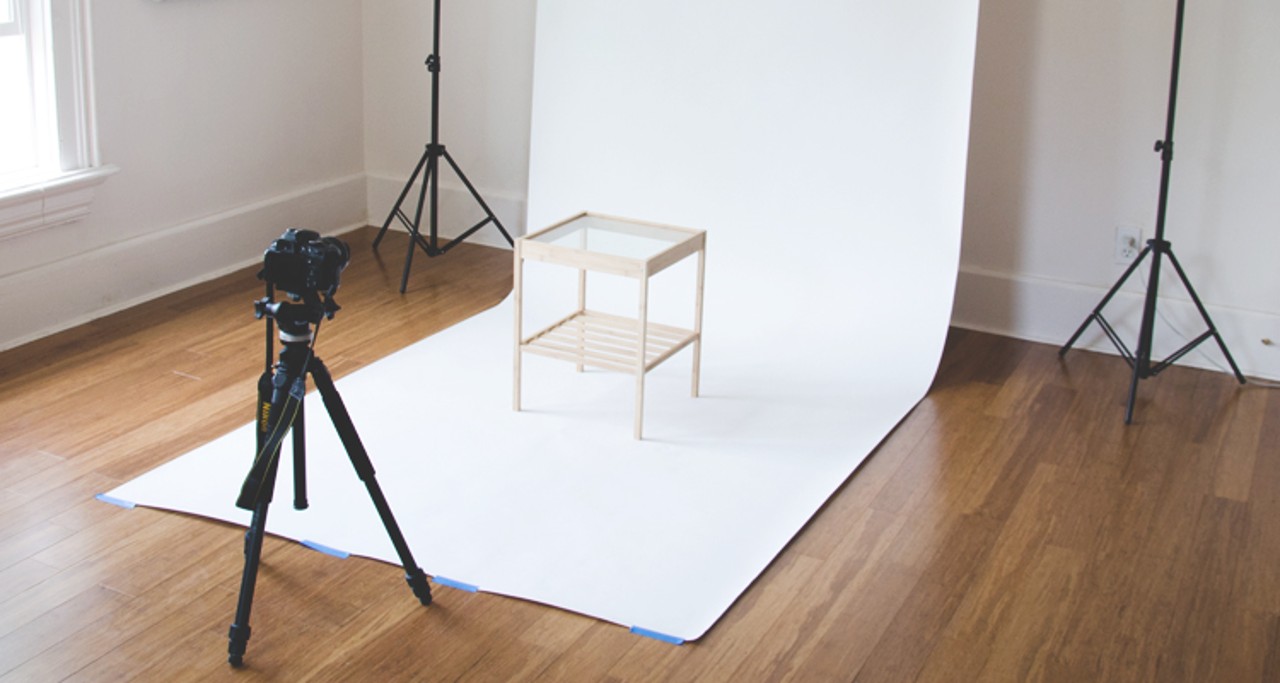
One of the simplest and most affordable backdrop options is a white poster board. It provides a clean and minimalist background that works well for showcasing small to medium-sized products.
Fabric Backdrops
Fabric backdrops come in a variety of colors and textures, making them versatile options for product photography. Simply hang a piece of fabric behind your subject to create a soft and elegant backdrop.
Wrapping Paper
Wrapping paper is an inexpensive and readily available option for creating colorful and patterned backdrops. Choose a design that complements your products and use tape or clips to secure it to a wall or flat surface.
Textured Wallpaper
Textured wallpaper adds dimension and sophistication to your product photos. Look for wallpaper with subtle patterns or textures that enhance rather than distract from your subject.
Wooden Planks
For a rustic and natural look, consider using wooden planks as a backdrop. Arrange the planks horizontally or vertically and adjust the lighting to create interesting shadows and highlights.
Marble Tiles
Marble tiles create a luxurious backdrop for product photography, especially for jewelry, cosmetics, or gourmet food items. Choose tiles with unique veining and patterns to add visual interest.
Colored Cardstock
Colored cardstock is an affordable option for creating vibrant and colorful backdrops. Mix and match different colors to create a bold and eye-catching backdrop for your products.
Nature-Inspired Backdrops
Bring the outdoors indoors with nature-inspired backdrops like grass, leaves, or flowers. Incorporating natural elements adds a touch of freshness and authenticity to your product photos.
Step-by-Step Guide to Creating DIY Backdrops
Preparation
Gather your materials and tools, including backdrops, lighting equipment, and camera gear. Choose a suitable location with ample space and good natural light.
Setting Up the Backdrop
Position your backdrop securely against a wall or support stand, ensuring it is smooth and free of wrinkles or creases. Use clamps or tape to secure the backdrop in place if necessary.
Lighting Setup
Set up your lighting equipment to illuminate the backdrop evenly without casting harsh shadows or causing glare. Experiment with different lighting angles and intensities to achieve the desired effect.
Camera Settings
Adjust your camera settings, including aperture, shutter speed, and ISO, to capture sharp and well-exposed images. Consider using a tripod to stabilize your camera and minimize blur.
Capturing the Images
Place your products on the backdrop and arrange them to create visually appealing compositions. Use a variety of angles and perspectives to showcase different features and details.
Tips for Achieving Stunning DIY Product Photography
Lighting Tips
- Use soft, diffused lighting to minimize harsh shadows and create a flattering glow.
- Experiment with natural light sources like windows or skylights for a soft and flattering look.
- Consider investing in a lightbox or softbox for controlled and consistent lighting.
Angles and Composition
- Play with different angles and perspectives to highlight the best features of your products.
- Follow the rule of thirds to create visually balanced compositions.
- Leave some negative space around your products to draw attention to them and create a sense of depth.
Editing Techniques
- Use photo editing software like Adobe Photoshop or Lightroom to fine-tune your images.
- Adjust brightness, contrast, and saturation to enhance colors and details.
- Remove any imperfections or distractions to create clean and professional-looking photos.
Conclusion
With a bit of creativity and resourcefulness, you can create stunning product photos without breaking the bank. By experimenting with different DIY backdrop ideas and following these tips, you can elevate your product photography skills and attract more customers to your business.
FAQs
- Can I use natural light for DIY product photography?
- Yes, natural light can produce beautiful results, especially if you have access to large windows or diffused sunlight.
- Do I need expensive equipment for DIY product photography?
- While professional equipment can enhance your results, you can achieve great photos with basic camera gear and DIY lighting setups.
- How can I make my product stand out in photos?
- Experiment with different backdrops, angles, and compositions to highlight unique features and create visually striking images.
- What are some common mistakes to avoid in product photography?
- Avoid using distracting backgrounds, harsh lighting, and cluttered compositions that take away from your products.
- How important is post-processing in product photography?
- Post-processing can enhance your photos by adjusting colors, brightness, and contrast, but it’s essential to maintain a natural and authentic look.
