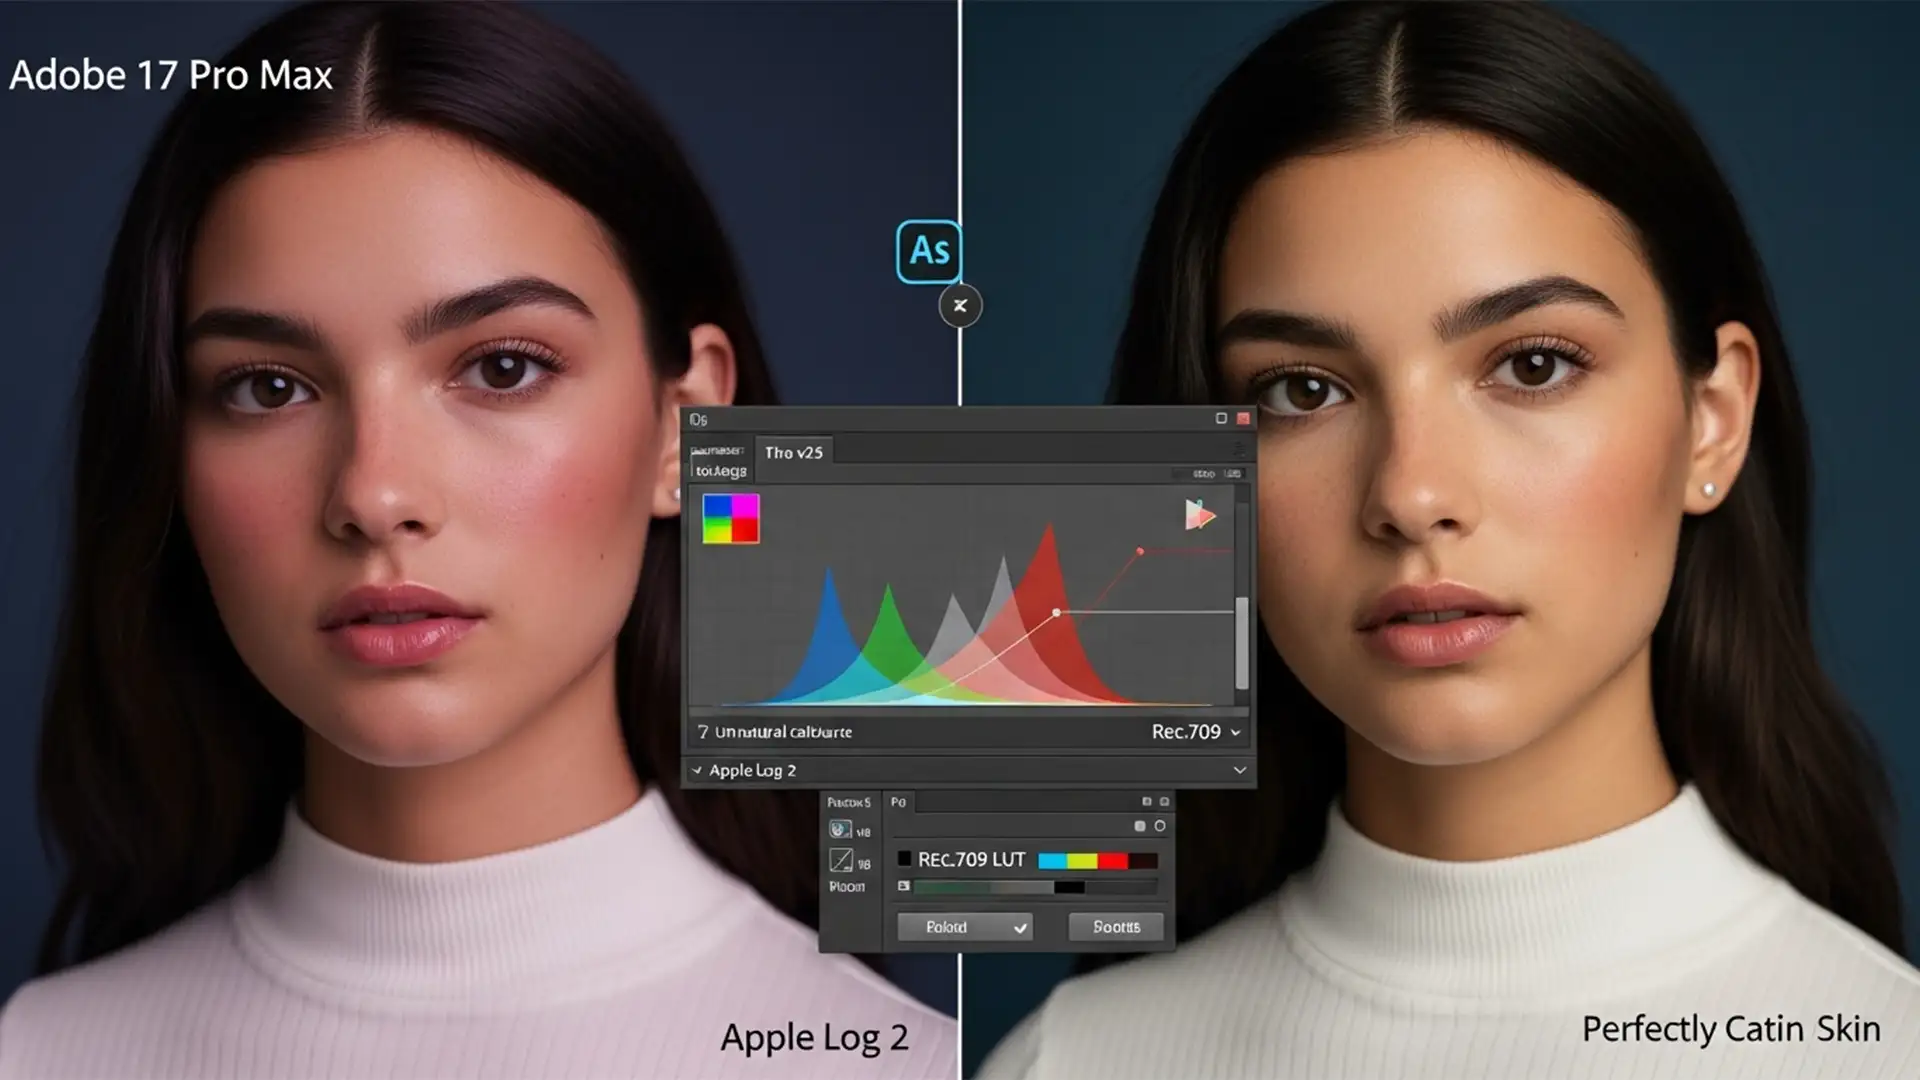
You just wrapped a stunning portrait shoot using the new iPhone 17 Pro, excited to push the limits of its massive dynamic range. But when you import that 10-bit ProRes Log or ProRAW file into Adobe Photoshop v25.x, disaster strikes. Instead of cinematic perfection, your subject’s skin has an unnatural, glowing magenta or red shift.
This frustrating color cast happens right in the 40-60 IRE range of midtone skin frequencies. It is caused by an ACES color pipeline interpretation mismatch with the new Apple Log 2 gamma curve. Don’t delete those files—here is exactly how to execute a flawless iPhone 17 Pro Apple Log 2 skin tone correction and rescue your commercial images.
Understanding the Apple Log 2 Red Shift
The introduction of Apple Log 2 on the iPhone 17 Pro and Pro Max was a massive leap for mobile cinematography and photography, offering unprecedented dynamic range. However, standard photo editing software hasn’t entirely caught up.
When Adobe Camera Raw v16.x or Photoshop v25.x attempts to decode these files without a dedicated color space transform, the newer Log 2 gamma curve slightly over-saturates the red channel. This results in a persistent ProRAW color shift, particularly noticeable under mixed lighting conditions where human skin tones reside.
Fortunately, this is a calibration issue, not a sensor defect. Below are three professional methods to neutralize the red shift.
How to Fix iPhone 17 Pro Apple Log 2 Skin Tone Correction
Depending on your workflow speed and precision requirements, you can resolve this issue using LUTs, Camera Raw adjustments, or manual curve manipulation.
Method 1: The Quick Fix Using a Rec.709 LUT
If you are processing a large batch of images and need a fast, standardized fix, applying an official conversion LUT is your best bet.
- Download the official Apple Log 2 to Rec.709 LUT from the Apple Developer portal.
- Open your image in Photoshop.
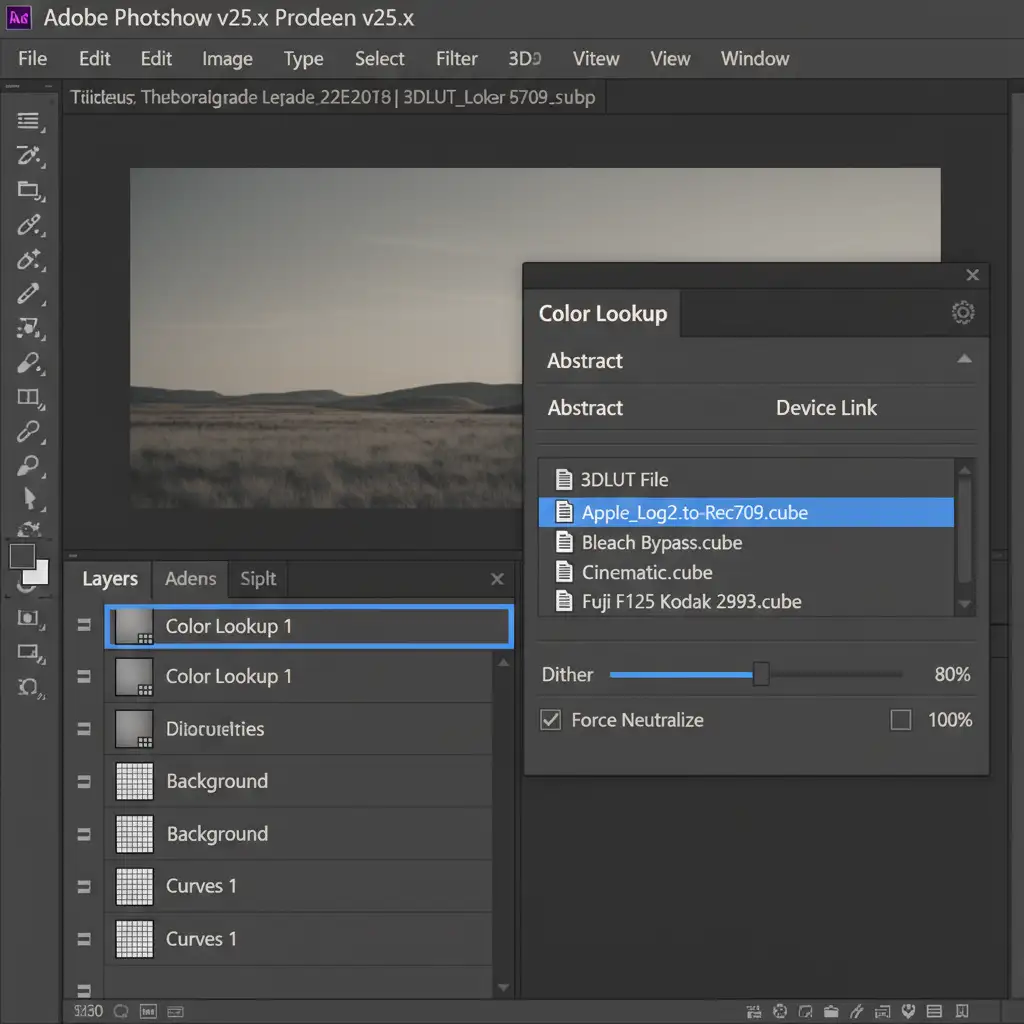
- Navigate to the Adjustments panel and add a Color Lookup adjustment layer.
- Click “Load 3D LUT” and select your downloaded .cube file.
- To prevent the LUT from making the overall image too harsh, drop the opacity of the Color Lookup adjustment layer to roughly 80 percent. This naturally restores skin tones while maintaining the expanded dynamic range of the original file.
Method 2: The Pro Workaround in Camera Raw Filter
For photographers who want non-destructive control over specific color channels without relying on external LUTs, the Camera Raw Filter provides an excellent targeted solution.
- Right-click your image layer and select Convert to Smart Object. This ensures your edits remain non-destructive.
- Go to Filter > Camera Raw Filter (or press Shift+Cmd+A / Shift+Ctrl+A).
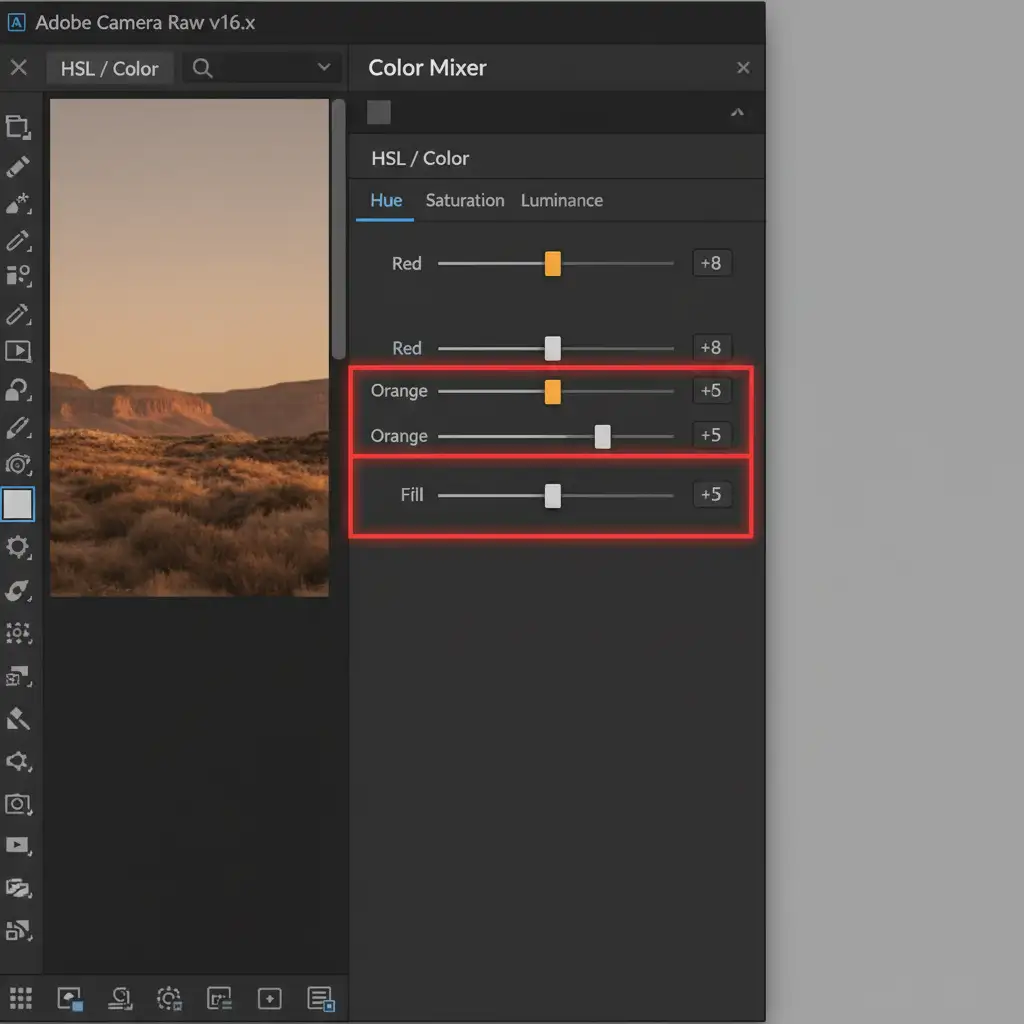
- Navigate to the Color Mixer panel.
- Select the Hue tab. Gently shift the Reds and Oranges sliders slightly towards yellow (usually between +5 to +12, depending on the lighting).
- Switch to the Saturation tab and drop the Red saturation slightly (around -5 to -10) to remove the glowing magenta cast in the 40-60 IRE range.
Method 3: Technical Deep-Dive with Manual Curves and Masking
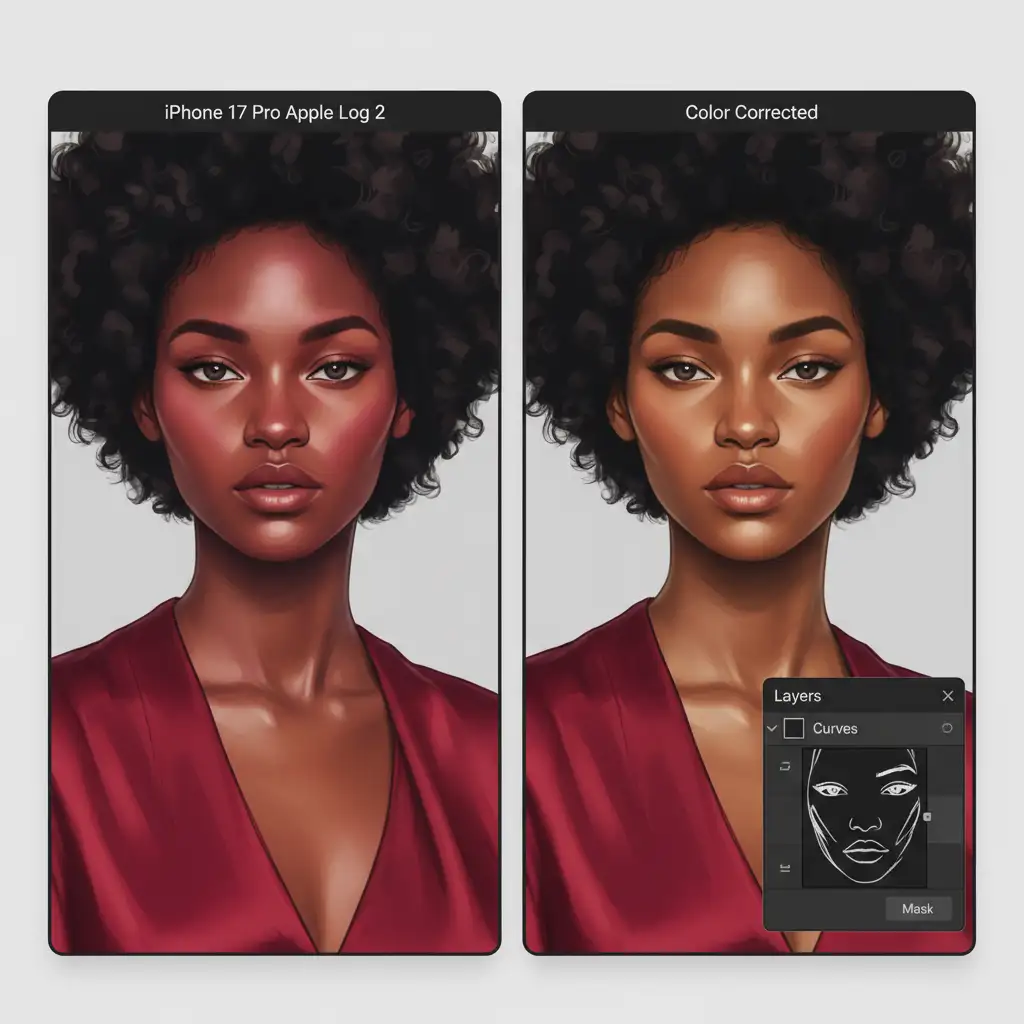
When editing high-end commercial beauty or fashion portraits, global adjustments might alter background elements (like warm sunsets or red clothing). This method isolates the correction strictly to the subject’s skin.
- Create a Curves adjustment layer in Photoshop.
- Select the Red channel from the dropdown menu. Click the center of the curve (the midtones) and pull it down slightly to reduce the magenta cast.
- Switch to the Blue channel. Lift the midtones slightly to neutralize any excess warmth created by dropping the reds.
- Select the Curves layer mask and press Cmd+I (Mac) or Ctrl+I (Windows) to invert the layer mask to black, hiding the effect.
- Select a soft white brush, lower your flow to roughly 10%, and carefully paint over the subject’s skin to apply this color correction selectively.
Scale Your High-End Commercial Retouching
Mastering the iPhone 17 Pro Apple Log 2 skin tone correction ensures your mobile photography retains a premium, professional aesthetic. However, dealing with complex ACES color pipeline mismatches, intricate layer masks, and batch color grading takes valuable time away from shooting and scaling your business.
Struggling to perfect the color grading on your latest iPhone 17 Pro commercial shoot? Let the experts at Image Work India and Cloud Retouch handle it. Our dedicated team specializes in high-end retouching, precise color calibration, and complex masking. Whether you need batch LUT processing or magazine-ready beauty retouching, we deliver flawless results with rapid turnaround times.
Contact Image Work India today to streamline your post-production workflow and elevate your portfolio.