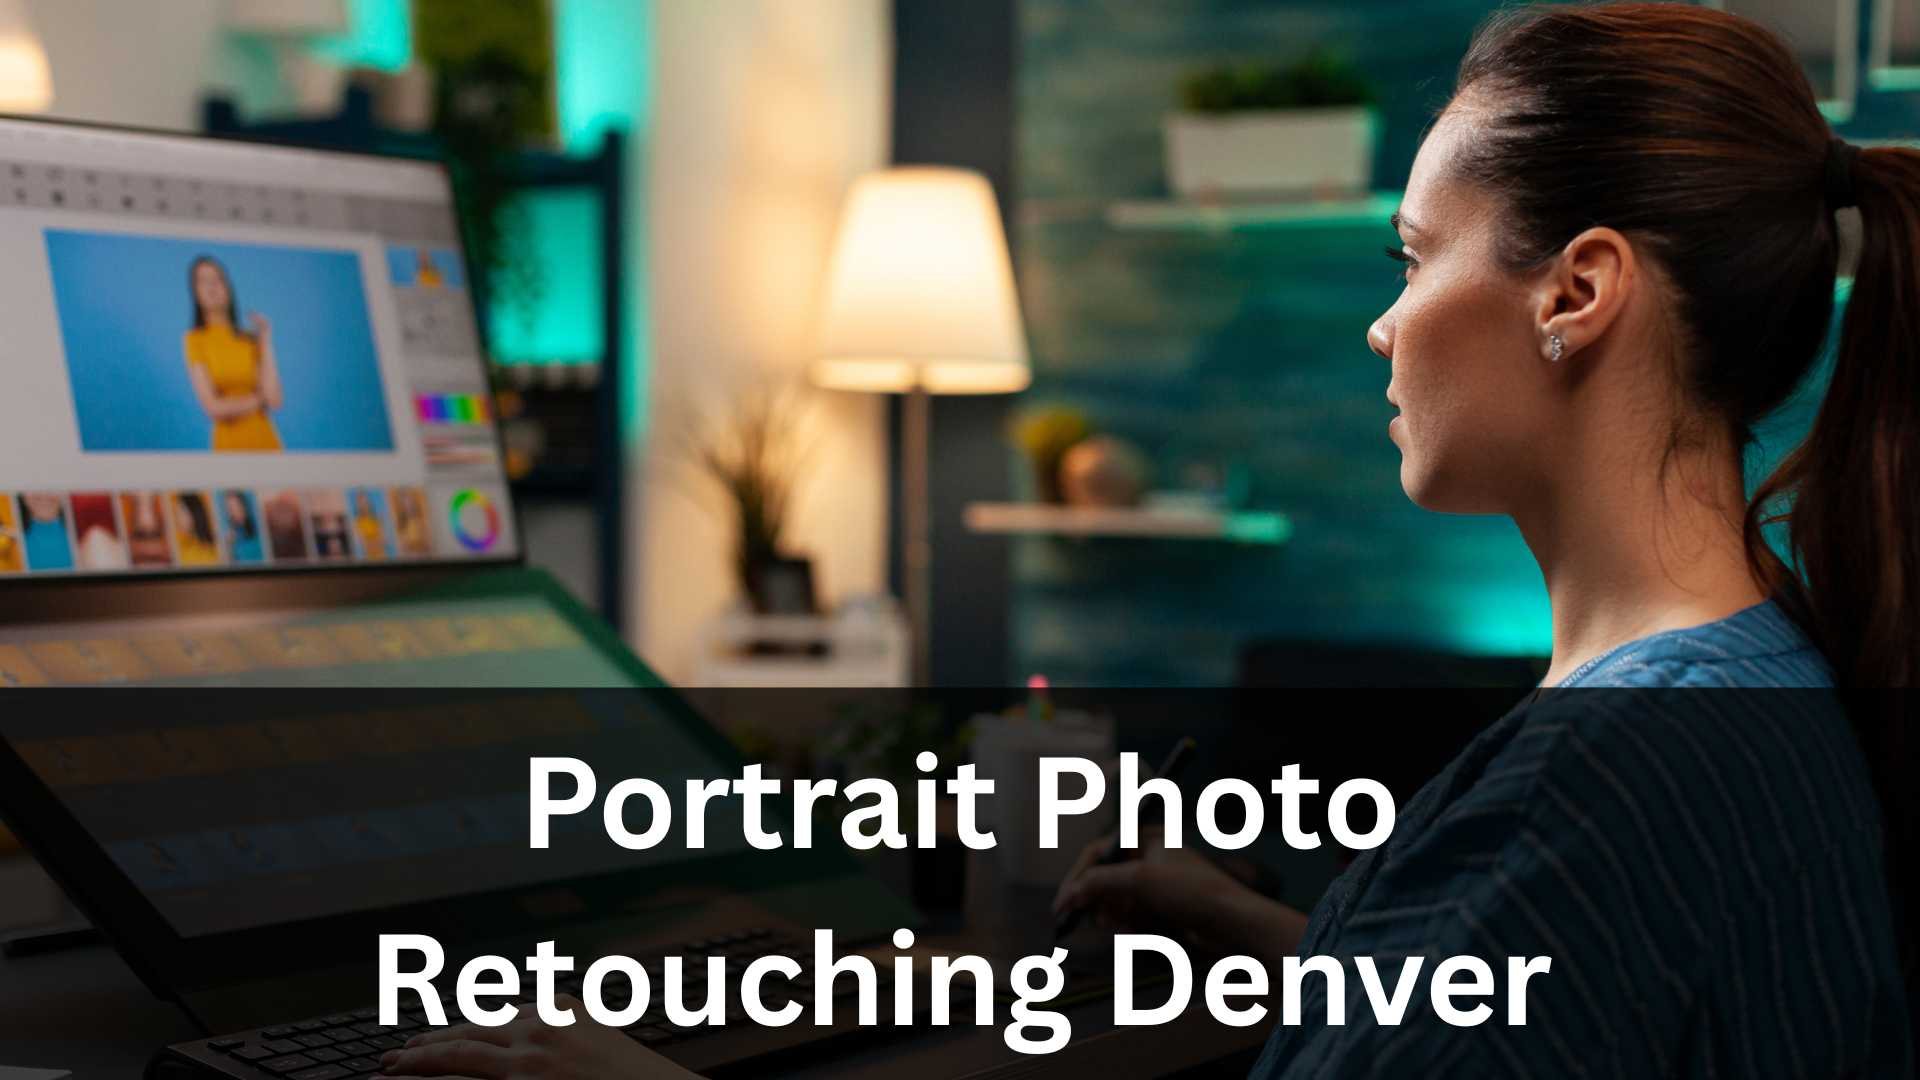
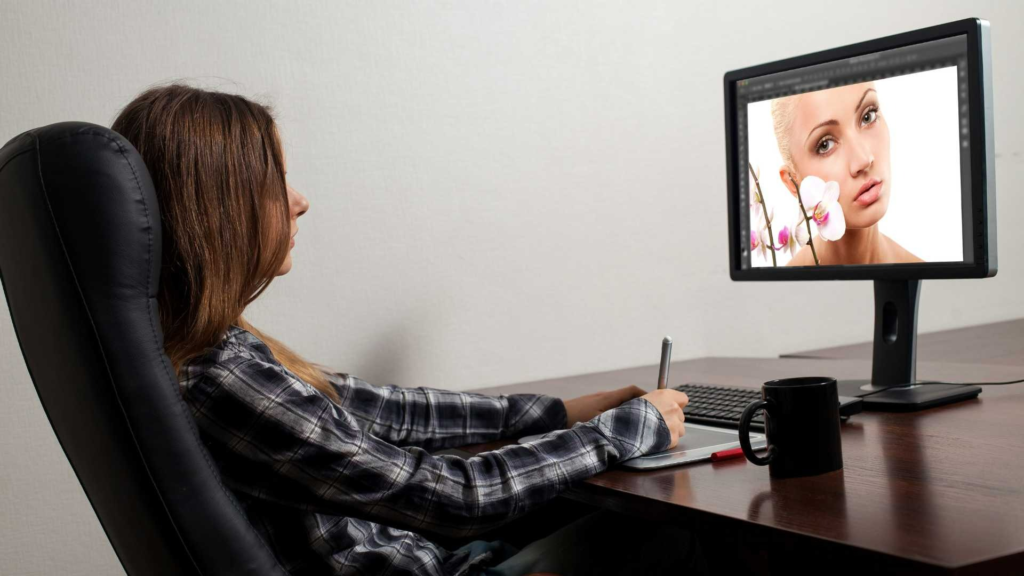
Portrait retouching is one of those creative skills that grows deeper the more you practice it. Whether you’re just opening Photoshop for the first time or you already work with a studio, learning the right Portrait Retouching Tips helps you create cleaner, more polished images that still look natural and human. Many beginners think retouching is just about removing blemishes or brightening eyes, but professional retouching is a full workflow-starting from raw adjustments and ending with refined color grading. In this guide, I’ll walk you through the complete process in a friendly, step-by-step way, explaining why each step matters and how you can apply these Portrait Retouching Tips to your own work.
Here at Image Work India, we help photographers and brands produce high-end images every day. So as you move through this guide, you’ll see insights from real workflows we use in studio environments. If at any point you feel the process gets heavy or you want support with bulk portrait editing, our team is always ready to help through Image Work India.
Understanding the Goal of Portrait Retouching
Before diving into tools and techniques, it’s important to understand what portrait retouching actually aims to achieve. The purpose is not to create unrealistic skin or overly airbrushed faces. Instead, good portrait retouching enhances natural features and reduces distractions so the viewer connects more clearly with the subject.
One of the most important Portrait Retouching Tips is learning the balance between correction and preservation. You want skin texture to remain intact. You want the subject to still look like themselves. And you want the final result to feel believable, even if you spent hours perfecting it. This mindset helps you approach every decision-from contrast adjustments to color grading-with intention.
Many beginners jump too quickly into heavy skin smoothing or global filters. But true professional work relies on thoughtful, gradual adjustments. In studios like ours at Image Work India, we begin every project with a clear understanding of the subject’s personality, age group, skin type, and intended photo style. These considerations help guide the retouching decisions that follow.
Starting With the Right Foundation: RAW Adjustments
Every professional retouch begins before Photoshop. Your raw file holds the maximum amount of detail and flexibility for editing, so this is where you set your foundation. Good Portrait Retouching Tips always emphasize the importance of getting this step right, because it affects everything that comes afterward.
Start by correcting overall exposure. Portraits often require slightly softer contrast to preserve skin detail. If the highlights are too strong on the forehead or cheeks, pull them down gently until texture becomes visible again. Shadows, on the other hand, can be lifted slightly to reveal more detail in darker areas like hair or clothing.
White balance is another key step. If your portrait feels too warm or too cool, adjust temperature and tint until the skin looks true to life. Many beginners forget that accurate white balance is one of the most powerful Portrait Retouching Tips you can apply because incorrect tones will fight against your later color-grading decisions.
You can also adjust clarity or texture at this stage, but avoid overdoing it. Heavy clarity often exaggerates pores, while too little clarity makes skin look overly smooth.
Once these base corrections are in place, bring your file into Photoshop or your preferred editing software. Now the more detailed portrait work begins.
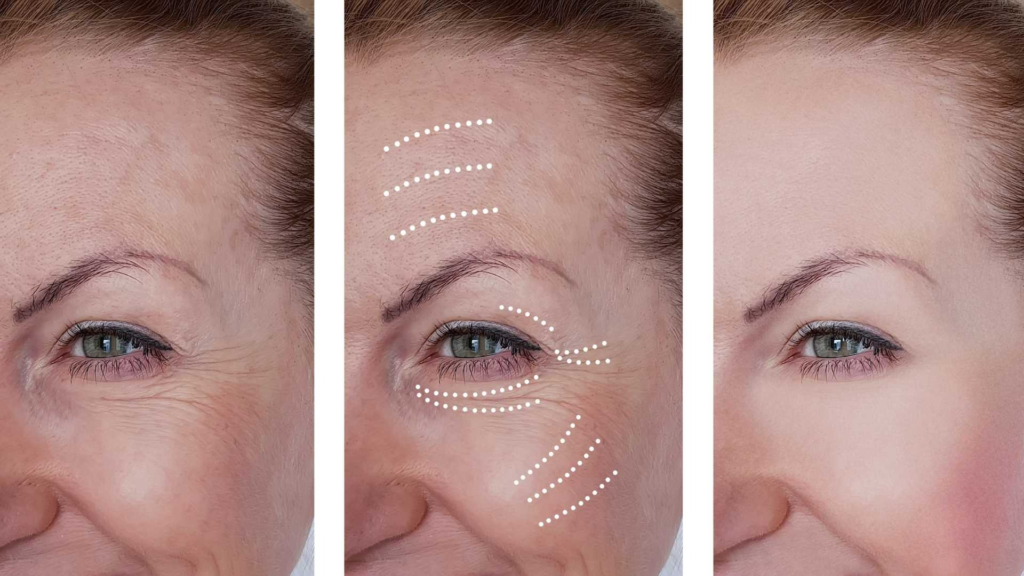
Cleaning Up the Skin Without Losing Texture
Skin retouching is where most beginners struggle. There’s a temptation to remove every small texture or line, but this leads to unnatural results. Professional Portrait Retouching Tips always highlight the importance of keeping skin believable.
The first technique is simple spot healing or clone stamping to remove temporary distractions-small blemishes, dust, stray hairs, or random marks. These are things that naturally disappear within days, so removing them does not change the person’s identity.
You should stay away from completely removing permanent features like moles unless requested by the client. These details contribute to individuality, and part of effective portrait editing is respecting the subject’s appearance.
After cleaning temporary marks, move into frequency separation or dodge and burn. Both methods allow you to enhance skin while keeping texture intact, but dodge and burn tends to offer more natural results because you’re working with light and shadow rather than smoothing.
Using dodge and burn, you gently brighten darker patches and darken brighter patches to create a more balanced skin tone. This method takes longer, but it’s one of the most powerful Portrait Retouching Tips for achieving professional-quality skin.
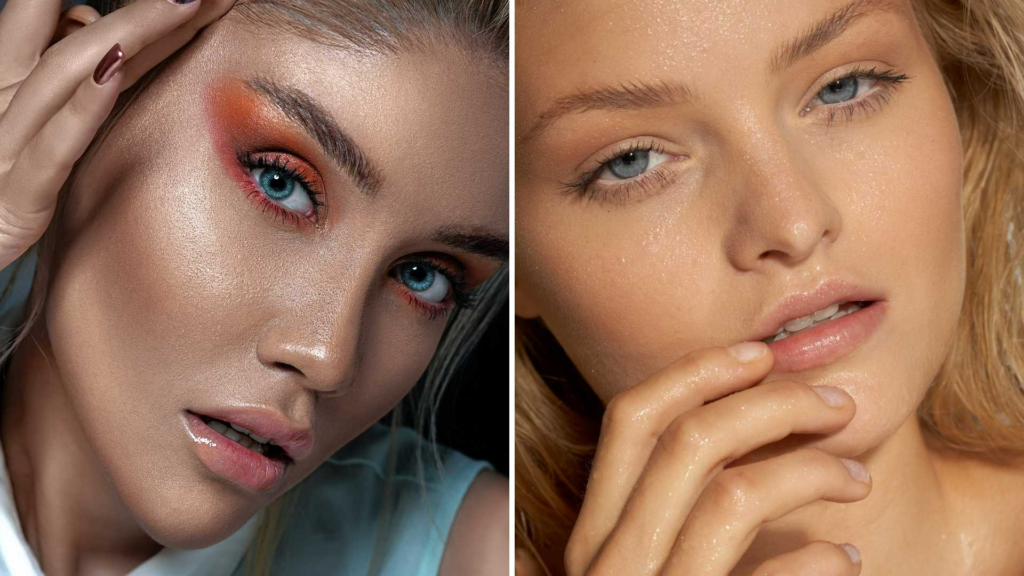
Enhancing Facial Features Naturally
Portrait retouching isn’t only about skin-it’s about bringing attention to the eyes, lips, hair, and facial structure. Subtle enhancements can strengthen the emotional impact of a portrait without making it look artificial.
Start with the eyes. You can brighten the whites slightly, but avoid making them stark or glowing. This is a common beginner mistake. Instead, aim for clarity by enhancing contrast around the iris and gently sharpening the eyelashes. These Portrait Retouching Tips help create a feeling of focus and depth, making the viewer connect more strongly with the subject.
Next, move to the eyebrows. Clean up stray hairs if needed, but avoid reshaping them unless the client requests it. Eyebrows define expression, so even a small adjustment can change the subject’s appearance. Professional retouchers often darken or sharpen the eyebrows slightly to create clean definition without altering their natural shape.
Lips can also be refined. You can add a bit of color, remove dryness, and create soft definition around the edges. The goal is to elevate, not transform. Many photographers and editors use selective dodge and burn to add dimension to the lips, giving them a gentle highlight and shadow that looks realistic.
Hair retouching may be time-consuming, especially if there are many flyaways. One of the most overlooked Portrait Retouching Tips is learning how to control flyaway hairs without making the hairline look artificially perfect. Instead of removing every strand, keep some natural looseness while cleaning up distracting or overly bright strands.
Working With Facial Contours and Shape Adjustments
Shape adjustments should be used with care. Tools like Liquify can enhance facial balance, but when overdone, the viewer immediately notices something unnatural. Always prioritize subtlety. Professional retouchers typically focus on small corrections, like softening a lens distortion effect or refining a slightly uneven jawline.
In general, it’s better to use dodge and burn to sculpt the face rather than reshaping features. These Portrait Retouching Tips apply especially when working with beauty portraits or commercial headshots, where structure plays a key role in the final look.
For example, you can deepen shadows under cheekbones or brighten highlights on the bridge of the nose to create more dimension. These adjustments mimic natural lighting and maintain realism.
Refining Clothing and Background Elements
Portrait retouching extends beyond the face. If the background has distractions or if clothing looks wrinkled, your final portrait still feels unpolished. Many photographers forget that clothing retouching is just as important, especially in corporate headshots or fashion portraits.
Start by removing wrinkles carefully. Rather than blurring them out, enhance fabric texture while reducing deep folds. This keeps clothing looking natural. If colors appear uneven due to lighting, use selective color adjustments to balance the tones.
The background should be clean but still believable. Remove distracting spots, reflections, or strong color shifts. You can soften the background slightly to bring more attention to the subject, especially in outdoor portraits where foliage or buildings can pull attention away.
These finishing touches help elevate the entire image. When clients view their portraits, they may not notice all the small improvements individually, but they immediately recognize the overall polish.
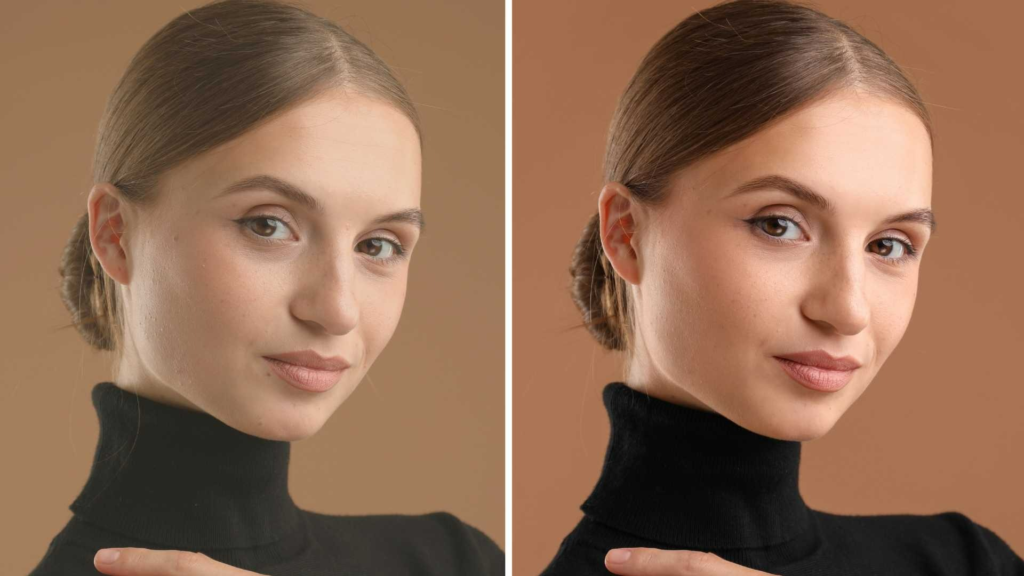
Color Grading for Mood and Style
Color grading is one of the most creative steps in portrait retouching. It shapes the overall tone and emotional feel of your portrait. Many Portrait Retouching Tips focus on blending technical corrections with artistic style, and color grading is the perfect example of this balance.
Start by adjusting overall color harmony. Skin tones should remain natural even if the rest of the image takes on a stylized look. Avoid pushing colors too far into orange or magenta. A good approach is to grade shadows and highlights separately. Warmer highlights and cooler shadows create depth and atmosphere, a technique often used in cinematic portraits.
You can also experiment with subtle hues. Teal-and-orange looks, soft pastels, or classic magazine-style tones all have their place depending on the project. Just remember that the style should support the subject, not overpower them.
At Image Work India, our team often builds custom LUTs for consistent branding. If you have multiple portraits from the same session, using a consistent color grade helps create a unified collection.
Sharpening, Final Checks, and Output
Once all your adjustments are complete, the final steps bring your portrait to life. Sharpening should be subtle and targeted. Apply sharpening to the eyes, lashes, and lips more strongly than to the skin. Too much global sharpening reintroduces texture you may have spent time smoothing.
Zoom out to view the portrait as a whole. This helps you spot issues that were invisible at 100% zoom but become obvious at a full view. Check for any color inconsistencies, unnatural shadows, or leftover blemishes.
Before exporting, choose the right output settings for web or print. Portraits for social media or websites typically use sRGB color space, while print requires Adobe RGB or CMYK depending on the printer.
If you’re delivering a set of portraits to a client, consider exporting in multiple formats-high-resolution for print and optimized files for online use. These small touches help you present a polished service and build trust, which is something we always emphasize at Image Work India.
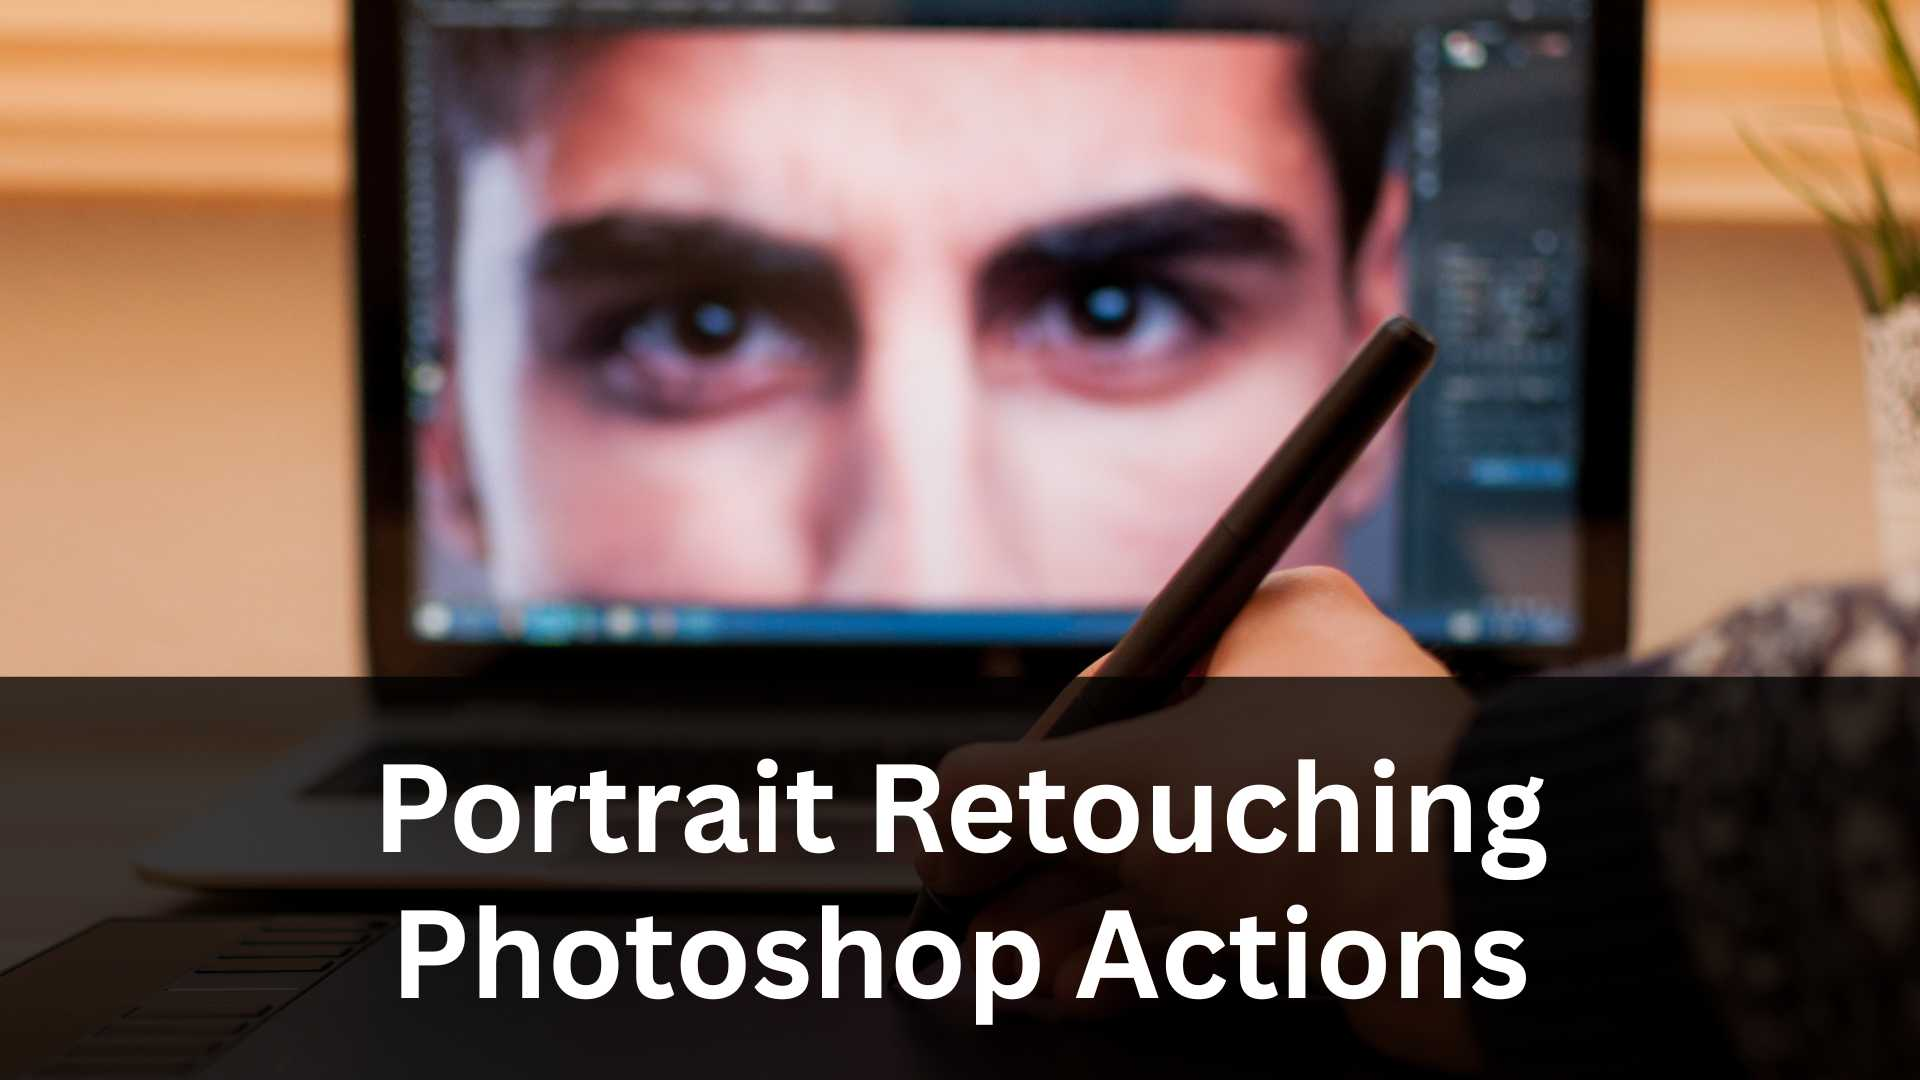
Mastering the Art of Dodge & Burn
Dodge and burn is often called the “heart” of portrait retouching. While many tools make dramatic changes quickly, dodge and burn lets you refine tonal transitions at micro levels. This technique enhances dimension, evens out skin without removing texture, and corrects lighting inconsistencies.
Start by creating two curves adjustment layers-one to brighten and one to darken-then mask them. Use a soft brush at very low opacity and slowly paint in corrections. The goal is not to make drastic adjustments but to gradually refine the portrait. Many beginners rush this stage, but one of the most valuable Portrait Retouching Tips is to spend time here. It is the stage that separates amateur portraits from high-end beauty retouching.
For beginners, working zoomed out occasionally helps maintain perspective. If you stay zoomed in the entire time, you can overcorrect areas that don’t actually need much attention. Professionals often recommend checking your portrait at different zoom levels every few minutes to ensure balance and realism.
Dodge and burn can also be used creatively. You can subtly sculpt cheekbones, jawlines, and noses by enhancing natural highlights and shadows. Unlike Liquify, this method preserves the original structure while giving the portrait more presence.

Using Frequency Separation More Professionally
Frequency separation has become popular because it separates texture from color, making it easier to retouch skin. But many beginners misuse it, creating plastic-looking skin. Using this method responsibly is one of the most essential Portrait Retouching Tips.
Instead of blurring the low frequency layer heavily, keep it mild. Your goal is subtle color blending, not smoothing the skin into a flat surface. Retouchers at Image Work India often balance frequency separation with dodge and burn so they can maintain natural skin texture while correcting uneven tones.
Use frequency separation for:
- Reducing blotchiness
- Blending uneven shadows
- Fixing minor texture inconsistencies
Avoid using it for:
- Removing wrinkles completely
- Eliminating natural texture
- Reconstructing facial features
Remember, your edits should enhance-not replace-the natural beauty of the subject.
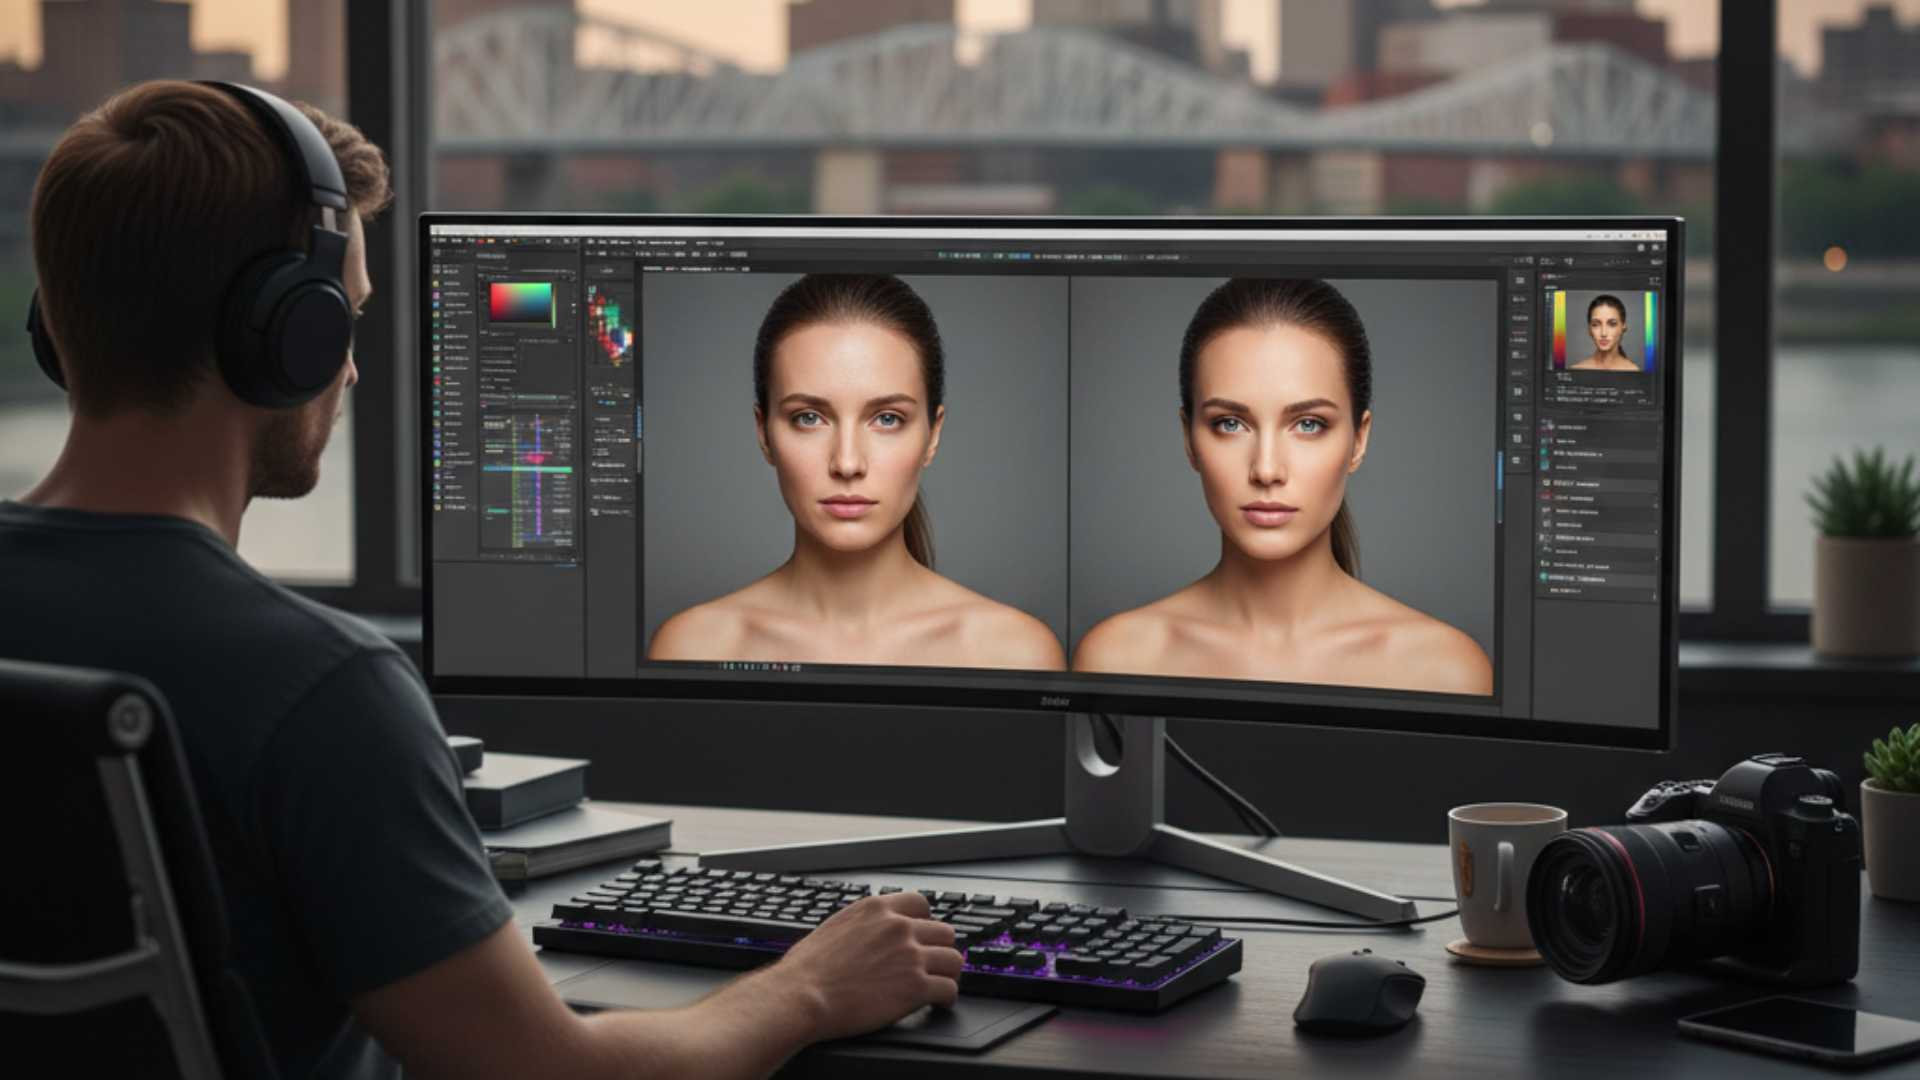
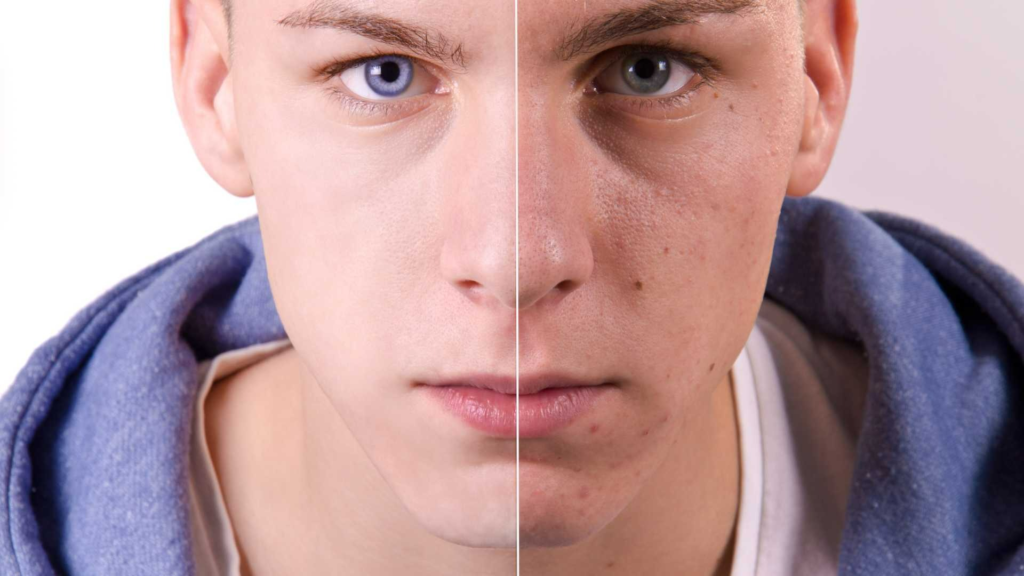
Correcting Skin Tones for Natural Results
Skin tone correction is one of the hardest parts of portrait editing because every person has a different undertone-warm, cool, olive, or neutral. Simple adjustments can shift colors too much, which is why detailed Portrait Retouching Tips always include strategies for controlling subtle color shifts.
Start by examining whether the skin has unwanted color casts. Are the shadows too green? Are the highlights too pink? Does the midtone area look dull? The Selective Color tool, Hue/Saturation, and Color Balance are excellent for adjusting subtle shifts.
A good rule is to work with masks so adjustments apply only to specific areas. For example, if the forehead appears too bright or too red compared to the rest of the skin, isolate that area and make a gentle correction. Small improvements create big visual impact.
In beauty and fashion retouching, editors also refine saturation levels to avoid overly bright skin. Natural skin rarely has intense color-it’s soft, understated, and even. Professional Portrait Retouching Tips often recommend reducing saturation slightly before applying final color grading for a more polished effect.

Detail Enhancement Without Over-Sharpening
Sharpening is a finishing technique that must be used carefully. The human eye loves detail, especially in portraits, but too much sharpening makes skin look harsh.
Instead of global sharpening, apply it selectively:
- Eyes
- Eyelashes
- Lips
- Hair
- Eyebrows
These areas benefit from extra clarity because they draw the viewer’s attention.
One advanced tip is to sharpen on a stamped layer and mask out areas where you don’t want texture emphasized. Another is using High Pass sharpening at low opacity for a clean, controlled effect.
At Image Work India, our retouching team sharpens in stages, applying subtle adjustments rather than one strong filter. This ensures the portrait remains soft and natural while still feeling detailed.
Understanding Light and Shadow to Create Depth
Lighting is everything in portraits. When editing, you are not only correcting but also enhancing the lighting that already exists. Many professional Portrait Retouching Tips revolve around studying how light interacts with the face.
Ask yourself:
- Does the light highlight the subject’s best features?
- Are shadows consistent on both sides of the face?
- Is there enough contrast to create shape and dimension?
Sometimes, you may need to add artificial light using dodge tools or deepen existing shadows for drama. This technique is often used in magazine portraits and high-end editorial photos.
One helpful strategy is creating a low-opacity black-and-white layer at the top of your stack to evaluate contrast without distraction from color. This helps you see where adjustments are needed.
Working With Makeup Retouching
Makeup is a significant part of portrait photography. Photographers and makeup artists often do a great job on set, but retouchers refine makeup digitally for a polished final look.
Some useful Portrait Retouching Tips for makeup include:
- Enhancing eyeshadow and lip color selectively
- Cleaning up eyeliner smudges or mascara clumps
- Smoothing lipstick texture while keeping natural detail
- Strengthening eyebrow shape without making them look drawn
Makeup retouching should never overpower the subject. The goal is refinement-not reinvention.
Color Grading for Style, Brand, and Emotion
Color grading is where your creative personality shines. A well-graded portrait communicates mood instantly. Many Portrait Retouching Tips focus on color theory because it helps editors make better artistic decisions.
Different grading styles include:
- Warm cinematic tones for emotional depth
- Cool tones for modern, editorial looks
- Pastel tones for soft lifestyle portraits
- High-contrast tones for bold, dramatic portraits
Whichever style you choose, make sure skin tones remain natural. You can add color to shadows, adjust highlight warmth, or manipulate midtones for atmosphere-but preserve skin tone harmony.
Studios like Image Work India build signature looks through color grading presets or LUTs. This helps photographers maintain consistency across multiple shoots.
Preparing Portraits for Web, Print, and Social Media
Different platforms require different output settings. A portrait that looks perfect on your monitor might look dull, oversaturated, or too dark on social media if not exported properly.
Here are key considerations:
For Web & Social Media
- Use sRGB
- Reduce file size without losing detail
- Sharpen slightly more for online display
For Print
- Use Adobe RGB or convert to CMYK depending on the printer
- Avoid excessive sharpening
- Export at high resolution
One of the practical Portrait Retouching Tips we share at Image Work India is to export multiple versions for different use cases. This prevents clients from resizing or compressing files incorrectly.
Maintaining a Consistent Workflow
Retouching becomes easier when you follow a consistent process. Professionals use checklists to ensure they never skip important steps.
A strong workflow includes:
- RAW adjustments
- Cleanup (spots, stray hairs, distractions)
- Skin correction
- Dodge and burn
- Texture refinement
- Feature enhancement
- Color grading
- Sharpening
- Export and delivery
When you retouch regularly, this flow becomes second nature. Your speed increases, your decisions become more intuitive, and your results look more professional.
Common Mistakes Beginners Should Avoid
Even with the best Portrait Retouching Tips, beginners often fall into the same traps. Knowing these mistakes beforehand saves hours of rework.
Over-smoothing the skin
Natural texture must remain visible. If your portrait looks like plastic, you’ve gone too far.
Over-sharpening
Harsh sharpening highlights pores and imperfections unnecessarily.
Ignoring the background
A clean subject with a messy background still feels incomplete.
Incorrect color balance
Skin can turn orange, green, or magenta if color grading is applied without care.
Rushing the process
Portrait retouching is meant to be slow and intentional.
The more mindful you become, the more refined your portraits will grow.
Why Professionals Trust Image Work India
If you love retouching and enjoy doing everything yourself, these Portrait Retouching Tips will help you grow your skill dramatically. But if you’re a photographer, brand, or studio handling many portraits, time becomes a real challenge.
That’s where Image Work India makes a difference.
We offer:
- High-end portrait retouching
- Corporate headshot cleanup
- Beauty and fashion retouching
- Skin color correction
- Background cleanup
- Consistent editing for full collections
You can explore more through Image Work India, where we provide fast delivery and a natural, high-end finish trusted by professionals worldwide.
Whether you need 1 portrait or 1,000, our team ensures accuracy, consistency, and a friendly working experience.
Final Thoughts: Becoming a Better Portrait Retoucher
Portrait retouching is both a skill and an art form. It requires patience, understanding, and constant practice. With the right Portrait Retouching Tips, you can transform an ordinary portrait into something expressive and memorable.
Start with the basics, develop a personal style, and always respect the natural beauty of the subject. Remember-great retouching is not about changing a person but revealing their best version with clarity and elegance.
If you ever need help with large projects or want expert-level results, Image Work India is always ready to support your creative journey.