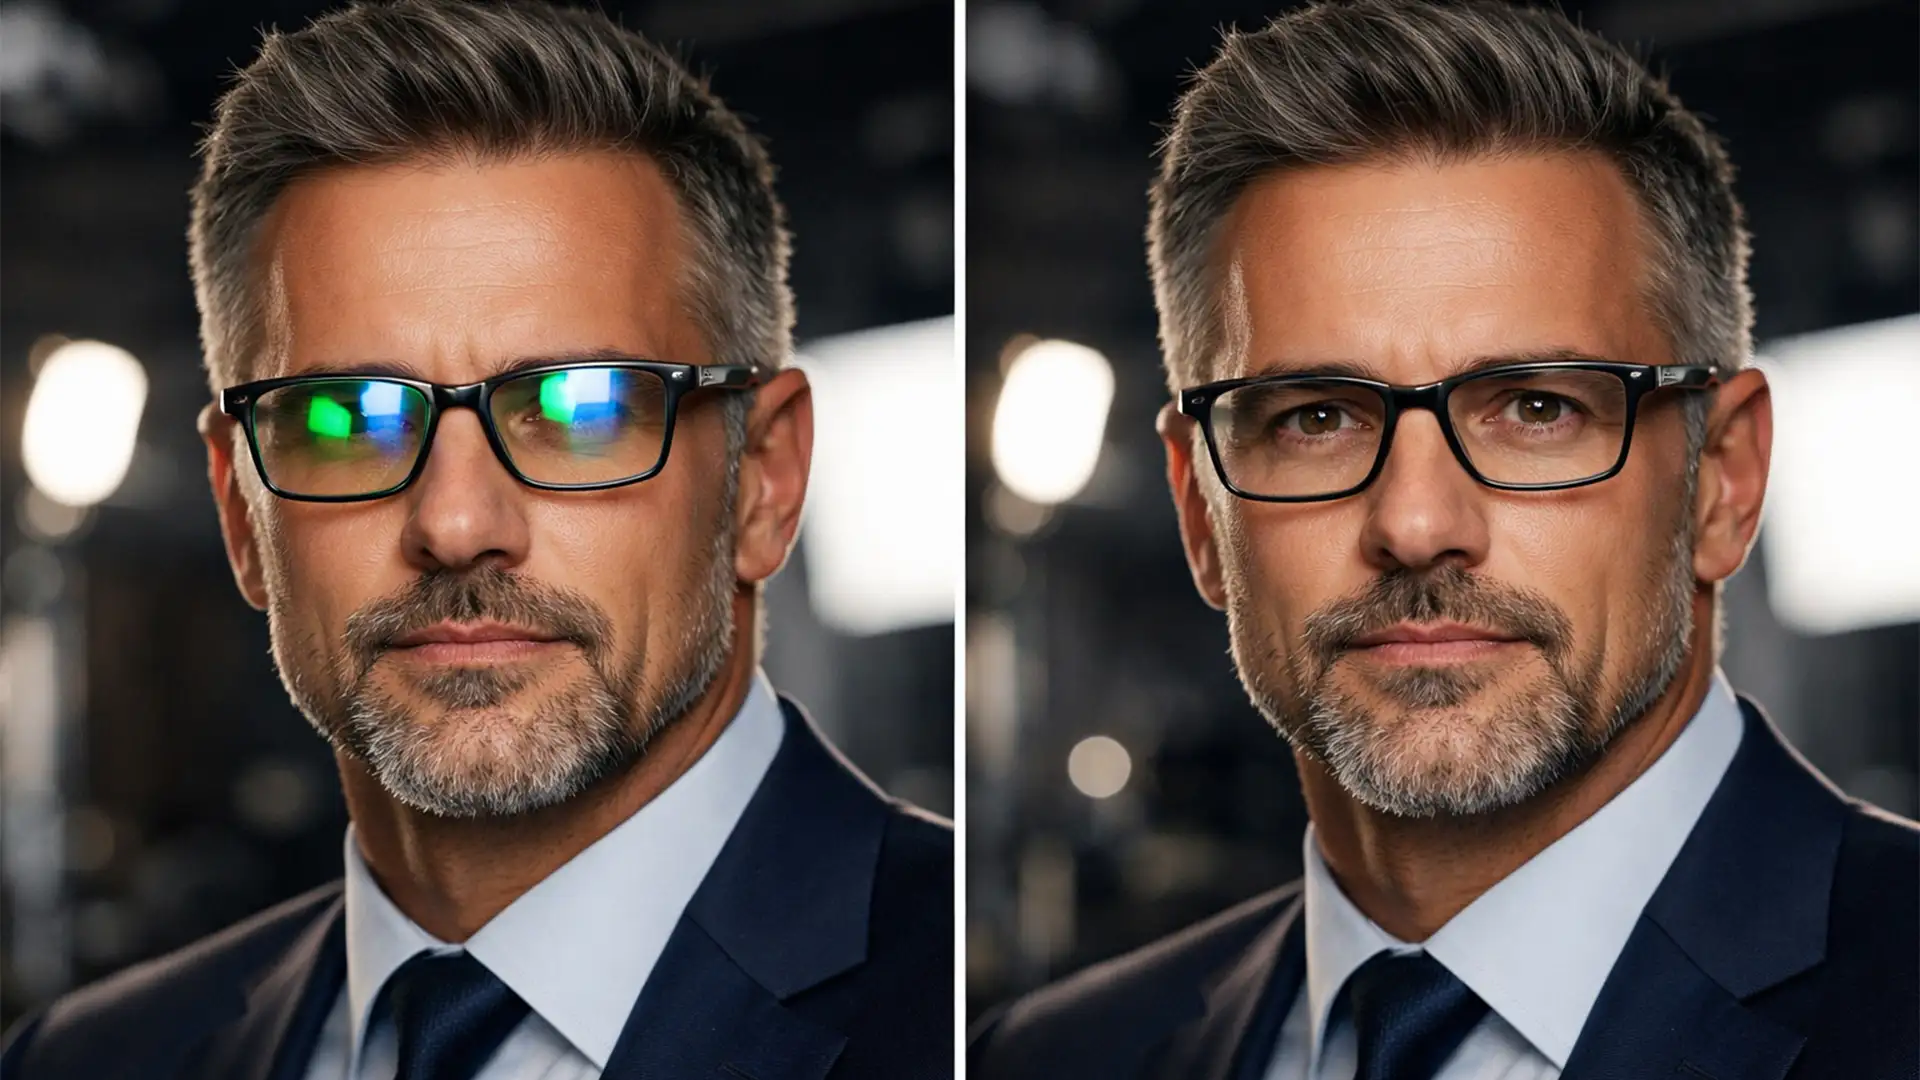
You just had a fantastic video meeting, and a colleague captured the perfect screenshot of you mid-smile. It is exactly the confident, approachable expression you want for your LinkedIn profile. But when you crop it, reality hits: severe macroblocking, low bit-depth color banding, and a miserable 72dpi resolution.
Zoom screenshots suffer from aggressive video compression algorithms that cap quality at 1080p or less. When you need a professional headshot from a Zoom screenshot, standard cropping simply won’t work.
Fortunately, you don’t need to book an expensive studio photoshoot. Using Adobe Photoshop v25.x and above, you can restore lost facial details, remove compression artifacts, and digitally upgrade your wardrobe. Here is the definitive guide to transforming a low-resolution webcam capture into a premium 300dpi headshot.
Why Zoom Screenshots Fail as Professional Headshots
Before diving into the fix, it helps to understand what we are fighting against. Video conferencing software prioritizes real-time transmission speed over image fidelity. This results in:
- Compression Artifacts & Macroblocking: Blocky, pixelated patches, especially in areas of high movement or shadows.
- Low Resolution: Usually capped at 72 pixels per inch (PPI), which looks blurry on high-resolution Retina displays.
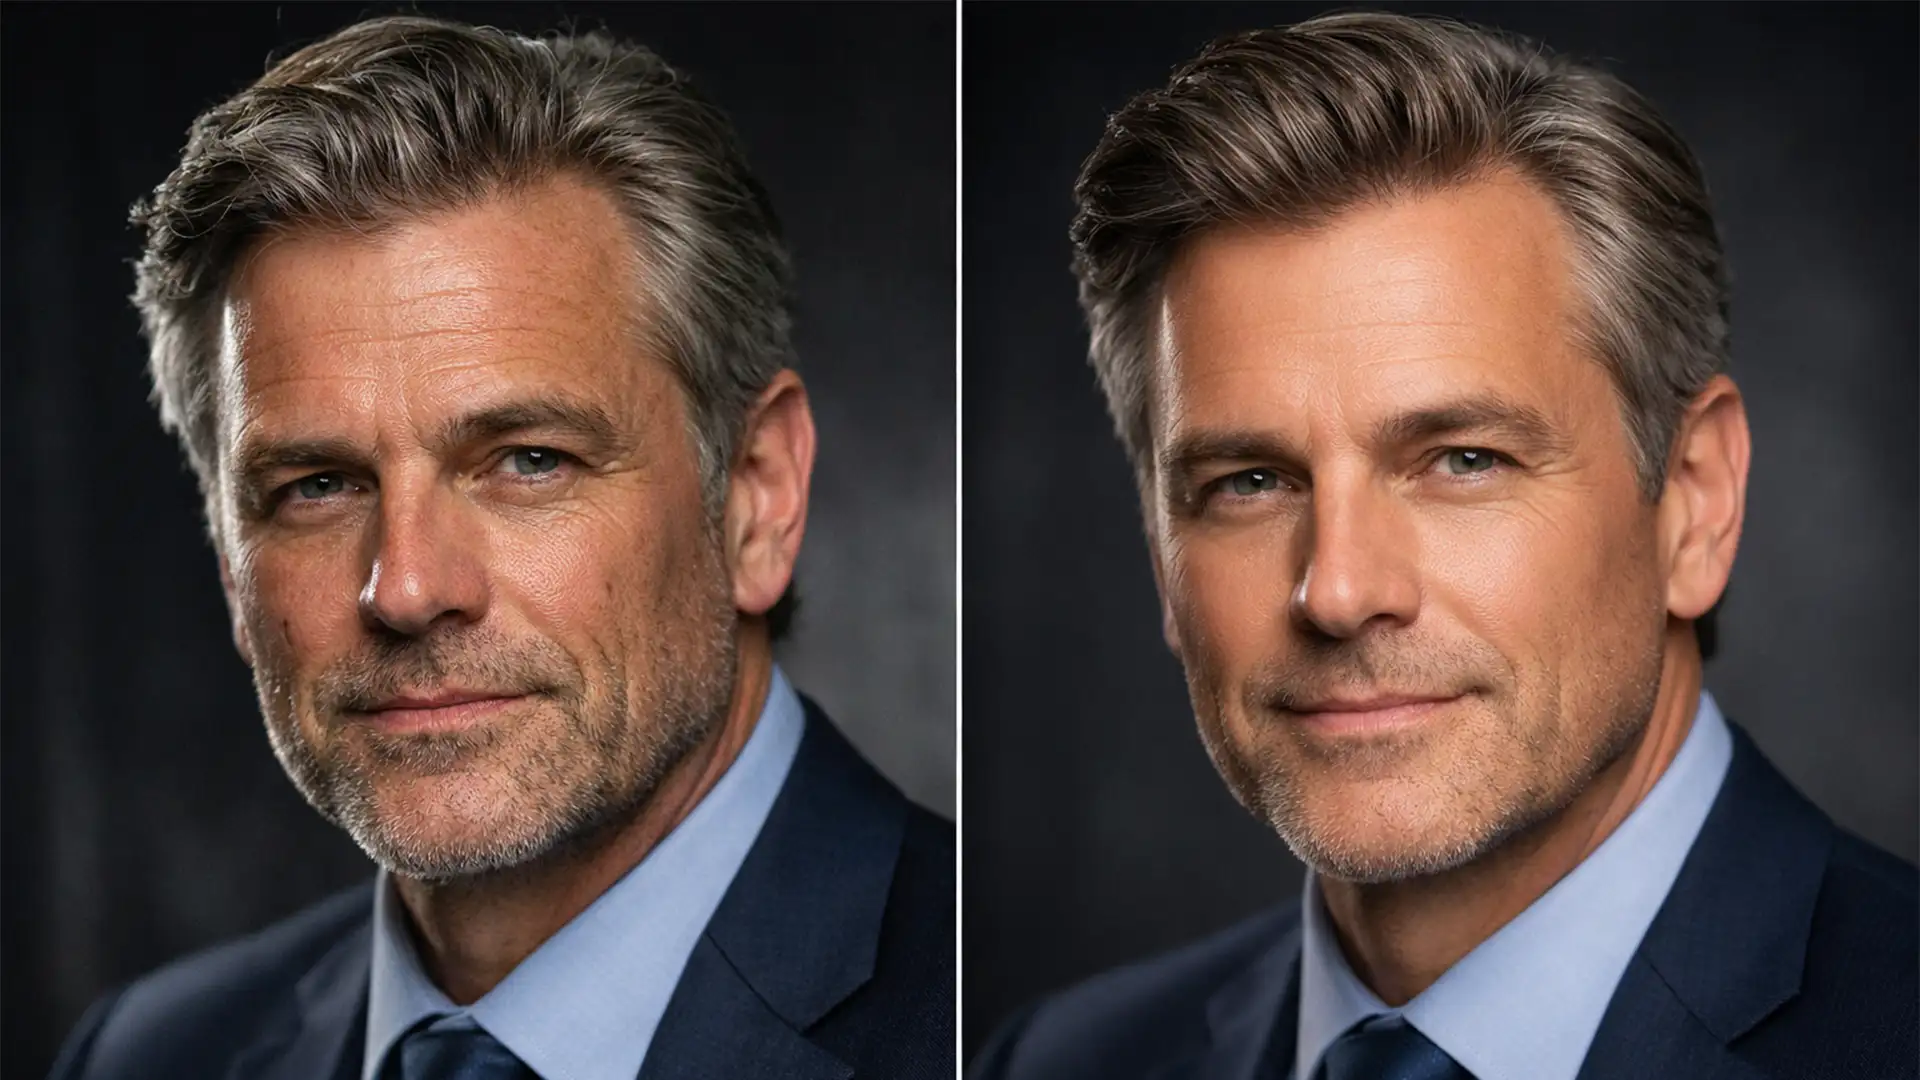
- Harsh Webcam Lighting: Unflattering highlights and deep shadows that wash out skin tones.
To fix this, our workflow requires a three-pronged approach: AI upscaling to reconstruct missing pixels, advanced retouching to smooth artifacts, and generative AI to correct the environment and wardrobe.
Step-by-Step: Creating a Professional Headshot from a Zoom Screenshot
Step 1: The Quick Fix – AI Upscaling with Super Resolution
Your first goal is to give Photoshop enough pixels to work with. If you try to retouch a 72dpi image, you will end up with a blurry, plastic-looking result. We need to double the pixel count using AI upscaling.
- Open your Zoom screenshot in Photoshop v25.x.
- In the Layers panel, right-click your image layer and select Convert to Smart Object.
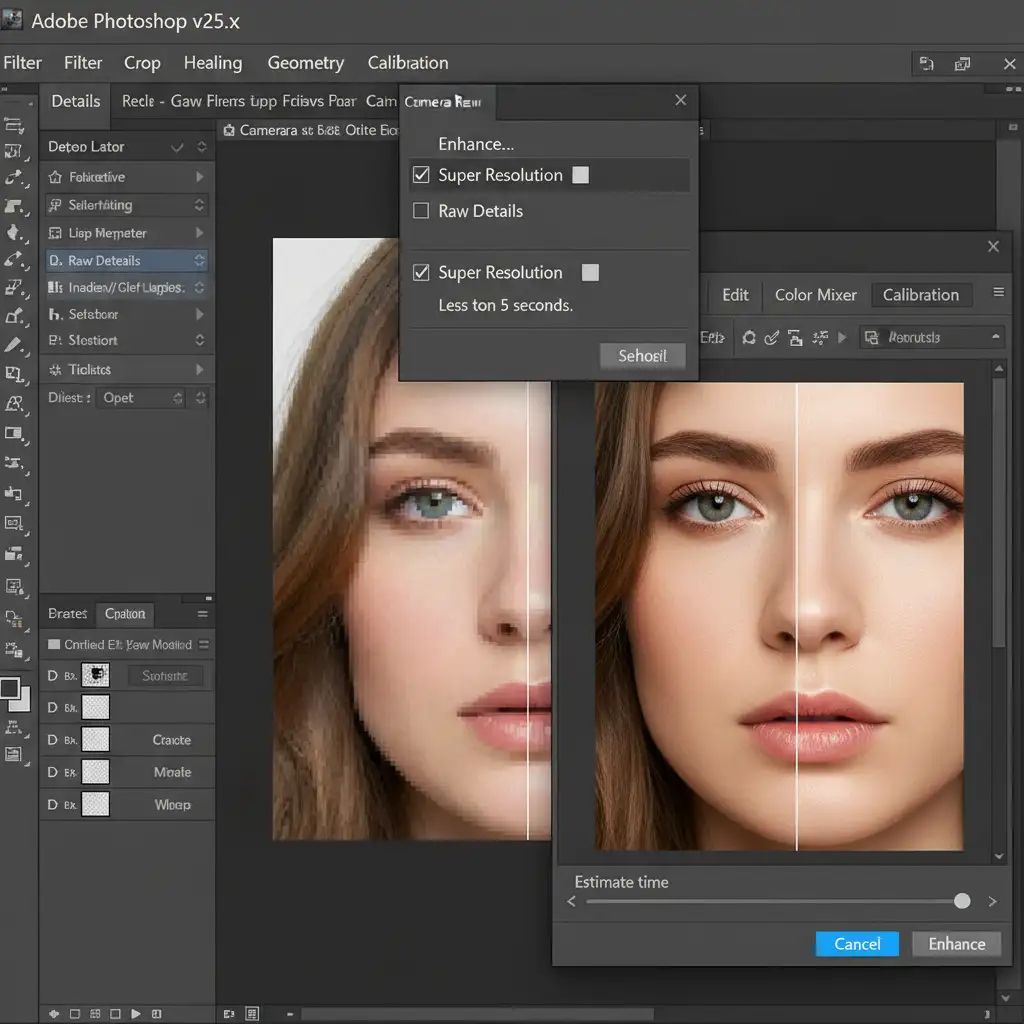
- Navigate to Filter > Camera Raw Filter.
- Right-click the image inside the Camera Raw window (or click the three dots menu) and select Enhance.
- Check the Super Resolution box. This uses Adobe’s machine learning to intelligently double the resolution while preserving edges.
Step 2: The Pro Workaround – Frequency Separation for Skin
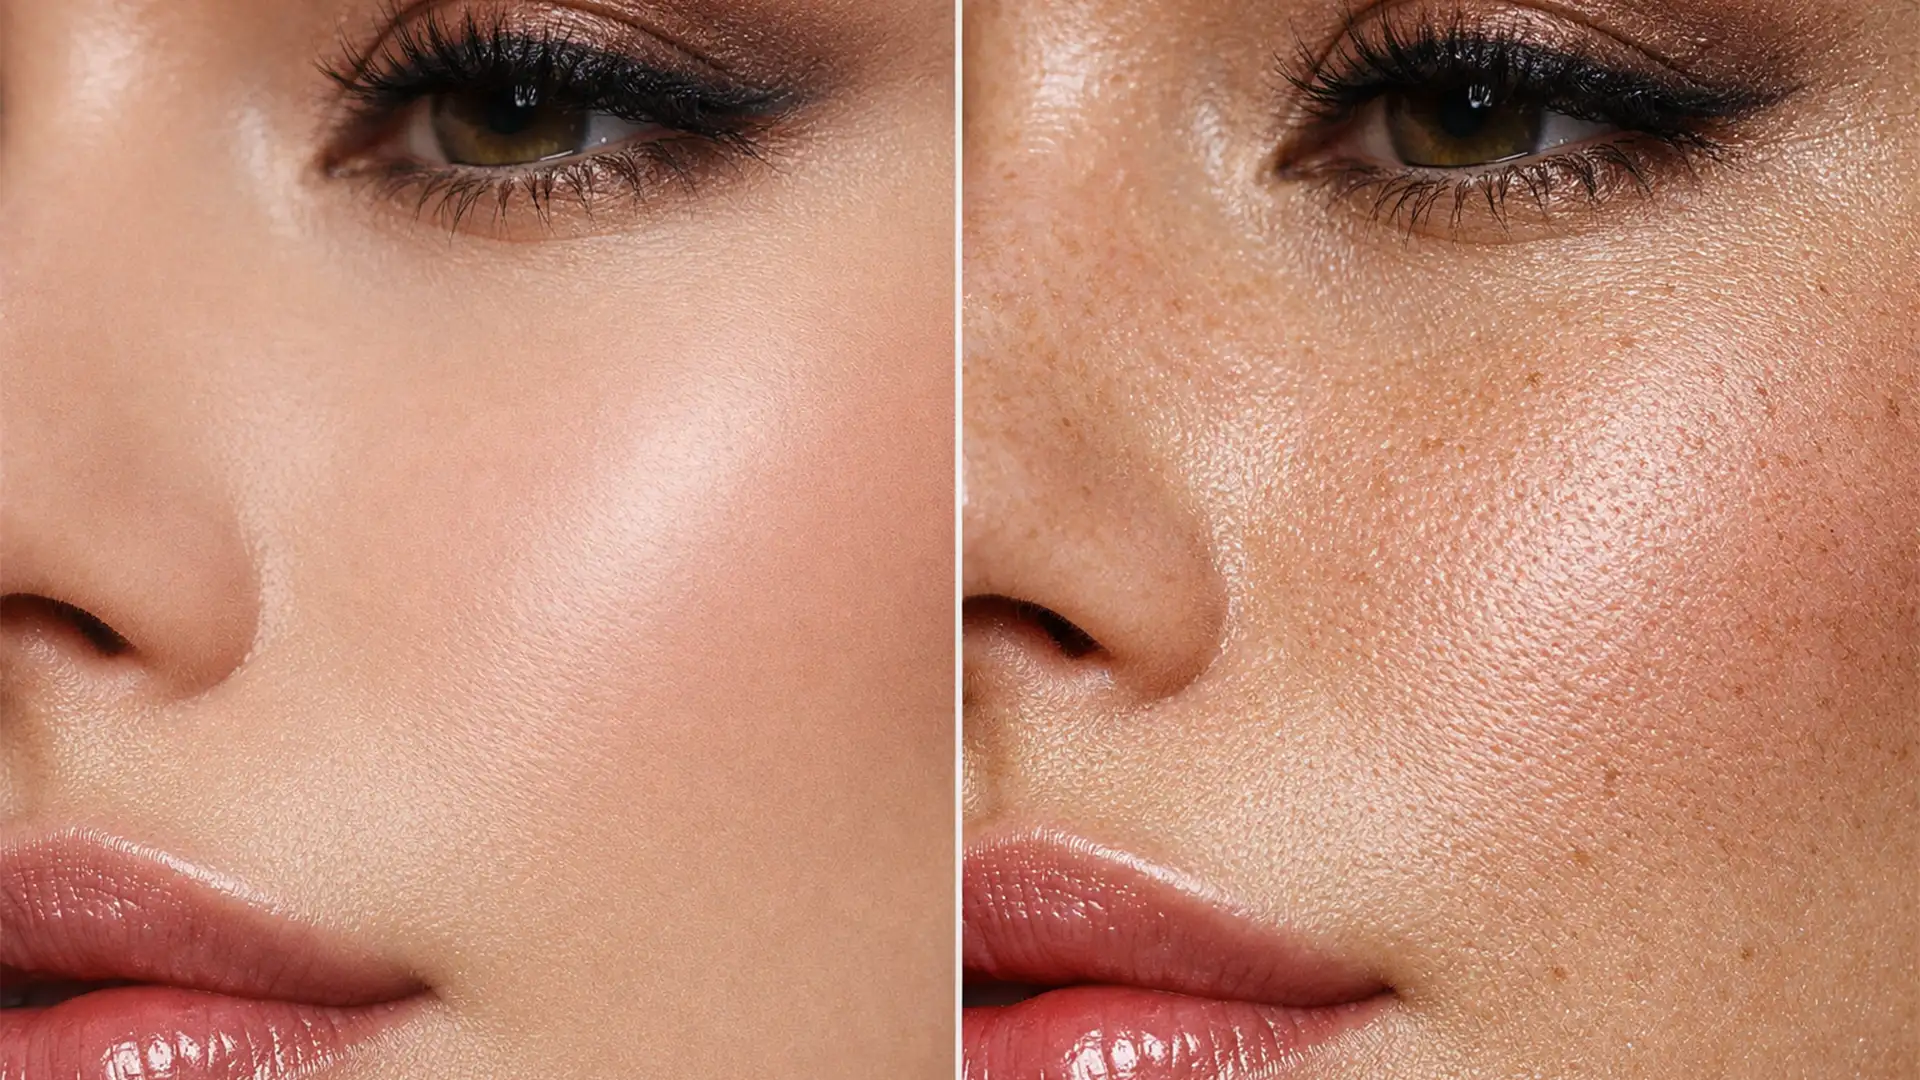
Now that we have a higher resolution, the macroblocking and color banding will be more obvious. Standard blurring tools will destroy the texture of your skin and eyes. Instead, we use Frequency Separation.
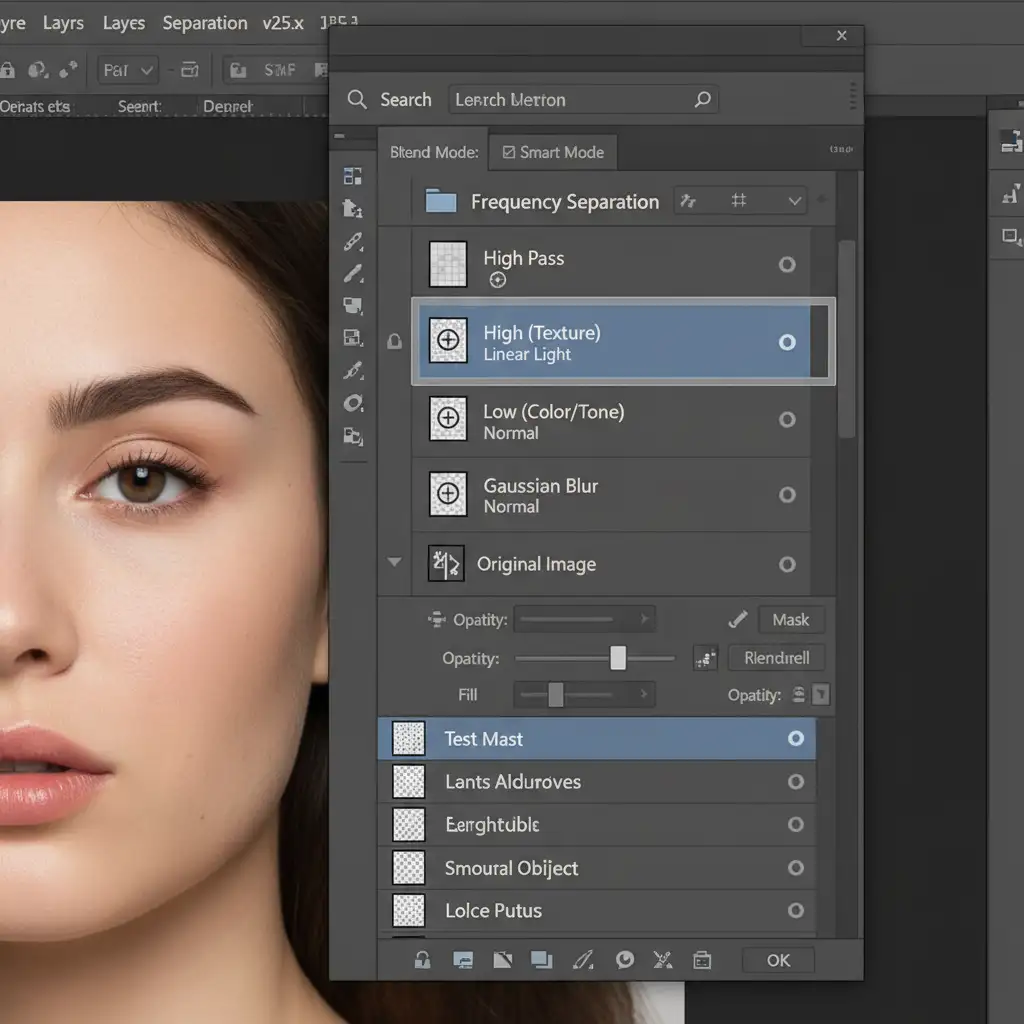
Frequency Separation splits your image into two distinct layers:
- High Frequency Layer: Contains only textures (pores, hair, eyelashes, blocky pixel edges).
- Low Frequency Layer: Contains only colors and tones (shadows, highlights, skin color).
By blurring the Low layer slightly with a Gaussian Blur, you can smooth out the blocky pixelation and harsh webcam lighting on the skin without blurring the sharp details of the eyes and hair on the High layer.
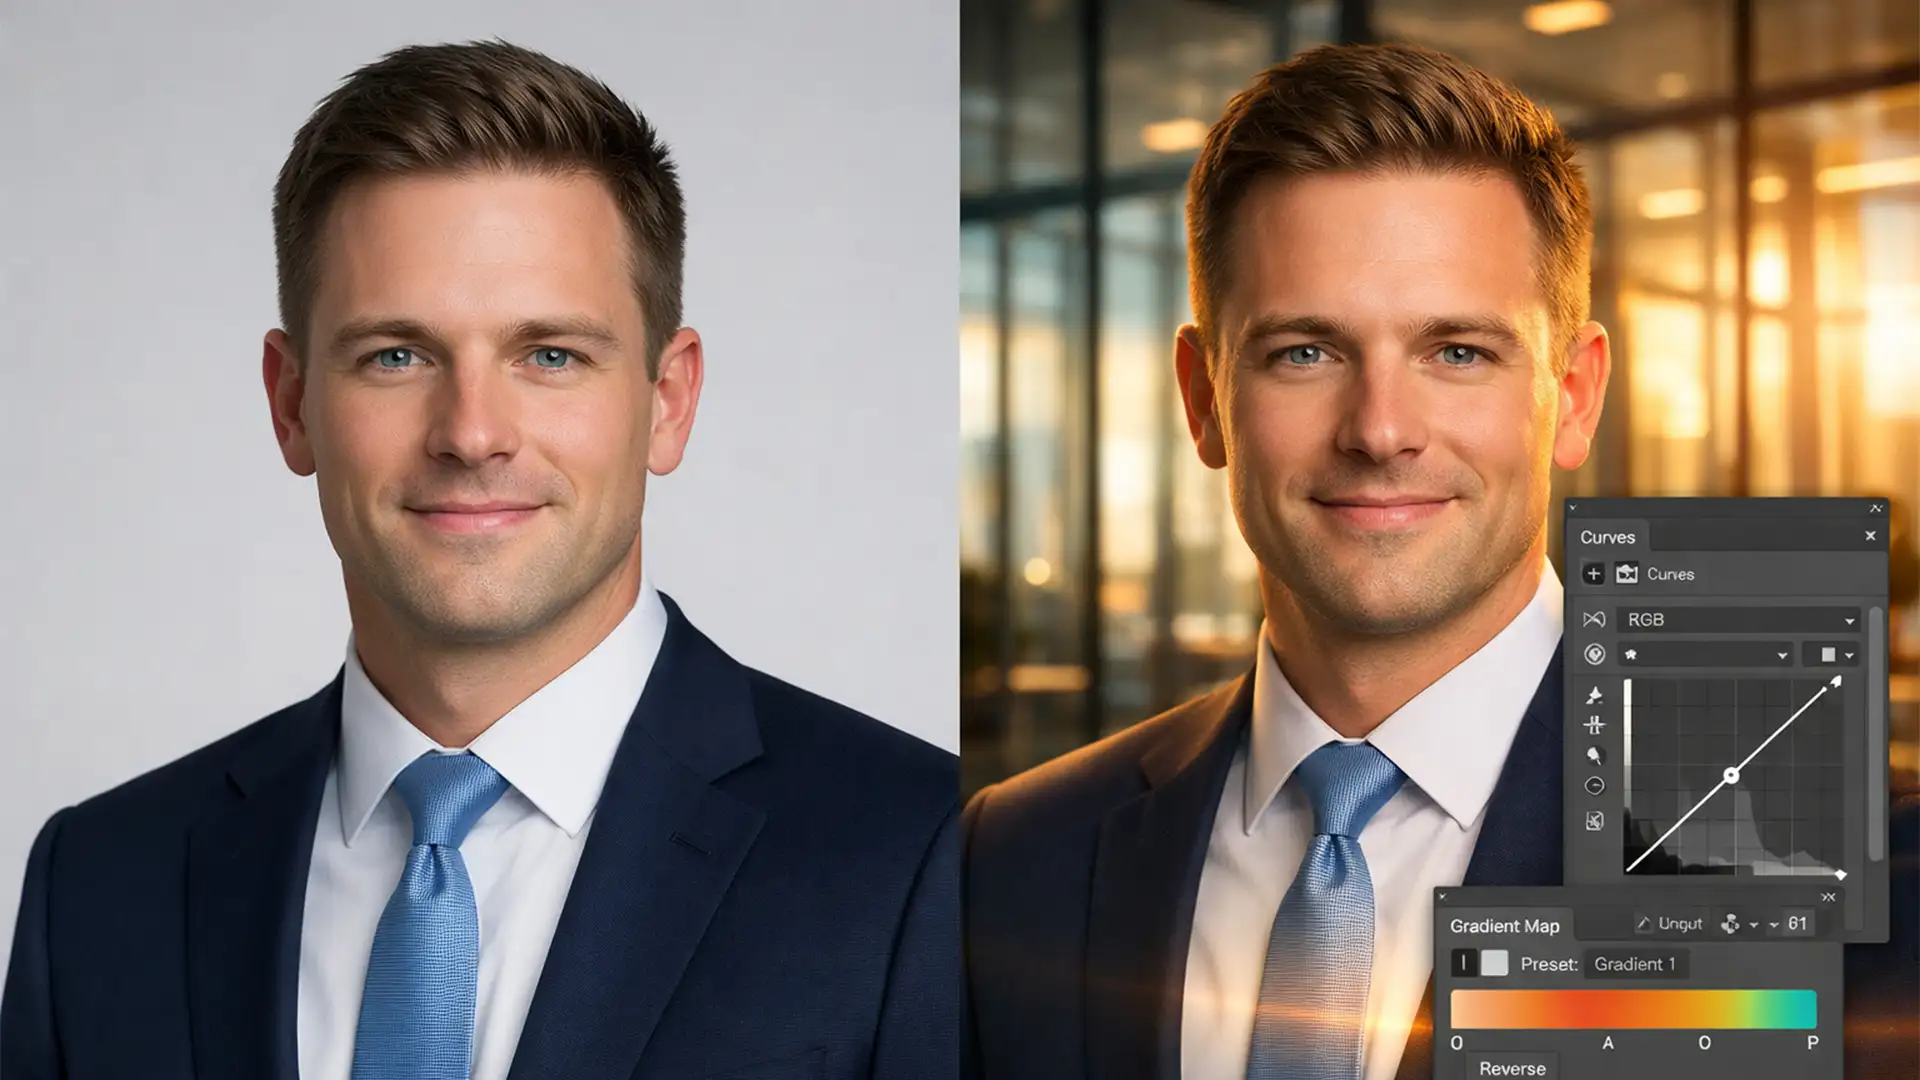
Step 3: Wardrobe and Background Upgrades with Generative Fill
A great expression won’t save a headshot if you are wearing a wrinkled hoodie in your home office. Photoshop’s Generative Fill is the perfect tool for replacing casual clothing with professional attire and extending the background to fit LinkedIn’s ideal aspect ratio.
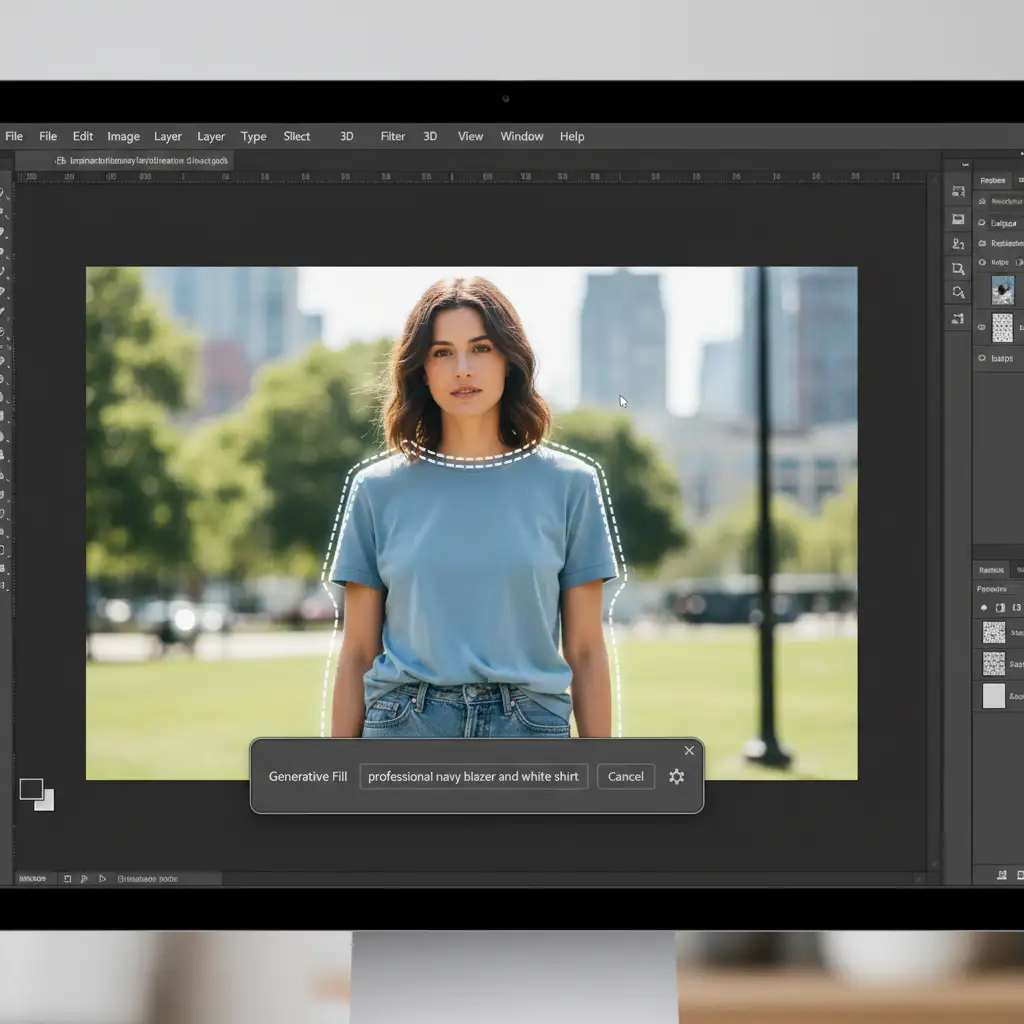
- Select the Lasso tool and draw a loose selection around your clothing, ensuring you overlap slightly with your neck.
- The contextual task bar will appear. Click Generative Fill.
- Type a descriptive prompt, such as “Professional navy blue suit jacket with a crisp white dress shirt.”
- Click Generate and cycle through the variations until you find a natural fit. You can use the same technique to replace a messy room with a clean, blurred office background.
Step 4: Technical Deep-Dive – Sharpening and Export Optimization
To ensure your new headshot pops on LinkedIn, we need to artificially inject crispness and lock in the color profile.
- Multi-pass Sharpening: Duplicate your merged, retouched image. Go to Filter > Other > High Pass and set the radius to 2.5 pixels. Change this layer’s blend mode to Soft Light. This creates micro-contrast, making eyes and hair look incredibly sharp.
- Resolution Check: Go to Image > Image Size. Uncheck Resample and type 300 into the Resolution box to ensure it is tagged as a 300dpi print-ready file.
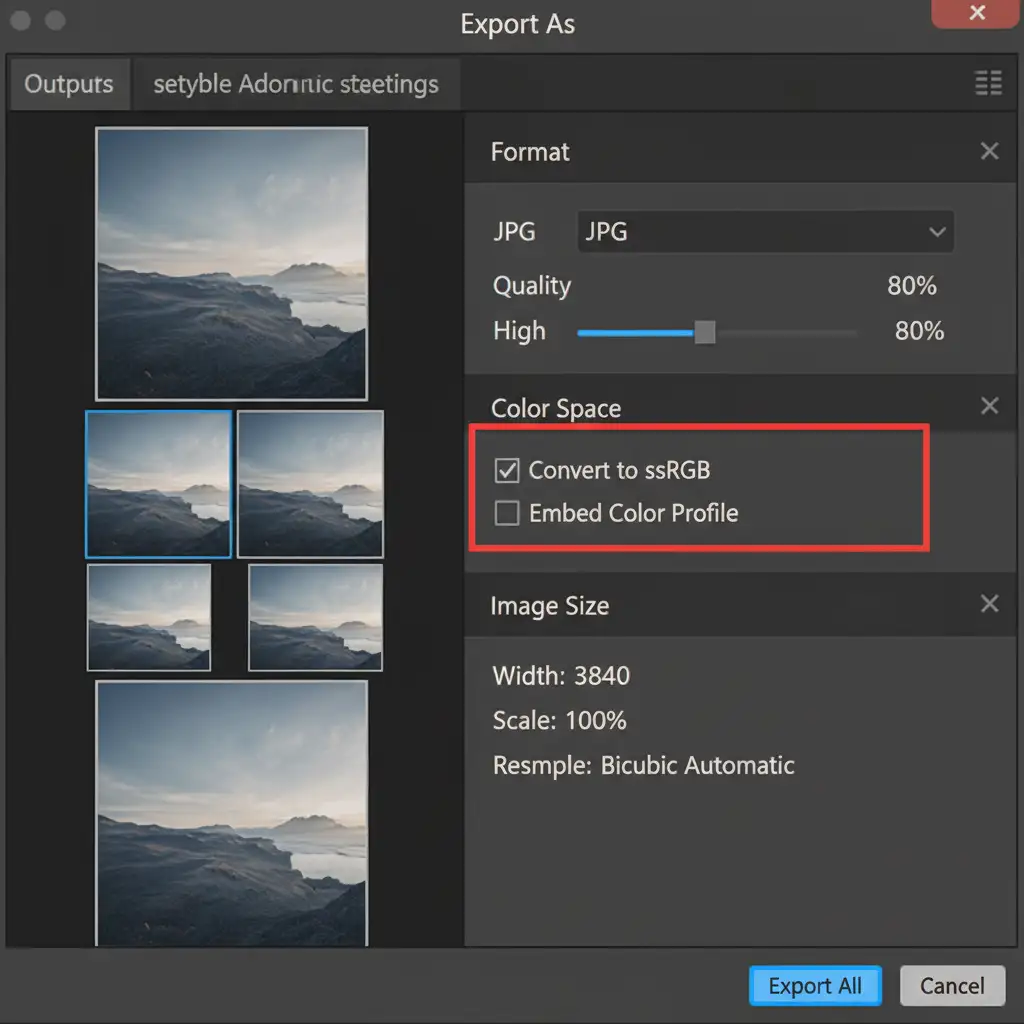
- Exporting for LinkedIn: Go to File > Export > Export As. Choose JPG format. Crucially, ensure “Convert to sRGB” and “Embed Color Profile” are checked. If you skip this, your colors will shift and look dull when uploaded to web browsers.
Skip the Hassle: Let Cloud Retouch Perfect Your Headshot
Extracting a professional headshot from a Zoom screenshot requires a deep understanding of AI upscaling, Neural Filters, and frequency separation. If pushed too far, AI tools can create artificial, plastic-looking textures that look uncanny on professional networks.
No time to master Photoshop v25.x? Let the experts handle it.
At Image Work India and Cloud Retouch, our professional photo editors specialize in rescuing low-resolution imagery. We will manually remove compression artifacts, apply flawless skin retouching, digitally tailor professional attire, and deliver a crisp, 300dpi sRGB headshot optimized perfectly for LinkedIn.
Struggling to get that perfect look from a webcam screenshot? Don’t settle for pixelated first impressions. Contact Cloud Retouch today to professionally upscale, retouch, and upgrade your headshot in under 24 hours.