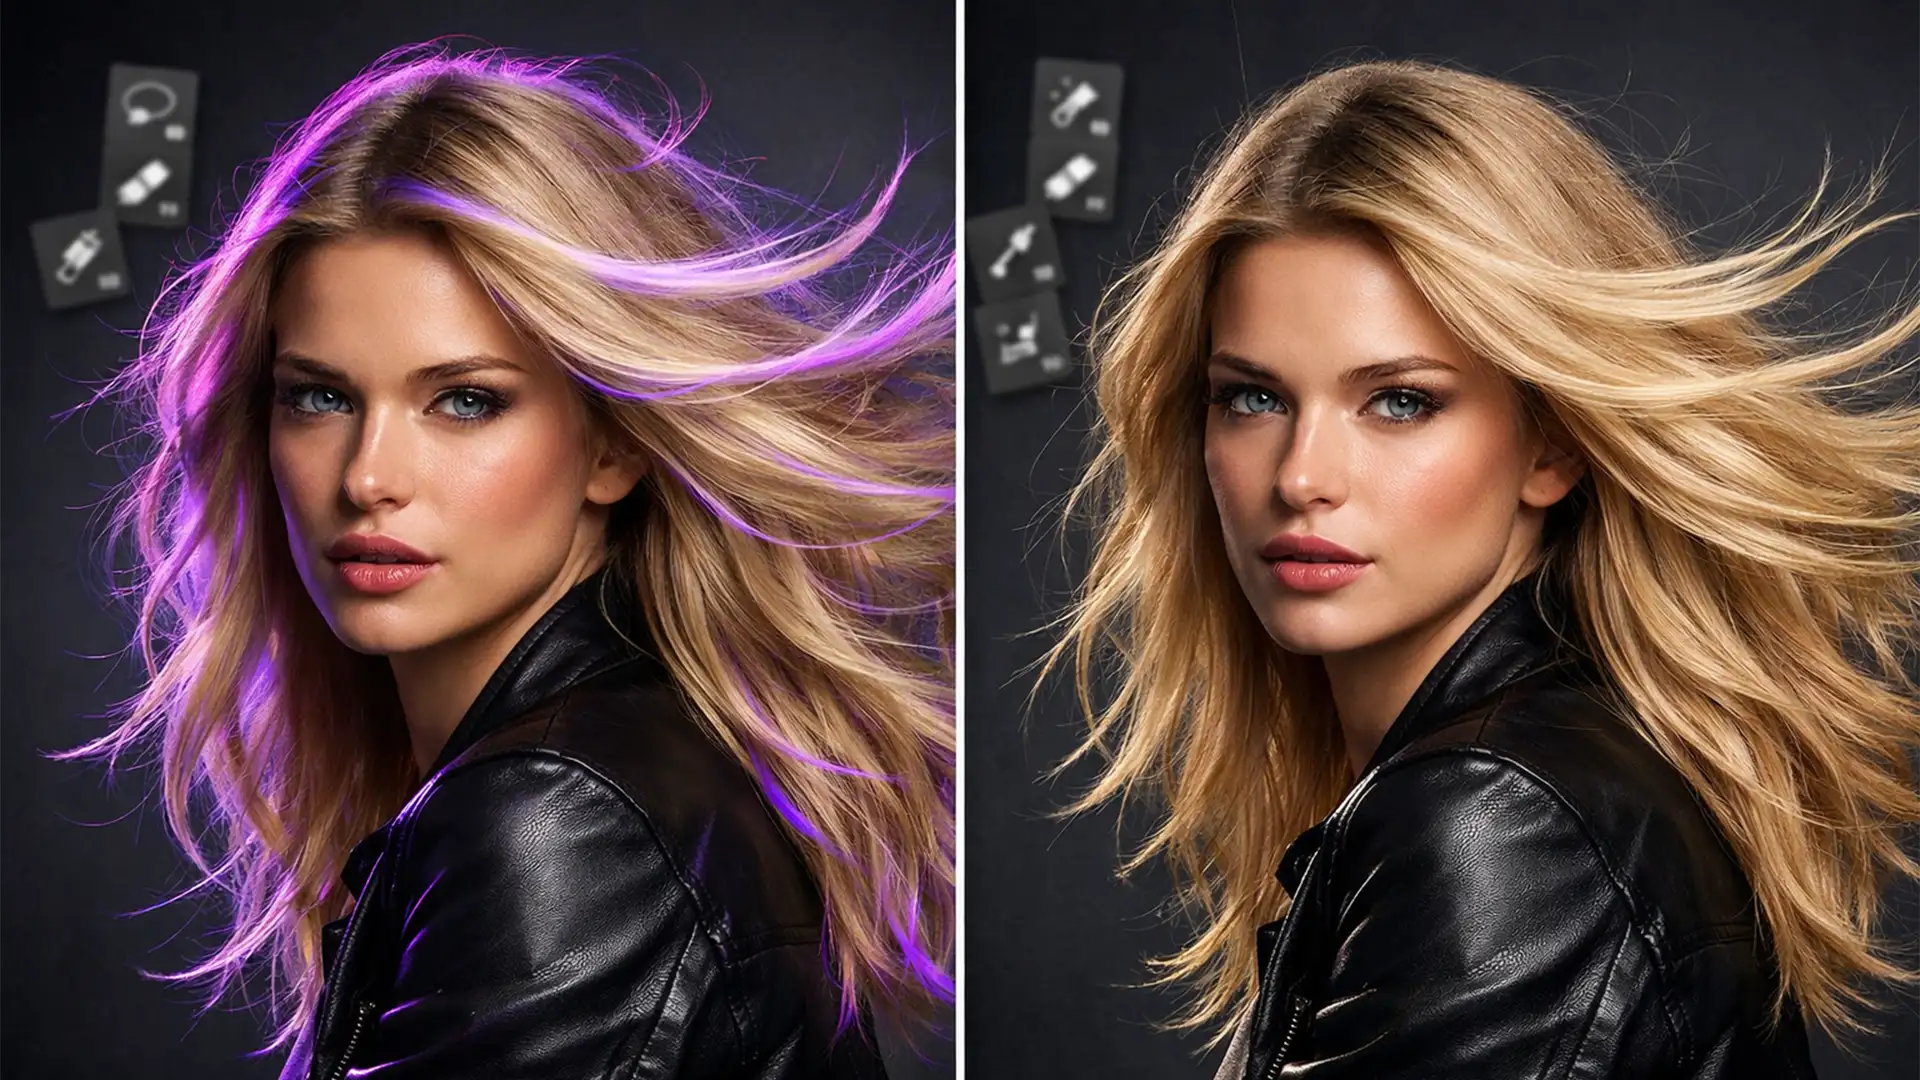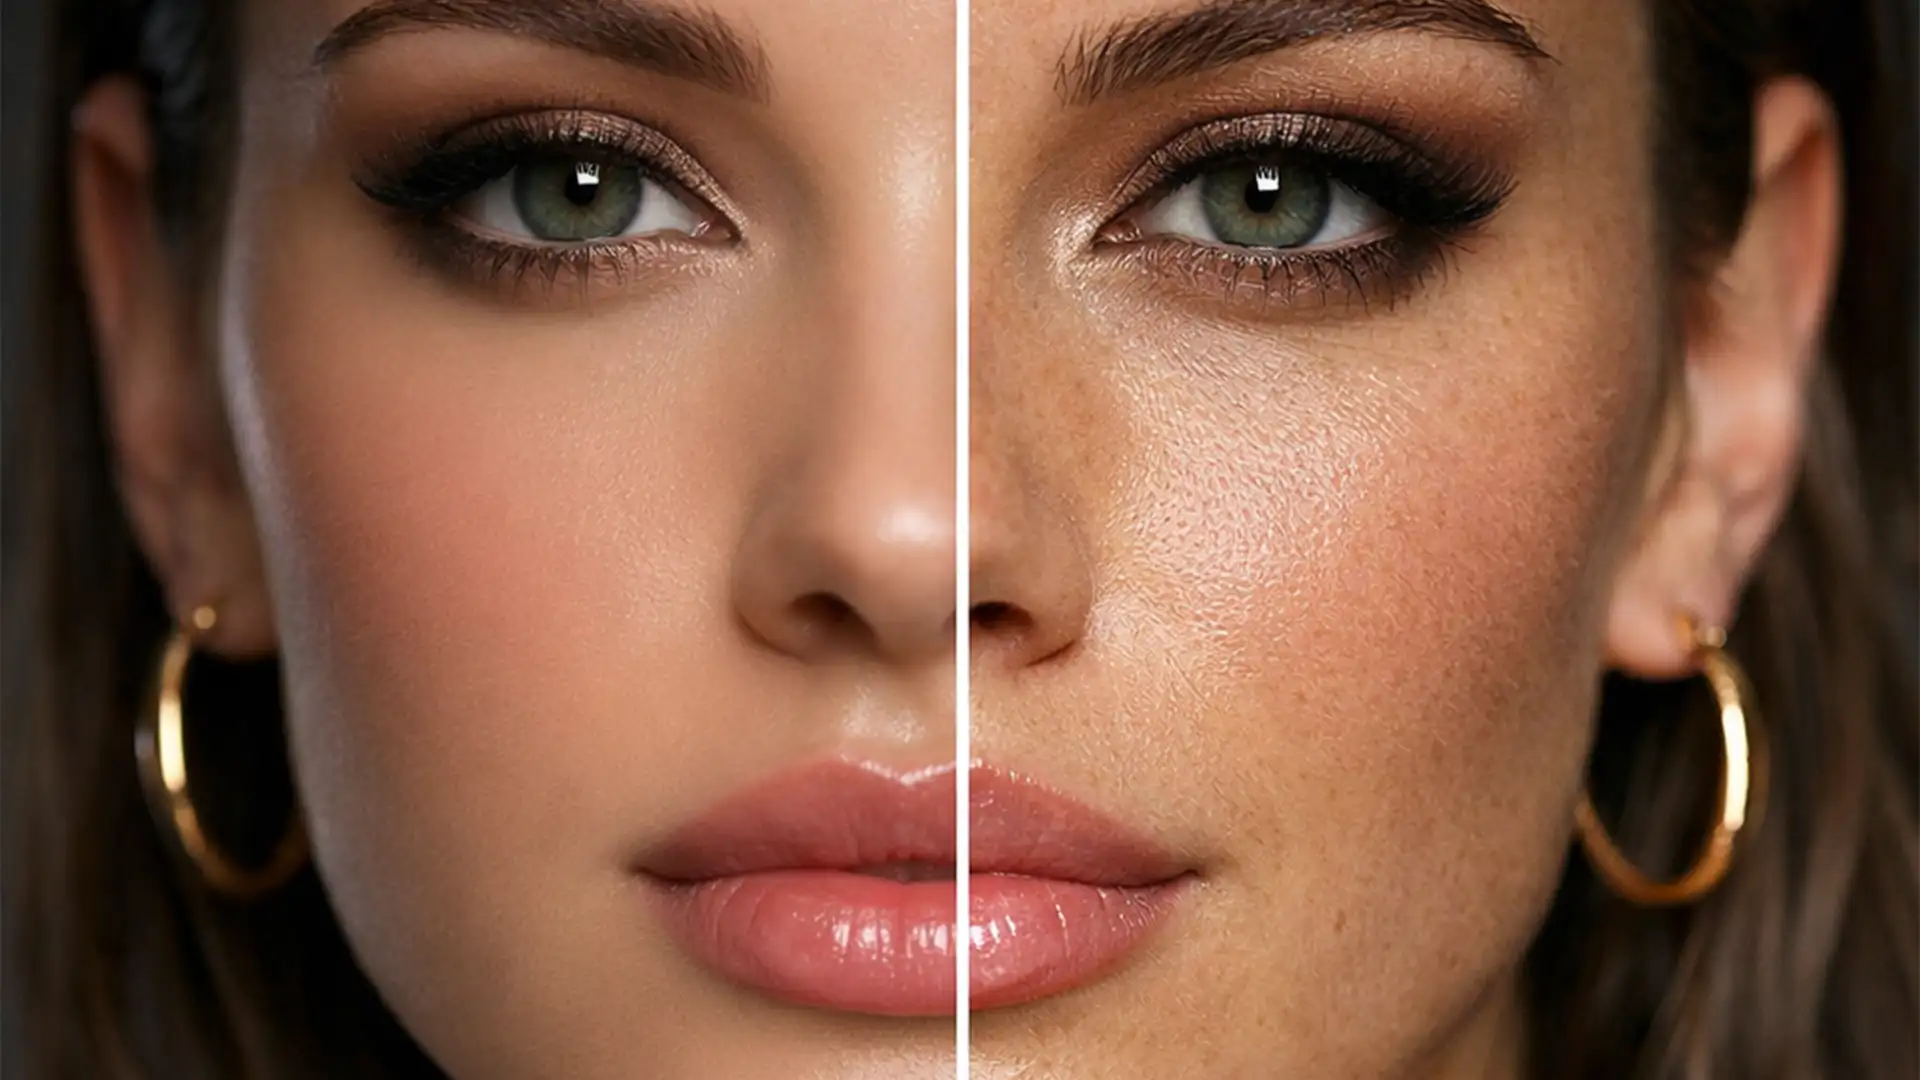
You’ve just run your portrait through the latest AI Skin Smoothing Neural Filters in Photoshop v25, Evoto, or Luminar Neo. The blemishes are gone, but so is everything else. You are left with a subject that looks more like a plastic mannequin than a human being. Aggressive AI retouching algorithms routinely destroy high-frequency detail, averaging out pixel luminosity and completely obliterating the natural epidermis layer. If you are struggling with this loss of micro-contrast, you aren’t alone. In this guide, we will show you exactly how to rebuild natural skin topology and begin restoring skin pores after AI smoothing.
Why AI Skin Smoothing Destroys Natural Texture
Modern AI editing tools are incredibly efficient at mapping facial planes and removing blemishes. However, algorithms often struggle to differentiate between a localized flaw (like a pimple) and global skin texture (pores). By averaging the RGB values to create a flawless transition of light and shadow, the software effectively flattens the micro-contrast that gives skin its realistic, three-dimensional feel.
The technical challenge for professional retouchers is regenerating or grafting this high-frequency data back onto the image without altering the underlying skin tones and volume established by the AI.

Method 1: The Quick Fix Using a High Pass Overlay
When your original, unedited photo still has great texture hiding underneath the blemishes, you can easily rescue those pores and overlay them onto your AI-smoothed result. This is the fastest method for restoring skin pores after AI smoothing.
Step-by-Step High Pass Recovery
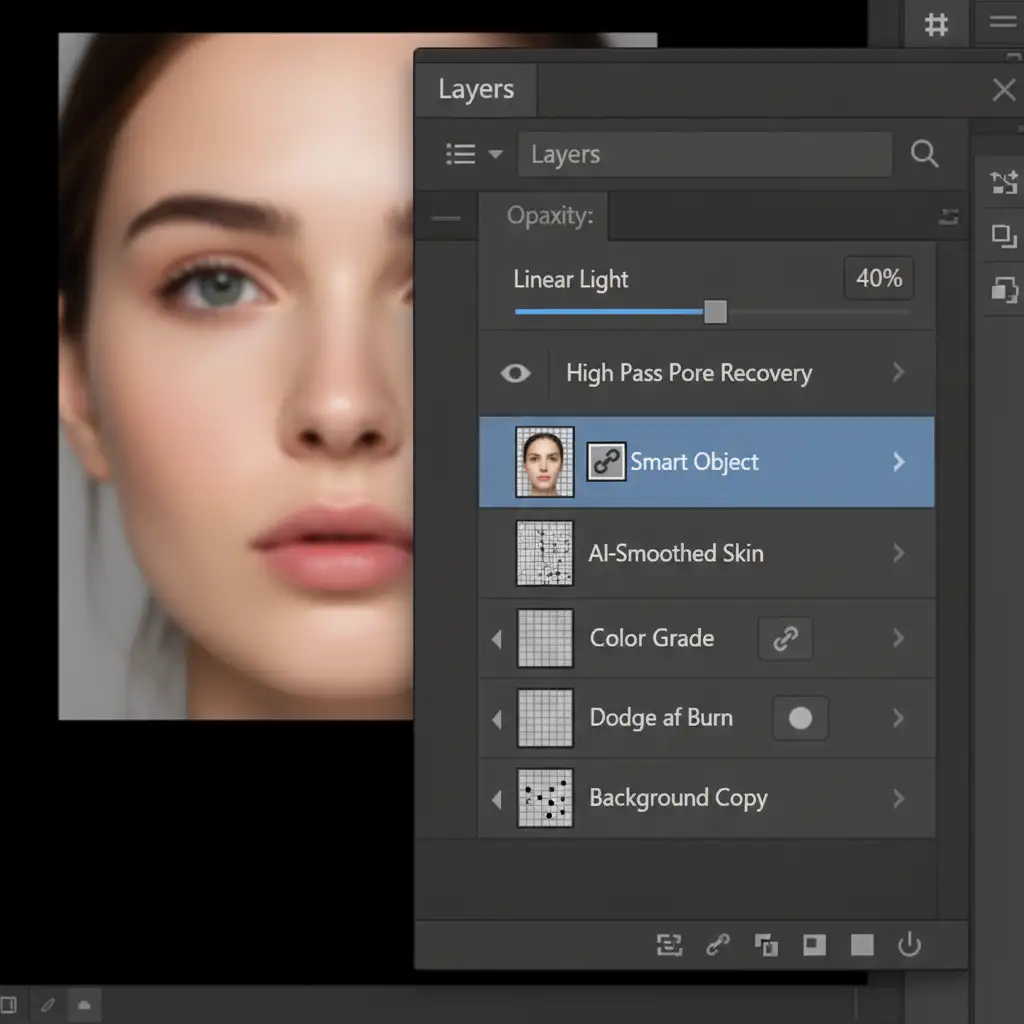
- Duplicate the Original: Take your original, unedited image layer and duplicate it.
- Move to Top: Drag this duplicated layer to the very top of your layer stack, resting directly above your AI-smoothed layers.
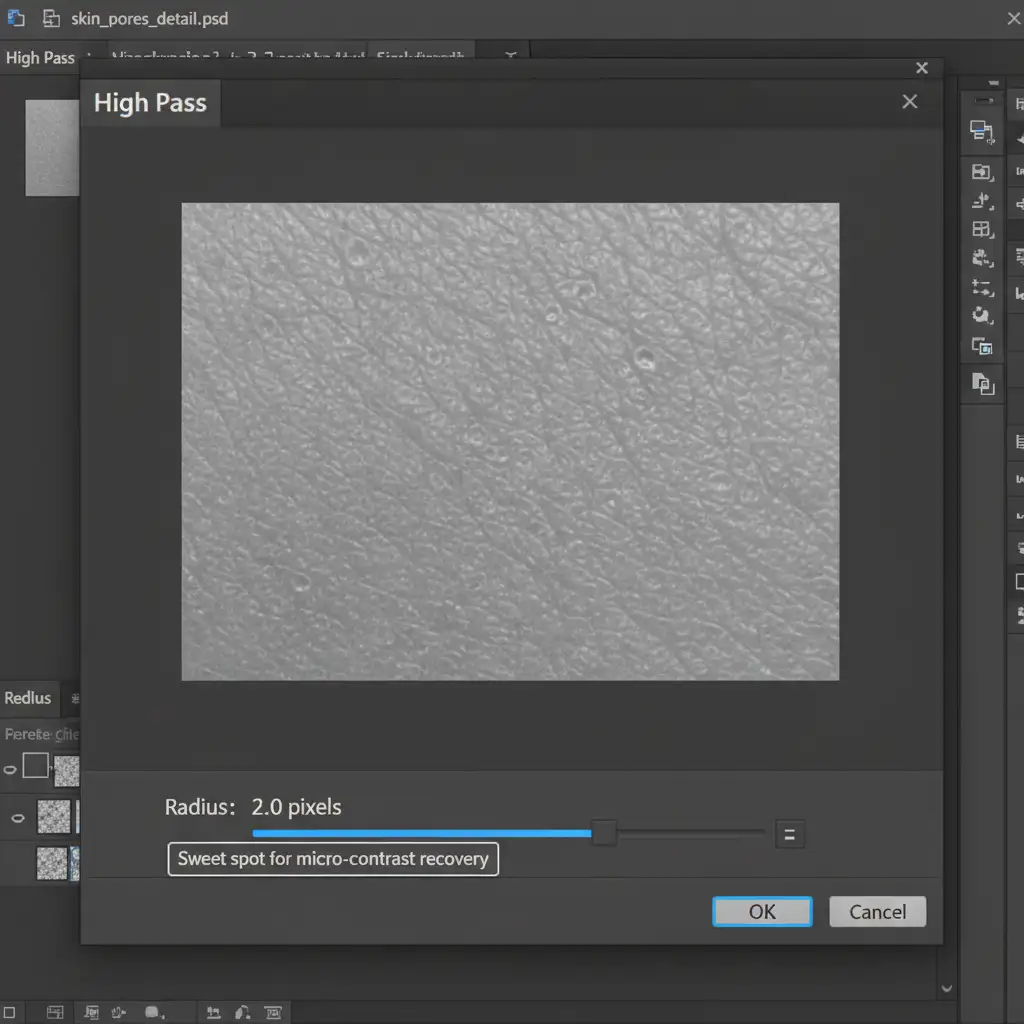
- Apply the Filter: Navigate to Filter > Other > High Pass.
- Set the Radius: Adjust the radius to isolate just the pores. The sweet spot is typically between 1.5px and 2.5px. Anything higher will introduce unwanted tonal shifts and bring back the blemishes you just removed.
- Blend Mode Adjustment: Change the layer blend mode to Linear Light (for a sharper effect) or Overlay (for a softer effect).
- Dial in Opacity: Drop the layer opacity to 30–50% to softly blend the original pores back into the skin.
Method 2: The Pro Workaround via Texture Grafting
Sometimes, the original image is too heavily damaged by acne or poor lighting, making the High Pass method unusable. In these cases, professional retouchers utilize Frequency Separation for texture grafting.
By separating the image into low-frequency (color and tone) and high-frequency (texture) layers, you can borrow healthy pores from one area of the face and graft them onto the overly smoothed “plastic” areas.
How to Graft Texture
Once your Frequency Separation action is run:
- Select your high-frequency (texture) layer.
- Select the Clone Stamp tool.
- Crucial Step: Ensure the ‘Sample’ dropdown in the top toolbar is set to ‘Current Layer’. If you leave it on ‘Current & Below’, you will accidentally clone skin color and ruin the graft.
- Option/Alt-click a patch of healthy, finely-textured skin.
- Carefully paint this texture over the flat, AI-smoothed areas to rebuild the epidermis.
Method 3: Synthetic Pore Generation (The Technical Deep-Dive)
What happens when the original texture is entirely lost, and there is no healthy skin to graft from? You must generate synthetic pores from scratch. While this sounds intimidating, combining Monochromatic Noise with an Emboss filter creates highly realistic results.
Step 1: Base Layer Creation
Create a new empty layer at the top of your stack. Go to Edit > Fill and select 50% Gray. Change this layer’s blend mode to Overlay. Because Overlay ignores 50% gray, the layer will appear invisible.
Step 2: Add Noise and Emboss
Next, navigate to Filter > Noise > Add Noise. Set the Amount to 2-3%, select Gaussian, and ensure Monochromatic is checked to avoid introducing color artifacts.
To turn this flat noise into realistic 3D pores, go to Filter > Stylize > Emboss. Use the following settings:
- Angle: 135 degrees (matches standard portrait lighting)
- Height: 1px
- Amount: 50%

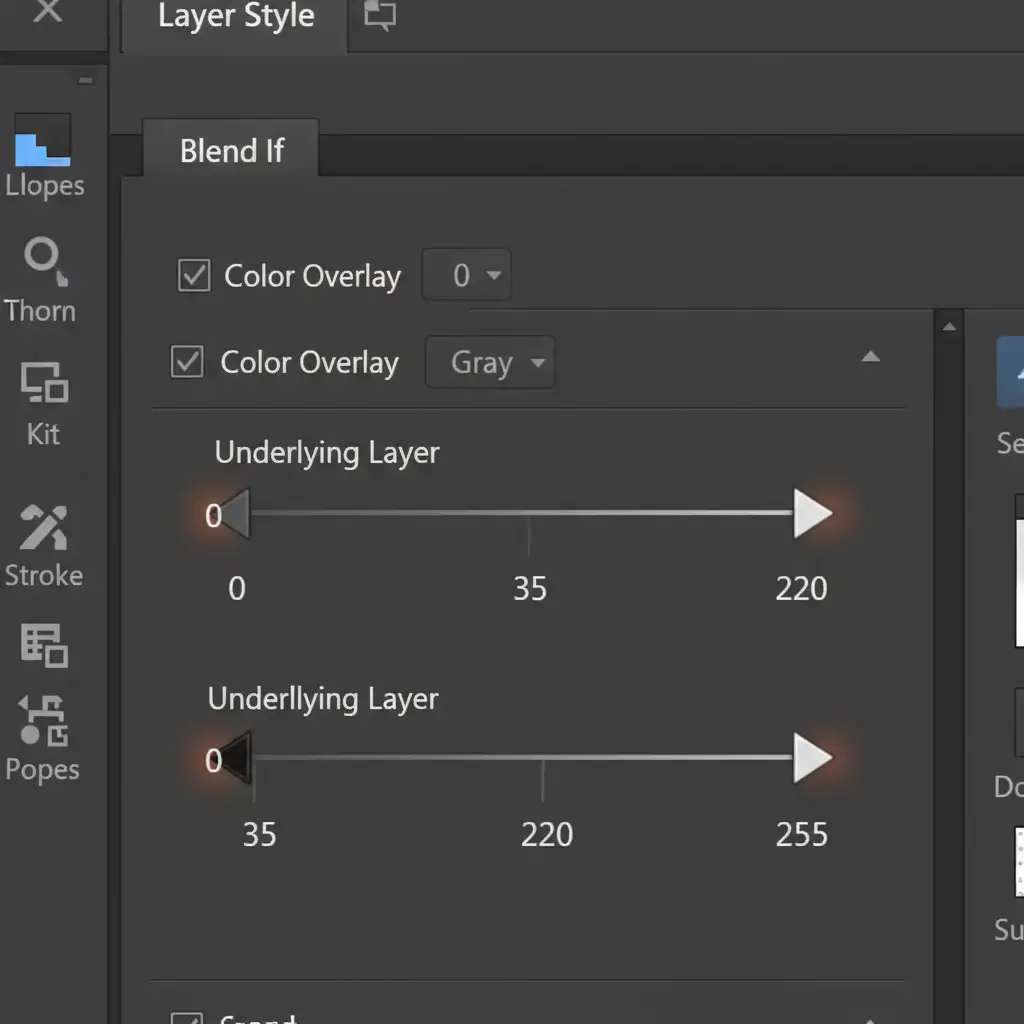
Step 3: Protecting Highlights and Shadows with Blend If
Real skin pores are highly visible in the midtones but largely disappear in pure highlights (due to light blowout) and deep shadows (due to lack of illumination). If your synthetic pores cover the entire image evenly, it will look like a digital grain overlay rather than real skin.
Double-click your gray layer to open the Layer Style dialog. Look at the ‘Blend If’ Underlying Layer slider at the bottom.
- Hold Alt/Option and click the black triangle on the left to split it. Drag the right half toward the center to smoothly fade the pores out of the deep shadows.
- Hold Alt/Option and click the white triangle on the right to split it. Drag the left half toward the center to smoothly fade the pores out of the bright highlights.
The Importance of Non-Destructive Editing
Regardless of which method you choose, always prioritize non-destructive editing. Converting your AI-smoothed layers into Smart Objects before applying filters ensures you can always go back and tweak the radius of your High Pass filter or the intensity of your Neural Filters without degrading the core image data.
Skip the Plastic Look: Elevate Your Portraits with Image Work India
Restoring skin pores after AI smoothing requires a keen eye for detail, an understanding of micro-contrast, and advanced technical proficiency in Photoshop. While the methods above will rescue your images from the dreaded “plastic look,” achieving flawless, commercial-grade skin takes significant time and expertise.
Struggling to get natural-looking skin in your high-end portraits? Skip the frustration and let the professionals handle it. Hire the expert retouchers at Image Work India and Cloud Retouch for meticulous, pixel-perfect, and naturally textured commercial retouching. Whether you need frequency separation, complex texture grafting, or bulk portrait processing, our team delivers magazine-quality results that retain the authentic beauty of your subjects. Contact us today to elevate your portfolio.