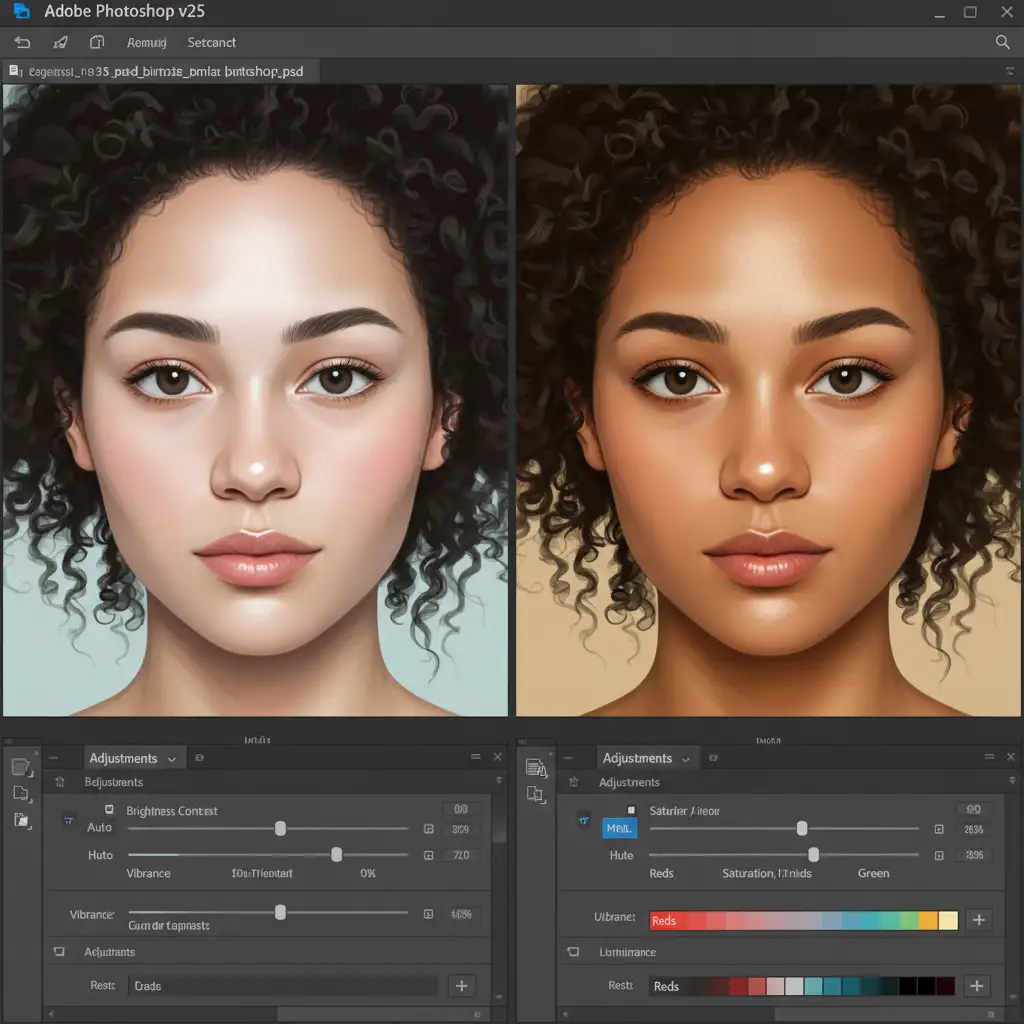
If you are relying on Photoshop’s auto-adjustments for diverse portraits, you are likely running into a major issue: whitewashing. In recent versions of Adobe Photoshop (v24.x – v25.x+), AI-based quick actions default to algorithms trained heavily on Caucasian skin. The result? Frustrating ashy undertones, flattened depth, and a complete loss of the subject’s natural glow.
Standard dodge and burn techniques or generic brightness curves often strip the rich saturation necessary for authentic representation. To achieve natural retouching for biracial skin tones, you must manage complex golden, red, and olive undertones without destroying the skin’s inherent texture.
Here is the technical guide to fixing whitewashed edits and mastering melanin preservation in Photoshop.
The Problem with Auto-Adjustments on Biracial Skin Tones
When editing biracial and POC (People of Color) skin tones, the primary technical pain point lies in managing luminance without shifting the hue. AI auto-enhancements tend to over-lift exposure and shadows. This introduces excessive cyan and blue into the midtones, creating an unnatural, gray, or “ashy” effect.
Furthermore, aggressive global adjustments destroy the high-frequency texture (pores and fine lines) while flattening the low-frequency color (underlying skin tones). True color grading for diverse skin requires a targeted approach.
3 Methods for Natural Retouching for Biracial Skin Tones
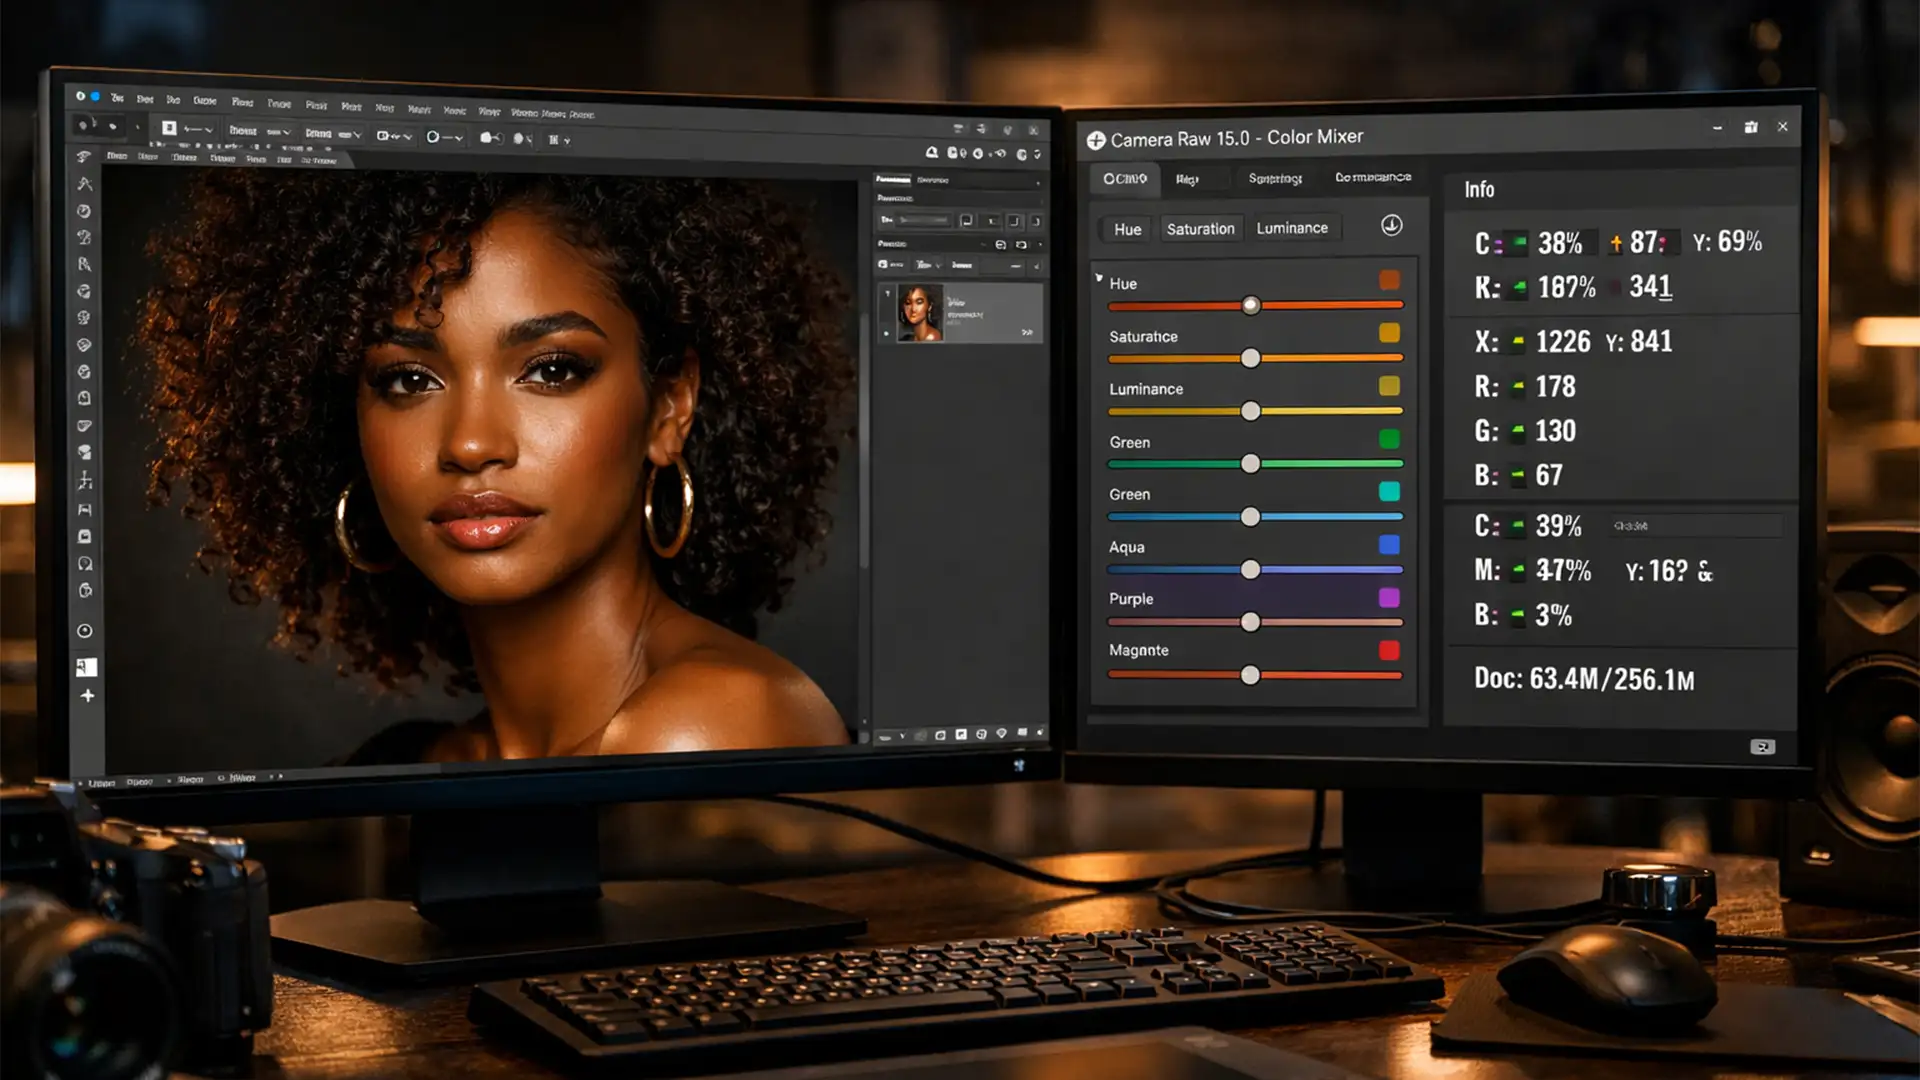
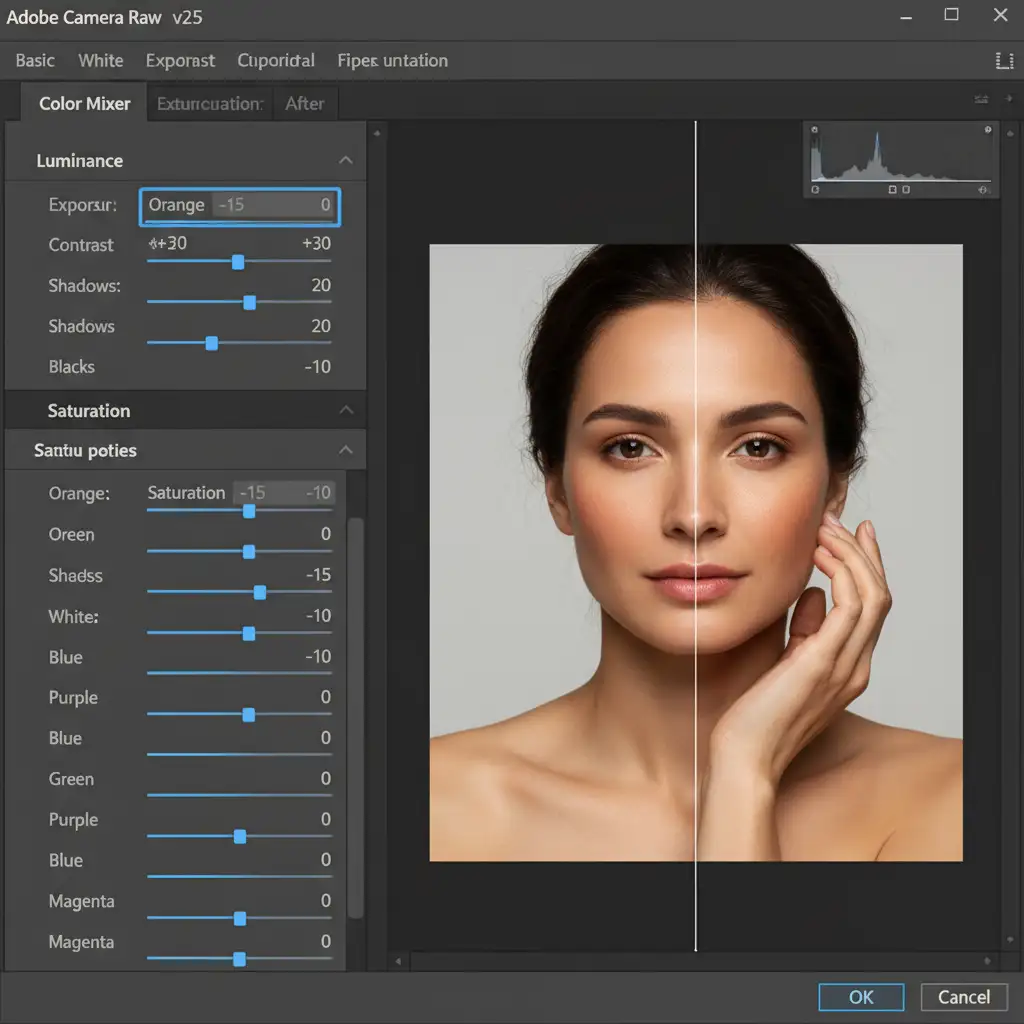
Method 1: The Quick Fix – Camera Raw Color Mixer
Instead of adjusting your overall exposure—which often leads to the dreaded whitewashed look—you need to isolate the specific color ranges that dictate skin tone luminance.
- Open your image or layer in the Camera Raw Filter (Shift + Ctrl + A).
- Navigate to the Color Mixer tab.
- Select Luminance. Target the Orange and Yellow sliders.
- Gently adjust these sliders to correct specific skin tone shifts. By avoiding the global exposure slider, you brighten the skin naturally without affecting the contrast of the entire image.
Method 2: The Pro Workaround – Frequency Separation with Melanin Preservation
Frequency separation is the industry standard for high-end beauty retouching, but it must be adapted for melanin preservation.
- Duplicate your background layer twice. Name the top layer “High” (Texture) and the bottom layer “Low” (Color).
- Apply a Gaussian Blur to the Low layer until the fine details disappear. Apply an Apply Image adjustment to the High layer (Subtract blending mode) to isolate the texture.
- The Crucial Step: Only use the Healing Brush on the high-frequency texture layer for distinct blemishes.
- On the low-frequency color layer, select the Mixer Brush or a standard soft Brush tool with a very low flow (1-2%). Sample adjacent skin colors to gently even out tonal transitions.
By working this way, you avoid the need for heavy luminance masking or global brightening curves that strip away the skin’s natural depth.
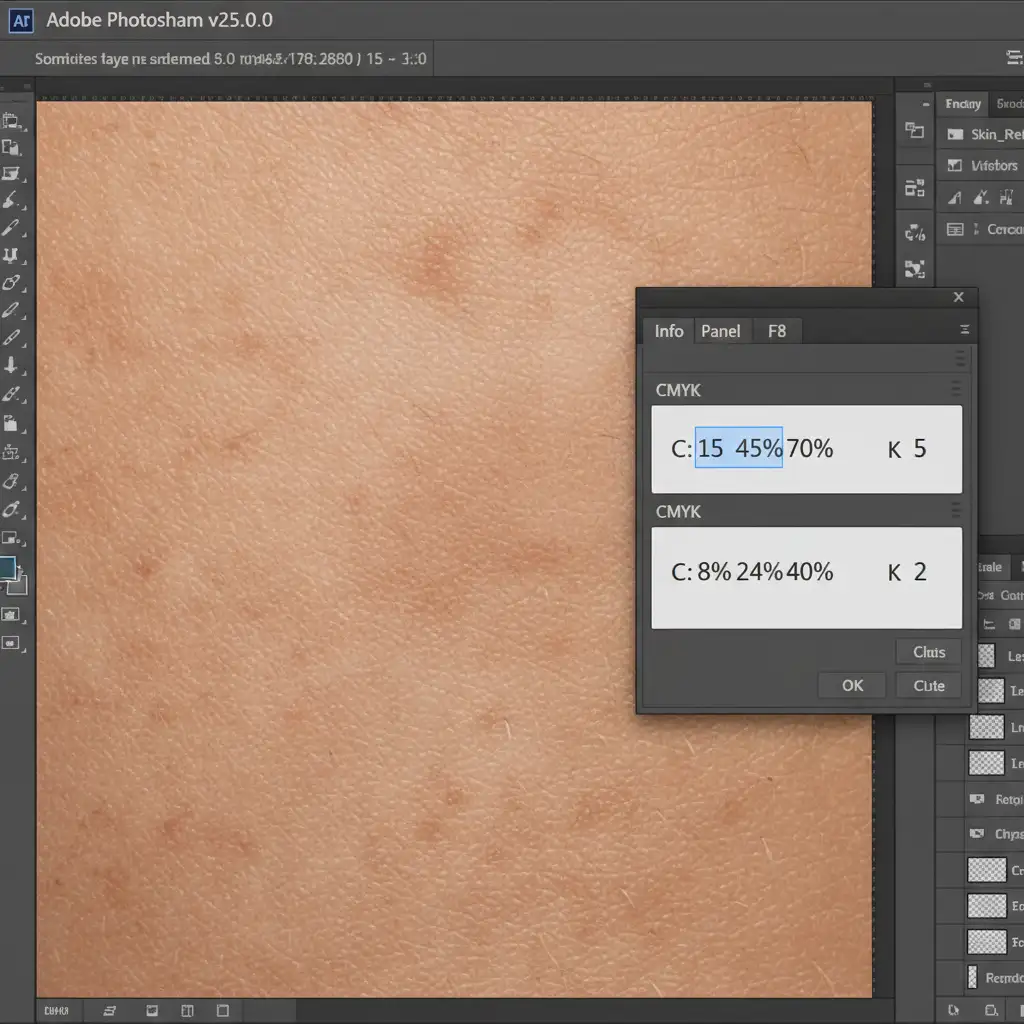
Method 3: The Technical Deep-Dive – CMYK Skin Tone Verification
Relying purely on your monitor calibration can be risky. The most mathematically accurate way to ensure natural retouching for biracial skin tones is by validating the CMYK color model values.
- Open the Info Panel (F8).
- Click the eyedropper icon within the panel and set the secondary readout to CMYK.
- Hover your cursor over a midtone area of the subject’s skin.
The Golden Rules for Biracial Skin Tones:
- Yellow must always be higher than Magenta.
- Cyan should be roughly 1/3 to 1/2 of the Magenta value.
- If Cyan is too high: The skin will look ashy and gray.
- If Cyan is too low: The skin will look overly red or sunburned.
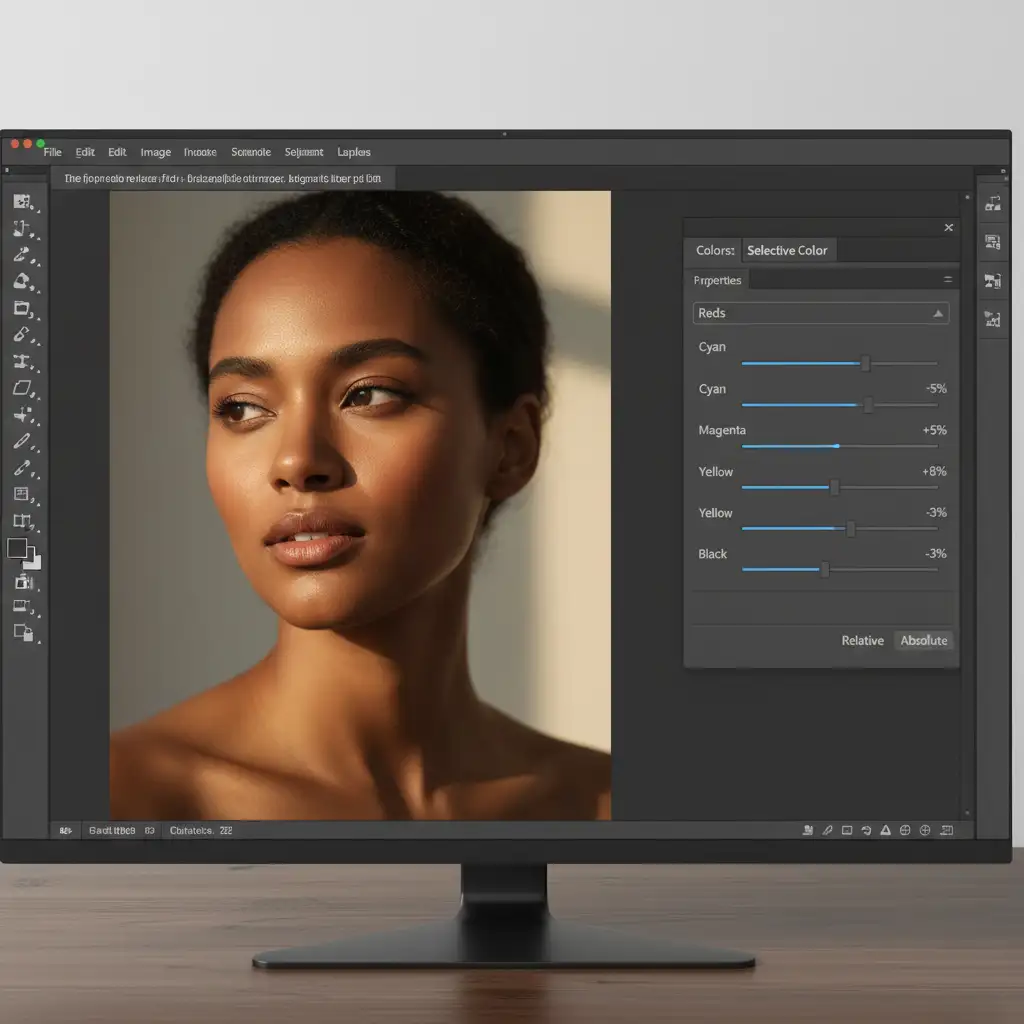
Fixing CMYK Imbalances with Selective Color
If your CMYK readouts are off, do not reach for the Hue/Saturation slider. Instead, use a Selective Color adjustment layer.
Target the Reds and Yellows in the dropdown menu. If your Cyan readout was too high (causing ashy undertones), gently pull down the Cyan slider within the Reds channel until your Info Panel numbers align with the golden ratio above.
Video Tutorial: Mastering Skin Tone Accuracy
Watch how these technical adjustments come together in a professional retouching workflow to preserve identity and skin texture.
Scale Your Portrait Retouching with Image Work India & Cloud Retouch
Mastering natural retouching for biracial skin tones requires a deep understanding of color theory, precise CMYK validation, and meticulous frequency separation. Getting it wrong doesn’t just result in a bad photo—it results in a loss of the subject’s cultural identity.
If your studio is processing high volumes of diverse headshots, fashion portraits, or commercial campaigns, manual color grading can severely bottleneck your workflow.
Image Work India and Cloud Retouch specialize in culturally aware, high-end photo finishing. Our expert retouchers understand the nuances of melanin preservation, ensuring every subject looks authentic, radiant, and true to life.
Need bulk retouching that respects skin tone authenticity? Stop relying on generic AI presets. Contact Image Work India and Cloud Retouch today to outsource your diverse portrait batches for flawless, professional results.