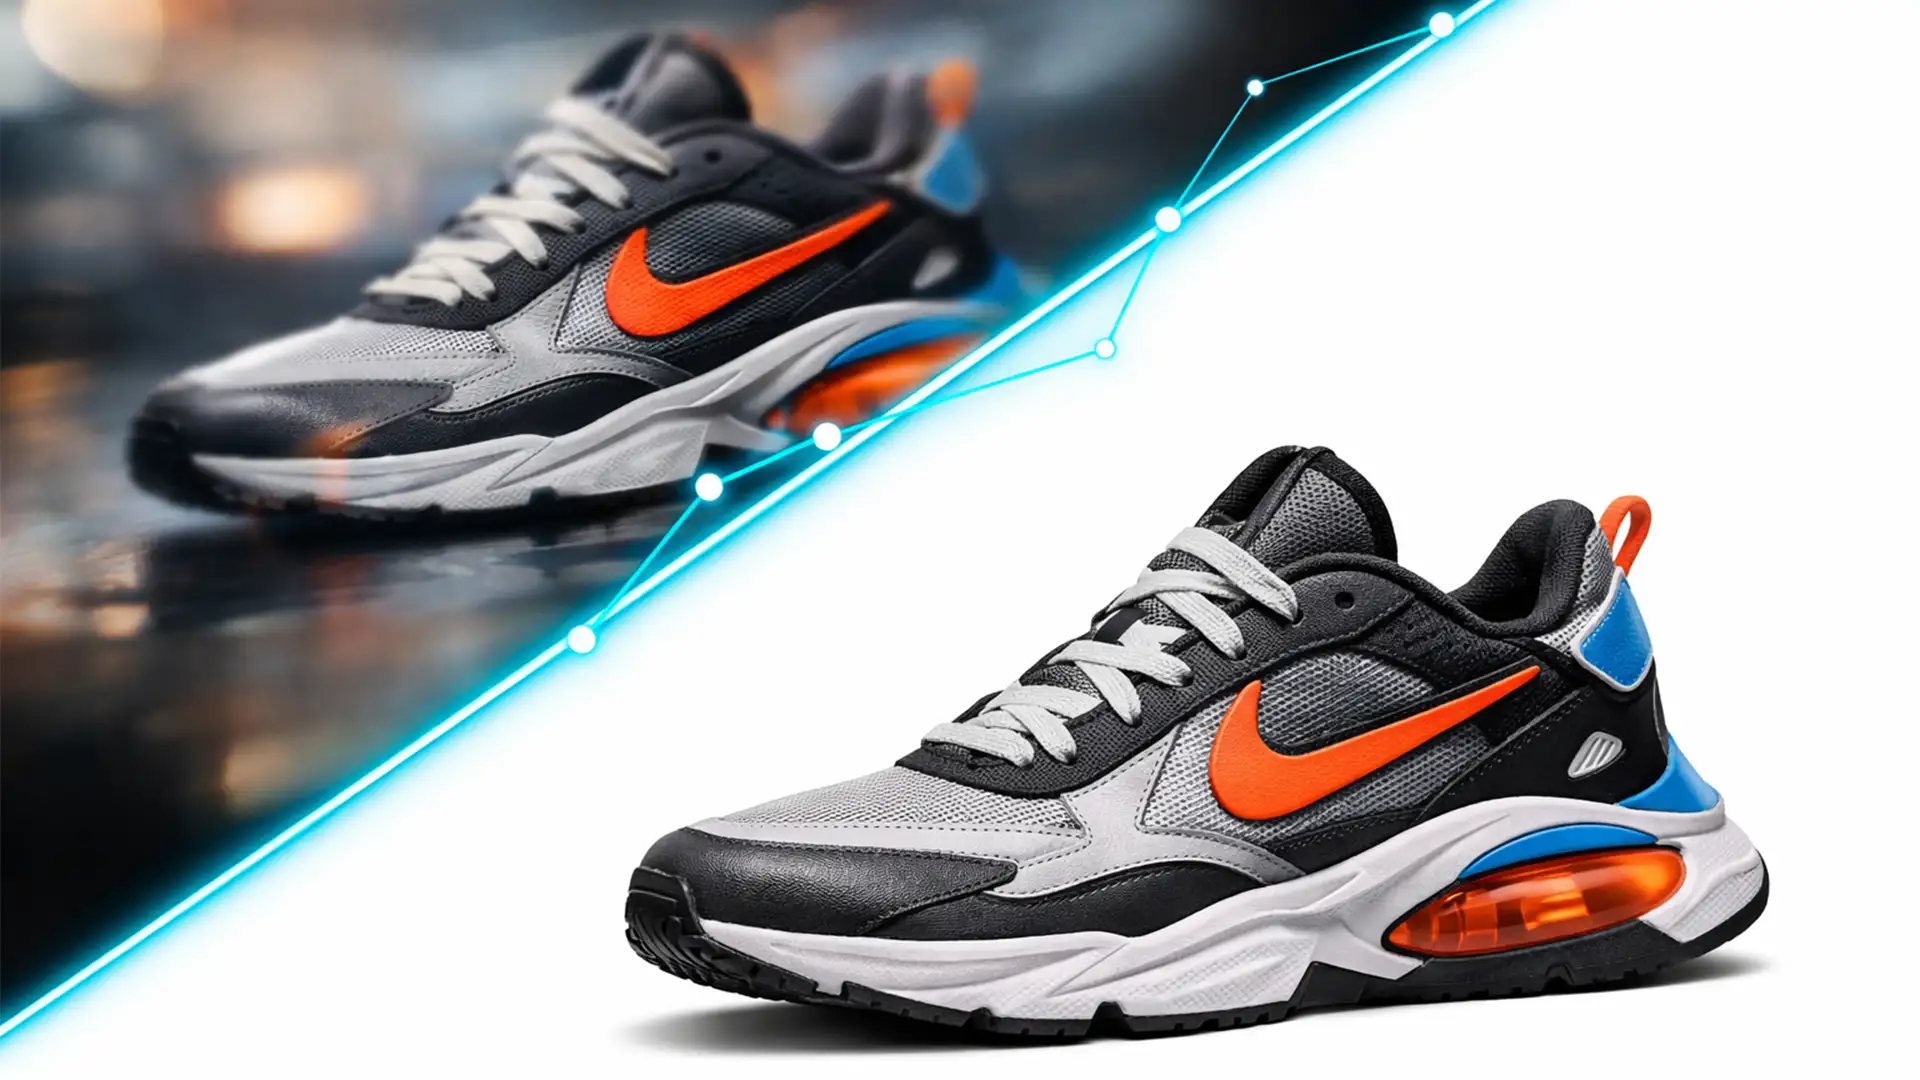
You just generated a breathtaking product concept using Midjourney v6. The lighting is dramatic, the textures look rich, and the composition is flawless. But the moment you zoom in to prepare the image for your e-commerce store, the illusion shatters.
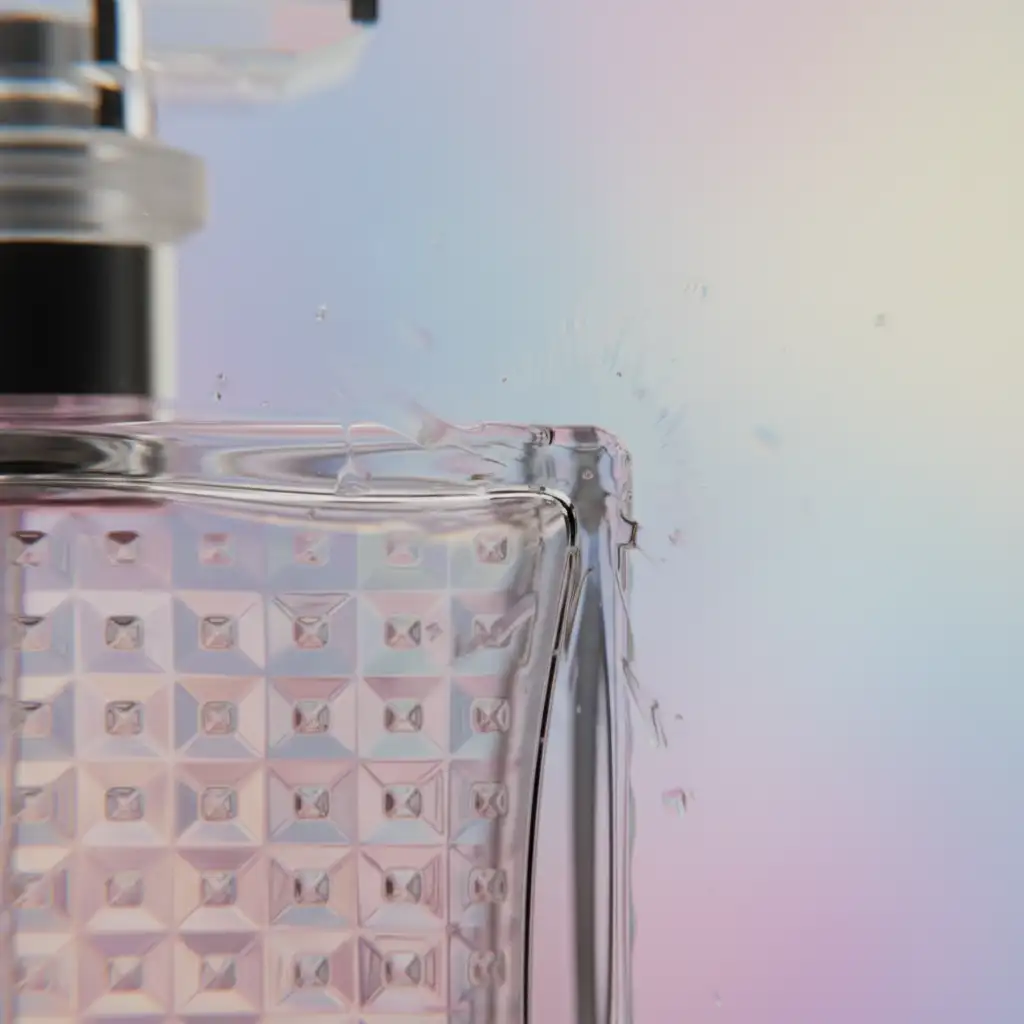
The background is fused to the product. The edges are blurry, bleeding into the shadows with unnatural ghosting.
If you upload this directly to your storefront, customers will immediately spot the fake. This is the core challenge of modern AI generation: the machines can dream up incredible concepts, but they lack the mathematical precision required for commercial silhouetting.
To make these images viable, top-tier brands are adopting a new standard. It requires mastering the clipping path for AI generated product photography to slice away the digital noise. Welcome to the 10% Rule.
The Core Problem: Why AI Product Photos Fail the Zoom Test
In 2024 and 2025, AI generators like Midjourney v6 and Stable Diffusion have revolutionized concept art. However, they process images as a holistic grid of pixels, not as distinct layered objects. Because the AI doesn’t inherently “know” where a product ends and a background begins, it creates hallucinated edges.
When you try to extract these products for a clean white background or a composite lifestyle shot, you are forced to deal with artificially blended pixel data.
Introducing the 10% Rule for E-commerce
The secret to a successful hybrid workflow is what we call the 10% Rule. It states that 90% of your final image is handled by the AI generator—the lighting, the reflections, the base geometry. But the final 10%—the critical, pixel-perfect definition—requires manual human intervention.
Without that final 10%, your product lacks the hard, authentic silhouette that consumers subconsciously associate with real photography.
Why Automated Photoshop Tools Fail on AI Images
You might think Photoshop v25.x’s automated tools can save you. Unfortunately, AI struggles to fix AI.
Tools like Select Subject or the Object Selection Tool rely on high edge contrast to detect boundaries. Because AI-generated images have melted, low-contrast boundaries, Photoshop’s automated tools frequently misinterpret the edges. They will either grab chunks of the hallucinated background or cut off vital parts of the product itself.
Step-by-Step Fixes: Perfecting AI Edges
To transform an AI concept into a commercially viable asset, you must manually define the reality of the object. Here are the three methods professionals use to rescue AI generated product photography.
Method A: The Quick Fix (Raster Masking)
If you are working with an AI image that has mostly clean edges and you are on a tight deadline, you can force automated tools to behave better.
- Open the image in Photoshop.
- Use the Object Selection Tool to generate a base selection.
- Open the Select and Mask workspace.
- Apply a slight Feather (0.5px) to soften the jagged automated edge.
- Apply a Shift Edge (-10%) to choke the selection inward, effectively cutting off the outermost layer of AI ghosting.
- Output to a Layer Mask.
Note: This method relies on raster masking and will still fail on highly complex or severely merged AI elements.
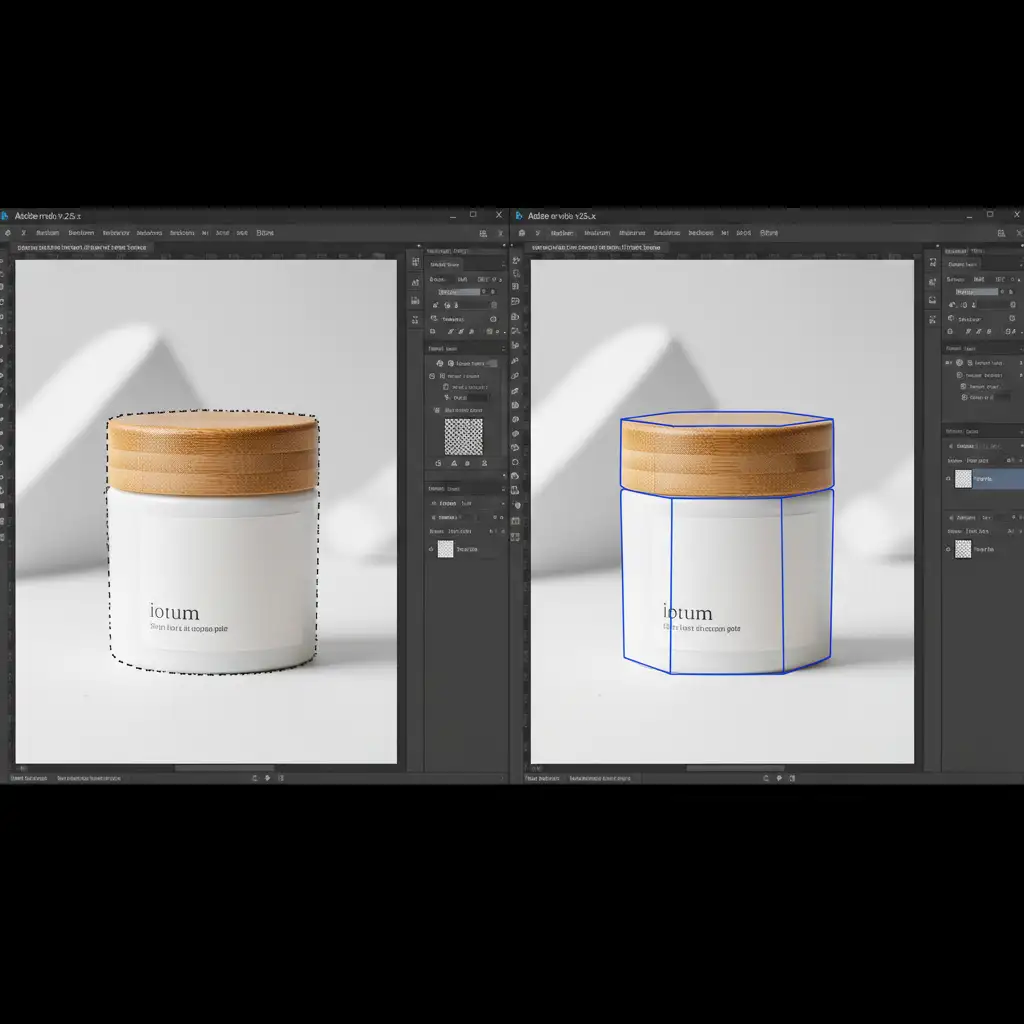
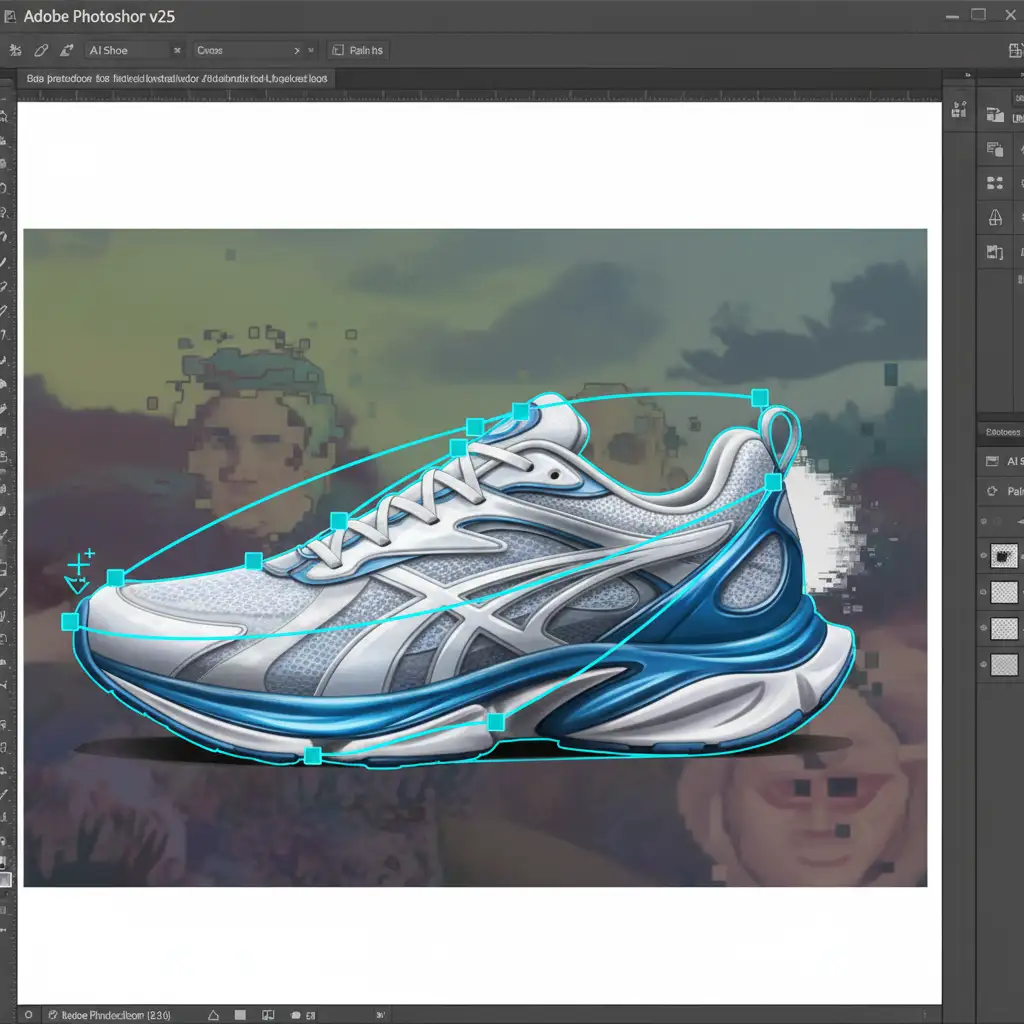
Method B: The Pro Workaround (Manual Vector Path)
This is the industry standard for the 10% Rule. By using a manual vector path, you bypass the confused pixel data entirely and dictate exactly where the product’s edge should be.
- Select the Pen Tool (P).
- Begin plotting bezier curves slightly inside the visual boundary of the product (about 1-2 pixels inward).
- Explicitly ignore the blurry AI halos. Use your human judgment to draw the hard, geometric silhouette that the product should have in reality.
- Close the path, right-click, and choose Make Selection (0px feather).
- Mask the product. You now have an authentically sharp edge.
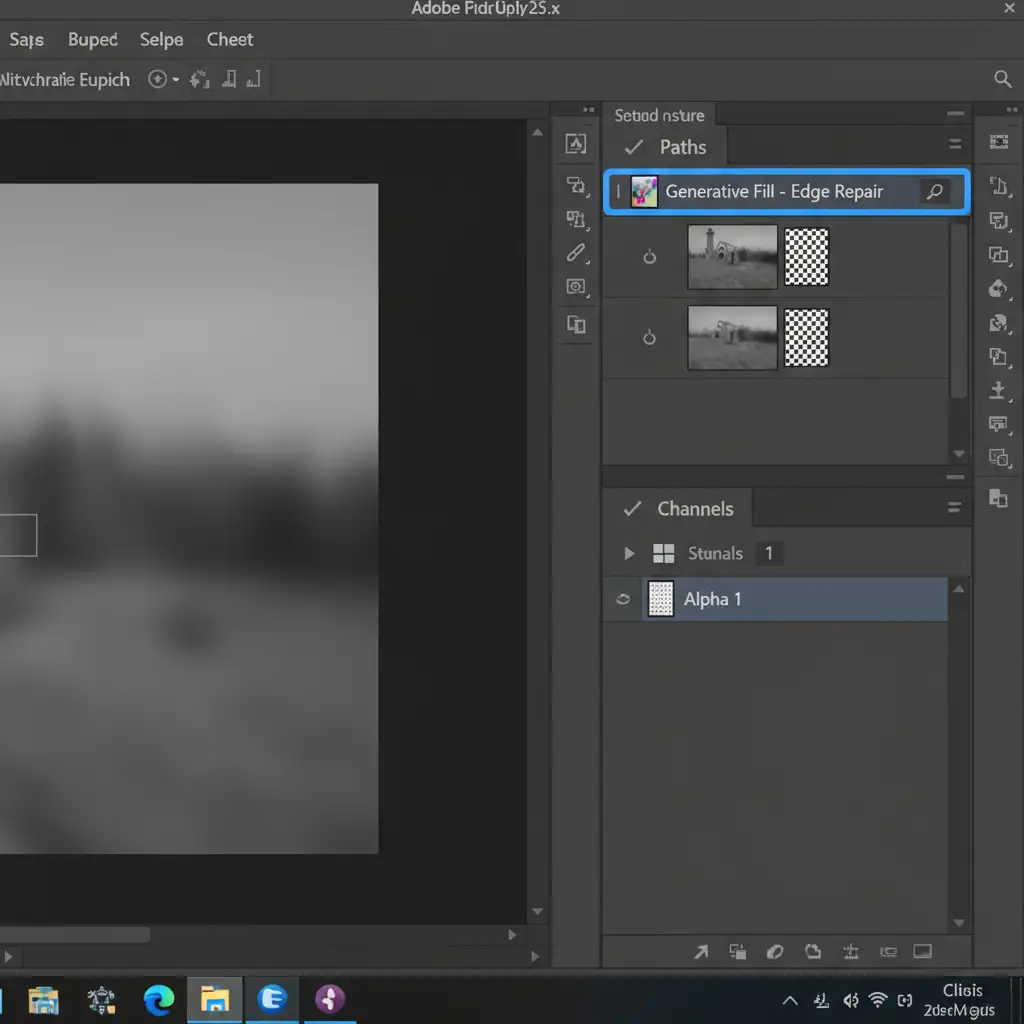
Method C: The Technical Deep-Dive (Alpha Channels & Generative Fill)
Sometimes, slicing away the AI artifacts removes too much of the product, leaving you with missing textures. This advanced technique rebuilds the edge perfectly.
- Isolate the product using the manual Pen Tool method described above.
- Go to the Channels panel and save your selection as an Alpha Channel.
- Ctrl-click (or Cmd-click) the Alpha Channel to load the selection, then invert it so only the background and the very edge of the product are selected.
- Expand the selection by 3-5 pixels.
- Use Photoshop’s Generative Fill with a prompt like “clean studio background, sharp product edge” exclusively on this masked boundary.
- Because the core product is protected by your Alpha Channel, Generative Fill will only rebuild the missing textures along the perimeter, resulting in a flawless, realistic edge.
Stop Fighting Hallucinated Edges: Let the Experts Handle It
AI image generation is a powerful tool for scaling your e-commerce catalog, but raw AI outputs are simply not ready for the storefront. The difference between a cheap-looking AI concept and a high-converting product photo comes down to pixel-perfect edge isolation.
You don’t have to spend hours plotting bezier curves and fighting with Generative Fill to fix AI artifacts.
Don’t let blurry AI edges ruin your product launch. Hire Image Work India and Cloud Retouch. Our expert retouching teams specialize in the ultimate hybrid workflow, delivering hand-drawn, pixel-perfect manual clipping paths that make your AI concepts look authentically photographed.
Ready to make your AI product photos look 100% real? Contact Cloud Retouch today for flawless silhouetting and professional e-commerce image editing.


