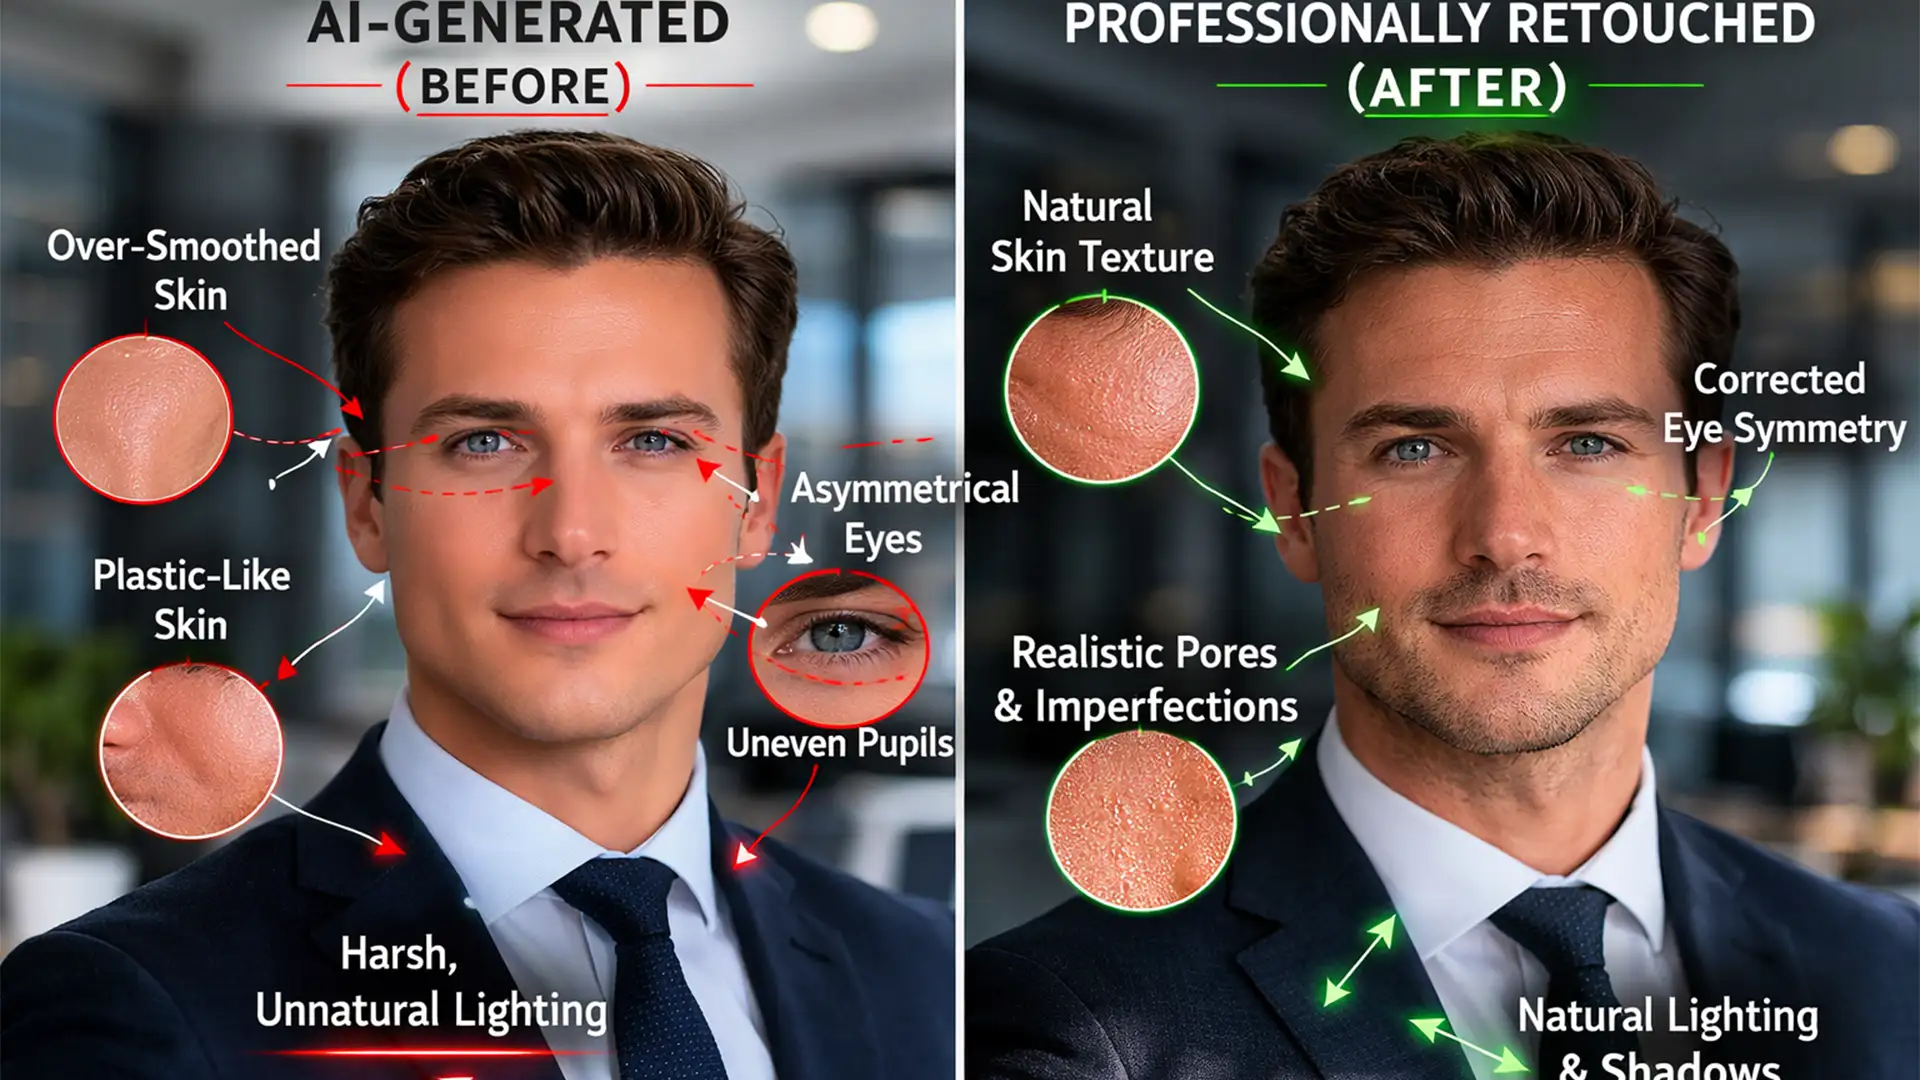
You generated the ideal corporate portrait using Midjourney or Stable Diffusion. The lighting is great, the composition is solid, but something feels deeply wrong. The subject has hyper-smoothed plastic skin, asymmetrical pupils, and hair strands melting into their collar.
These visual errors trigger the uncanny valley-a subconscious rejection by human viewers when something looks almost, but not entirely, human. While AI image generation is powerful, it cannot replace the need for manual pixel pushing.
If you want to use generated images for professional branding, you must learn the art of fixing AI headshot artifacts and uncanny valley effects. In this guide, we will walk through the definitive Photoshop v25.0+ workflow to restore human imperfection and salvage your generated portraits.
Why AI Generators Trigger the Uncanny Valley
AI models do not understand human anatomy; they understand pixel probabilities. This fundamental limitation results in predictable asymmetrical artifacts. When an AI attempts to render a face, it often averages out textures, resulting in a flawless but synthetic “glow.”
The most common giveaways of an unedited AI headshot include:
- Plastic Skin: Complete absence of pores, vellus hair (peach fuzz), or natural skin variation.
- Mangled Teeth: Too many teeth, fused teeth, or a luminescent white glow without natural dental shadows.
- Eye Asymmetry: Pupils that are different sizes or looking in slightly different directions.
- Merged Textures: Earrings blending into jawlines, or hair merging with fabric.
To fix these, we need to move beyond standard Generative Fill prompts and apply high-end commercial retouching techniques.
How to Fix AI Headshot Artifacts in Photoshop
Method 1: The Quick Fix for Plastic AI Skin
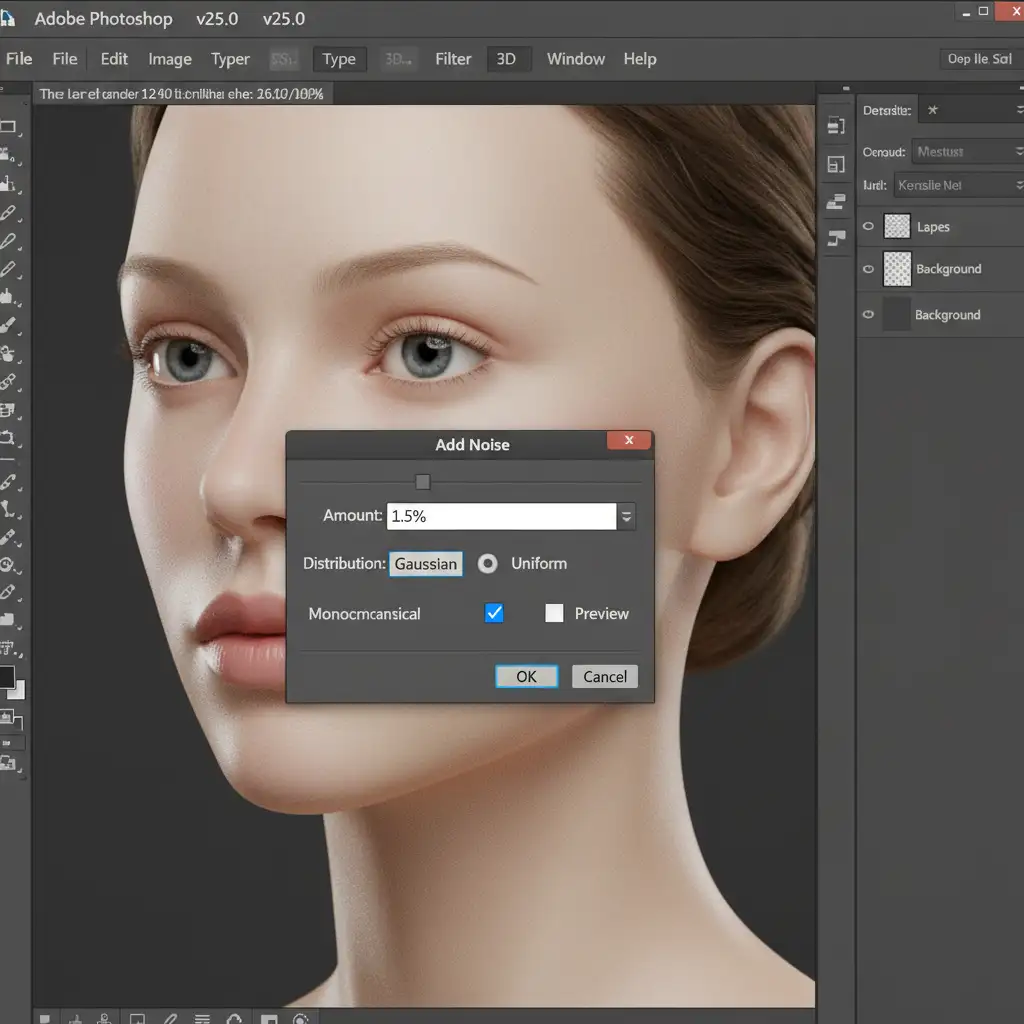
The fastest way to reduce the synthetic look of an AI image is to reintroduce texture. AI generators strip away natural film grain and skin pores, leaving a hyper-smooth surface.
- Open your AI headshot in Photoshop.
- Create a new layer and fill it with 50% gray, setting the blend mode to Overlay.
- Navigate to Filter > Noise > Add Noise.
- Set the amount to 1-2%.
- Crucially, ensure Gaussian noise and Monochromatic are checked.
This breaks up the plastic banding and simulates realistic camera sensor grain, tricking the eye into perceiving natural texture.
Method 2: The Pro Workaround Using Frequency Separation
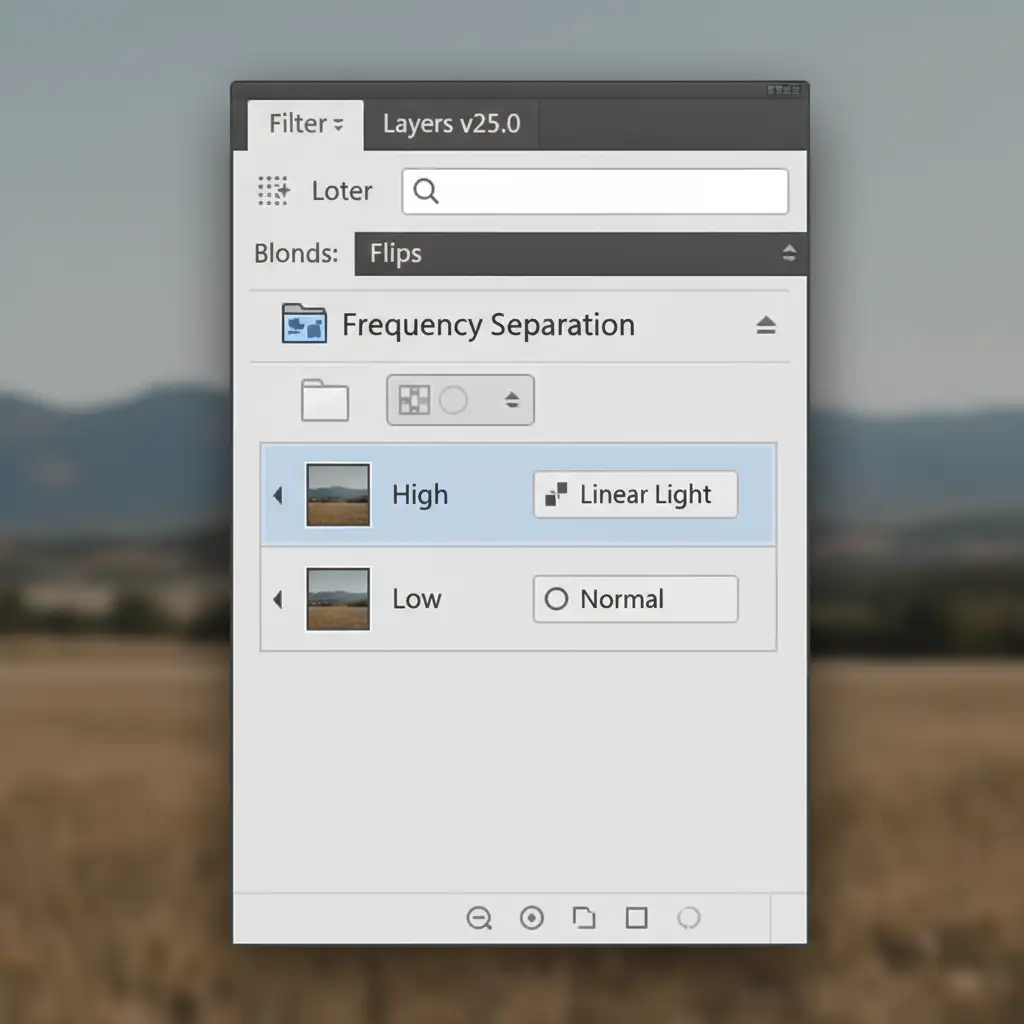
For professional-grade results, simple noise isn’t enough. You need to apply Frequency separation, a staple in high-end beauty retouching, to graft real human texture onto the AI image.
- Duplicate your base AI image layer twice. Name the bottom layer “Low” (for color and tone) and the top layer “High” (for texture).
- Apply a Gaussian Blur to the Low layer until the skin texture disappears but the facial features remain recognizable.
- Select the High layer. Go to Image > Apply Image. (If working in 8-bit, set blending to Subtract, Scale 2, Offset 128. This acts similarly to a High pass filter).
- Change the High layer’s blend mode to Linear Light.
- Group both layers into a folder named “Frequency Separation.”
Now for the magic: Open a high-resolution stock photo of a real human face. Use the Clone stamp tool on your High layer. Sample the real skin pores from the stock photo, and gently stamp them over the AI subject’s plastic cheeks and forehead. Finally, use the Healing Brush on the Low layer to blend out any weird, unnatural AI shadow artifacts.
Method 3: Fixing Asymmetrical Eyes and Mangled Teeth
The most disturbing uncanny valley effects happen in the eyes and mouth. These require targeted, structural adjustments.
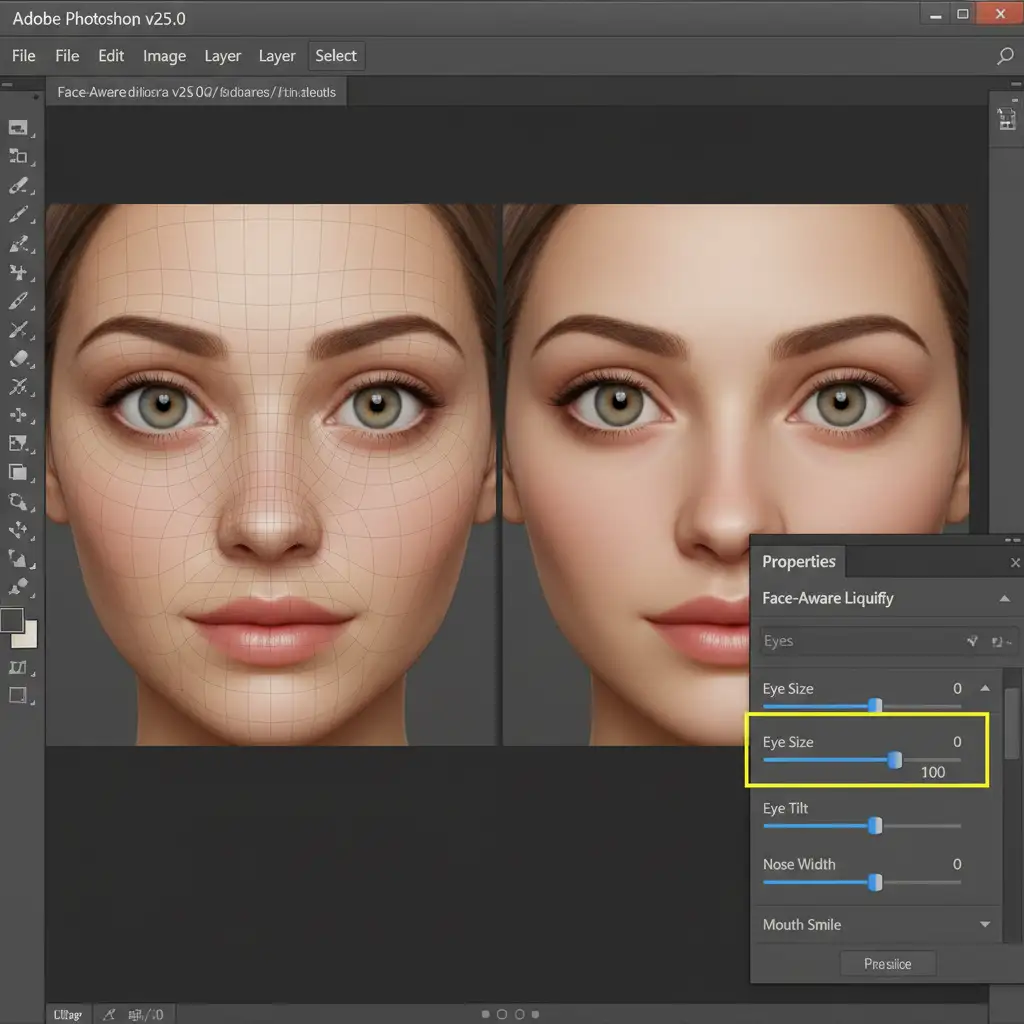
Correcting AI Eyes with Face-Aware Liquify
AI often generates eyes where one pupil is noticeably larger or positioned higher than the other.
- Press Shift+Ctrl+X to open the Liquify workspace.
- Select the Face-Aware Liquify tool from the left panel.
- Expand the “Eyes” dropdown menu.
- Manually adjust the Eye Size, Eye Height, and Eye Tilt sliders to ensure perfect symmetry.
Reconstructing Teeth with Dodge and Burn
AI struggles to understand where one tooth ends and another begins, often creating a fused, glowing white block.
- Use the Pen Tool to carefully map out proper, individual tooth boundaries. Convert the paths to selections.
- Apply a Curves adjustment layer to pull down the unnatural luminescent white glow of the AI teeth.
- Create a new layer set to Soft Light. Use the Dodge and burn tools (or paint with black and white at a low opacity) to manually paint in realistic dental shadows between the teeth and under the gumline.
Let the Professionals Handle Your Portrait Retouching
Fixing AI headshot artifacts and uncanny valley errors requires a deep understanding of human anatomy, lighting, and advanced Photoshop techniques. While the steps above will dramatically improve your generated images, manual pixel pushing is incredibly time-consuming.
If you are generating corporate headshots, marketing assets, or commercial portraits and need them to look flawlessly human without the tedious manual labor, we can help.
At Image Work India and Cloud Retouch, our expert team of professional retouchers specializes in humanizing AI-generated imagery. We handle the Frequency Separation, structural corrections, and texture restoration so you don’t have to. Contact us today to turn your synthetic AI generations into indistinguishable, studio-quality human portraits.


