
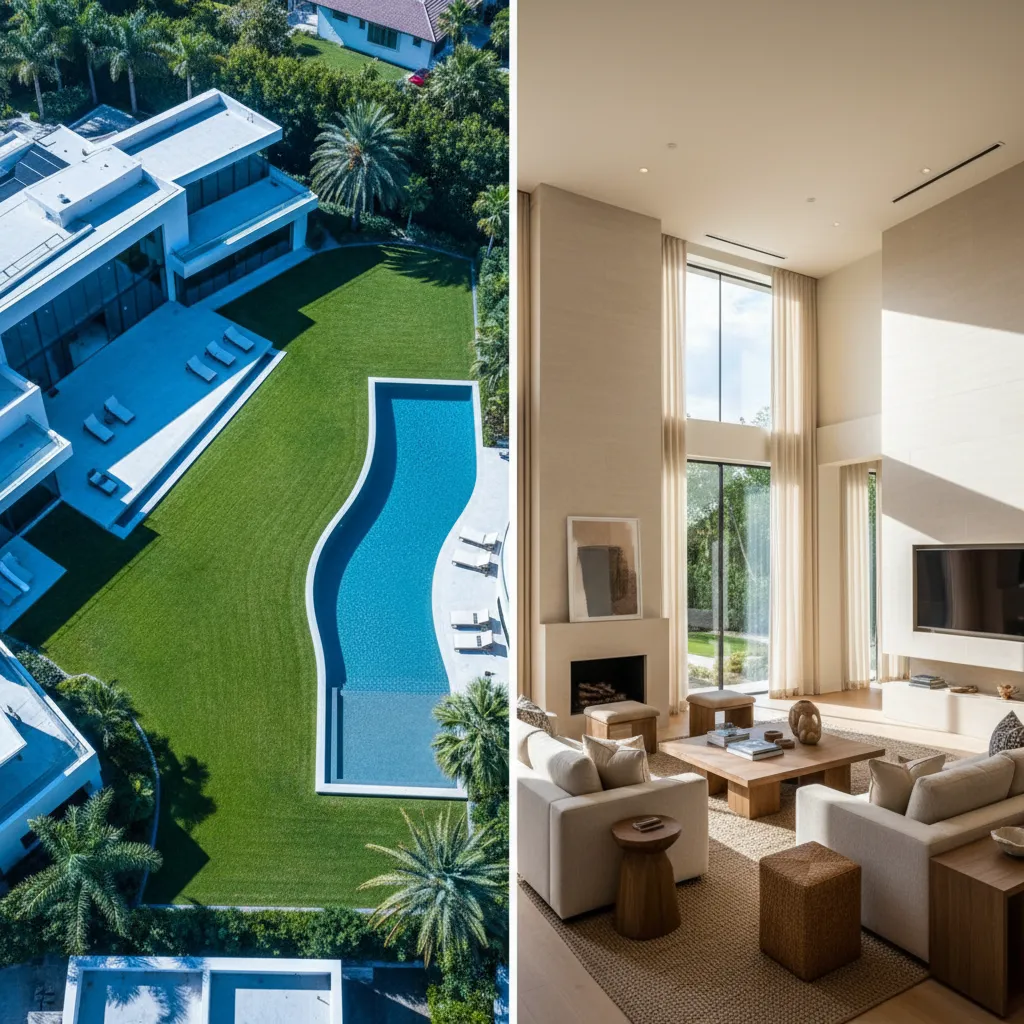
There is nothing more frustrating than delivering a real estate or event gallery only to realize your exterior aerials look like they belong to a completely different project than your interior shots. You’ve spent hours perfectly grading your full-frame DSLR images, but out of the box, your 1-inch sensor drone aerials look cold, heavily saturated, and visually disconnected. If you are tired of blindly tweaking sliders with no scientific baseline, you are in the right place.
Learning how to match drone photo color to DSLR is the ultimate key to professional visual consistency. In this guide, we will break down exactly how to bridge the gap between different camera sensors using Photoshop v25.x and Adobe Camera Raw v16.x.
Why Drone and DSLR Color Science Clashes
The core technical pain point stems from the physical differences between camera bodies. Smaller 1-inch drone sensors (like those found in the DJI Mavic series) process light, contrast curves, and dynamic range much differently than full-frame DSLR or Mirrorless sensors.
Drone manufacturers typically engineer their default color science to pop immediately upon export—pushing cooler blues, aggressive greens, and higher contrast. DSLRs, on the other hand, offer more neutral, malleable RAW files with superior dynamic range. When combining these in a single gallery, the mismatched color profiles break visual consistency.
Here is how to fix it using three distinct workflows, ranging from a quick automated fix to a professional batch-processing solution.
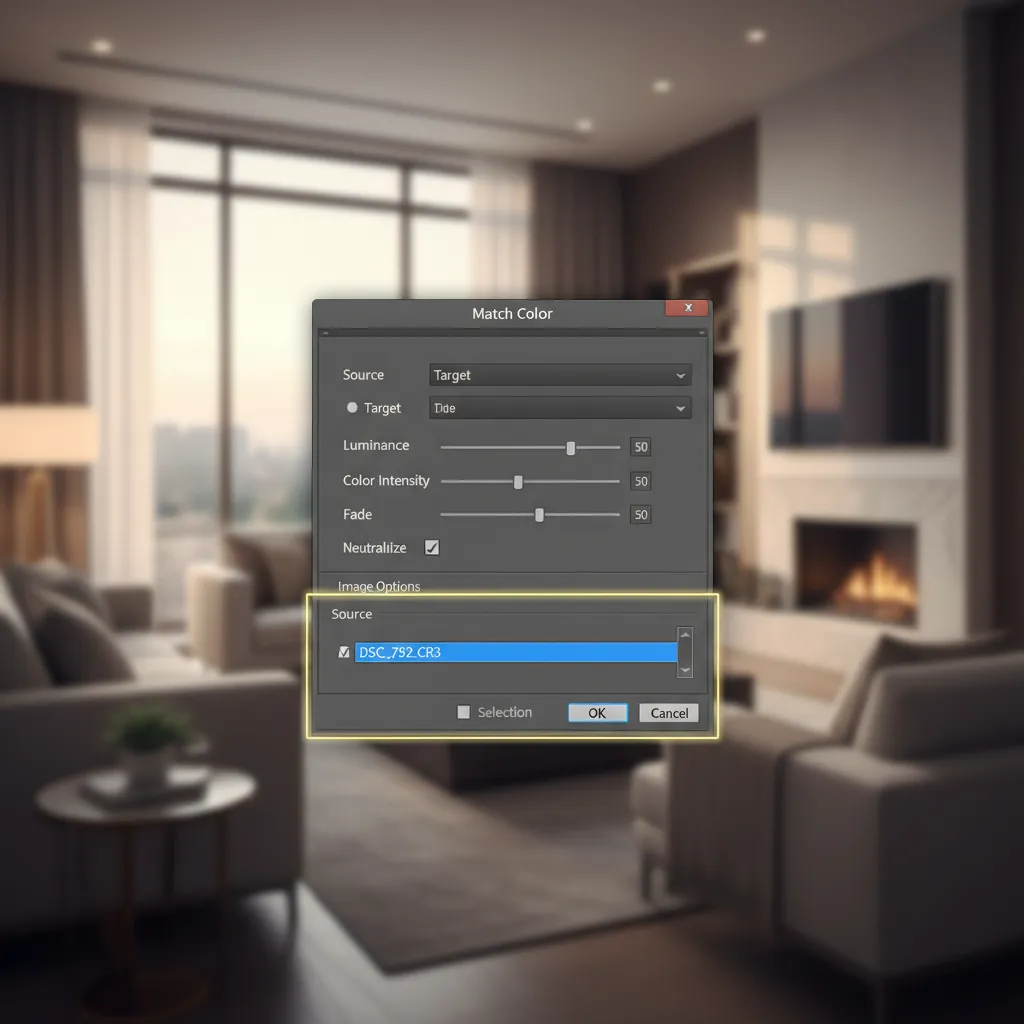
Method 1: The Quick Fix Using Photoshop’s Match Color Tool
If you need a rapid solution for a handful of images, Photoshop v25.x has a built-in algorithmic tool designed specifically for this scenario.
- Open Both Images: Load both your target drone image and your reference DSLR image into a single workspace in Photoshop.
- Target the Drone Layer: Make sure your drone image layer is selected.
- Navigate to Match Color: Go to Image > Adjustments > Match Color.
- Set the Source: In the dialog box, look under the “Image Statistics” section. Change the “Source” drop-down menu to your DSLR image file.
- Finesse the Sliders: The algorithm will instantly attempt to match the color palette. Adjust the Luminance (to match exposure) and Color Intensity (to match saturation) sliders until the drone shot blends naturally with the DSLR aesthetic.
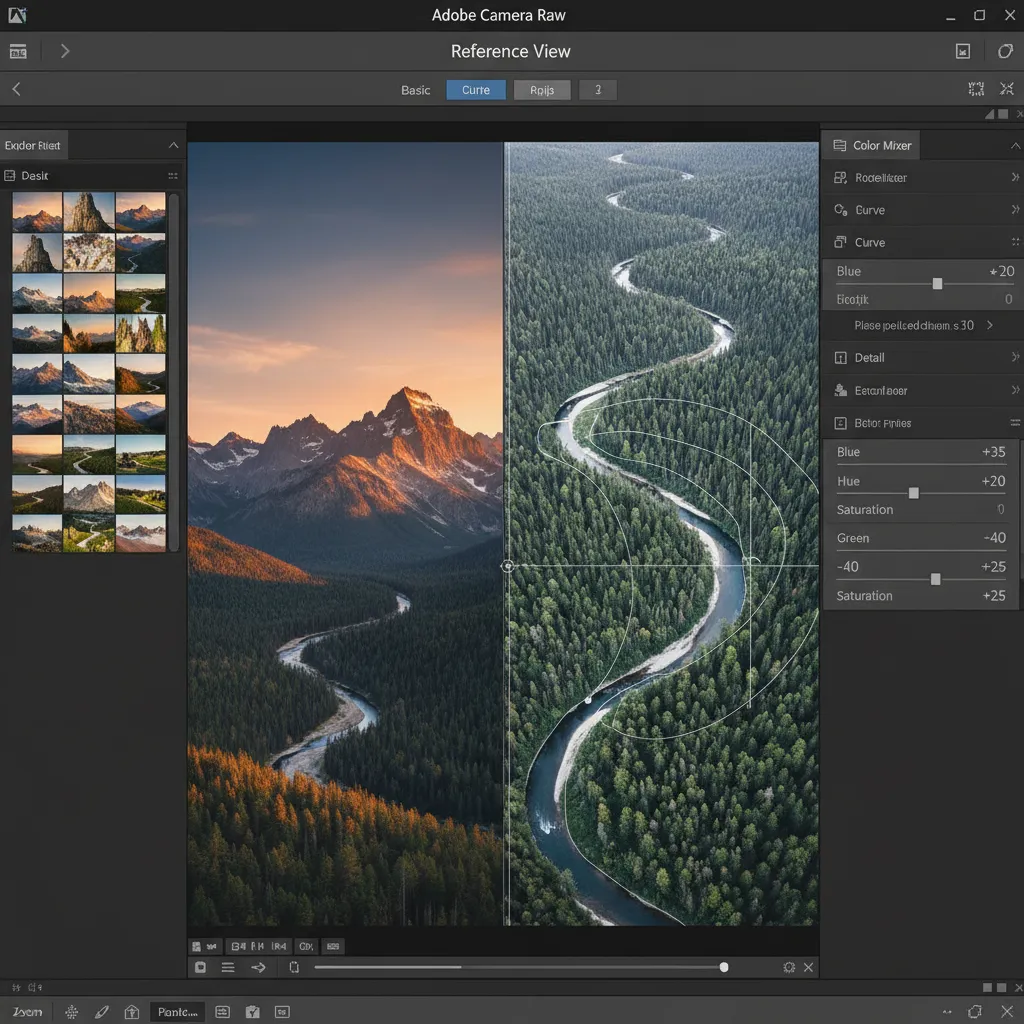
Method 2: The Pro Workaround Using Camera Raw Reference View
For maximum control over RAW files, Adobe Camera Raw (ACR) v16.x provides a side-by-side editing environment that eliminates the guesswork of matching color science.
- Launch ACR: Open both your DSLR file and your drone file in Adobe Camera Raw.
- Enable Reference View: Click the Reference View icon (the split-screen icon at the bottom of the preview window).
- Assign Roles: Drag your perfectly graded DSLR photo onto the left side (Reference) and place your unedited drone photo on the right side (Active).
- Match the Baseline: Start by adjusting the White Balance (Temperature and Tint) on the drone shot to match the overall warmth of the DSLR.
- Dial in the Color Mixer: Scroll down to the Color Mixer and Calibration panels. Tweak the specific Hue, Saturation, and Luminance of your blues (skies) and greens (grass) until the drone’s color science mirrors the DSLR.
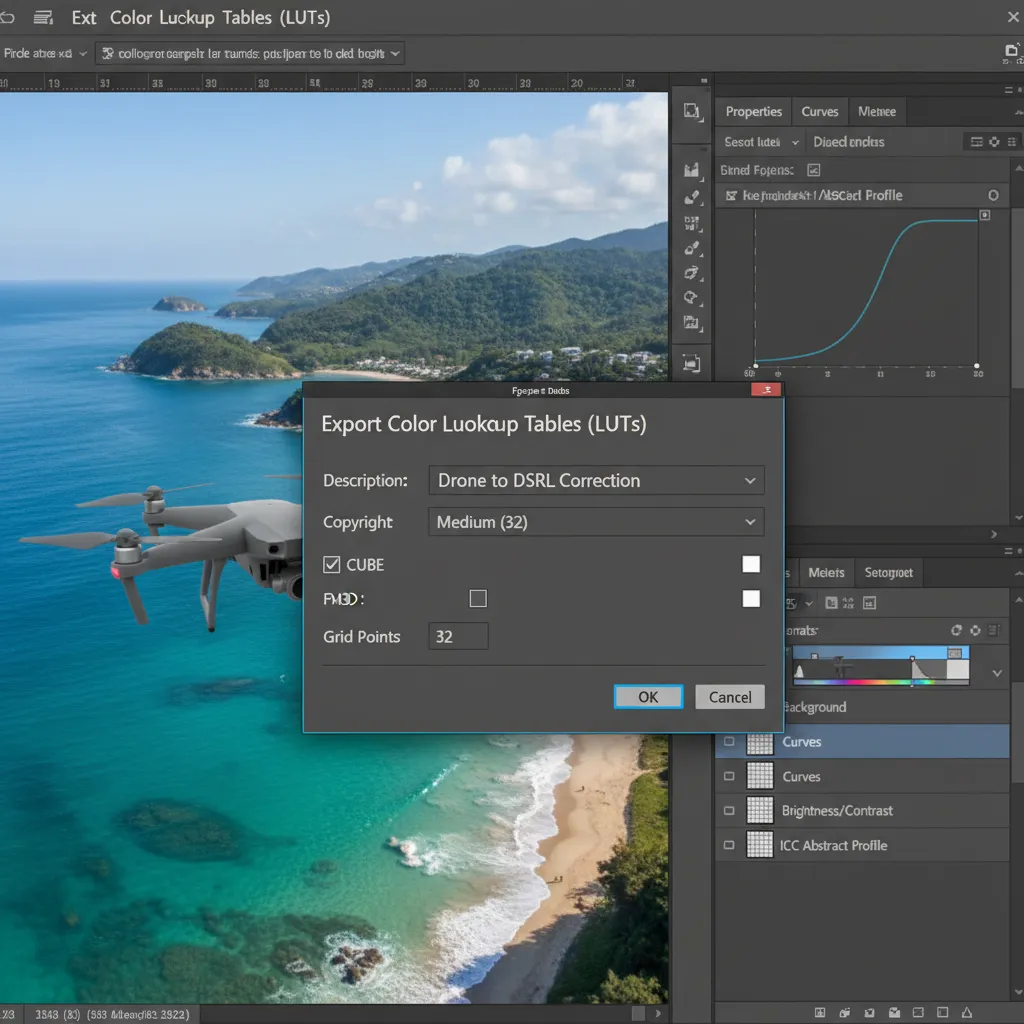
Method 3: The Technical Deep-Dive – Creating a Custom LUT
If you regularly shoot with the same drone and DSLR combination under similar lighting conditions, you shouldn’t repeat these steps for every project. Instead, create a custom Color Lookup Table (LUT).
- Match the Points: Open your drone shot in Photoshop. Create a Curves adjustment layer. Use the eyedropper tools within the Curves properties to match the black point, white point, and midtones exactly to your DSLR reference image.
- Export the LUT: Once your drone image perfectly matches the DSLR’s color profile, navigate to File > Export > Color Lookup Tables.
- Save as .CUBE: Name your file (e.g., “Mavic_to_SonyA7.cube”), select the “CUBE” format, and set the Grid Points to 32 (a good balance of quality and file size).
- Batch Apply: You can now load this custom LUT onto any future drone aerials shot in similar lighting to instantly convert its color science to match your DSLR.
Glossary of Essential Color Matching Terms
To master color grading, it helps to understand the vocabulary behind the software:
- Color Space: The specific range of colors a camera sensor can capture (e.g., sRGB, Adobe RGB).
- LUT (Color Lookup Table): A mathematical file (.CUBE) that transforms color input values into new output values to achieve a specific look.
- Adobe Camera Raw (ACR): The underlying processing engine in Photoshop used to non-destructively edit RAW image data.
- Color Science: The proprietary algorithms a camera manufacturer uses to interpret light and color data from the sensor.
- Luminance: The objective measurement of brightness in an image, independent of its hue or saturation.
Stop Wasting Hours on Color Correction
Figuring out how to match drone photo color to DSLR files manually can eat up hours of your post-production workflow, especially on massive real estate galleries or large-scale event shoots. While custom LUTs and the Match Color tool are incredibly powerful, they still require a trained eye to ensure perfect consistency across varying lighting conditions.
Need perfectly matched real estate galleries without the hours of tweaking? Hire the expert retouchers at Image Work India and Cloud Retouch. Our professional team specializes in flawless color consistency across all your aerial and interior shots, ensuring your final deliverables look cohesive, premium, and ready to wow your clients. Let us handle the technical color science so you can get back behind the camera.


![Fix Photoshop 2024 HDR to SDR Color Shift Bug [Full Guide]](https://imageworkindia.com/wp-content/uploads/2026/05/photoshop-2024-hdr-sdr-color-shift-fix-Featured-Image.webp)