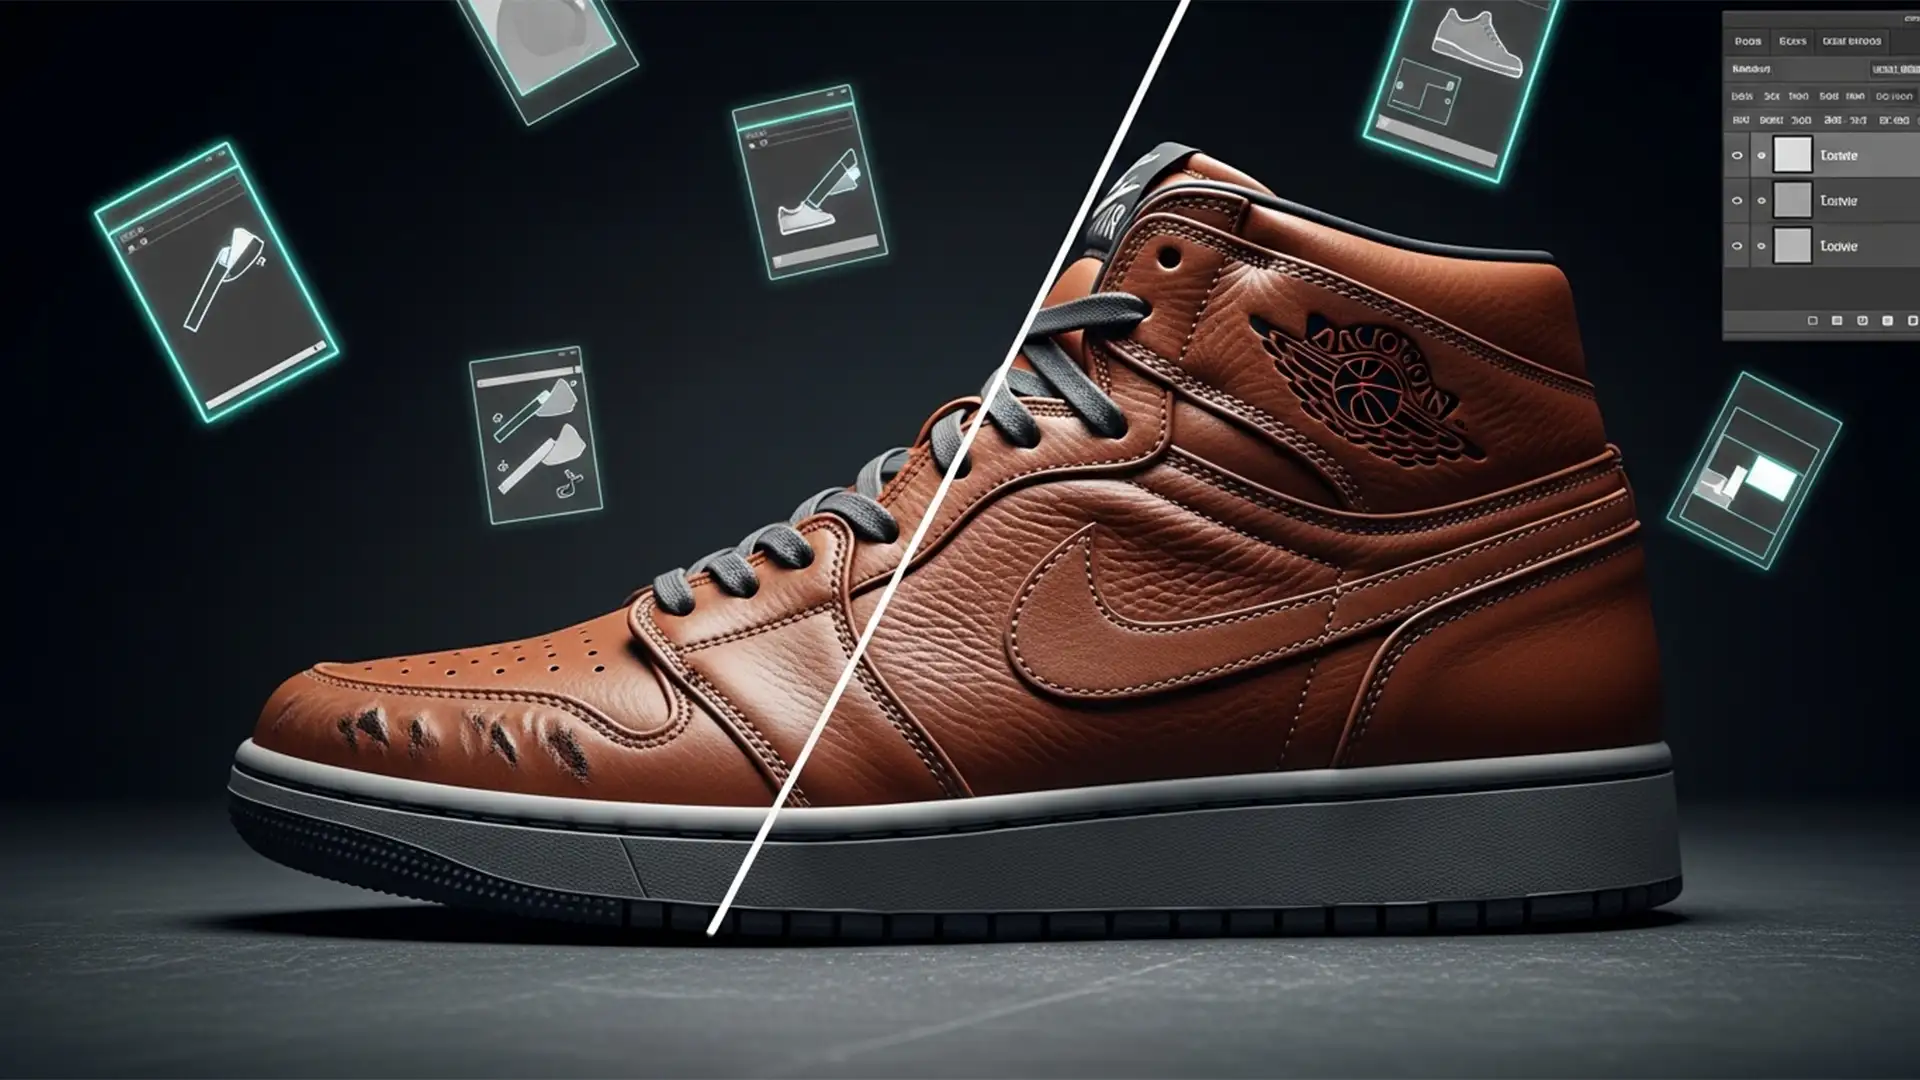
You just isolated a stunning product shot of a sneaker and used Photoshop’s AI tools to create a sleek, lifestyle background. The environment looks incredible, but there’s a massive problem: the AI completely butchered the brand logo. Instead of a crisp, perfect trademark, you are left with a distorted, melted mess.
In Adobe Photoshop v25.0 and newer, Firefly AI struggles with strict brand geometry, hallucinating edge pixels during the blending process. For e-commerce, a ruined logo renders the image commercially unusable. If you are struggling with this issue, here is the ultimate Photoshop Generative Fill brand logo fix to protect your brand integrity and keep your product visuals pristine.
Why Firefly AI Distorts Sneaker Logos
When expanding or replacing backgrounds around products like sneakers, Photoshop relies on its Firefly blending algorithm to naturally merge the subject with the new environment. However, this edge blending process is inherently aggressive.
The AI attempts to recalculate the lighting, texture, and geometry of the transition zones. When these zones overlap with strict brand geometry—such as the Nike Swoosh, Adidas stripes, or Puma logo—the AI hallucinates pixels. This results in distortion, melting, or unprompted additions to the trademark. Because brand integrity is the most critical aspect of commercial-grade product retouching, you must use strict isolation techniques to bypass the Generative Fill blending algorithm entirely.
How to Fix Photoshop Generative Fill Brand Logo Distortion
To achieve a flawless background replacement without degrading the core product, you need to transition from basic AI prompting to advanced non-destructive editing. Here are three proven methods to secure your logos.
Method 1: The Quick Fix – Strict Selection Expansion
If you need a rapid solution for a batch of e-commerce images, controlling the exact pixel radius of the AI’s generation zone is your best defense.
- Select the Object Selection Tool and click on your sneaker to create a tight initial selection.
- Navigate to the top menu and click Select > Modify > Expand.
- In the dialog box, expand your selection by exactly 2 pixels.
- Invert the selection (Ctrl+Shift+I or Cmd+Shift+I) so the background is selected, not the shoe.
- Apply Generative Fill.
By expanding the marching ants slightly outward, you force the AI blending zone away from the physical edge of the shoe, keeping the logo safely outside the AI’s computational reach.
Method 2: The Pro Workaround – Masking Lock-In Technique
For high-end commercial retouching, you cannot afford a single hallucinated pixel on the product. The Masking Lock-In Technique physically separates the AI generation from the product layer.
- Duplicate your original shoe layer (Ctrl+J or Cmd+J).
- Hide the top duplicate layer for a moment.
- Select the bottom layer, mask the shoe, and run Generative Fill to create your new background. (Don’t worry if the shoe edges look slightly warped here).
- Turn the top duplicate layer back on. Because it sits above the Generative Fill layer, it overwrites any AI mistakes.
- Apply a precise Layer Mask to this top layer to isolate the shoe.
- If the edges look too harsh against the new background, select the mask, choose a soft brush at 10% opacity, and gently paint only on the outermost edges of the shoe. Keep the brush completely away from the logo area.
This guarantees your strict brand geometry remains 100% untouched by AI.
Method 3: Technical Deep-Dive – Smart Objects and Alpha Channels
When dealing with highly complex logos or transparent product elements, professional retouchers rely on Alpha Channels to dictate exactly what the AI can and cannot touch.
- Convert your original shoe layer into a Smart Object to ensure completely non-destructive editing.
- Open the Channels Panel. Duplicate the channel with the highest contrast to create a custom Alpha Channel.
- Use levels and the brush tool to paint the Alpha Channel so that only the brand logo is pure white, and the rest of the image is pure black.
- Run your Generative Fill on the background layer as usual.
- If you spot any edge blending distortion near the trademark, Ctrl+Click (or Cmd+Click) your custom Alpha Channel to load it as a precise selection.
- Apply this selection as a layer mask to the Generative Fill layer, masking out the AI’s mistakes and letting the untouched Smart Object logo shine through flawlessly.
Scale Your E-Commerce Editing with Image Work India & Cloud Retouch
Mastering the Photoshop Generative Fill brand logo fix takes time, patience, and a deep understanding of advanced masking techniques. When you are processing hundreds or thousands of SKUs for an e-commerce catalog, manually fixing AI-hallucinated edge pixels on every single image simply isn’t scalable.
Don’t let AI ruin your brand integrity. Contact Image Work India and Cloud Retouch today. Our expert teams specialize in pixel-perfect, commercial-grade product retouching. We combine the efficiency of modern editing workflows with the meticulous human oversight required to guarantee 100% accurate trademarks every single time.
Get a free trial with Cloud Retouch today and let us handle your complex background replacements while you focus on scaling your business!