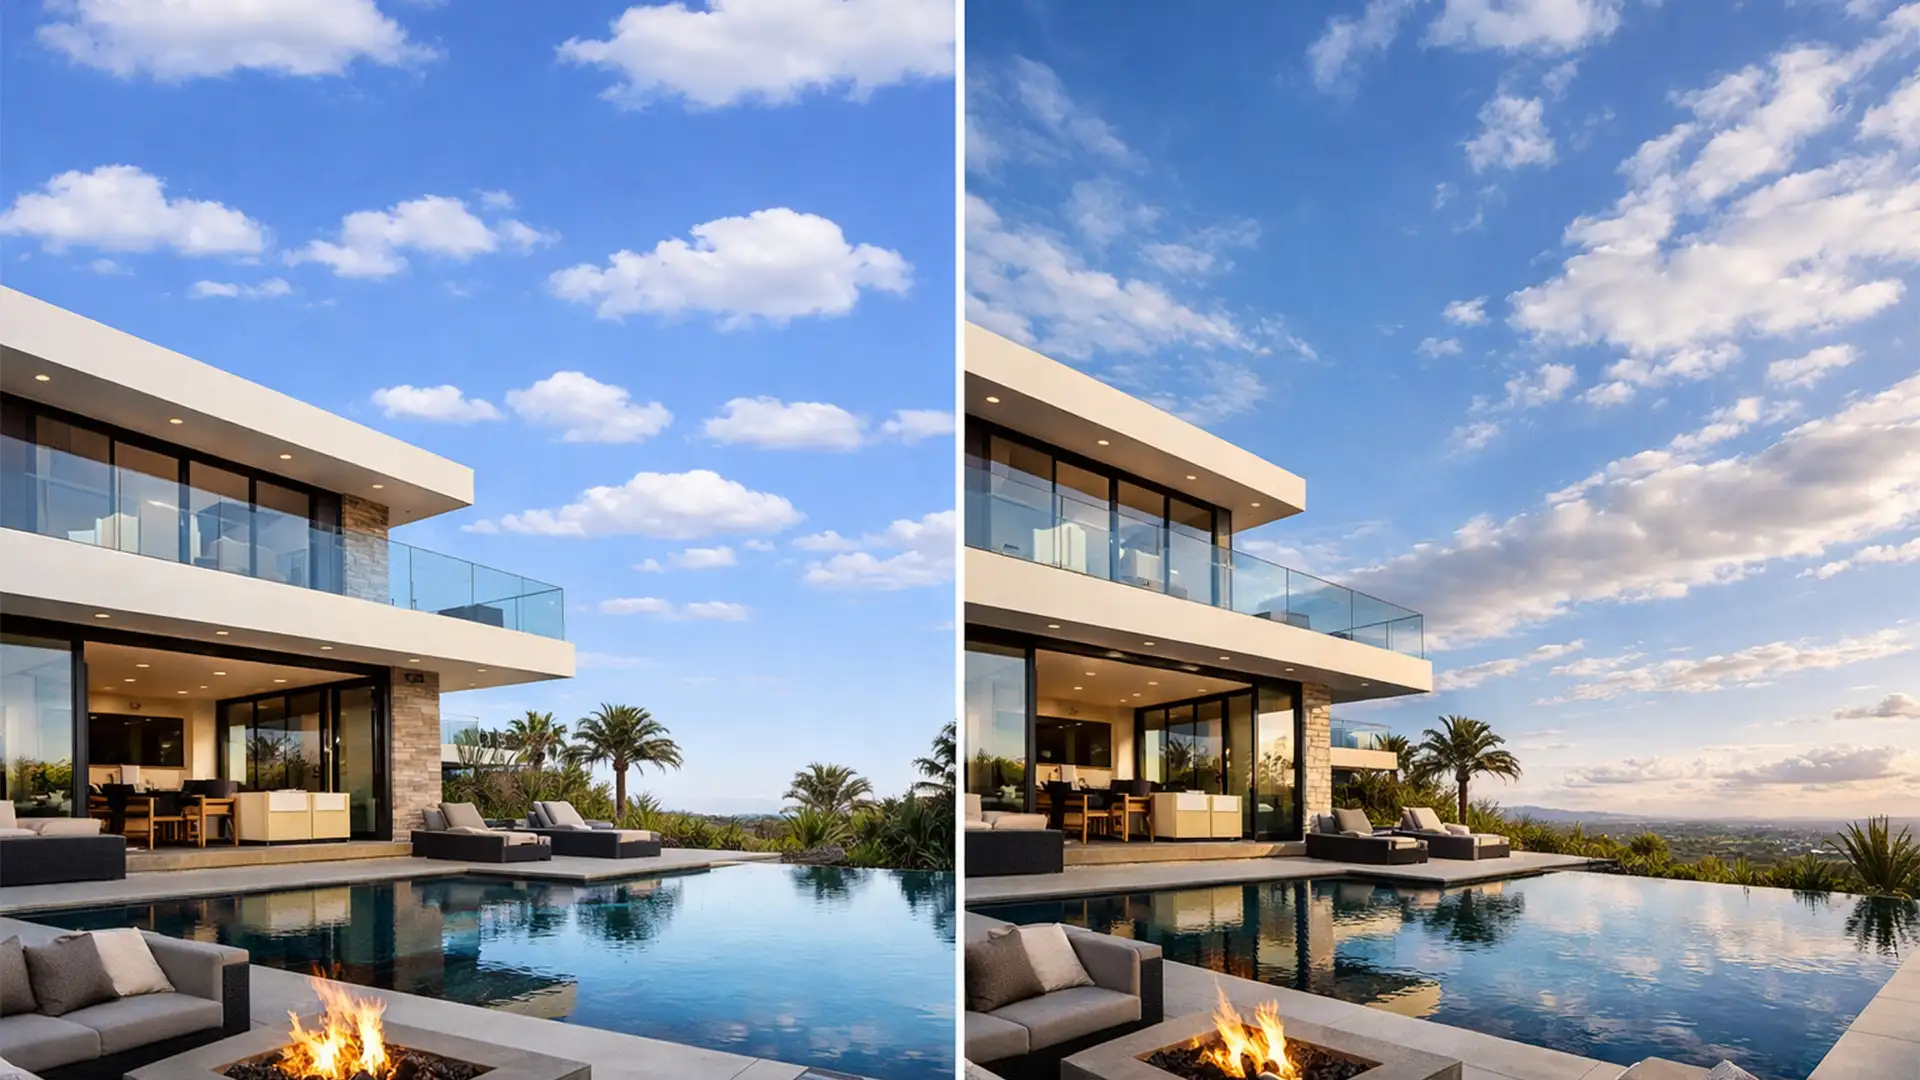
You just shot a stunning luxury property using a premium wide-angle lens. The architecture looks incredibly dynamic, but the sky is completely blown out. You open Photoshop, run the Adobe Sensei AI Sky Replacement tool, and suddenly-the image looks cheap. Sound familiar?
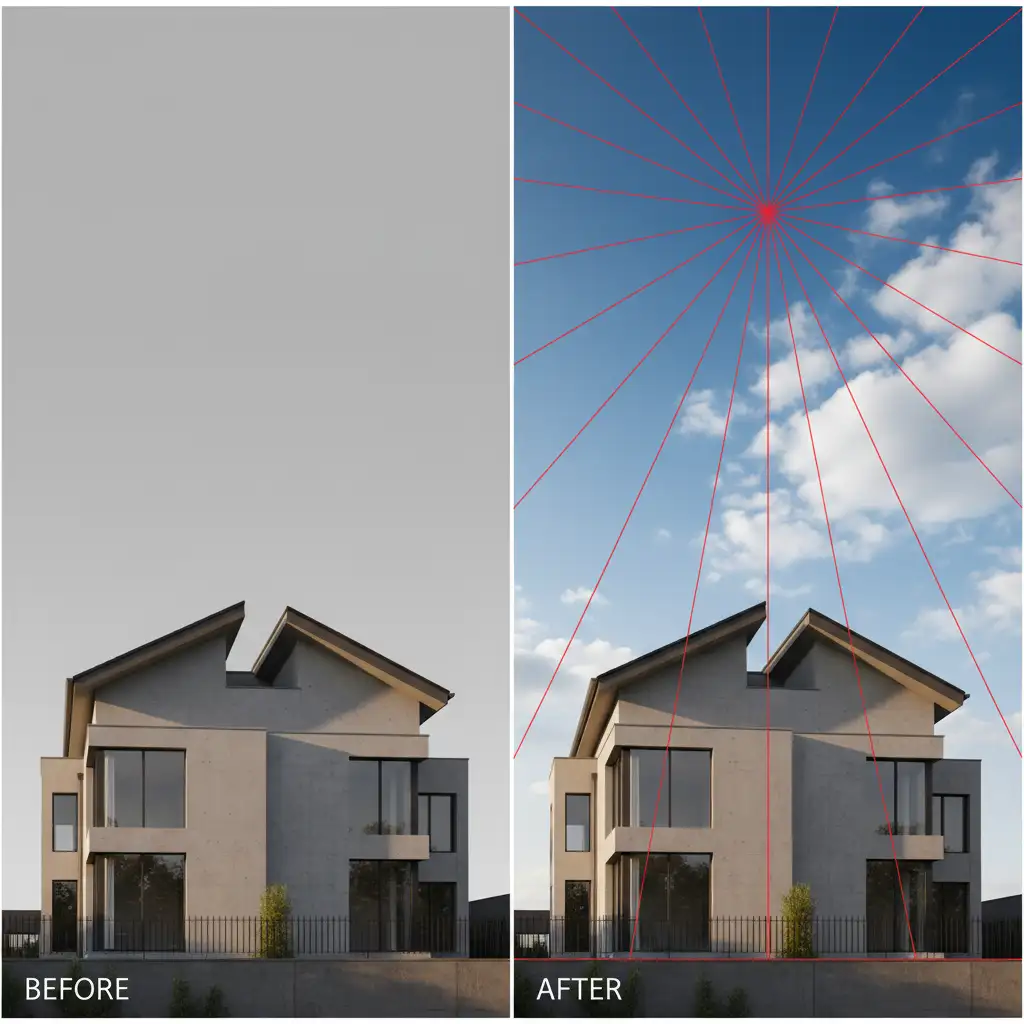
The biggest giveaway of a “faked” real estate photo isn’t the color of the clouds; it’s the geometry. AI treats skies as flat 2D planes, completely ignoring the converging verticals and vanishing points of your architectural lens. If you want a seamless real estate sky replacement perspective distortion fix, you need to go beyond the default sliders.
Here is the ultimate guide to matching sky perspective perfectly so your property listings look highly professional and undeniably real.
Why Adobe Sensei AI Fails at Architectural Perspective
Photoshop’s native Sky Replacement tool (versions v22.x through v25.x+) is a massive time-saver for masking. However, it is not engineered for the complex lens geometry used in real estate photography.
When you shoot with a wide-angle or tilt-shift lens, the architecture pushes toward a distinct vanishing point. Because Adobe Sensei AI applies the sky as a flat texture, the clouds do not share these converging lines. This creates a severe visual disconnect: mismatched horizon lines, incorrect scale proportions, and a composite that feels fundamentally “off” to the human eye.
To fix this, we have to manually introduce perspective distortion, atmospheric perspective, and lens curvature back into the AI-generated sky.
How to Fix Real Estate Sky Replacement Perspective Distortion
Depending on the severity of the distortion and the required quality of the final image, there are three proven methods to correct AI sky perspective errors.
Method 1: The Quick Horizon Calibration (Beginner)
For minor perspective issues, you can often correct the visual disconnect directly within the native tool by aligning the true horizon line.
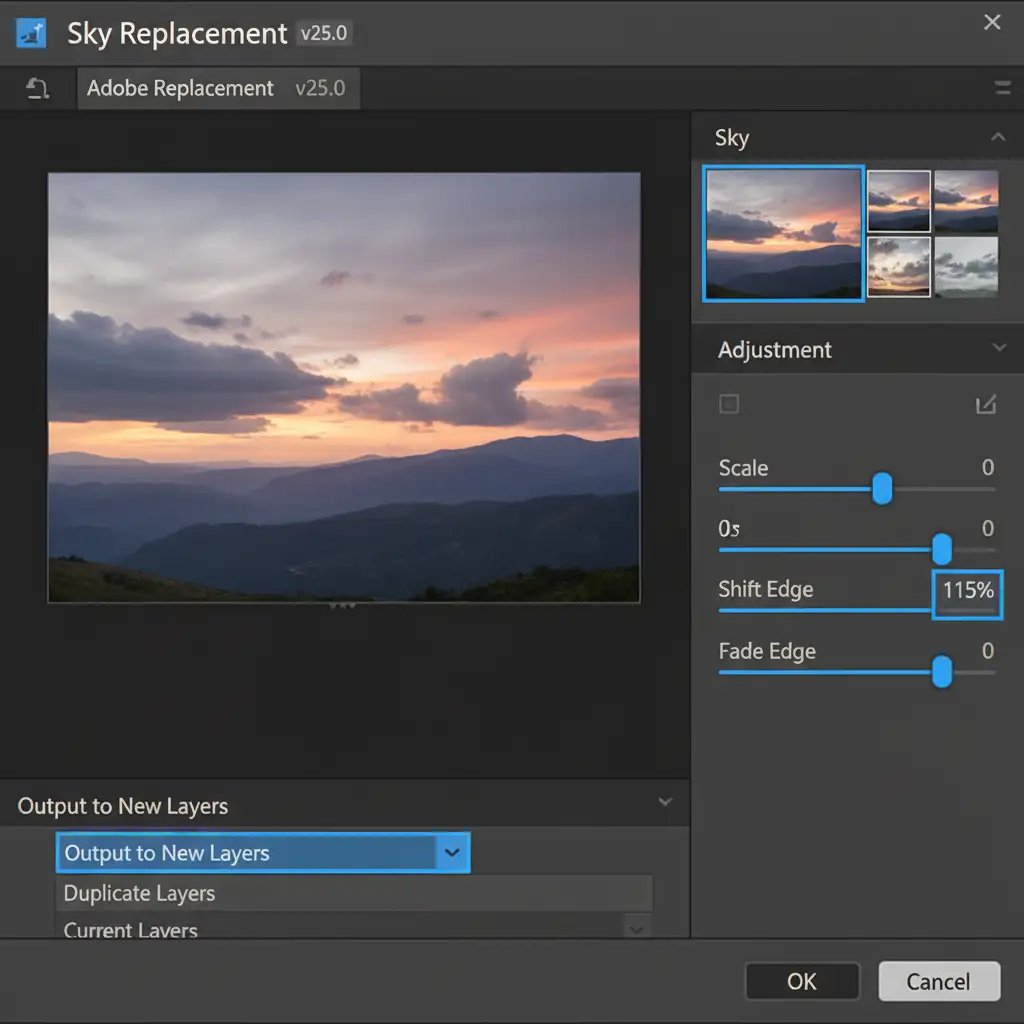
- Open the Sky Replacement tool (Edit > Sky Replacement).
- Inside the properties panel, locate the Scale, Shift Edge, and Flip controls.
- Instead of accepting the default placement, click and manually drag the sky within the preview window.
- Ensure the sky’s horizon perfectly overlaps the property’s true horizon line. Scale the clouds up so they don’t look miniature compared to the foreground architecture.
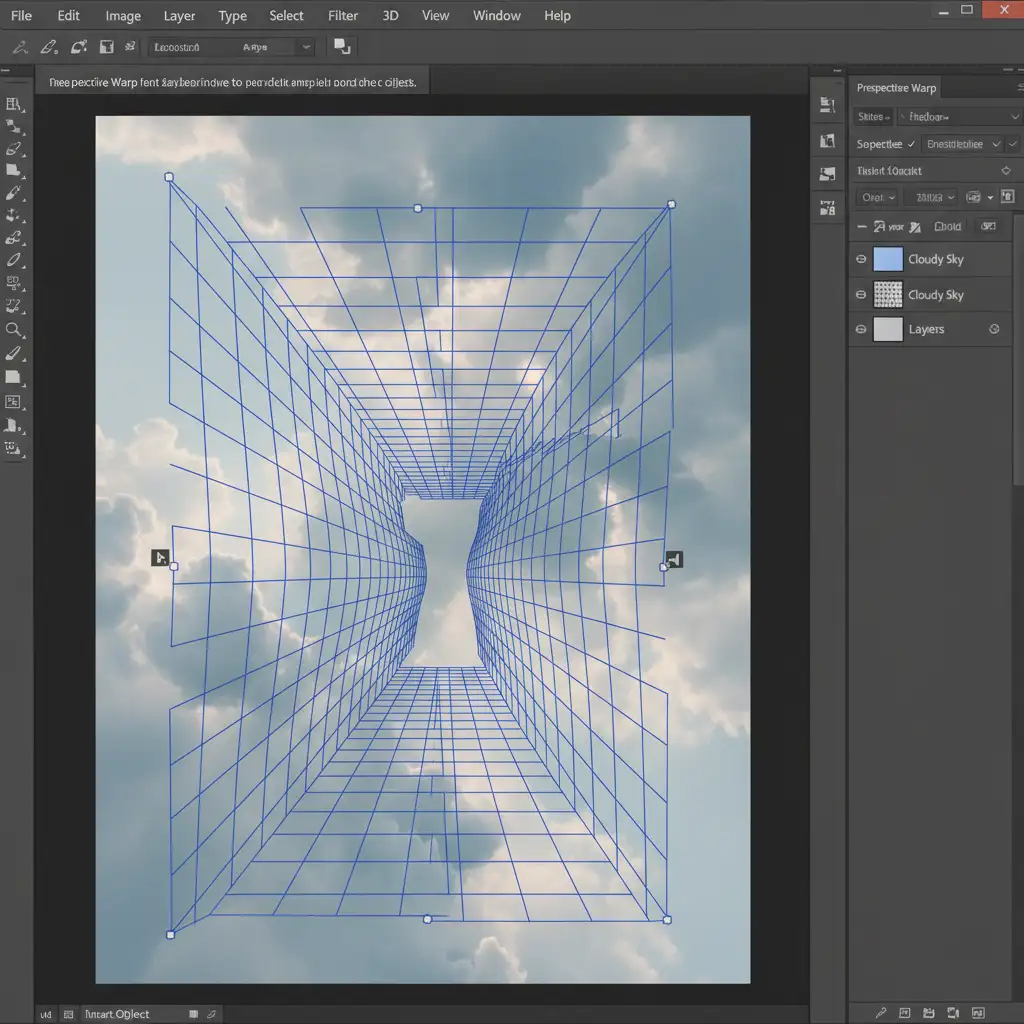
Method 2: The Perspective Warp Workaround (Pro)
This is the industry-standard method for ensuring your sky matches the exact geometry of your property.
- In the Sky Replacement dialog, you must set Output to New Layers. Hit OK.
- In your Layers Panel, locate the newly generated Sky layer and convert it into Smart Objects (Right-click > Convert to Smart Object). This protects the pixel data.
- Navigate to Edit > Perspective Warp.
- Draw your layout planes over the sky. Switch to the ‘Warp’ step.
- Drag the corner pins of the sky to match the architectural vanishing points dictated by the property’s rooflines.
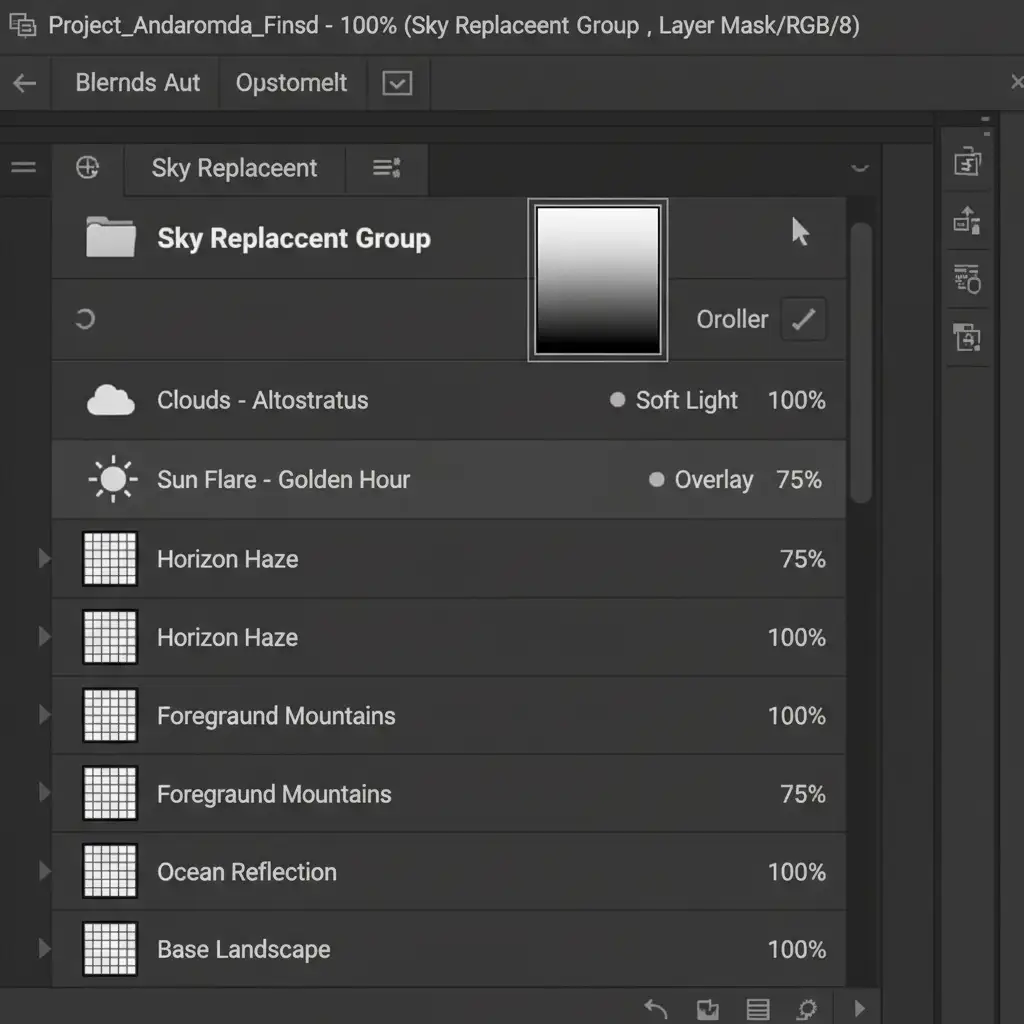
Method 3: Atmospheric Depth & Lens Distortion (Advanced)
For ultra-luxury listings, matching the vanishing point isn’t enough. You must also match the physical characteristics of the wide-angle lens and the natural haze of the atmosphere.
- Add Barrel Distortion: Select your sky Smart Object. Go to Filter > Lens Correction. Under the Custom tab, adjust the ‘Remove Distortion’ slider to introduce a slight barrel distortion (mimicking the curve of your wide-angle lens).
- Create Atmospheric Perspective: In reality, skies lose contrast and become hazier as they approach the horizon line.
- Select the entire Sky Replacement Group folder in your Layers Panel.
- Add a layer mask to the group.
- Use the Gradient Tool (G) to draw a black-to-white gradient from the horizon line upward. This gently fades the sky near the horizon, simulating realistic light falloff and atmospheric haze.
Scale Your Real Estate Editing with Image Work India
Manually executing a real estate sky replacement perspective distortion fix on a single hero image is manageable. But what happens when you have a batch of 500 listing photos that all require flawless perspective matching, lens correction, and atmospheric depth?
Struggling to make your real estate listings look perfectly natural at scale? Let the editing experts at Image Work India and Cloud Retouch handle it. Our professional retouchers understand the intricate geometry of architectural photography. We don’t just rely on automated AI sliders-we manually calibrate every sky to ensure perfect horizon lines, accurate vanishing points, and stunning realism.
[Contact Image Work India today] to streamline your post-production workflow and deliver breathtaking, true-to-life property photos to your clients faster than ever.


