You’ve just spent hours shooting a breathtaking macro image of a diamond ring, but when you zoom in on the final edit, the edges look soft, jagged, and synthetic. If you rely on automated selection tools, you are likely suffering from the dreaded “marching ants” jaggedness. In macro photography, choosing the wrong masking method destroys the luxury appeal of your piece.
For high-end print standards, the debate of layer mask vs vector mask for jewelry retouching usually comes down to one technical conflict: how do you balance the razor-sharp edges of hard metal and gemstones with the soft, feathered gradients needed for realistic drop shadows?
In this guide, we break down how to achieve hyper-realistic edges in Photoshop v25.x using advanced masking techniques.
The Core Problem: Why Automated Masking Fails Luxury Jewelry
Jewelry images require absolute precision. When editing a high-end watch or a faceted gemstone, the edges must look hard, crisp, and flawlessly cut.
If you use standard, pixel-based tools, your mask is resolution-dependent. When scaled for print or zoomed in for macro-level viewing, these rasterized masks reveal their anti-aliasing flaws—resulting in soft halos or jagged steps along what should be perfectly smooth metal bands.
To solve this, professional retouchers rely on a combination of techniques to ensure both sub-pixel rendering for sharp edges and smooth alpha channel gradients for shadows.
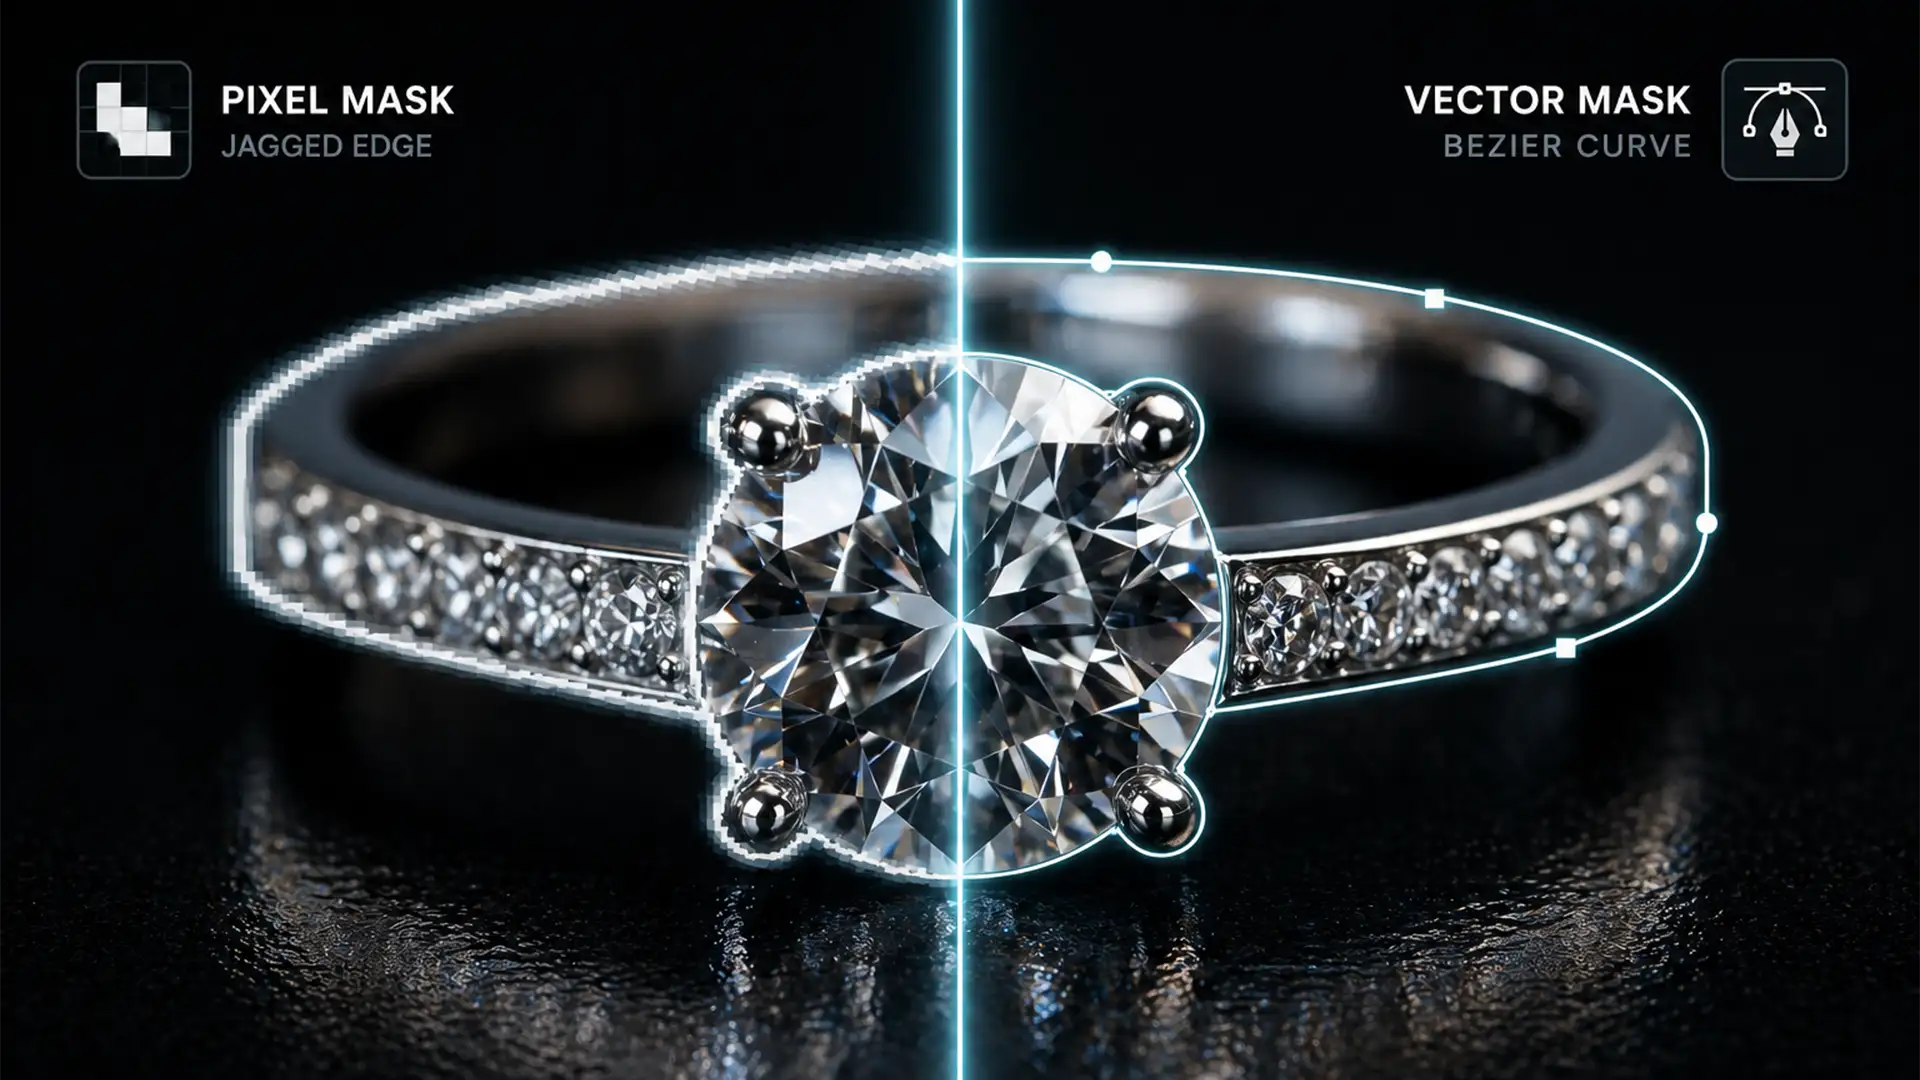
Layer Mask vs Vector Mask: Understanding the Difference
Before diving into the workflows, it is crucial to understand the tools at your disposal for non-destructive editing.
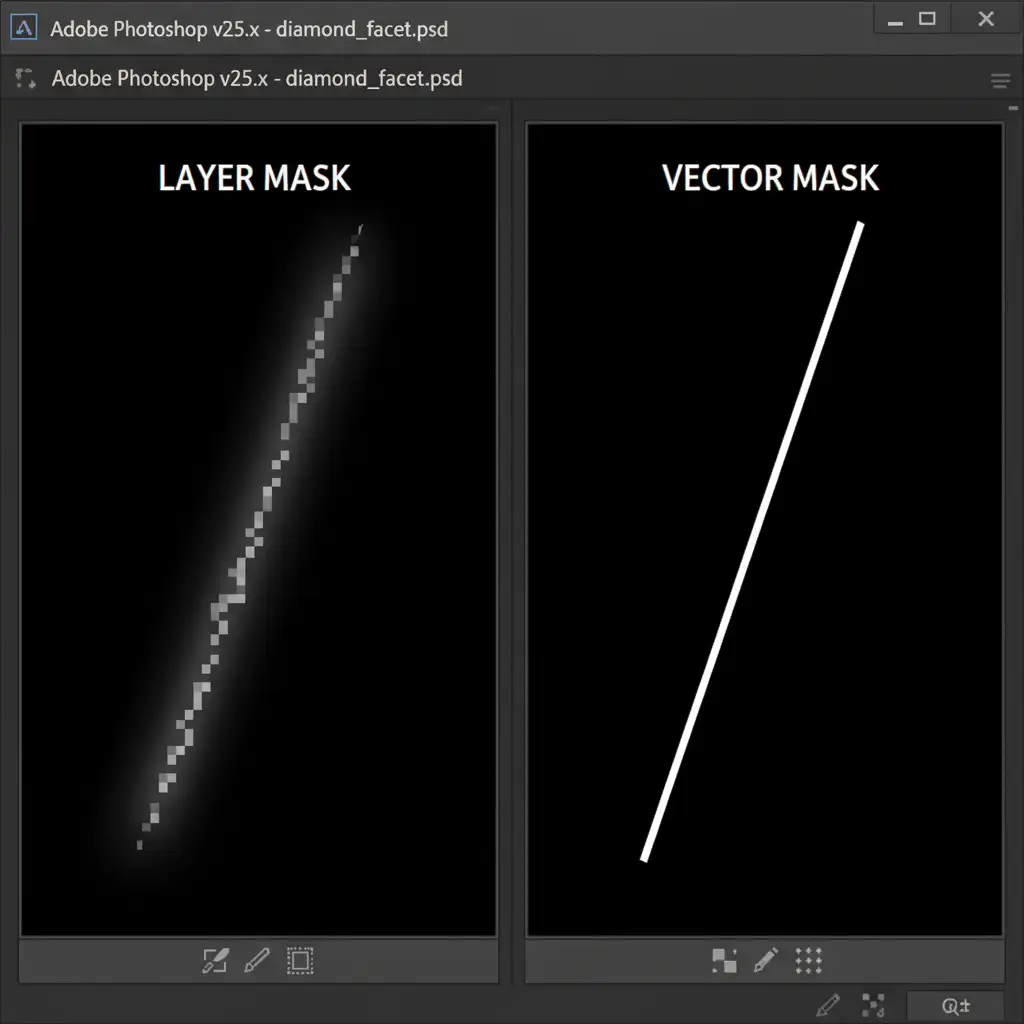
Pixel-Based Layer Masks (The Soft Edge)
A standard Layer Mask uses pixel data (grayscale values) to hide or reveal parts of an image.
- Pros: Excellent for soft transitions, gradients, drop shadows, and blending reflections.
- Cons: Resolution-dependent. Prone to jagged edges when masking hard surfaces like metal or diamonds.
Vector Masks (The Razor-Sharp Edge)
A Vector Mask uses mathematical Bezier curves created with the Pen Tool to dictate visibility.
- Pros: Completely resolution-independent. Creates a flawless clipping path that scales infinitely without losing edge sharpness.
- Cons: Cannot create soft gradients or partial transparency natively.
How to Mask Jewelry in Photoshop v25.x: 3 Professional Workflows
Here is how you can tackle jewelry cutouts in Photoshop, ranging from the quick automated fix to the ultimate high-end hybrid workflow.
Method A: The Quick Fix (Standard Layer Mask)
If you are on a tight deadline for low-resolution web use, you might be tempted to use Photoshop’s automated tools.
- Select the Object Selection tool.
- Hover over your jewelry piece and click to generate the marching ants.
- Click the Add Layer Mask icon at the bottom of the Layers panel.
The Verdict: While incredibly fast, this method often leaves artifacts and jaggedness on shiny metal edges. It is not suitable for luxury print standards.
Method B: The Pro Workaround (The Hybrid Masking Technique)
This is the industry-standard workflow for high-end jewelry retouching. It combines the strengths of both masking methods.
- Select the Pen Tool and ensure GPU acceleration is enabled for smooth path drawing.
- Trace the hard outer edges of the ring or gemstone.
- Apply this path as a Vector Mask to your layer. This guarantees maximum crispness for the hard surfaces.
- Group the layer (Ctrl/Cmd + G).
- Add a standard Layer Mask to the newly created group folder.
- Use a soft brush on the group’s Layer Mask to smoothly paint in soft drop shadows and bottom reflections.
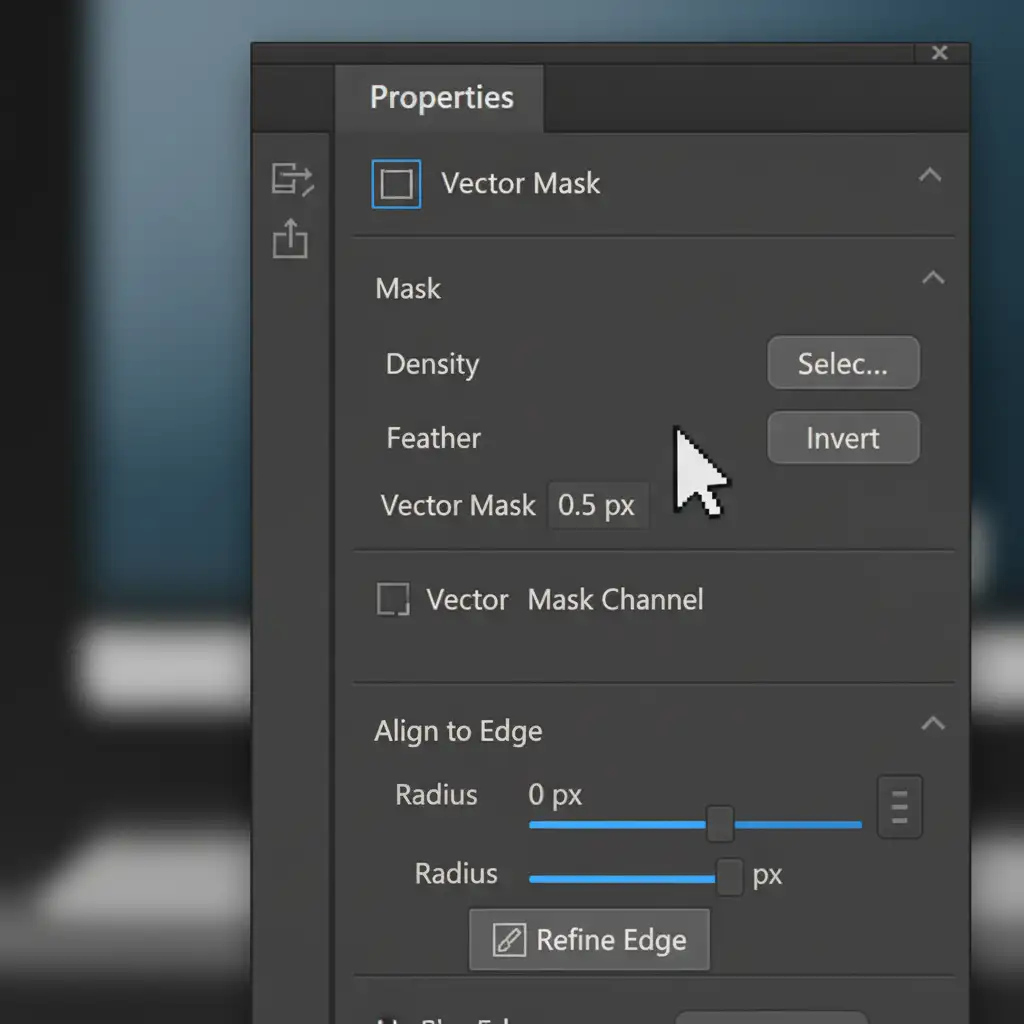
Method C: The Technical Deep-Dive (Vector Mask Edge Refinement)
A common issue with raw vector masks is that they can look too perfect, resulting in a synthetic, “cut-out” appearance. To maintain sub-pixel rendering sharpness while integrating the jewelry naturally into its background, you must utilize edge refinement.
- Create your meticulous clipping path with the Pen Tool and apply it as a Vector Mask.
- Open the Properties panel (Window > Properties).
- With the Vector Mask selected, locate the Feather slider.
- Adjust the feathering by 0.3 to 0.5 pixels.
This microscopic adjustment removes the harsh, synthetic cut-line while maintaining the structural sharpness of the metal and gems.
Stop Struggling with Complex Jewelry Cutouts
Mastering the layer mask vs vector mask workflow is essential for achieving the flawless, hyper-realistic look demanded by luxury brands. However, drawing meticulous Bezier curves and balancing sub-pixel edge refinement takes immense patience and time—time you could be spending shooting your next campaign or scaling your business.
If you are struggling with complex jewelry cutouts, let the experts handle it. Image Work India and Cloud Retouch specialize in high-end jewelry retouching, providing pixel-perfect clipping paths, flawless edge refinement, and pristine shadow recreation tailored specifically for luxury brands.
Contact Cloud Retouch today to elevate your jewelry imagery to flawless 2024 print standards!


