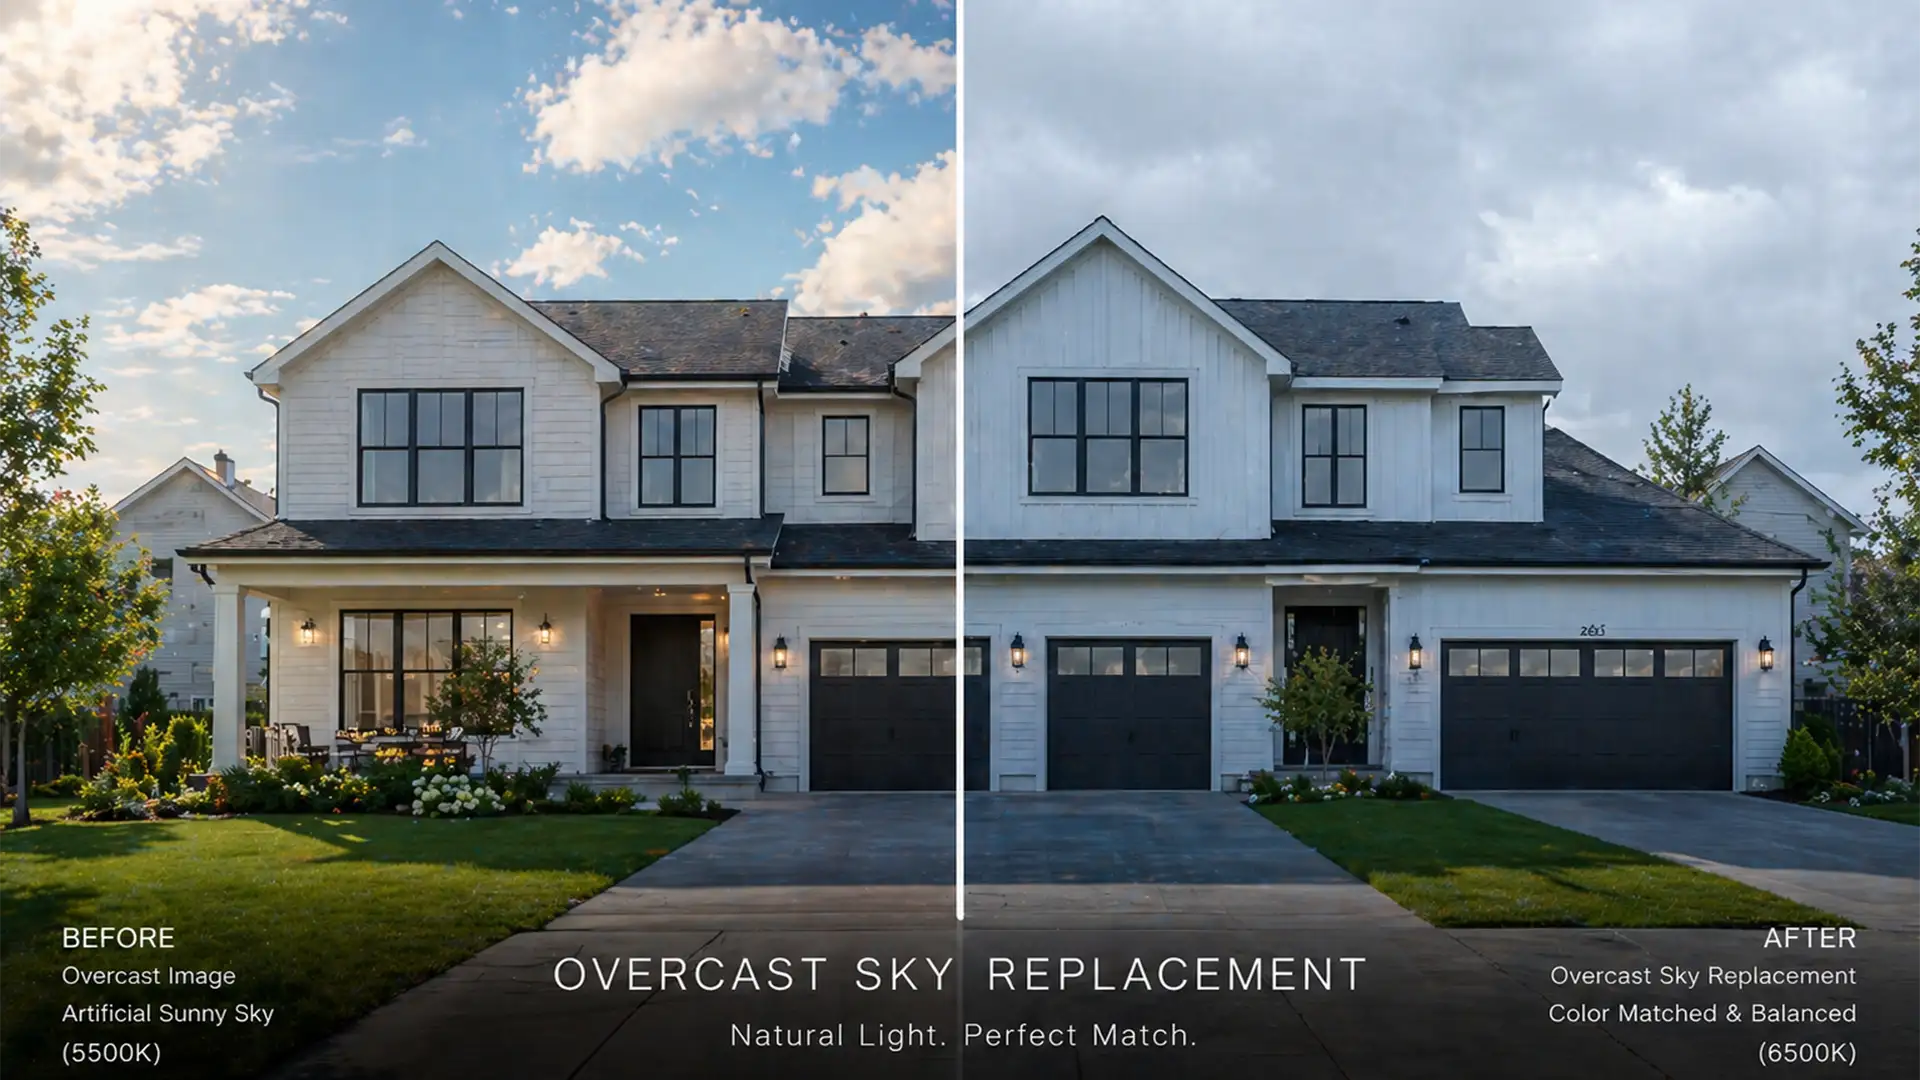
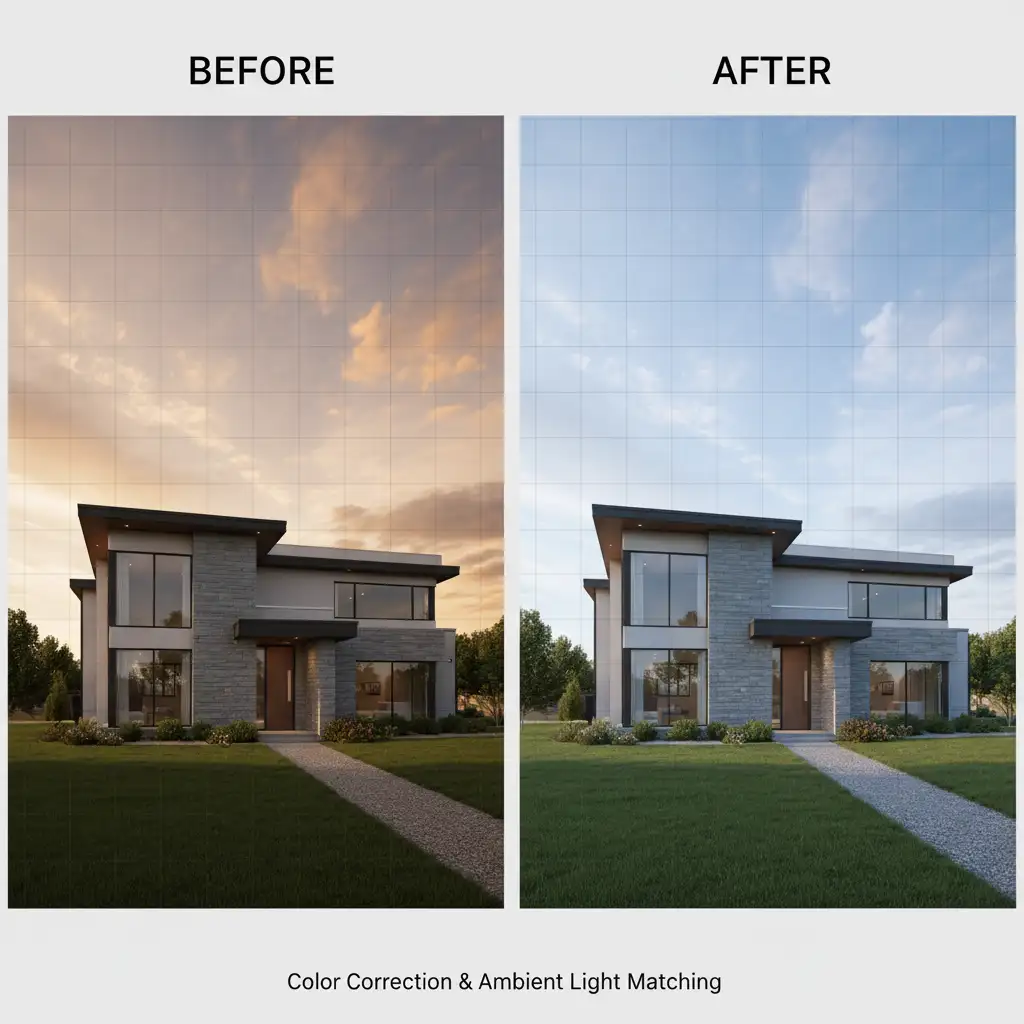
There is nothing worse than a beautifully composed real estate exterior ruined by a fake-looking sky. You know the look: the property was shot on a gloomy Tuesday, but the editor dropped in a blazing, high-contrast summer sky.
This creates a jarring semantic mismatch. The shadows don’t align, the dynamic range clashes, and potential buyers instantly recognize the photo is doctored. Mastering real estate sky replacement color matching overcast conditions is the dividing line between amateur edits and premium property marketing.
In this guide, we will break down exactly how to bridge the gap between flat foregrounds and dynamic skies using Adobe Photoshop v24.0 through v25.x, ensuring your ambient light blending is always flawless.
Why Default Sky Replacements Fail on Overcast Days
The core problem comes down to Color Temperature and contrast.
Overcast lighting acts as a giant softbox. It produces a flat, cool, and diffused lighting environment that typically sits around 6000K to 6500K. There are minimal harsh shadows, and the overall contrast is low.
Conversely, default sky overlays in Photoshop often feature 5000K to 5500K lighting with high contrast and highly directional sunlight. When the automated algorithm in Photoshop’s native Sky Replacement tool processes this, it occasionally fails to adequately relight the foreground or tone down the sky’s saturation. The result is a pasted-on look that requires manual color grading and luminosity matching.
3 Methods for Realistic Overcast Sky Replacements
Depending on your batch volume and the complexity of the property’s roofline, you can tackle this issue using three different workflows in Photoshop.
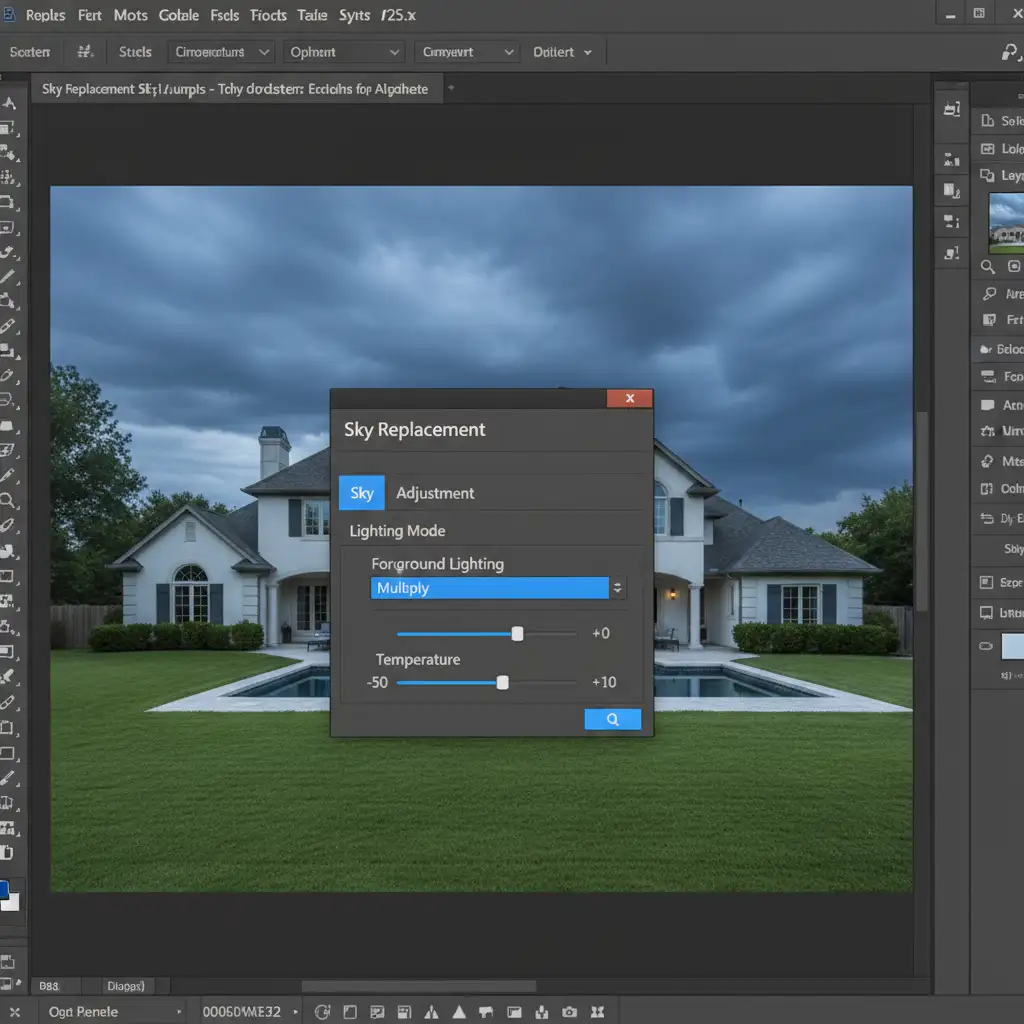
Method A: The Quick Fix (Photoshop Native Sliders)
If you need a rapid adjustment, the native Sky Replacement dialog offers built-in tools to cool down your sky and match the foreground’s white balance.
- Navigate to Edit > Sky Replacement.
- Select a sky that closely mimics diffuse lighting (avoid skies with a visible, harsh sun).
- Scroll down to the Foreground Lighting section.
- Change the Lighting Mode from Screen to Multiply. This helps darken the edges where the sky meets the roofline, grounding the image.
- Decrease the Lighting Adjustment slightly to blend the edges.
- Crucially, adjust the Temperature slider towards the left (the blue/cooler end) to match the 6500K overcast ground.
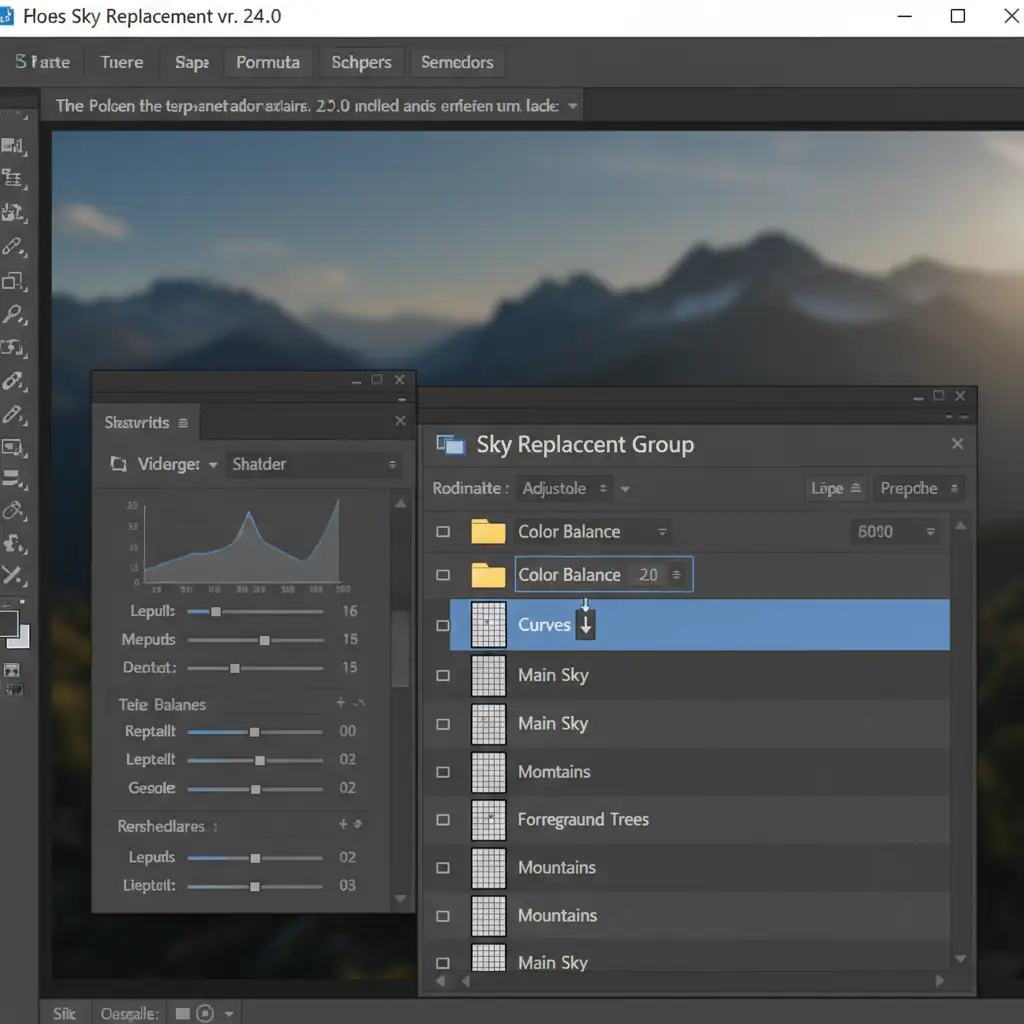
Method B: The Pro Workaround (Manual Layer Adjustments)
For high-end real estate listings, the automated sliders rarely provide enough granular control. The professional approach is to output the sky replacement as layers and manually adjust the color and luminosity.
- Run the Sky Replacement tool and set the “Output To” dropdown to New Layers.
- Open the newly created Sky Replacement Layer Group in your Layers Panel.
- Add a Color Balance adjustment layer. Right-click it and select “Create Clipping Mask” so it only affects the sky.
- Push the Midtones towards Cyan and Blue to neutralize the warm sunlight.
- Next, add a Curves adjustment layer and clip it to the sky layer as well.
- To mimic flat overcast lighting, lift the black point (bottom left of the curve) up slightly, and lower the white point (top right) down. This flattens the sky’s contrast to match the foreground.
- Pro-Tip: Double-click the Curves layer to open the Layer Style panel and use the Blend If sliders to protect the darkest shadows in the sky from becoming too washed out.
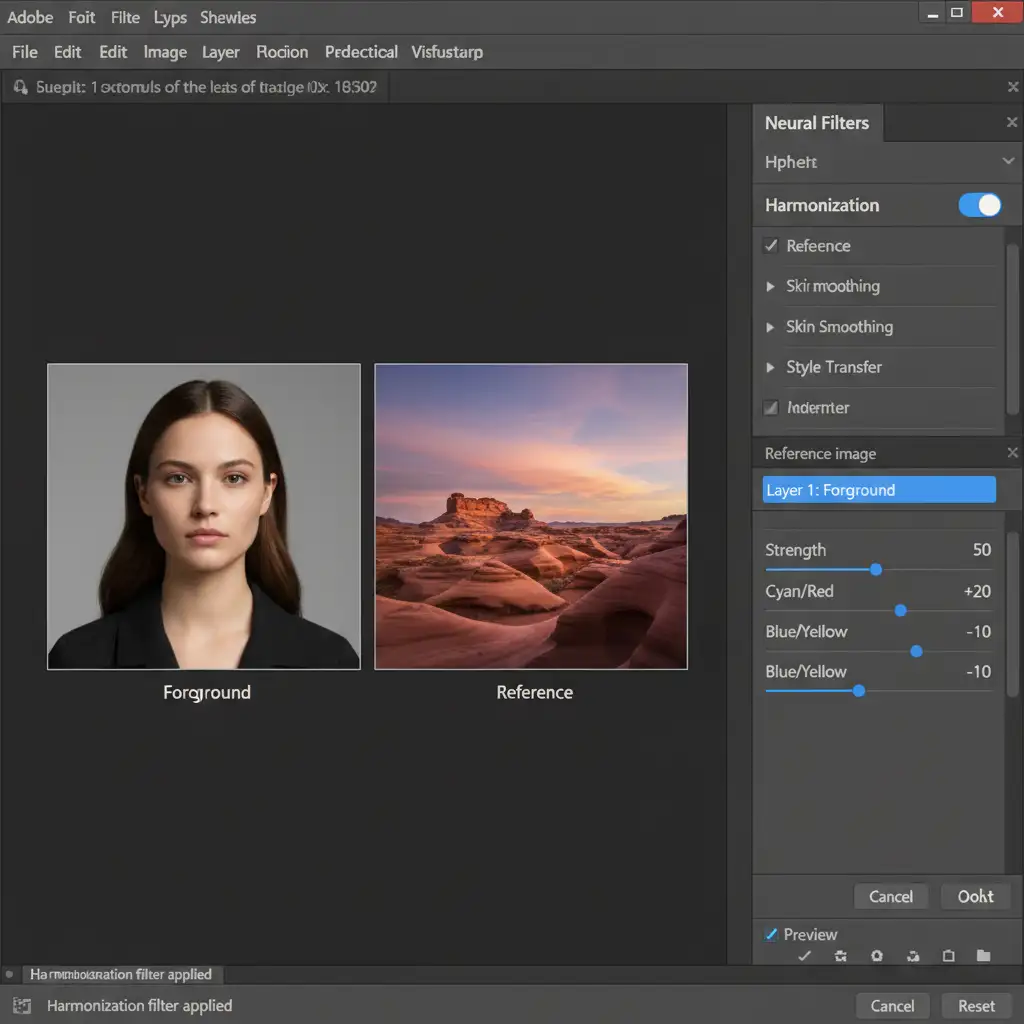
Method C: The Technical Deep-Dive (Harmonization Filter)
Adobe Sensei AI has introduced powerful neural filters in recent versions of Photoshop (v24.0 and v25.x) that can automatically handle complex ambient light blending.
- Output your sky replacement to New Layers.
- Select your isolated sky layer.
- Go to Filters > Neural Filters.
- Toggle on the Harmonization filter.
- On the right-hand panel, select your original overcast foreground layer as the “Reference image”.
- Photoshop will automatically analyze the foreground and adjust the sky layer’s color, luminosity, and contrast to match the ambient overcast environment.
- Fine-tune the effect strength using the Opacity slider within the filter panel before hitting OK.
Scale Your Real Estate Editing Without Sacrificing Quality
Mastering real estate sky replacement color matching for overcast photos takes time, a keen eye for color grading, and a deep understanding of light behavior. When you are processing hundreds of listing photos a week, spending five to ten minutes manually tweaking curves and clipping masks on every single overcast shot will drain your profitability.
Struggling to get high-volume real estate batches looking natural? Outsource your editing to the experts at Image Work India and Cloud Retouch. Our professional retouchers specialize in flawless, realistic sky replacements, advanced color correction, and ambient light blending at scale. Let us handle the tedious pixel-pushing so you can focus on shooting more properties and growing your business. Contact us today to elevate your real estate portfolio.


