
You just received the final product photos from your studio, but there’s a massive problem: the colors don’t match your brand’s official guidelines. Thanks to studio lighting, camera sensors, and incorrect white balance, that vibrant brand orange (#FF5733) looks dull and washed out. In e-commerce, slight color deviations aren’t just annoying—they destroy customer trust and skyrocket your return rates.
If you’ve ever tried directly painting over a product with a Hex color, you know the frustration of instantly flattening all the texture and ruining the image. To achieve perfect color accuracy, you need to shift the pixel data dynamically without destroying luminosity gradients.
In this tutorial, we will show you exactly how to match a product photo to a hex code in Photoshop (v24.x and newer) using non-destructive adjustment layers, HSB values, and RGB channel targeting.
Why E-Commerce Colors Shift (And Why Hex Matching is Hard)
E-commerce product photos almost always display slight color shifts. Even with perfect studio lighting, the camera sensor interprets light differently than the human eye. When brands require exact color matching to specific Hexadecimal codes to maintain consistency, standard color correction often falls short.
The technical requirement is to shift the Hue, Saturation, and Lightness (HSB values) or LAB values dynamically. Let’s break down three professional methods to achieve pixel-perfect color accuracy.
Method A: The Quick Fix (Solid Color + Blend Modes)
This is the fastest method to match a product photo to a hex code in Photoshop. It is ideal for flat products or when you need a rapid turnaround for a large catalog.
- Isolate the Product: Select the product area you want to recolor using the Object Selection Tool.
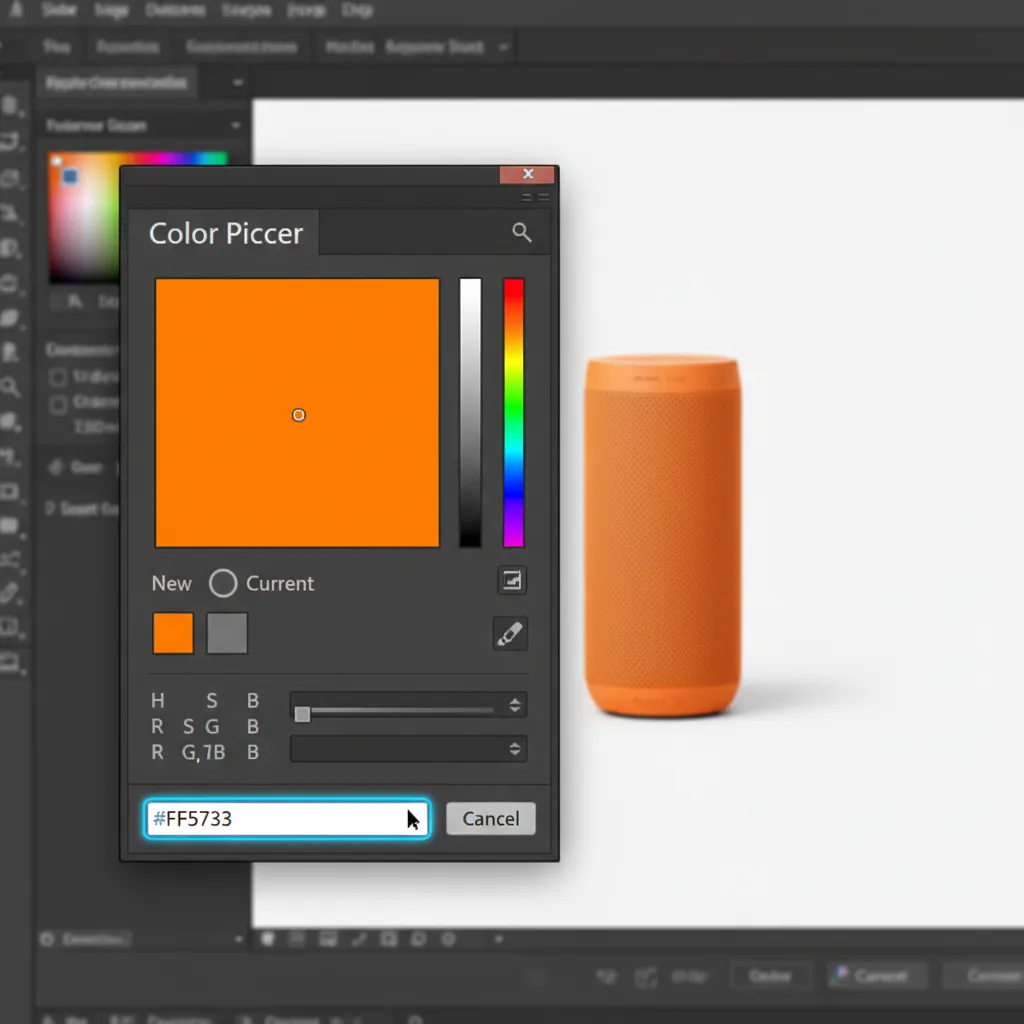
- Apply the Hex Code: Create a Solid Color Adjustment Layer. A Color Picker dialog box will appear. Paste your exact target Hex code (e.g., #FF5733) into the hex field.
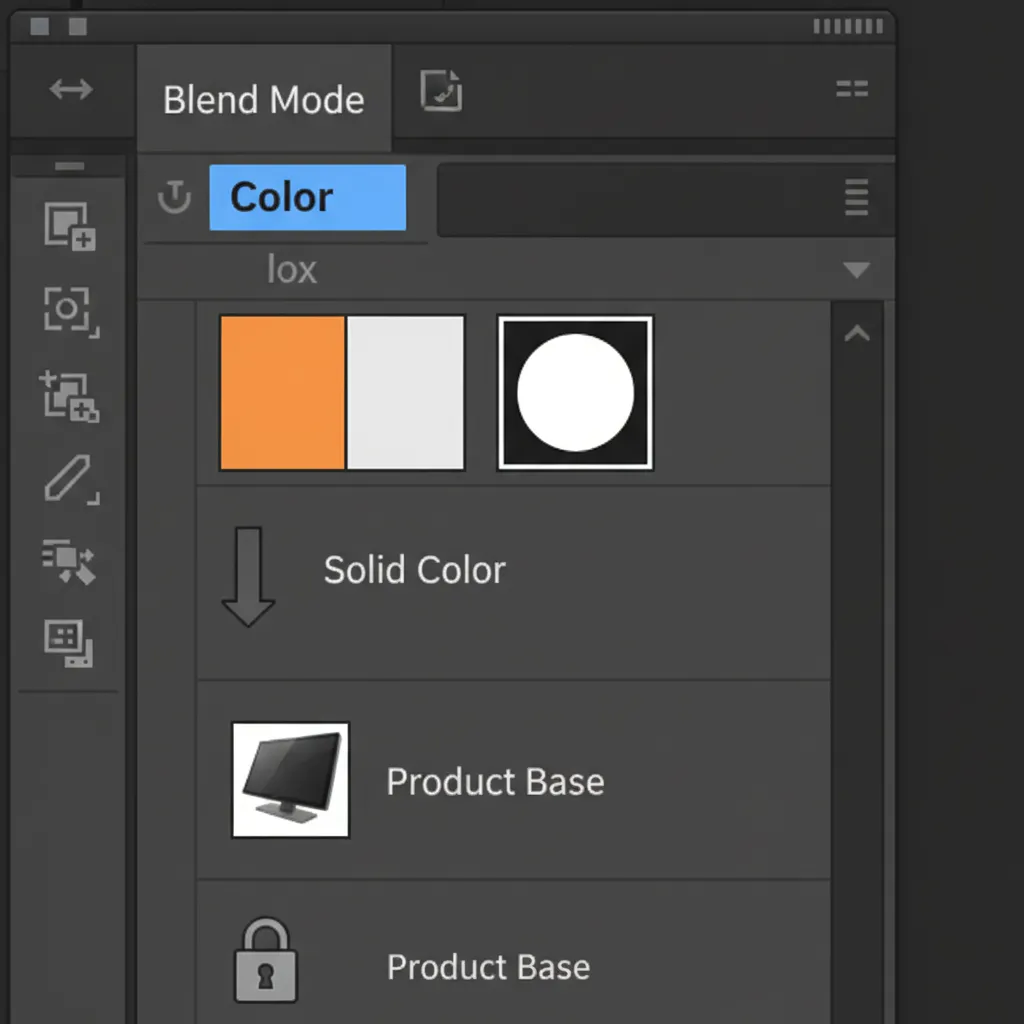
- Preserve Texture: Change the Solid Color layer’s Blend Mode to Color.
Note: While this method preserves basic luminosity, it can sometimes make complex textures look slightly flat because it overrides the original saturation data entirely.
Method B: The Pro Workaround (Hue/Saturation Match)
When the Quick Fix leaves your product looking too flat, you need to manually adjust the HSB values. This method allows for better compensation for studio lighting.
- Create a Reference Point: Draw a small vector shape (like a square) on your canvas and fill it with your target Hex code. This is your visual anchor.
- Add Hue/Saturation: Add a Hue/Saturation Adjustment Layer and apply a clipping mask so it only affects the product layer.
- Match Visually: Adjust the Hue slider until the product’s midtones visually match your reference shape. You will likely need to tweak the Saturation slider to compensate for how the original lighting washed out the item.
Method C: The Technical Deep-Dive (Curves Matching via Info Panel)
For high-end e-commerce retouchers, visual matching isn’t enough. You need mathematical proof that your product matches the brand guidelines. This method uses the Color Sampler tool and RGB channels to guarantee 100 percent texture retention and absolute color accuracy.
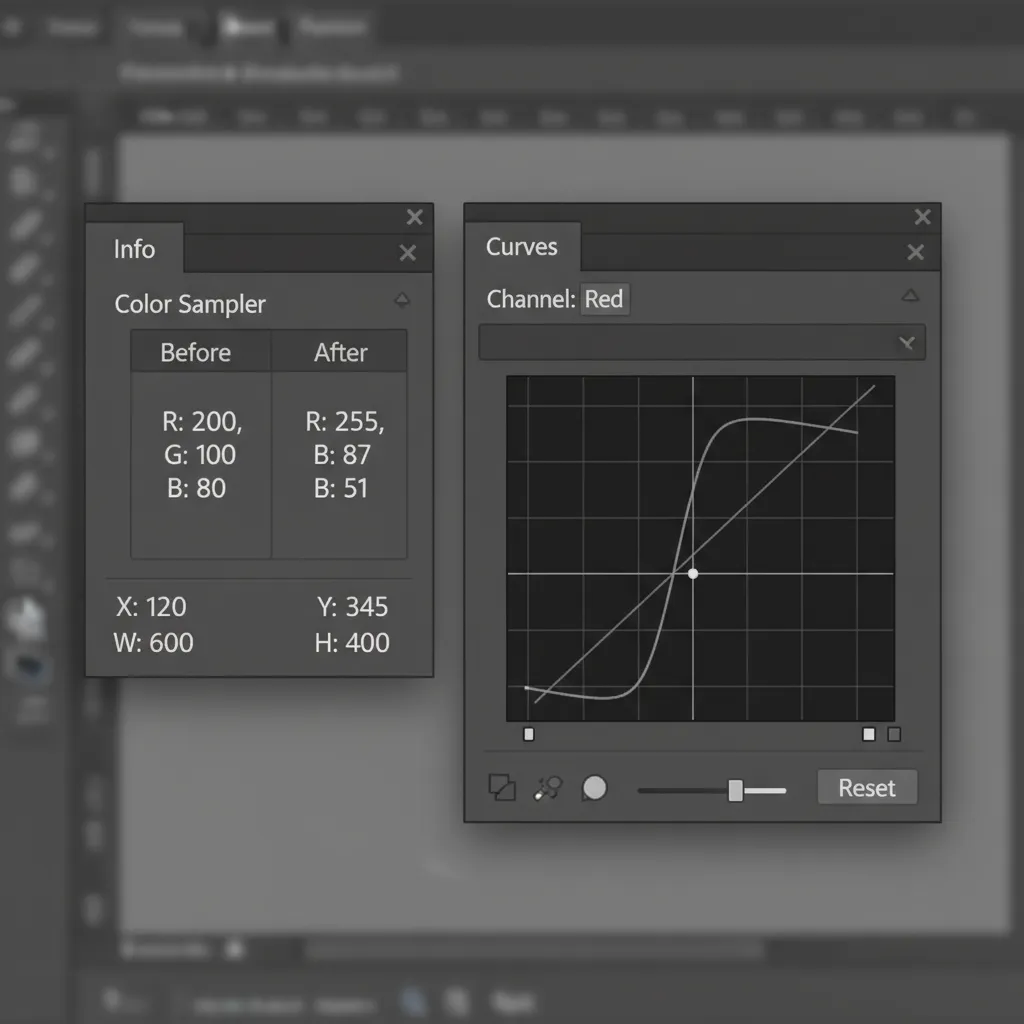
- Drop a Sampler: Open the Info Panel (Window > Info). Select the Color Sampler tool (hidden under the Eyedropper tool) and click on a well-lit midtone area of your product.
- Convert Hex to RGB: Convert your target Hex code to its exact RGB values (e.g., #FF5733 is R:255, G:87, B:51).
- Apply Curves: Create a Curves adjustment layer and apply a clipping mask to your product.
- Target Individual Channels: Look at your Info Panel. It will show the current RGB values of your sampled point. Open the Curves properties, and instead of adjusting the master RGB curve, select the Red, Green, and Blue channels independently.
- Dial in the Math: Adjust the curve line for each channel until the “After” numbers in your Info Panel exactly match your target RGB values.
Because you are manipulating the underlying luminosity curve on a per-channel basis, the product retains flawless lighting and texture while perfectly matching the brand’s Hex code.
Scale Your E-Commerce Color Correction
Learning how to match a product photo to a hex code in Photoshop is an essential skill, but executing it across thousands of SKUs is a massive drain on your team’s time and resources. When dealing with seasonal catalog updates, lighting inconsistencies, and strict brand guidelines, manual color correction can bottleneck your entire production pipeline.
Struggling with inconsistent product colors across your e-commerce catalog?
Hire the experts at Image Work India and Cloud Retouch. Our specialized retouchers deliver pixel-perfect, Hex-accurate color correction at scale. We ensure your products look exactly like they do in real life, preserving every ounce of texture while matching your strict brand guidelines—ultimately reducing your return rates and boosting customer satisfaction.
[Contact us today to get a free trial and see how we can streamline your post-production workflow.]


![Fix Photoshop 2024 HDR to SDR Color Shift Bug [Full Guide]](https://imageworkindia.com/wp-content/uploads/2026/05/photoshop-2024-hdr-sdr-color-shift-fix-Featured-Image.webp)