
You just selected an area, typed your prompt, and hit generate. The composition looks amazing, but there is a glaring problem: a harsh dividing line where the AI-generated pixels meet your original image. The new area has a different tint, lacks contrast, and feels completely disconnected from the rest of the plate.
If you are trying to figure out how to fix generative fill color shift issues in Photoshop, you are not alone. While Adobe Firefly is incredibly powerful, it frequently struggles to interpret complex embedded ICC profiles or match the localized film grain of your original shot.
Instead of spending hours manually painting over AI mistakes, you need a systematic approach. Below is the exact, professional workflow to eliminate tint shifts, fix saturation gaps, and seamlessly blend Generative Fill layers into your original plate.
Why Does Generative Fill Cause Color Shifts?
Before applying the fix, it is important to understand why the Adobe Firefly cloud engine creates these artifacts in Photoshop (v25.x to v26.x).
The primary culprit is color space mismatch. Generative Fill operates natively in a standardized cloud environment. If your working document is set to a wide color gamut like ProPhoto RGB, CMYK, or is operating in 16-bit or 32-bit mode, the AI cloud engine often defaults its output back to 8-bit sRGB. When those sRGB pixels are placed back into your ProPhoto RGB document, they look washed out, overly saturated, or shifted in hue.
Secondly, Generative Fill generates mathematically “clean” pixels. It routinely fails to inherit the localized noise, film grain, and subtle lighting gradients of your original photograph, creating an unnatural, plastic-looking transition area.
Here are the three professional methods to fix it.
How to Fix Generative Fill Color Shift (Step-by-Step)
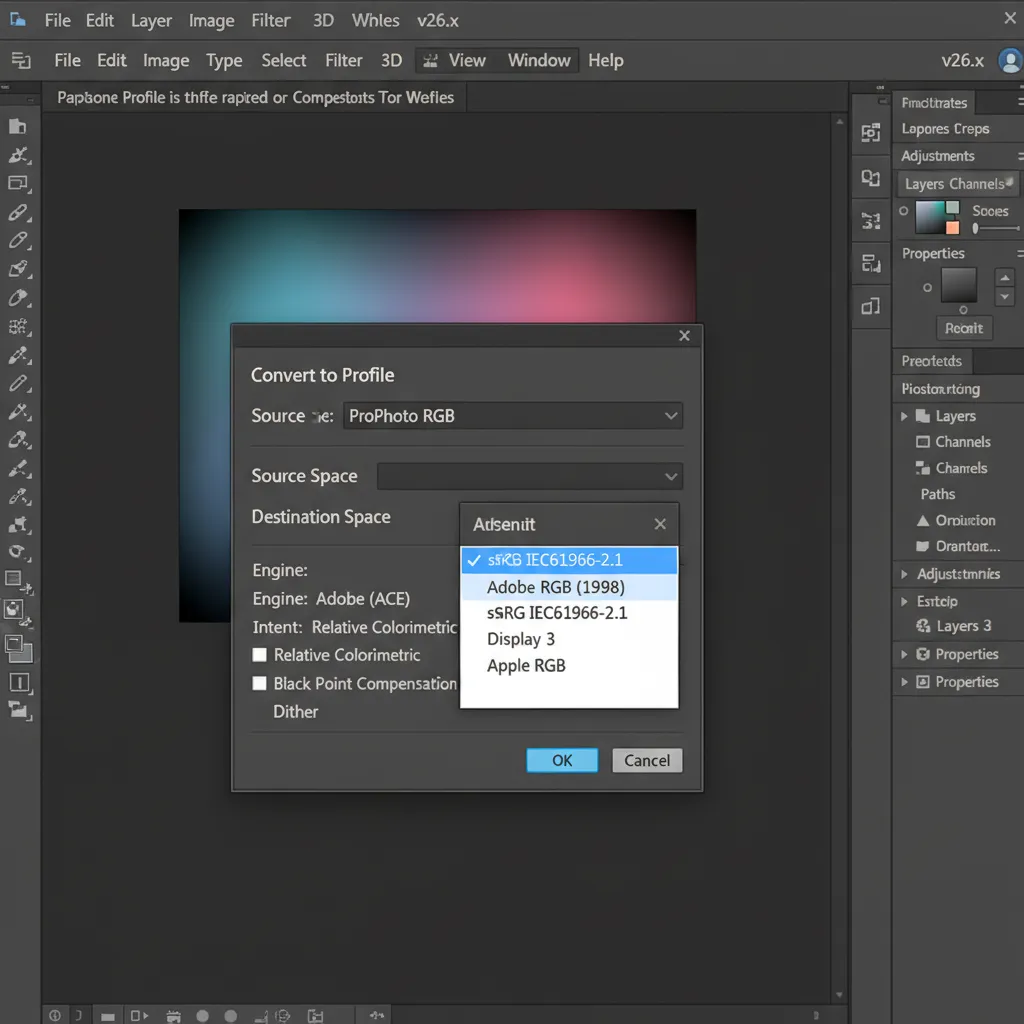
Method 1: The Quick Fix – Standardize Color Profiles
The easiest way to prevent color shifting before it happens is to ensure your document matches the AI’s preferred working environment.
- Before making your selection, navigate to Edit > Convert to Profile.
- In the Destination Space dropdown, select sRGB IEC61966-2.1.
- Next, go to Image > Mode and ensure your document is set to 8 Bits/Channel.
- Apply your Generative Fill.
By standardizing the color profile before generating, you prevent the AI from rendering in a conflicting color space, significantly reducing the chance of a harsh dividing line.
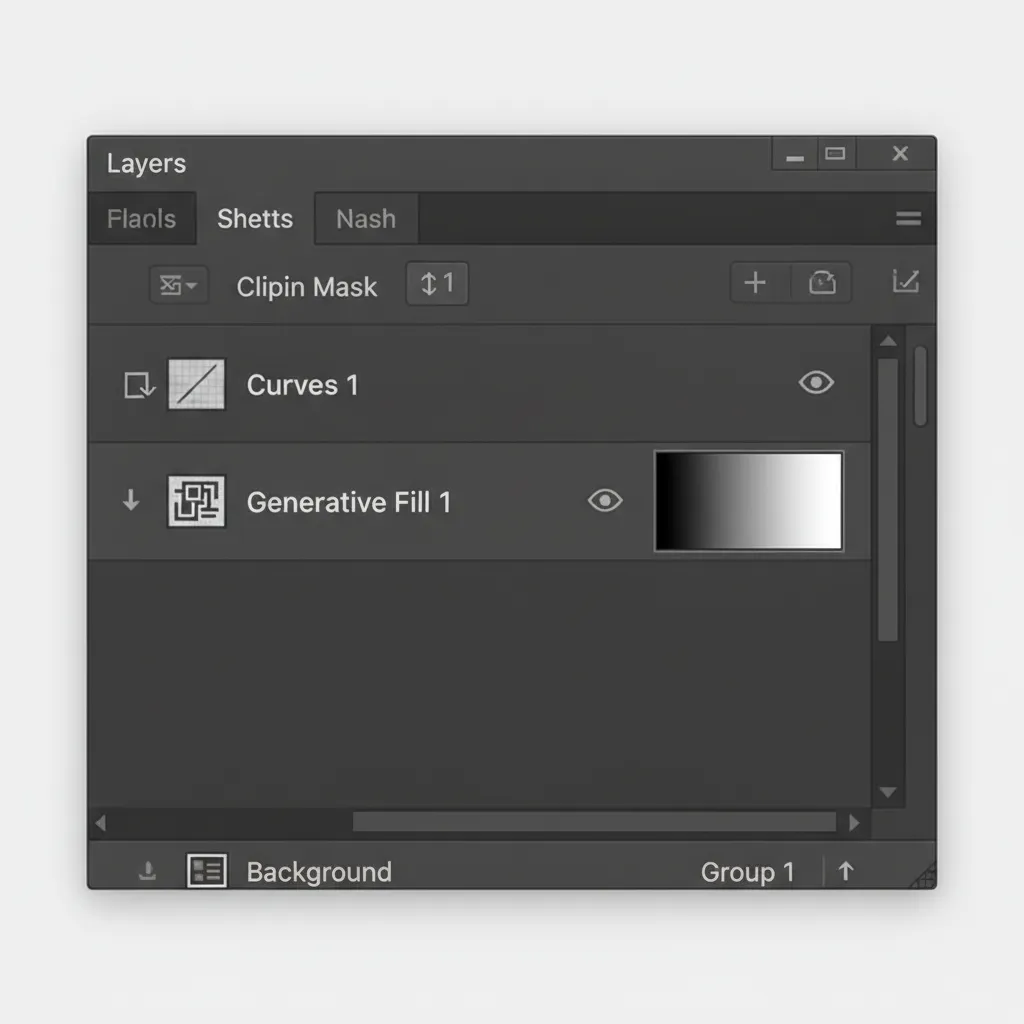
Method 2: The Pro Workaround – Helper Curves and Clipping Masks
If you have already generated the perfect element and just need to fix the tint mismatch, you need to use localized adjustment layers.
- Select your Generative Fill layer in the Layers Panel.
- Add a Curves Adjustment Layer directly above it.
- Hold Alt (Windows) or Option (Mac) and click the line between the Curves layer and the Generative Fill layer to create a Clipping Mask. This ensures your color corrections only affect the AI-generated pixels.
- Open the Curves properties and adjust the individual Red, Green, and Blue channels to match the luminosity and color tint of the original plate.
- Select the Layer Mask of the Generative Fill layer, grab a soft-edged brush (B) set to 10% opacity, and gently feather the harsh dividing line to blend the edges.
Method 3: The Technical Deep-Dive – Noise Matching and Blend If
Sometimes the color shift isn’t a hue problem; it is a texture and luminosity problem. Because AI pixels lack grain, they reflect light differently than the original photograph.
Step A: Match the Noise
- Create a new blank layer above your Generative Fill layer and clip it (Alt/Option-click).
- Go to Edit > Fill and choose 50% Gray.
- Change the layer blend mode to Overlay.
- Go to Filter > Noise > Add Noise. Add uniform, monochromatic noise until the grain matches the original plate.
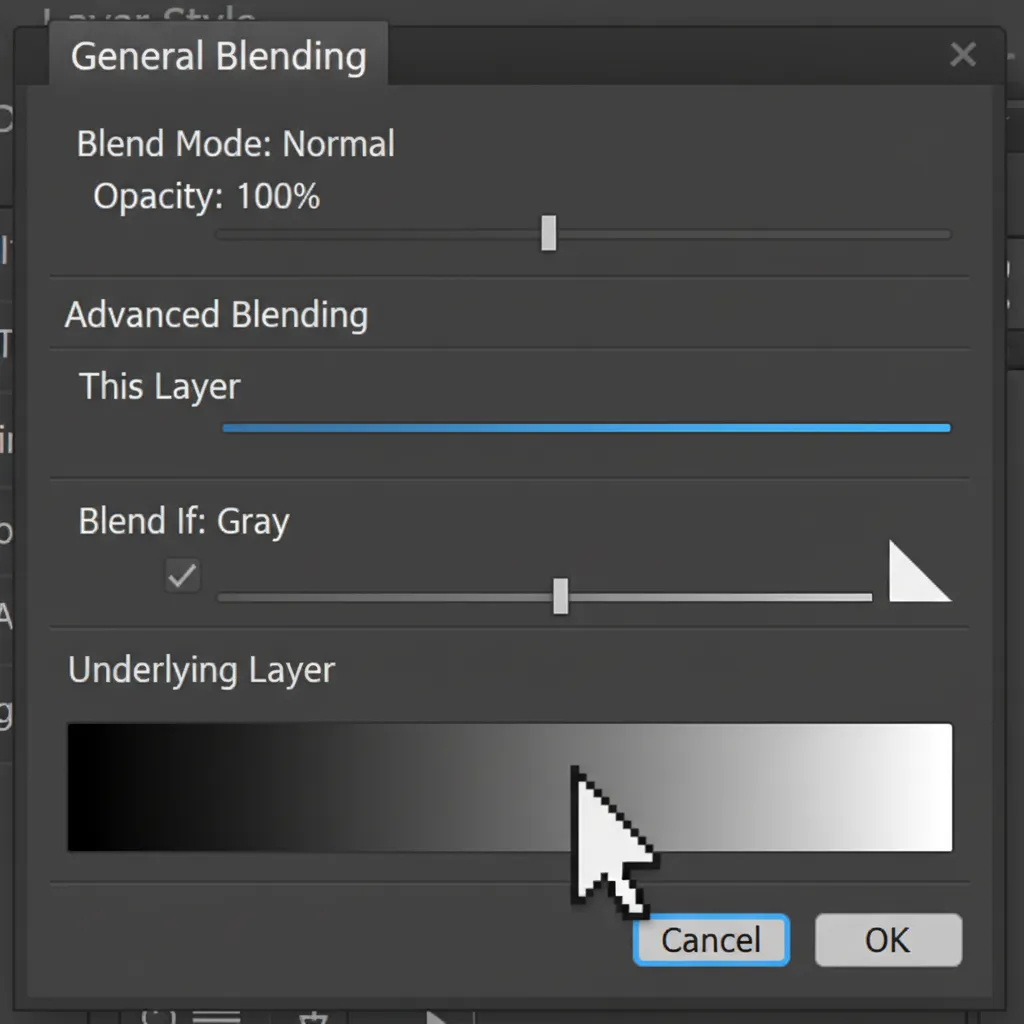
Step B: Seamless Transitions with Blend If
- Double-click the Generative Fill layer to open the Layer Style dialog.
- Look at the Blend If section at the bottom, specifically the Underlying Layer slider.
- Hold Alt/Option and click the triangle sliders to split them.
- Drag the split halves inward to create a smooth, feathered transition between the AI-generated highlights/shadows and the original image underneath.
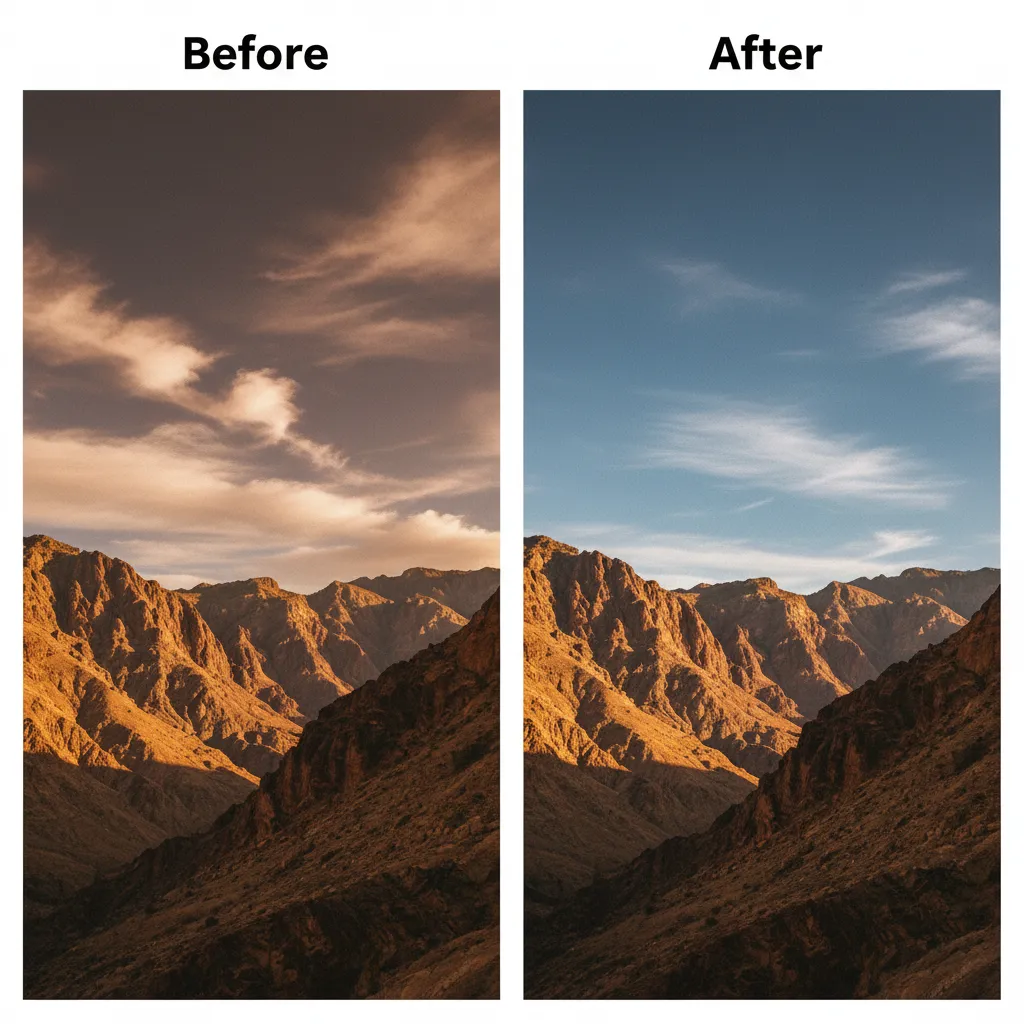
Before and After: Seamless AI Blending
By combining an sRGB workflow with clipped adjustment layers and noise matching, you completely eliminate the tell-tale signs of AI manipulation. The dividing line vanishes, and the color space matches perfectly.
Need Flawless, Pixel-Perfect Retouching?
Fixing a generative fill color shift on a single image is manageable, but if you are processing hundreds of e-commerce product shots, high-end fashion editorials, or real estate composites, wrestling with AI artifacts drains your time and profitability. AI tools are great for ideation, but pixel-perfect commercial results still require an expert human touch.
If you need flawless results without the AI artifacts, outsource your complex, high-end retouching to Image Work India and Cloud Retouch. Our team of professional retouchers understands the technical nuances of color spaces, luminosity blending, and seamless compositing. Let us handle the tedious pixel-pushing so you can focus on scaling your creative business.
Contact Image Work India and Cloud Retouch today for seamless, professional image editing services tailored to your exact standards.


![Fix Photoshop 2024 HDR to SDR Color Shift Bug [Full Guide]](https://imageworkindia.com/wp-content/uploads/2026/05/photoshop-2024-hdr-sdr-color-shift-fix-Featured-Image.webp)