We’ve all been there: you are an hour deep into meticulous high-end skin retouching using your trusty frequency separation action, only to realize your initial blur radius was slightly off. Because standard frequency separation forces you to flatten image layers or stamp visible pixels, your precise clone stamp and mixer brush work is now permanently locked in. To fix it, you have to scrap the layer and start over.
It is a massive waste of time and a critical bottleneck for professional retouchers.
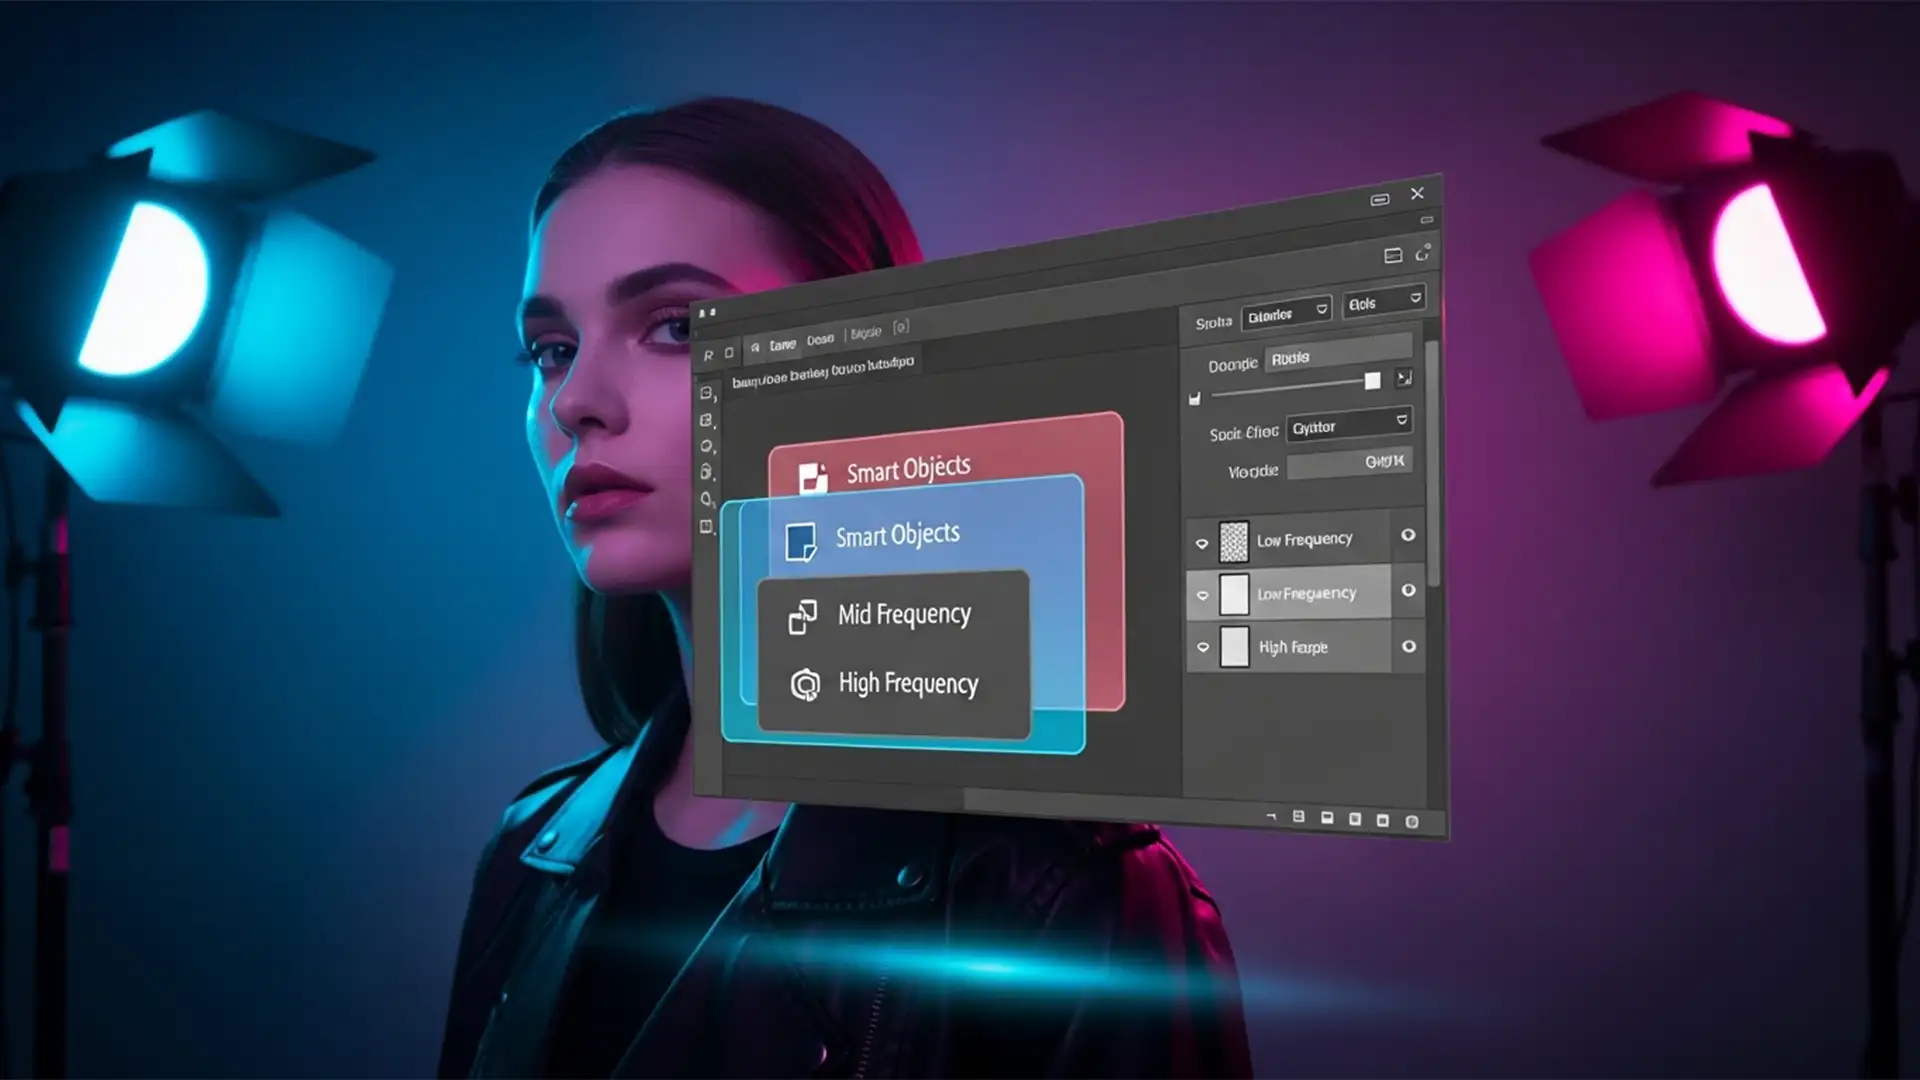
But what if you could change that radius retrospectively? Enter the “Unicorn” workflow: non-destructive multi-radius frequency separation. By leveraging nested Smart Objects and advanced Apply Image calculations in Adobe Photoshop (v24.x to v27.x), you can stack multiple spatial frequencies without ever destroying a single pixel.
Here is how to master this elite technique to protect your micro-texture and perfect your broad transitions.
The Problem with Standard Frequency Separation
Traditional frequency separation restricts retouchers to a single radius blur. You duplicate your background, blur the bottom layer (Low Frequency), and use Apply Image to extract the texture to the top layer (High Frequency).
The fatal flaw? Skin is not composed of just two frequencies. Blemishes exist on one spatial frequency, pores (micro-texture) on another, and broad tonal transitions on yet another. When you are restricted to a single radius, you are forced to compromise. Furthermore, once you begin painting with your mixer brush on the low-frequency layer, you are editing destructive pixels. If the client requests a softer transition later, your previous brushwork is destroyed.
How to Set Up Multi-Radius Frequency Separation in Photoshop
To solve the pain point of destructive pixel editing, we must move away from static raster layers. Here are three methods to achieve true non-destructive multi-radius frequency separation, ranging from a quick fix to a full multi-band technical setup.
Method A: The Quick Fix (Smart Object Base)
If you want to keep your current action but add a layer of non-destructive safety, start here.
- Convert to Smart Object: Before running your frequency separation action, convert your base image layer into a Smart Object.
- Run Your Action: Execute your standard frequency separation action.
- Retrospective Editing: Because the base layer is a Smart Object, the Gaussian Blur applied to your low-frequency layer becomes a Smart Filter.
You can now double-click the Smart Object at any time to adjust the blur radius retrospectively without losing your clone stamp work on the blank layers above it.
Method B: The Pro Workaround (Stacked Frequency Groups)
To handle different details—like micro-texture versus broad color transitions—you need multiple radii. This method stacks frequency groups (Low, Mid, High).
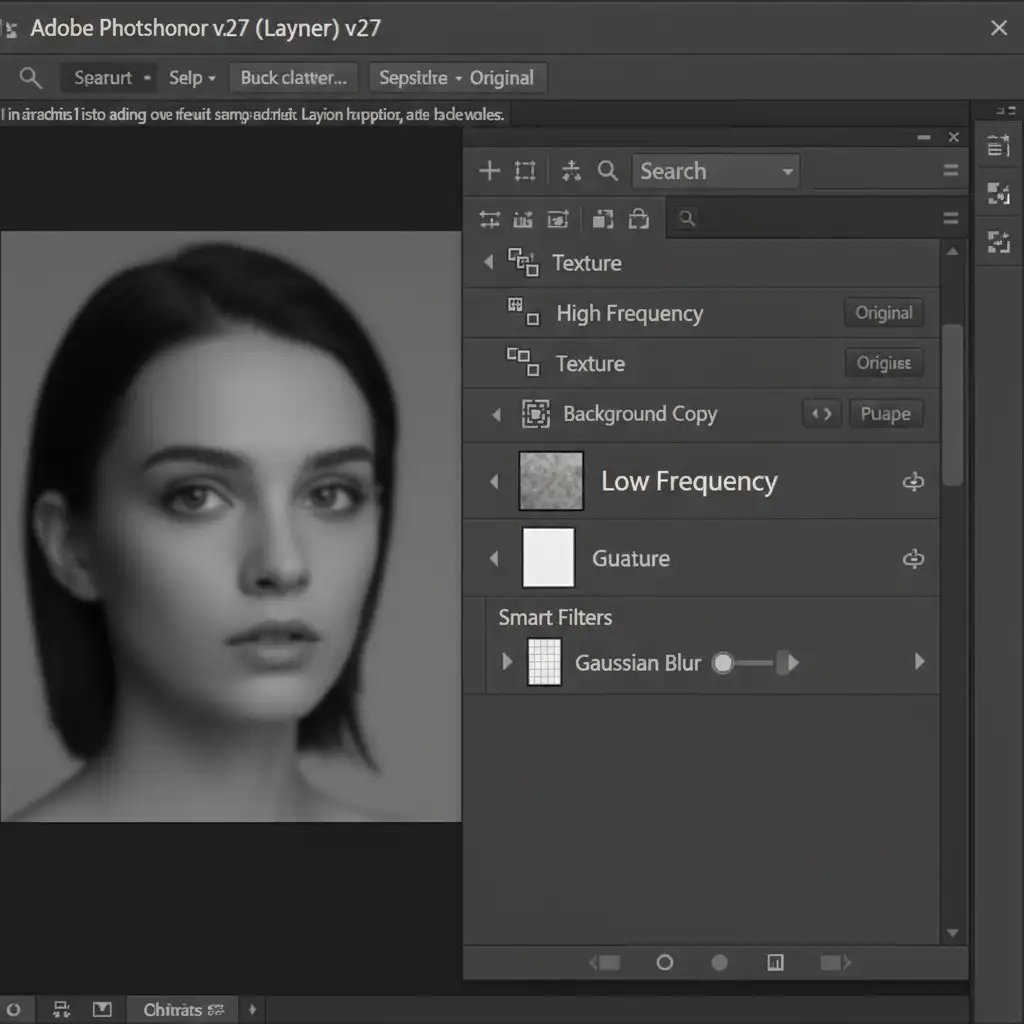
- Create Nested Smart Objects: Group your base image and convert the group into a Smart Object. Duplicate this Smart Object for as many frequency bands as you need.
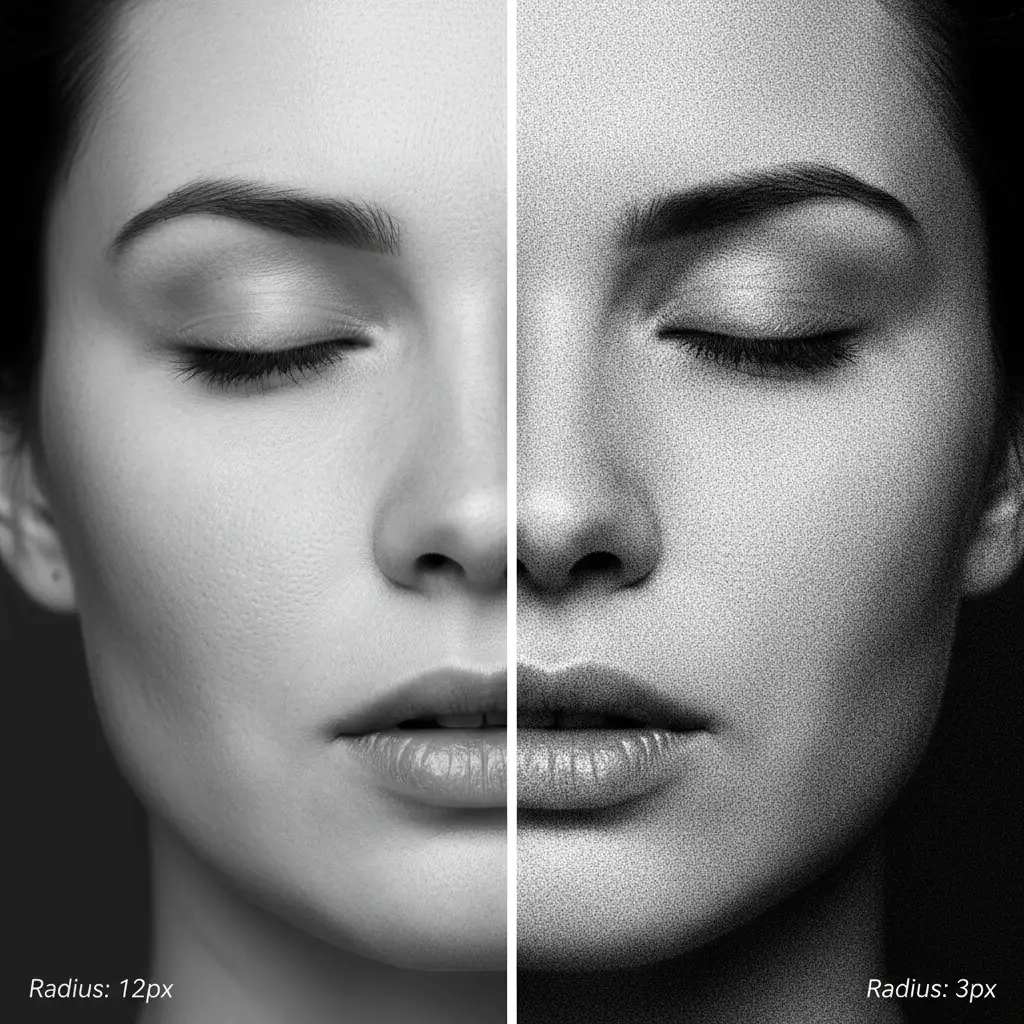
- Apply Different Radii: Apply a different Gaussian Blur radius to each Smart Object (e.g., 4px for fine texture, 12px for mid-tones, 24px for broad transitions).
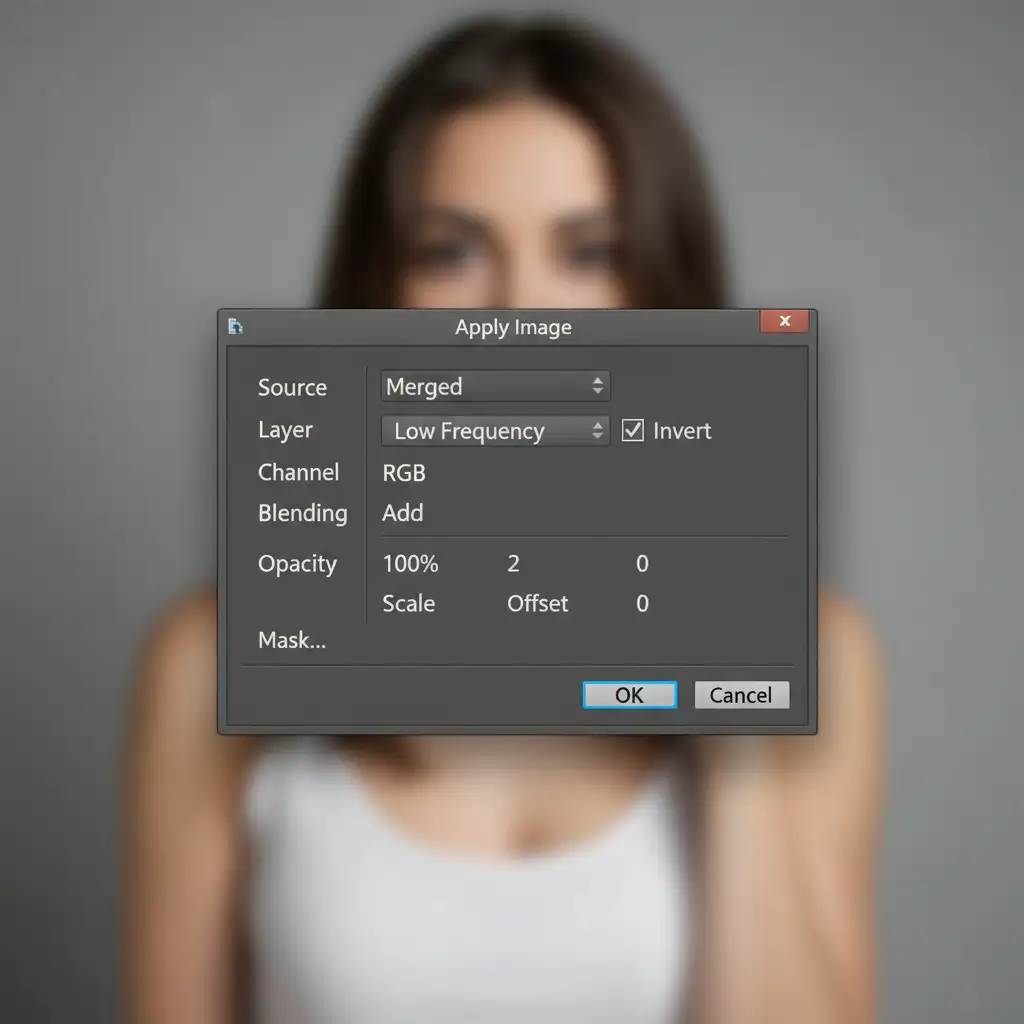
- Link via Apply Image: Use the Apply Image dialog box set to Subtract (for 8-bit) or Add with Invert (for 16-bit) to extract the specific frequencies between these nested Smart Objects.
- Masking: Group each frequency separation pair and use layer masks to target specific areas of the face.
Method C: The Technical Deep-Dive (Multi-Band Action)
For the ultimate high-end commercial retouching setup, we bypass Apply Image for the high frequencies and use a combination of High Pass and Surface Blur.
- The 50% Gray Foundation: Instead of extracting texture directly from the image layer, create a new layer filled with 50 percent gray and set its blend mode to Linear Light.
- High Pass Clipping: Clip a duplicate of your image (converted to a Smart Object) to this gray layer. Apply the High Pass filter to this clipped layer. Because it is a Smart Object, the High Pass radius is completely editable.
- Protecting Edge Transitions: On your low-frequency layer, replace Gaussian Blur with Surface Blur. Surface Blur preserves edge details while smoothing out the broad tonal transitions, preventing the “halo” effect common in standard frequency separation.
- Stacking: You can duplicate this 50% gray/High Pass clipping group multiple times, adjusting the High Pass radius on each to target specific spatial frequencies independently.
Why This Transforms Your High-End Retouching Workflow
Adopting a non-destructive multi-radius frequency separation workflow offers unparalleled advantages:
- Zero Lost Work: Adjust your blur or High Pass radii days later without redoing hours of mixer brush blending.
- Precision Targeting: Fix color blotchiness on a 15px radius without softening the 4px micro-texture.
- Ultimate Flexibility: Nested Smart Objects keep your file clean while allowing infinite retrospective adjustments.
Elevate Your Commercial Retouching with Image Work India
Mastering non-destructive multi-radius frequency separation takes time, deep technical knowledge, and an eye for pixel-perfect detail. If your studio is bottlenecked by destructive workflows, or if you simply need flawless, high-end commercial retouching delivered at scale, we are here to help.
At Image Work India and Cloud Retouch, our elite team of retouchers utilizes these exact non-destructive “Unicorn” workflows to ensure your editorial, beauty, and commercial images retain their natural micro-texture while achieving flawless tonal transitions.
Need pixel-perfect results without the technical headache? Contact Image Work India today and let us elevate your image catalog to the highest industry standards.


