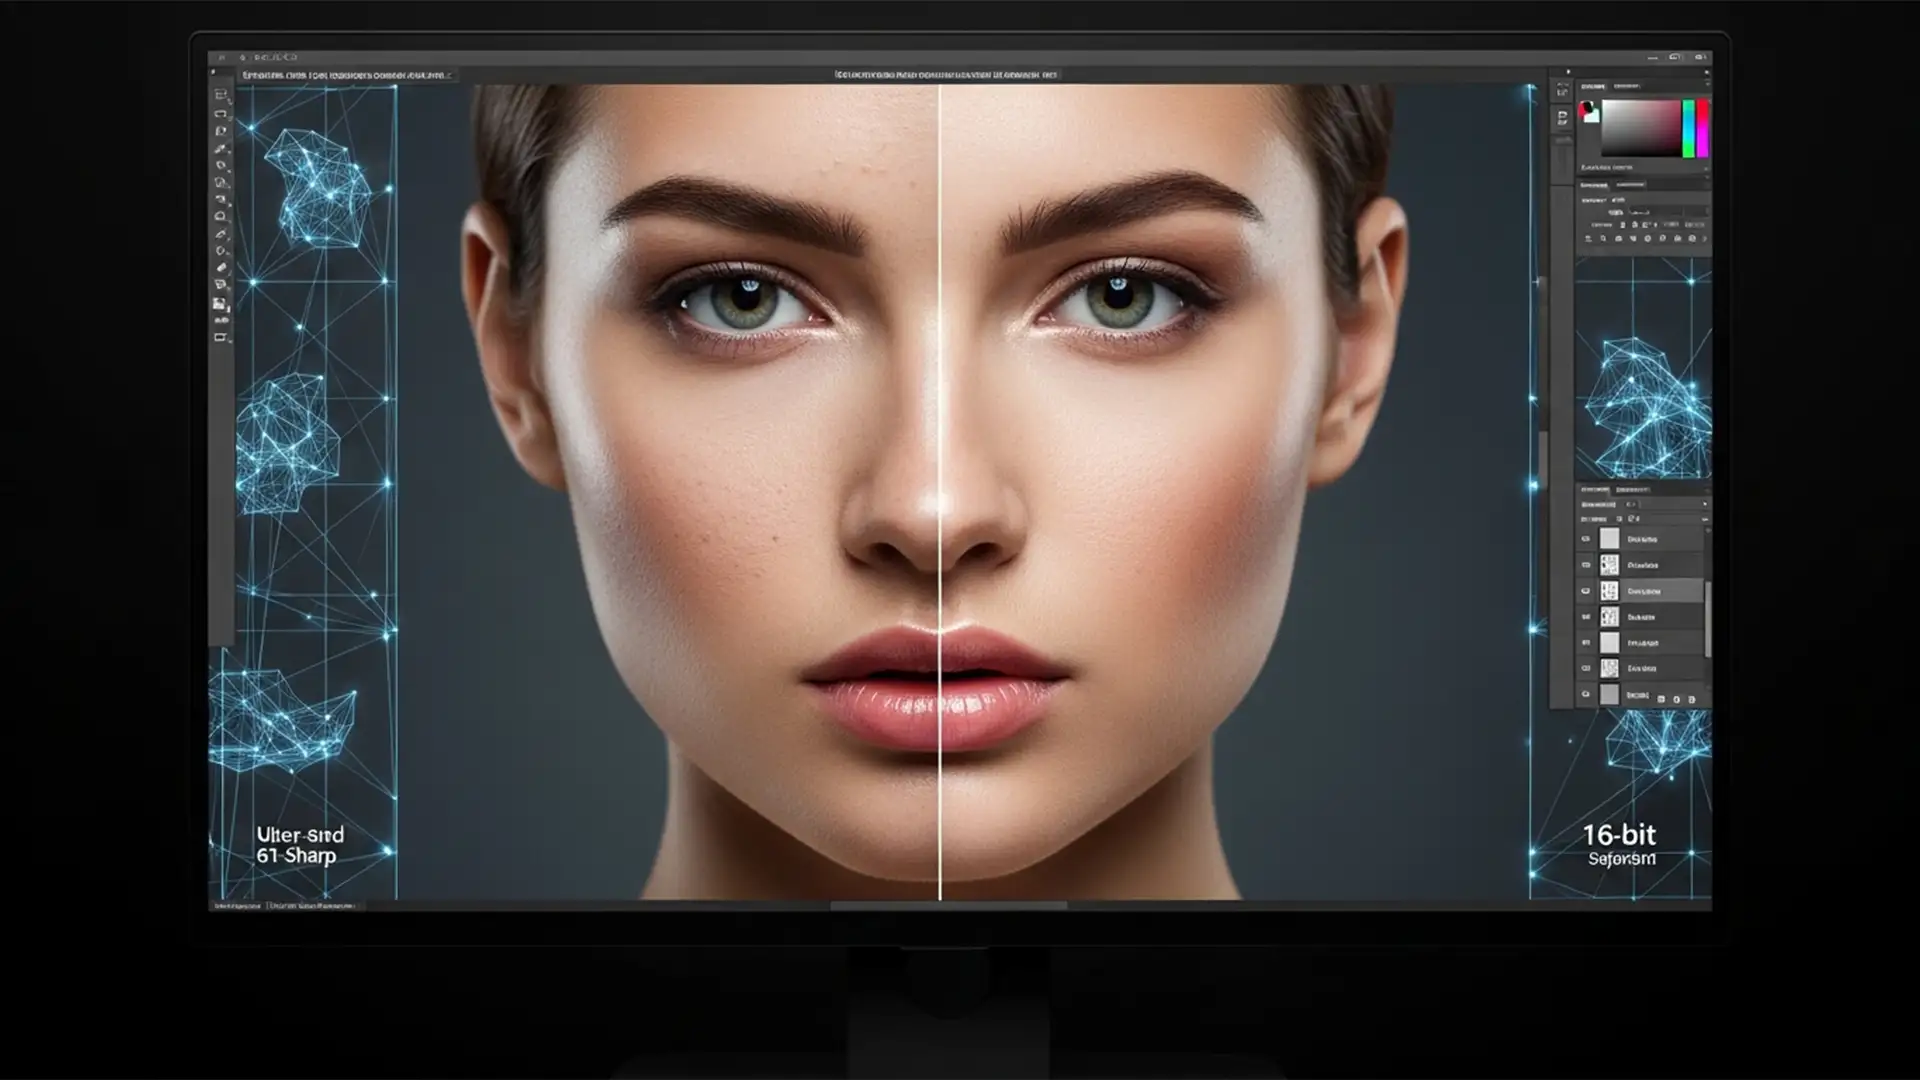
If you are editing 61-megapixel files in Photoshop CC v24.x or v25.x, you already know the nightmare: standard 8-bit frequency separation actions absolutely destroy your images. When you run a typical macro using a 4 to 6 pixel blur radius on an ultra-high-resolution 8K portrait, the mathematical limitations cause severe color banding and strip away crucial micro-contrast. The result? Unnatural, plastic-looking skin that ruins high-end commercial work.
To handle massive files without compromising quality, you must abandon standard actions and implement a true 16-bit mathematical separation. This guide breaks down the exact workflow for photoshop frequency separation for 8k portraits, utilizing advanced blur algorithms, Smart Objects, and hardware optimization to protect microscopic pore data.
Why Standard Frequency Separation Fails on 8K Portraits
Most commercially available frequency separation actions were built for 20- to 30-megapixel files using 8-bit depth. In an 8-bit workspace, Photoshop only has 256 tonal values per channel to calculate the separation between color and texture. When applied to 8K files, stretching these limited tonal values across a massive pixel count results in destructive color banding.
Furthermore, a standard Gaussian Blur radius of 4 to 6 pixels barely registers on a 61MP file. To properly separate the frequencies, you need a highly specific 16-bit setup.
The Pro Fix: 16-Bit Micro-Frequency Separation Workflow
To preserve true skin texture and micro-contrast, you must transition to a 16-bit workflow. Ensure your document is converted to 16-bit depth (Image > Mode > 16 Bits/Channel) before beginning.
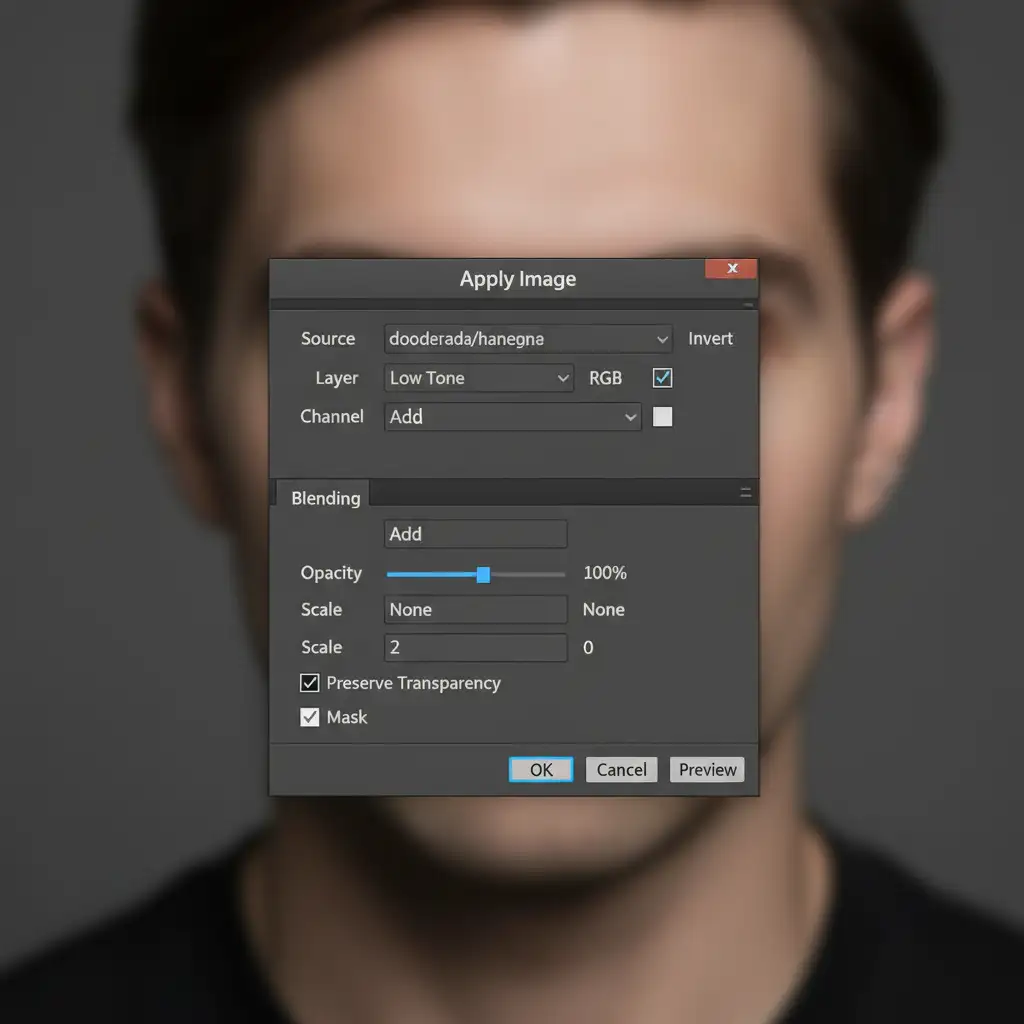
Method 1: The 16-Bit Apply Image Setup
This is the foundational setup required for ultra-high-resolution files. It relies on specific mathematical calculations that differ entirely from standard 8-bit workflows.
- Duplicate your background layer twice.
- Name the bottom duplicate Low Tone (this holds your color and transitions).
- Name the top duplicate High Texture (this holds your micro-contrast and pores).
- Hide the High Texture layer and select the Low Tone layer.
- Apply a Filter > Blur > Gaussian Blur. For 8K scale, you must increase the Gaussian Blur radius significantly—typically between 18 to 25 pixels.
- Unhide and select the High Texture layer.
- Navigate to Image > Apply Image.
Because you are working in 16-bit depth, the standard “Subtract” blending method will cause clipping. You must use the “Add” calculation.
Set the High Texture layer’s blend mode to Linear Light. Your image should now look exactly like the original, but perfectly separated for high-resolution retouching.
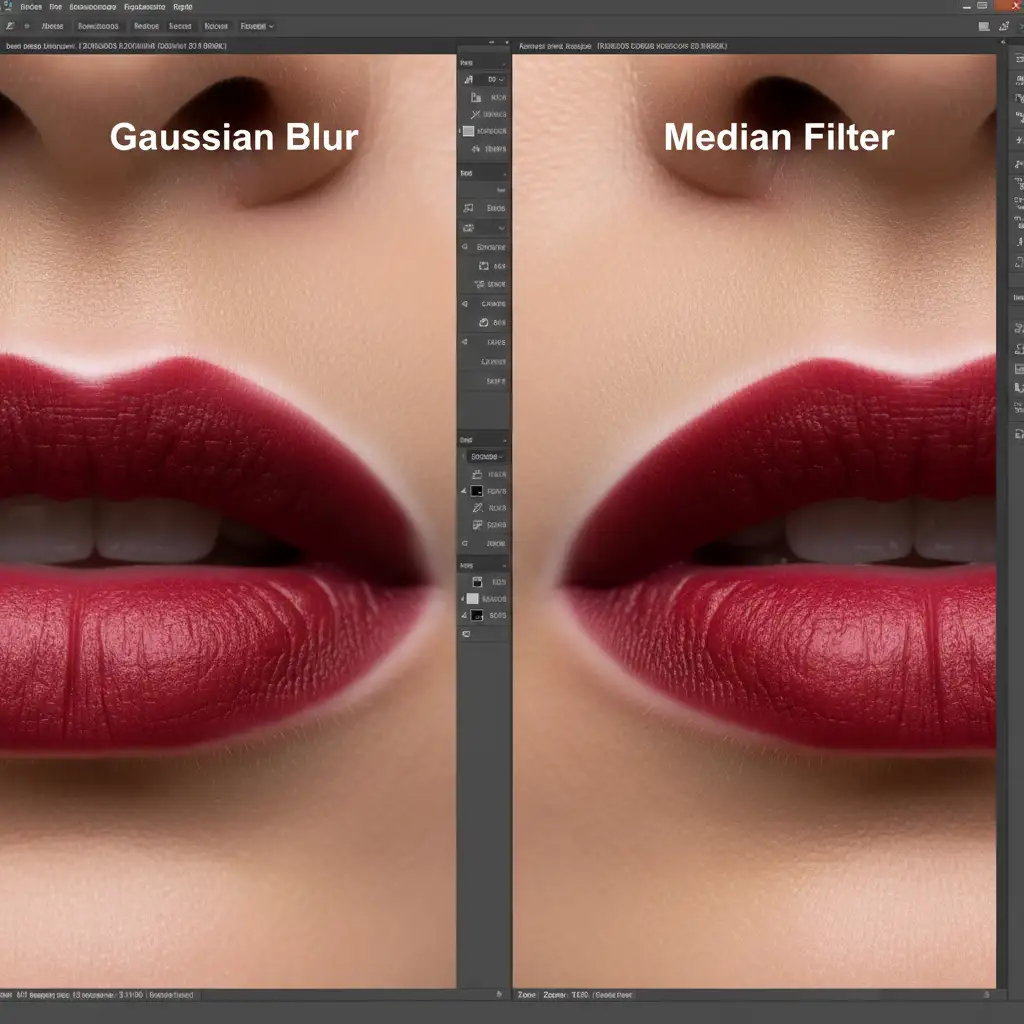
Method 2: The Median Filter Technique for Edge Preservation
While Gaussian Blur is the industry standard, it often creates a “halo” effect around high-contrast areas like lips, nostrils, and eyes on 8K files. The professional workaround is to replace the Gaussian Blur with a Median filter.
Instead of blurring pixels indiscriminately, the Median filter (Filter > Noise > Median) preserves distinct mathematical edges while smoothing the tonal transitions. For 61MP+ files, apply a radius of 15 to 20 pixels to your Low Tone layer.
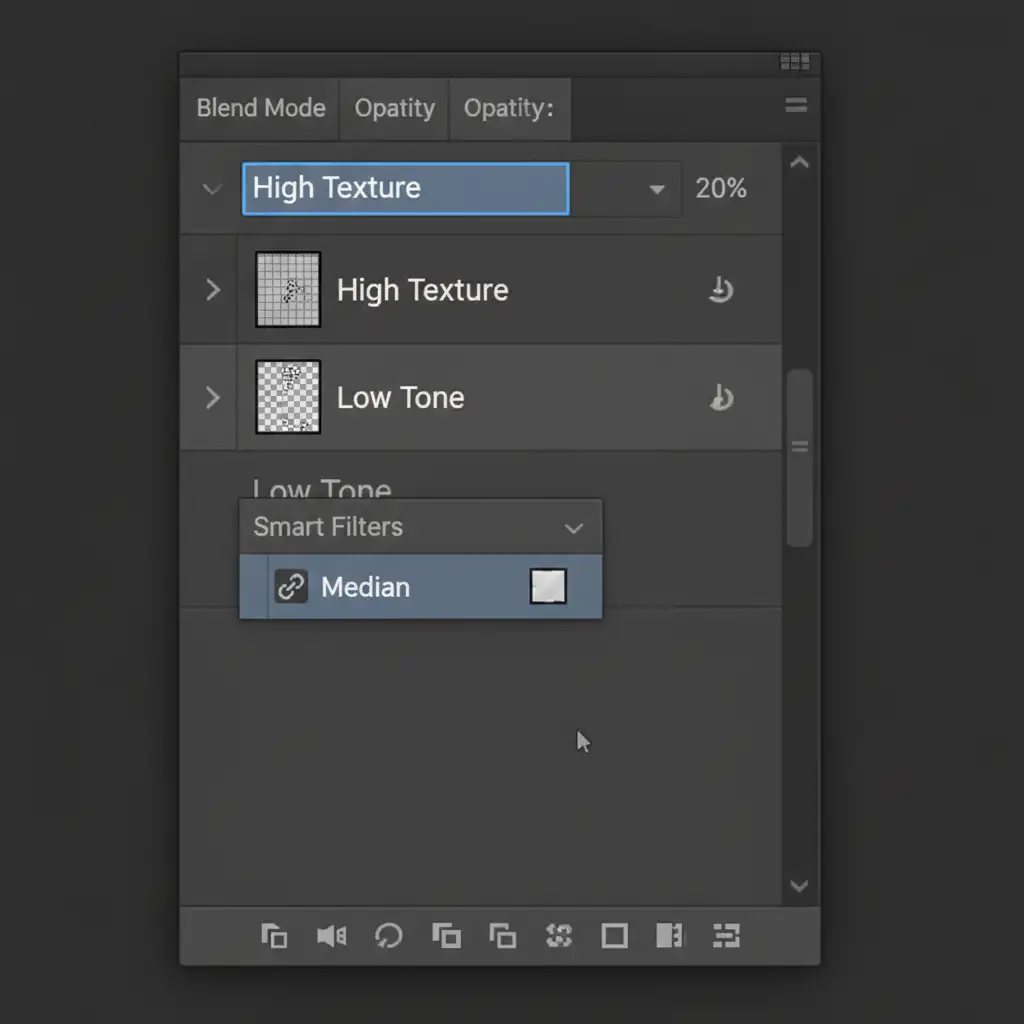
Method 3: Smart Objects & Performance Optimization
8K files demand massive computational power, and a complex frequency separation stack will cause Photoshop to lag. To maintain a non-destructive workflow and prevent system crashes, you must optimize your hardware and layer structure.
First, convert your Low Tone layer into a Smart Object (Right-click > Convert to Smart Object) before applying your Gaussian or Median filter. This allows you to dynamically adjust the blur radius on the fly without having to rebuild the entire frequency separation stack.
Next, you must optimize Photoshop’s GPU acceleration to handle the heavy math of 16-bit Apply Image calculations.
Navigate to Edit > Preferences > Performance (or Photoshop > Settings > Performance on Mac).
- Allocate at least 75% of your RAM to Photoshop.
- Ensure Use Graphics Processor is strictly enabled.

Scale Your High-End Retouching with Cloud Retouch
Mastering photoshop frequency separation for 8k portraits is critical for modern commercial photography, but executing these precise 16-bit calculations, managing Smart Objects, and fine-tuning micro-contrast on 61-megapixel files is incredibly time-consuming. When you are managing high-volume beauty campaigns or complex commercial editorials, spending hours on a single texture layer bottlenecks your entire post-production pipeline.
You don’t have to sacrifice quality for speed. Image Work India and Cloud Retouch specialize in high-end, non-destructive retouching for massive 8K raw files. Our expert retouching teams utilize advanced 16-bit workflows to ensure perfect color transitions while keeping every single pore perfectly intact.
Stop struggling with color banding and lagging Photoshop files. Let Image Work India handle the technical heavy lifting so you can focus on scaling your photography business. Contact Cloud Retouch today to outsource your high-resolution beauty and commercial retouching.


