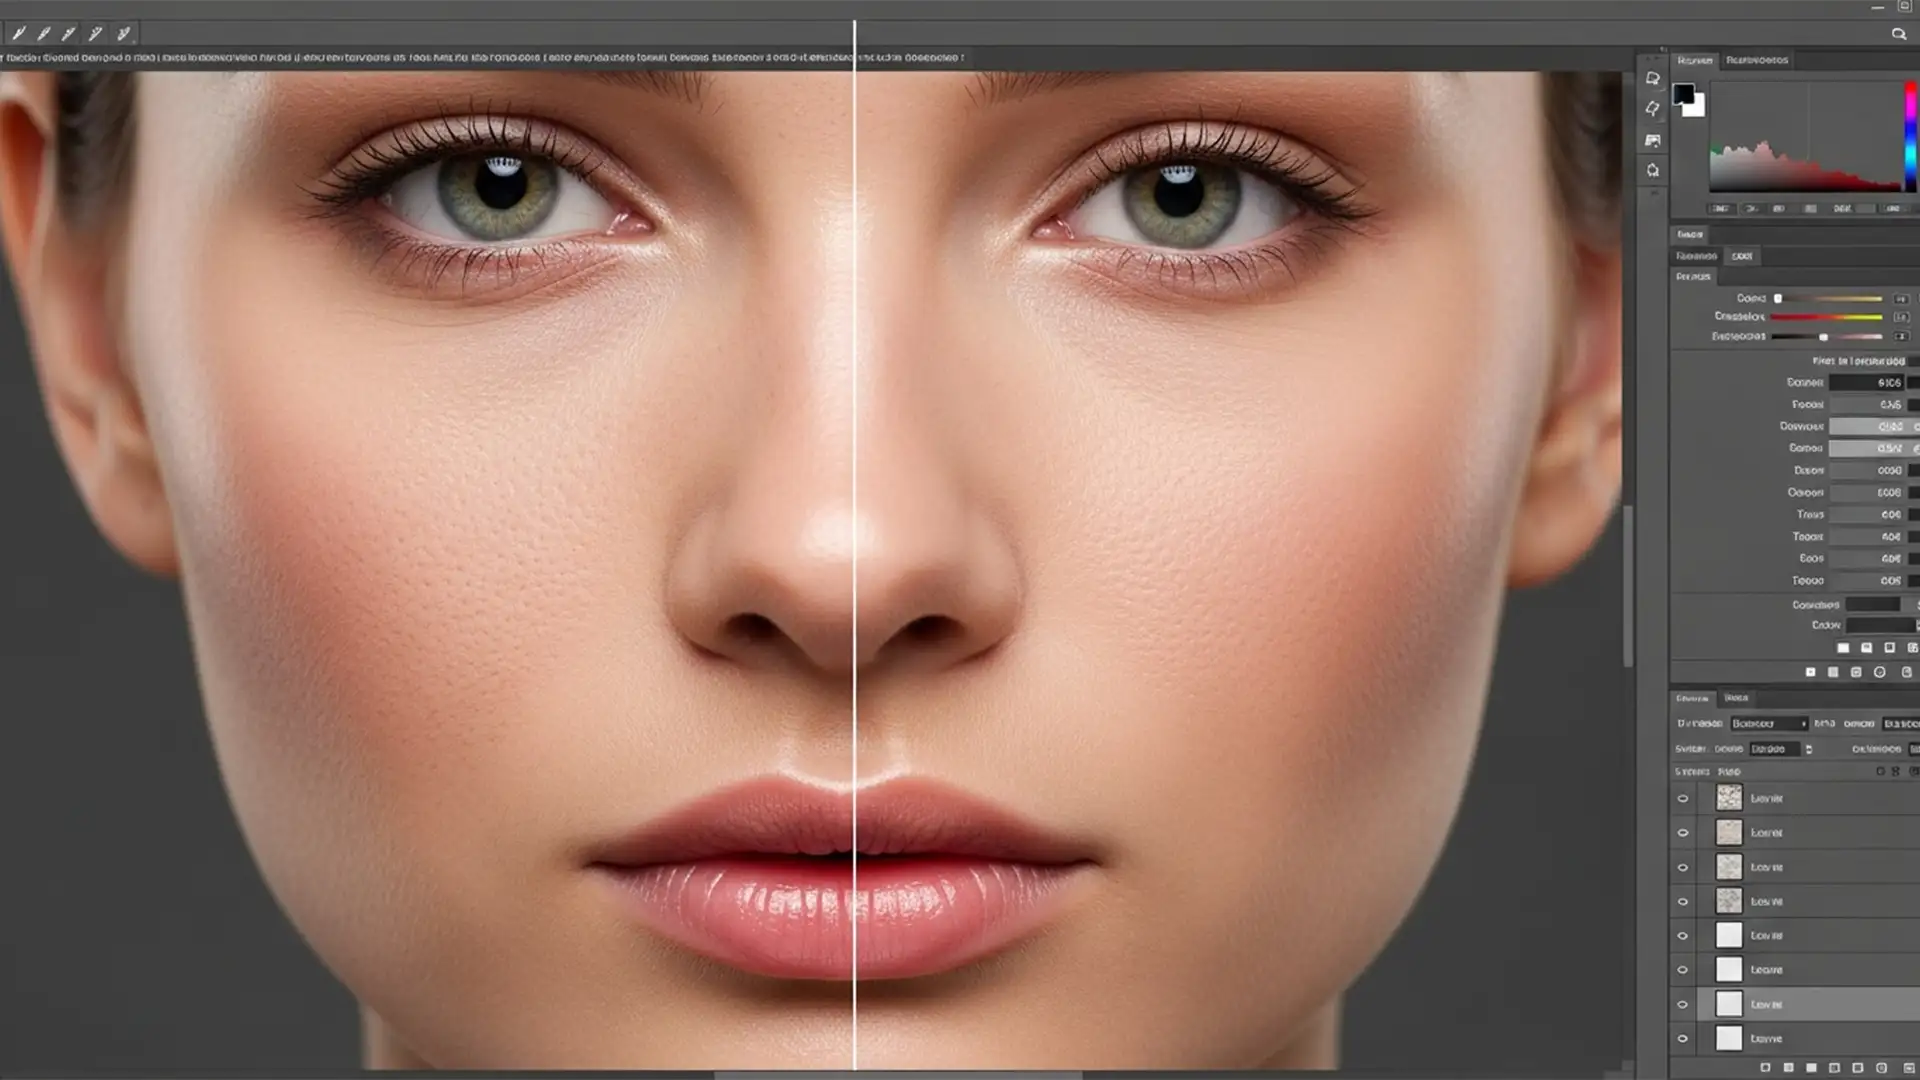
You’ve just used Photoshop’s Generative Fill to extend a background or remove a stray hair across a model’s face. The composition looks flawless from a distance, but as you zoom in to 100%, panic sets in. The AI has replaced high-resolution, beautifully textured human skin with an over-smoothed, “plastic” blur.
Photoshop’s Firefly algorithm often lacks the contextual awareness to replicate the micro-contrast, pores, and fine vellus hair captured by high-megapixel sensors. This jarring mismatch between the original photograph and the AI patch ruins high-end portraits. If you are struggling with restoring skin texture after AI generative fill, this technical guide will show you exactly how to graft real life back into your pixels using non-destructive editing techniques.
Why Generative Fill Creates “Plastic Skin”
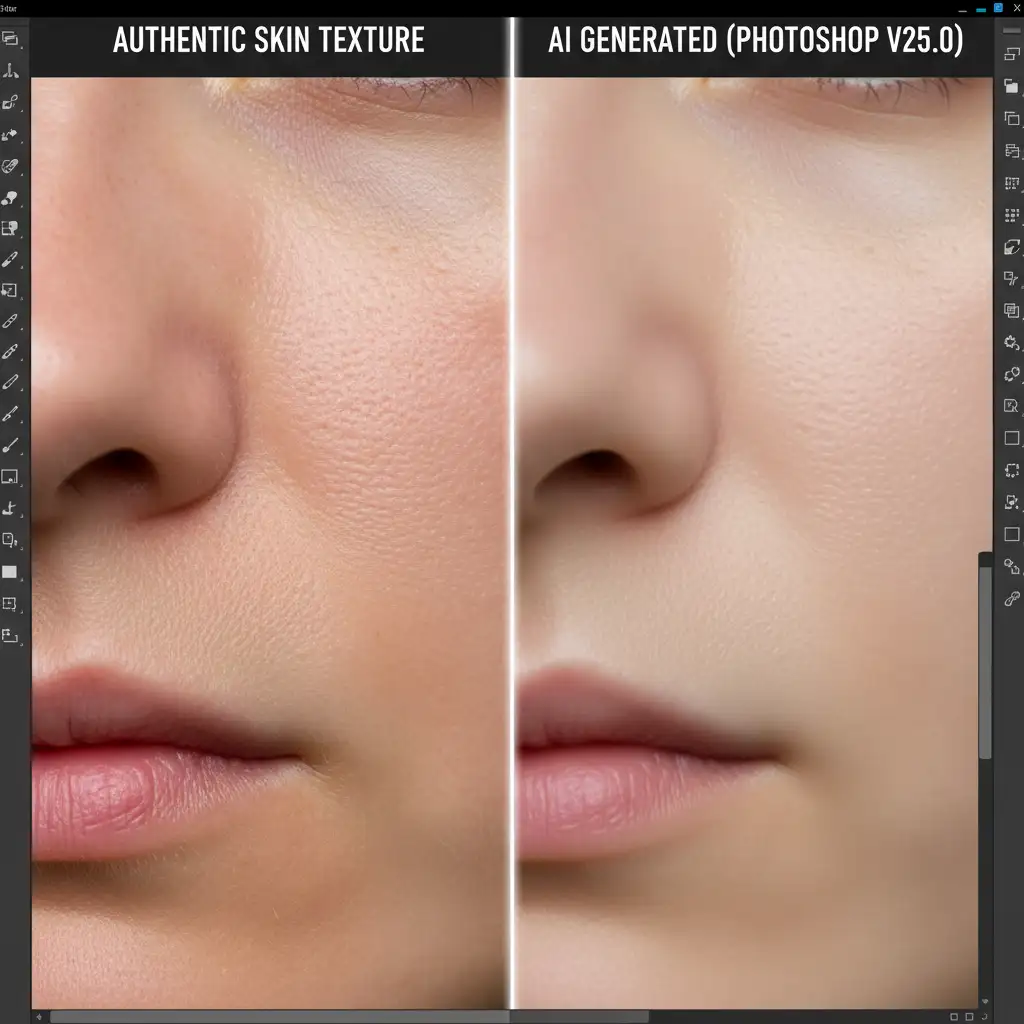
In Photoshop v25.0 and newer, the Firefly-powered Generative Fill algorithm is trained on vast datasets of imagery, but it struggles to generate localized, high-frequency texture on demand. When processing human skin, the AI defaults to a generalized, smoothed output.
Because it cannot read the exact digital noise profile or pore structure of your specific RAW file, the generated pixels lack micro-contrast. To fix this, professional retouchers must leverage texture grafting techniques to extract high-frequency details from the original plate and reintroduce them back onto the generated areas.
3 Professional Methods for Restoring Skin Texture After AI Generative Fill
Depending on the severity of the AI generation and the resolution of your image, you can approach texture recovery in three distinct ways.
Method A: The Quick Fix (High Pass Overlay)
This method is ideal for quick turnarounds where you need to blanket an AI-generated patch with the original skin texture from the underlying photograph.
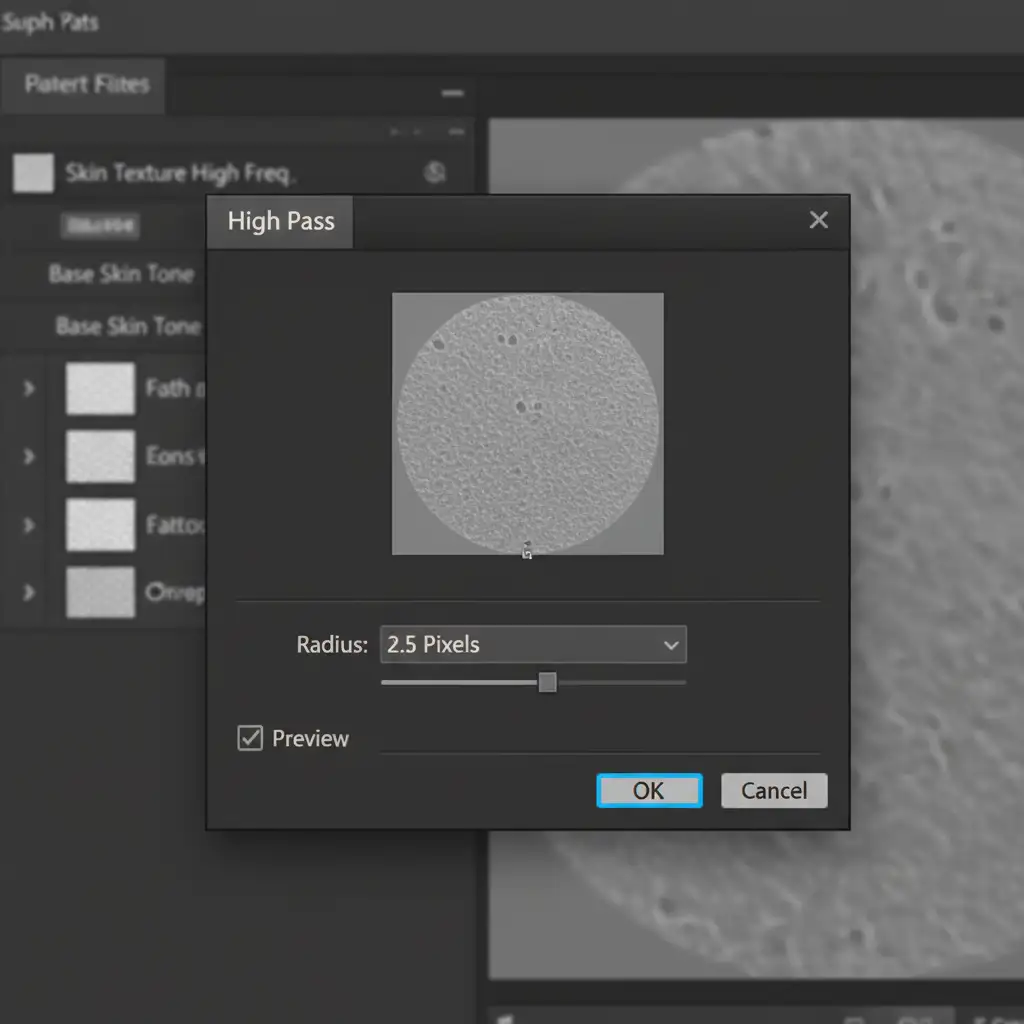
- Duplicate the Original: Duplicate the original un-retouched background layer and drag it directly above your Generative Fill layer in the Layers Panel.
- Apply High Pass Filter: Navigate to Filter > Other > High Pass. Set the radius between 1.5px and 3.5px depending on your image resolution (aim to see just the pores and fine lines, no color shifts).
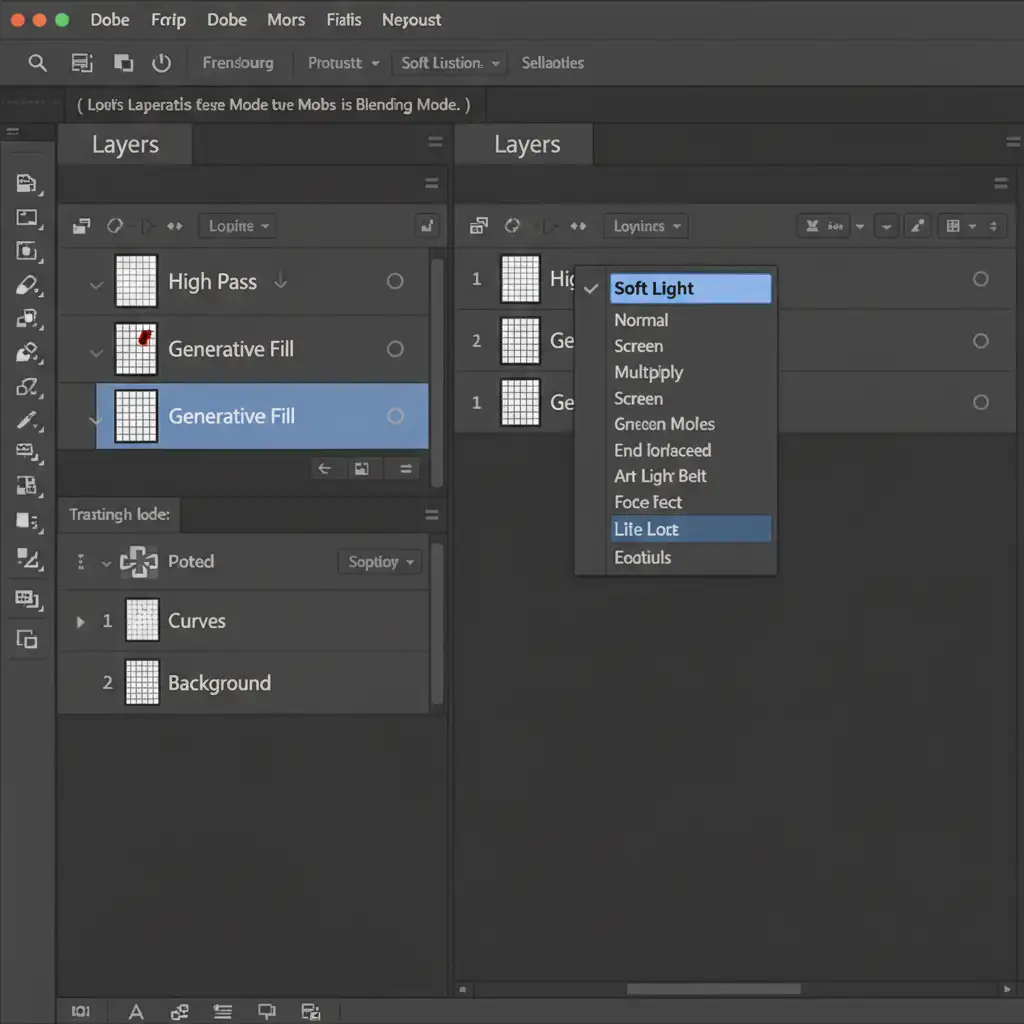
- Adjust Blending Modes: Change the Blending Mode of this High Pass layer to Linear Light or Soft Light.
- Isolate the Effect: Right-click the High Pass layer and choose Create Clipping Mask. This confines the recovered texture strictly to the AI-generated area, preventing over-sharpening on the rest of the image.
Method B: The Pro Workaround (Frequency Separation Grafting)
When the Generative Fill area is large and requires precise, manual texture reconstruction, Frequency Separation is the industry standard.
- Run Frequency Separation: Run your standard Frequency Separation action on the original image to separate color/tone (low-frequency) from texture (high-frequency).
- Target the Texture: Select your High-Frequency (Texture) layer.
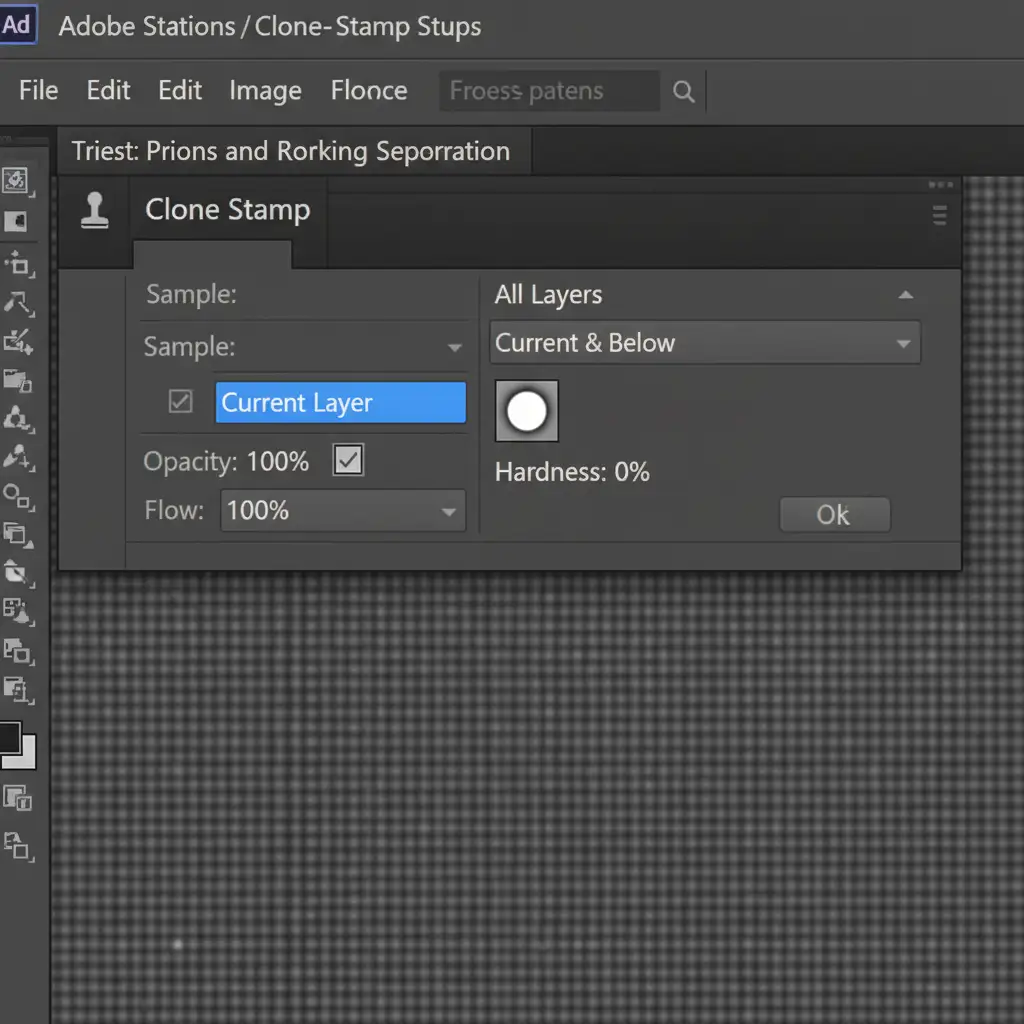
- Configure the Clone Stamp: Select the Clone Stamp tool. In the top options bar, set your Sample to Current Layer and your Hardness to 0%.
- Graft the Pores: Alt/Option-click to sample healthy pores from an unedited, well-lit part of the model’s face. Carefully stamp this authentic texture directly over the flat AI-generated zones. You are effectively grafting real pores onto the fake skin without altering the underlying AI-generated tones.
Method C: The Technical Deep-Dive (Matched Sensor Noise)
Sometimes, the “plastic” look isn’t just a lack of pores—it’s a lack of digital camera noise. Matching the camera raw grain perfectly blends AI additions into the original file.
- Create a Grain Layer: Create a new layer above the Generative Fill layer. Fill it with 50% Gray (Edit > Fill > 50% Gray) and set the Blending Mode to Overlay.
- Convert to Smart Object: Right-click the layer and select Convert to Smart Object. This ensures non-destructive editing so you can tweak the grain later.
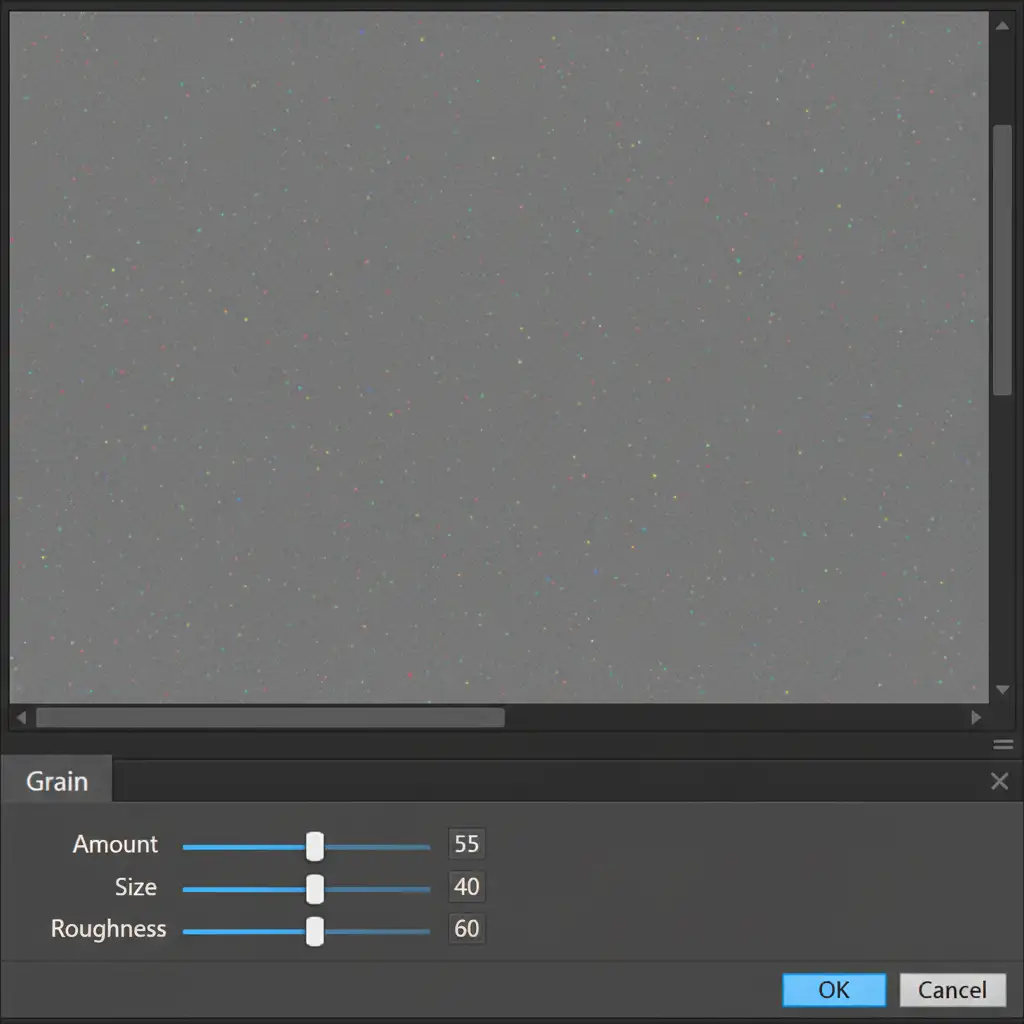
- Apply Camera Raw Grain: Go to Filter > Camera Raw Filter > Effects > Grain.
- Match the Profile: Zoom your canvas to 200%. Carefully match the Amount, Size, and Roughness sliders to the exact digital noise profile of the original camera sensor.
- Soften the Noise: If the digital noise appears too sharp compared to natural skin, add a subtle Gaussian Blur (0.3px to 0.5px) to the Smart Object to emulate organic texture.
The Ultimate Solution for High-End Skin Retouching
Restoring skin texture after AI generative fill requires a meticulous eye for detail, a deep understanding of Frequency Separation, and significant time. When you are managing high-volume editorial shoots, e-commerce campaigns, or beauty portraits, spending 20 minutes grafting pores onto every single AI-expanded image simply isn’t scalable.
That’s where Image Work India and Cloud Retouch step in.
Struggling to maintain natural skin textures in large batch processing? Our team of professional retouchers specializes in high-end skin retouching that retains 100% authentic texture, micro-contrast, and detail. We don’t rely on automated blurring; we use industry-leading non-destructive techniques to ensure your models look flawless yet entirely human.
Stop fighting with “plastic skin.” [Contact Image Work India and Cloud Retouch today] to elevate your portfolio with pixel-perfect, hyper-realistic retouching services.


