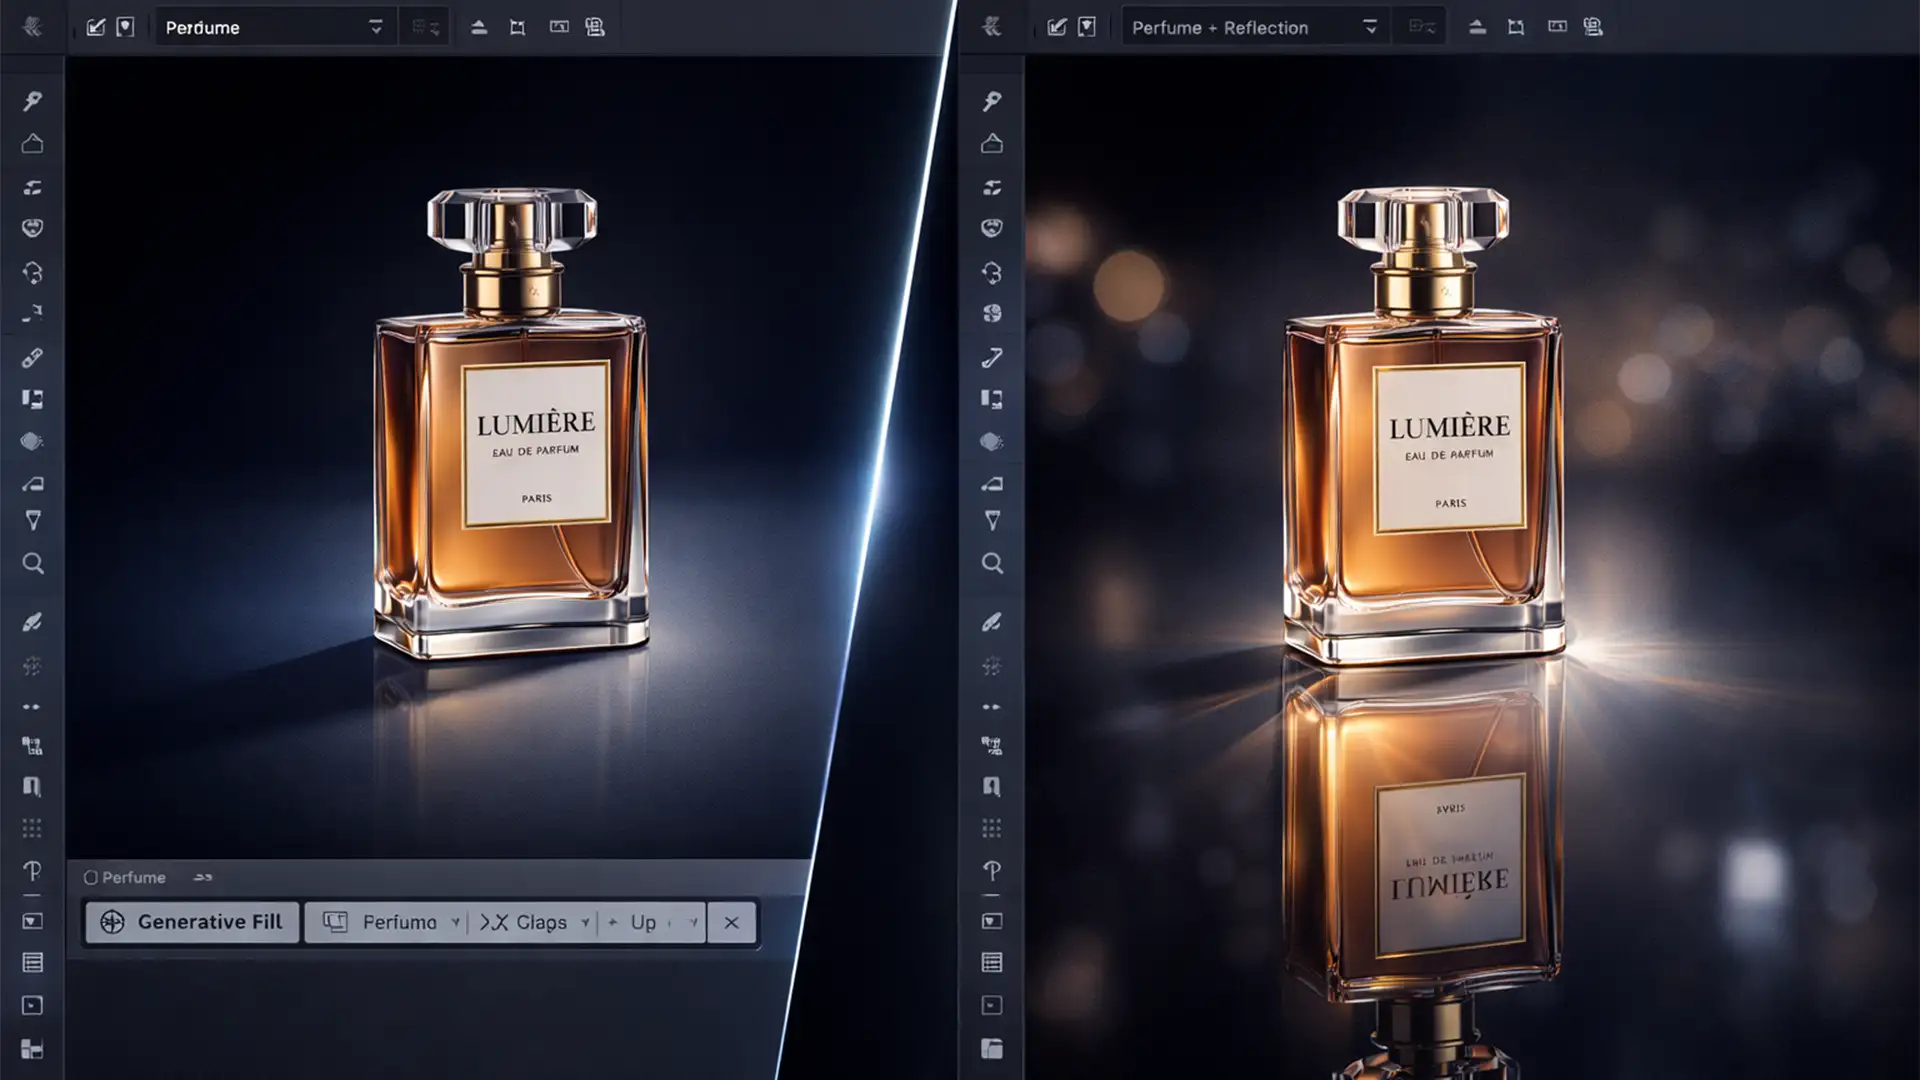
If you’ve recently updated to Photoshop 2026 (v27.x), you’ve likely noticed a massive feature missing: the legacy 3D workspace is completely gone. For e-commerce retouchers and designers who relied on the internal rendering engine for quick, 1-click ray-traced reflections on products and typography, this is a major workflow disruption.
Without an active 3D engine calculating exact light paths, how do you replicate the physical light-bounce roughness and Fresnel effect? You have to build it manually. In this guide, we’ll show you exactly how to create manual ray-traced reflections in Photoshop 2026 using advanced compositing techniques that look indistinguishable from real 3D renders.
The Challenge of Faking Ray-Tracing in 2D
True ray-tracing calculates exact light paths. It inherently understands how light bounces off a surface, creating accurate specular highlights, ambient occlusion, and natural falloff. Replicating this manually requires simulating three physical properties using Photoshop’s 2D filters:
- Opacity Falloff: Reflections fade the further they get from the object.
- Surface Roughness: No surface is a perfect mirror; reflections distort based on microscopic bumps.
- Depth of Field: Due to the Fresnel effect and focal distances, reflections get blurrier as they stretch away from the contact point.
Here are three methods to achieve this, ranging from a quick fix to a technical deep-dive.
Method 1: The Quick Fix (Standard Gradient Masking)
If you need a fast, passable reflection for a basic e-commerce catalog, a simple gradient mask will do the trick.
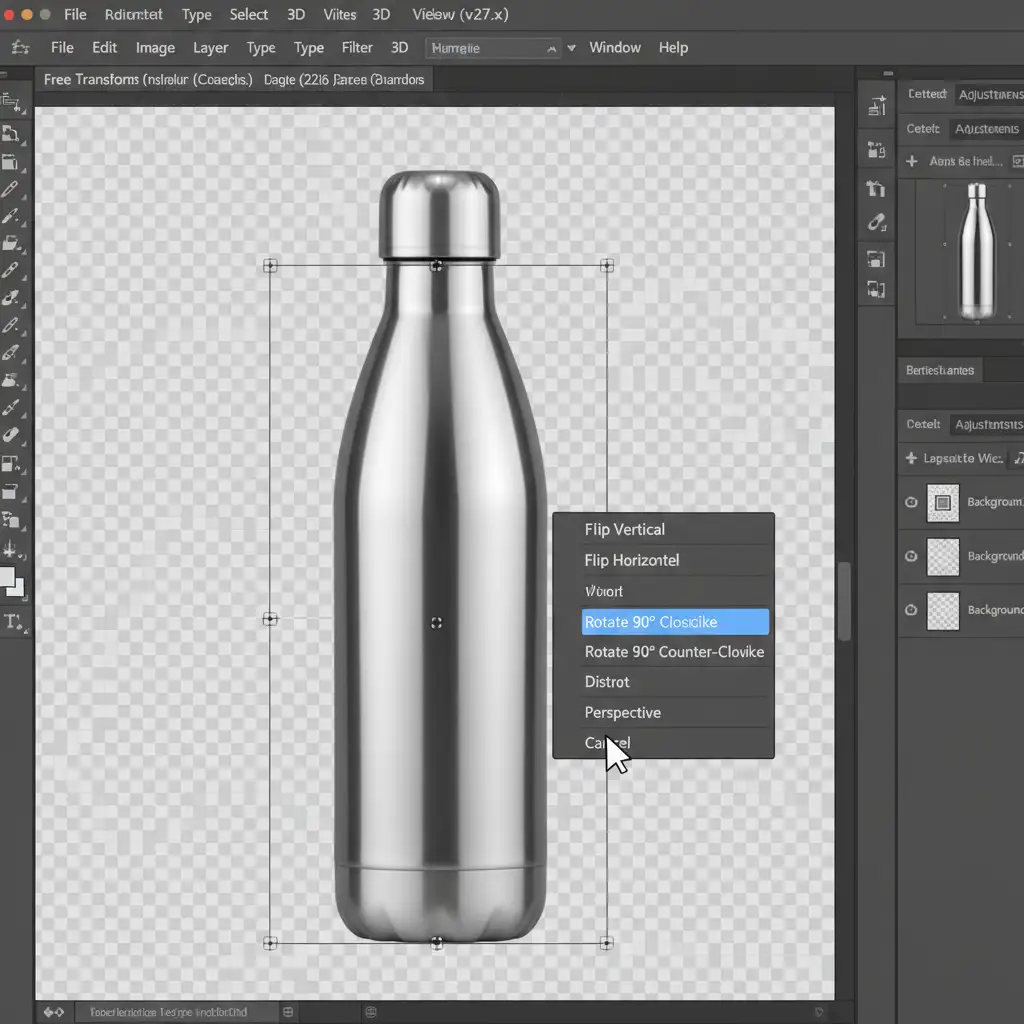
- Select your isolated product layer and duplicate it (Ctrl/Cmd + J).
- Press Ctrl/Cmd + T to bring up the Free Transform tool.
- Right-click inside the bounding box and select Flip Vertical.
- Move the flipped layer directly below your product so the bases touch.
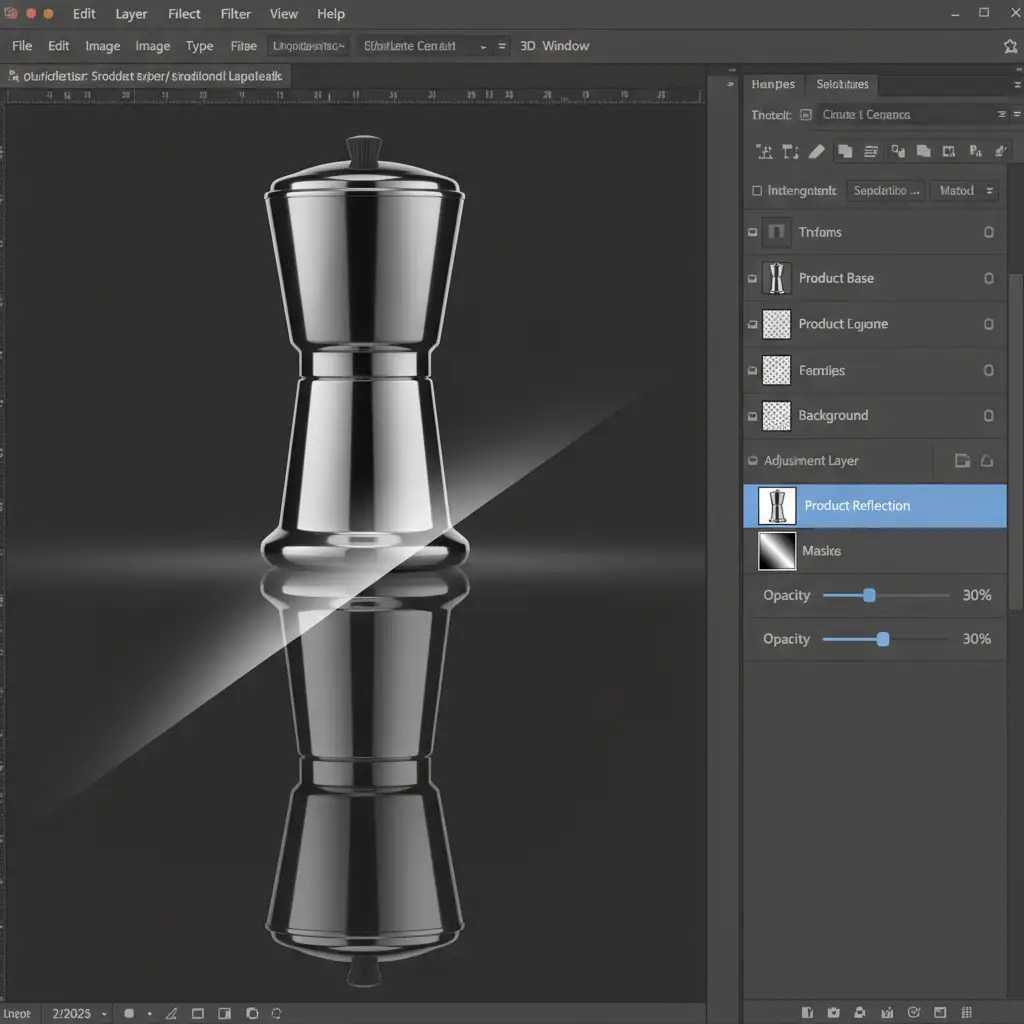
- Add a Layer Mask to the flipped layer.
- Select the Gradient Tool (G), choose a standard Black-to-White gradient, and drag from the bottom of the reflection up to the contact point.
- Lower the layer opacity to around 30%.
Method 2: The Pro Workaround (Displacement Maps & Smart Objects)
A flat reflection looks fake because it lacks surface roughness. Real surfaces—even polished studio tables—have microscopic imperfections. We can simulate this using a displacement map.
- Follow the steps in Method 1 to create your flipped reflection layer.
- Right-click the reflection layer and select Convert to Smart Object. This is crucial because Smart Objects allow you to update the base product later, and the distorted reflection will update automatically.
- Navigate to Filter > Distort > Displace.
- Set your Horizontal and Vertical scales (usually between 2 and 5, depending on your resolution).
- When prompted, select a pre-made black-and-white PSD file containing surface ripples or fine noise. This file acts as your displacement map, shifting the pixels of your reflection to mimic physical surface roughness.

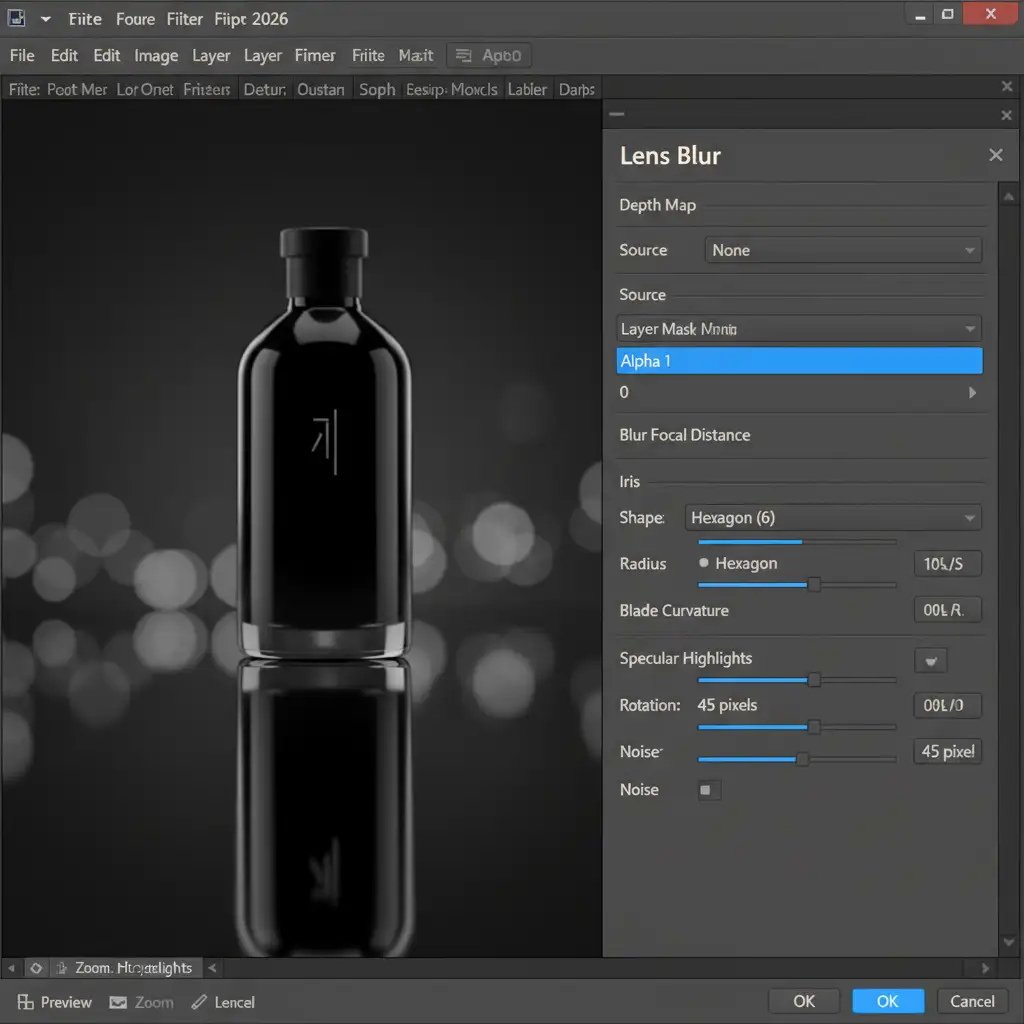
Method 3: The Technical Deep-Dive (Depth Maps & Lens Blur)
To truly achieve manual ray-traced reflections in Photoshop 2026, you must address the focal distance. In physical photography and 3D rendering, a reflection gets blurrier the further it travels from the contact point. We can perfectly simulate this physical light falloff using a custom Lens Blur depth map.
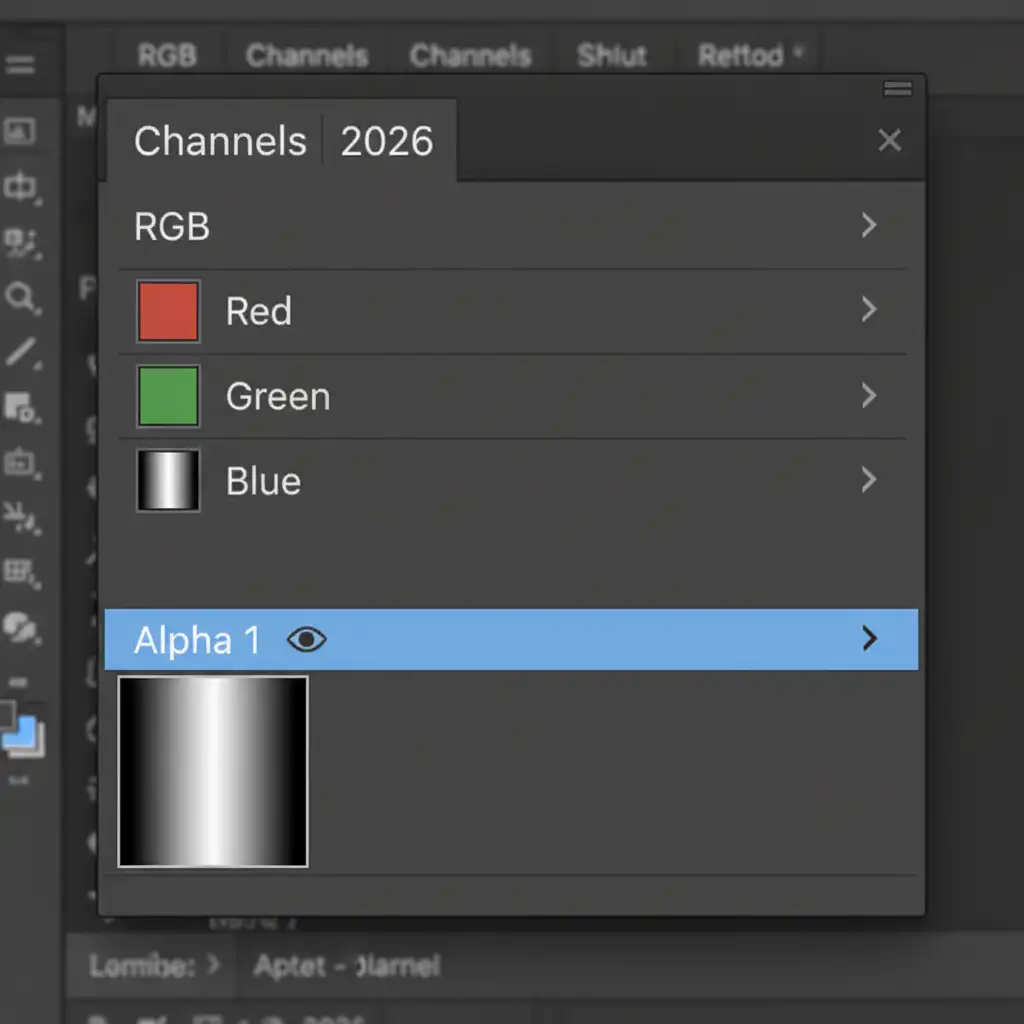
Step 1: Create the Alpha Channel
- Open your Channels panel and click the “+” icon to create a new Alpha channel.
- Select the Gradient Tool and draw a black-to-white gradient. The black area should be at the contact point of the reflection (where it will remain sharp), and the white area should be at the bottom of the reflection (where it will blur heavily).
Step 2: Apply the Lens Blur
- Return to your Layers panel and click on your Smart Object reflection layer.
- Go to Filter > Blur > Lens Blur.
- In the Lens Blur interface, look for the Depth Map section.
- Change the Source dropdown from “None” to your newly created Alpha channel.
- Adjust the Blur Focal Distance slider. Click directly on the contact point of your reflection in the preview window to set the sharpest point.
- Increase the Radius to dial in the exact amount of blur you want at the furthest edges of the reflection.
By combining the gradient mask (opacity), the displacement map (surface roughness), and the lens blur depth map (focal falloff), you have successfully reverse-engineered how a ray-tracing engine calculates a reflection.
Automate Your Workflow with Image Work India & Cloud Retouch
Manually building ray-traced reflections in Photoshop 2026 yields incredible results, but it is undeniably time-consuming. If you are processing hundreds of SKUs for an e-commerce catalog, spending 10 minutes per image on displacement maps and alpha channels will destroy your profit margins.
Struggling to achieve photorealistic reflections after the latest Photoshop updates? Don’t let software changes slow down your production. Hire Image Work India and Cloud Retouch for professional, high-volume e-commerce and product retouching. Our expert retouchers understand the physics of light, guaranteeing flawless, physically accurate specular highlights and reflections on every single image—delivered on time, every time.
Contact us today to scale your product imagery without compromising on premium quality.


