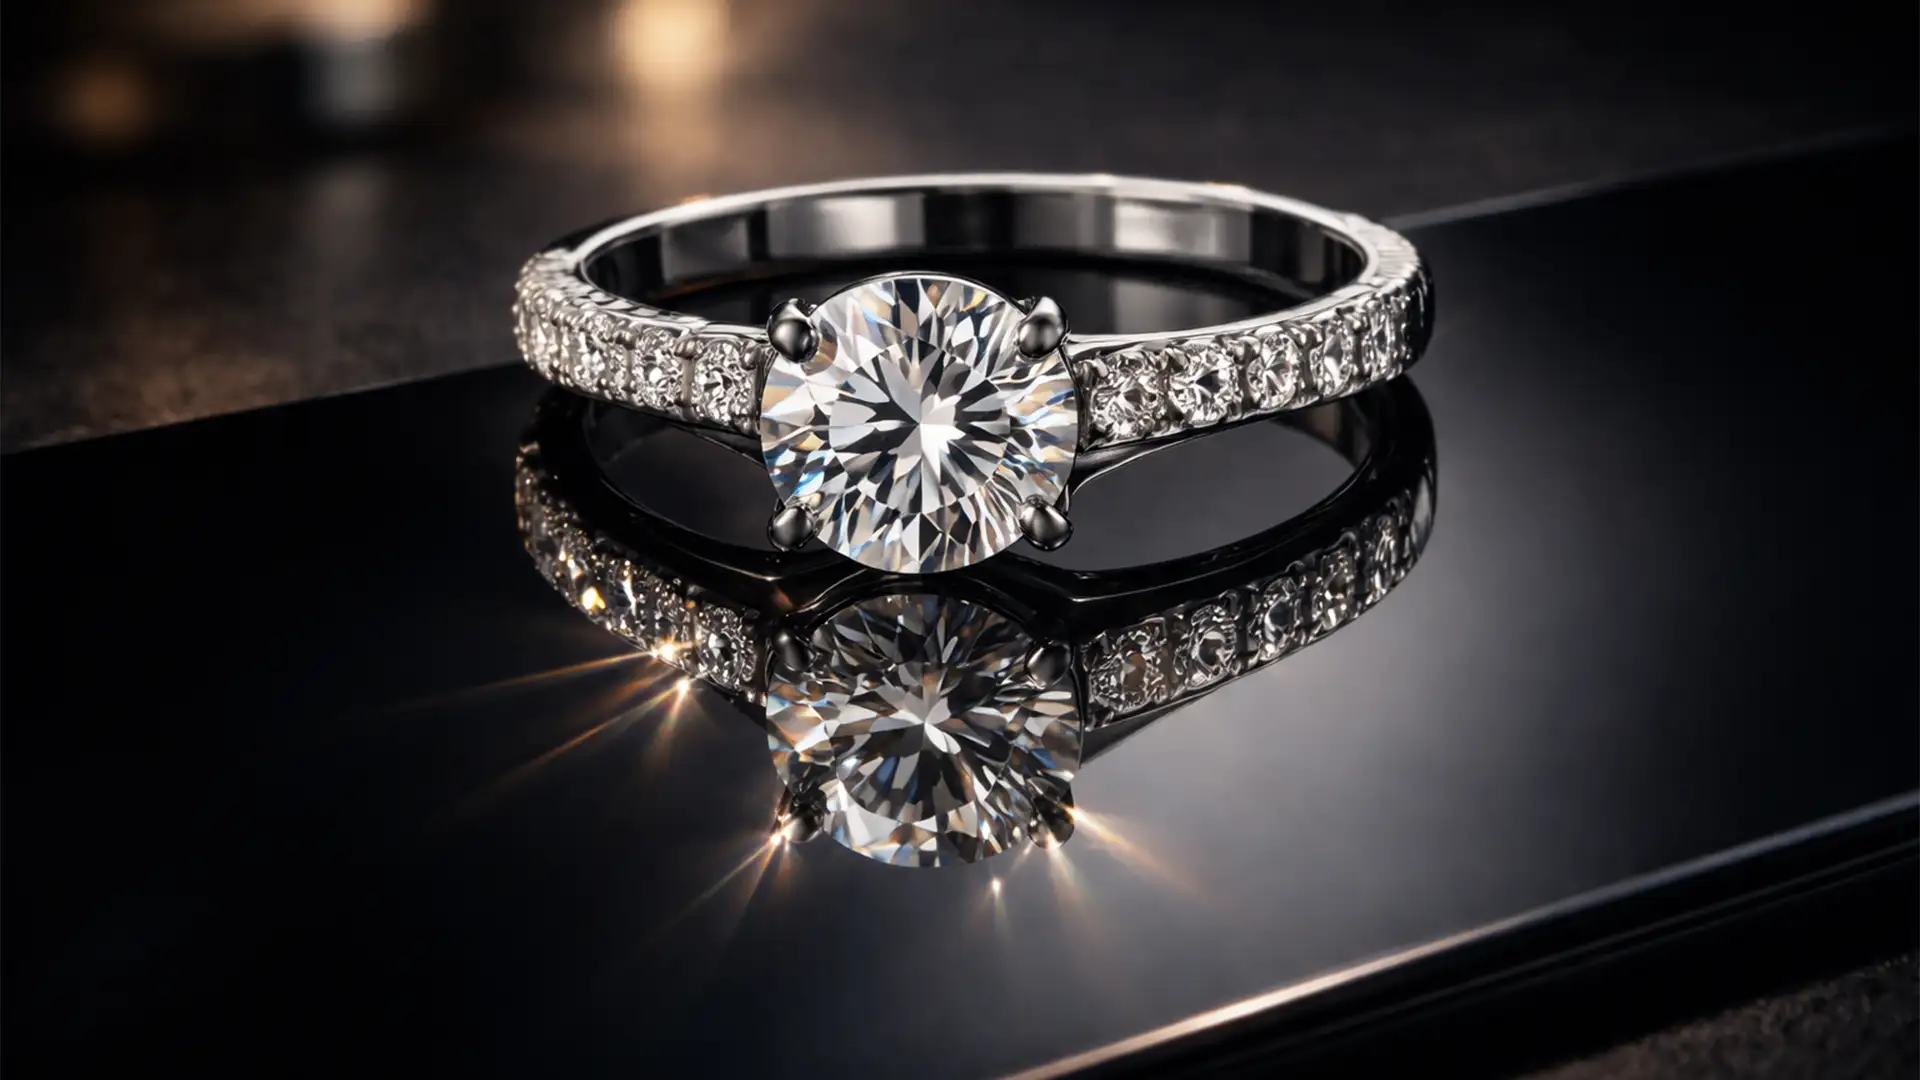
Have you ever duplicated a jewelry layer in Photoshop, flipped it vertically, and realized it looks completely fake? You are not alone. When photographing 3D objects like rings or curved pendants, the camera angle naturally exposes the inner band. A basic vertical flip causes the reflection to misalign at the contact point, destroying the illusion of a solid surface.
For luxury brands, these “floating” products are conversion killers. Mastering reflection shadows for jewelry e-commerce requires overcoming perspective distortion and light refraction issues. In this guide, we will show you exactly how to move past the amateur “flip-and-fade” and build geometrically accurate, high-end reflections in Photoshop.
Why Standard Reflections Fail in Jewelry Photography
In Photoshop v24.x and v25.x, achieving a premium look requires more than a simple layer duplication. Standard vertical flipping fails because it ignores the physical reality of the object’s resting angle.
Professional jewelry retouching demands perspective-matching. This means utilizing advanced warping to match the curvature of the jewelry, generating a grounded contact shadow, and independently rendering the light refractions of gemstones versus the solid reflections of metallic bands.
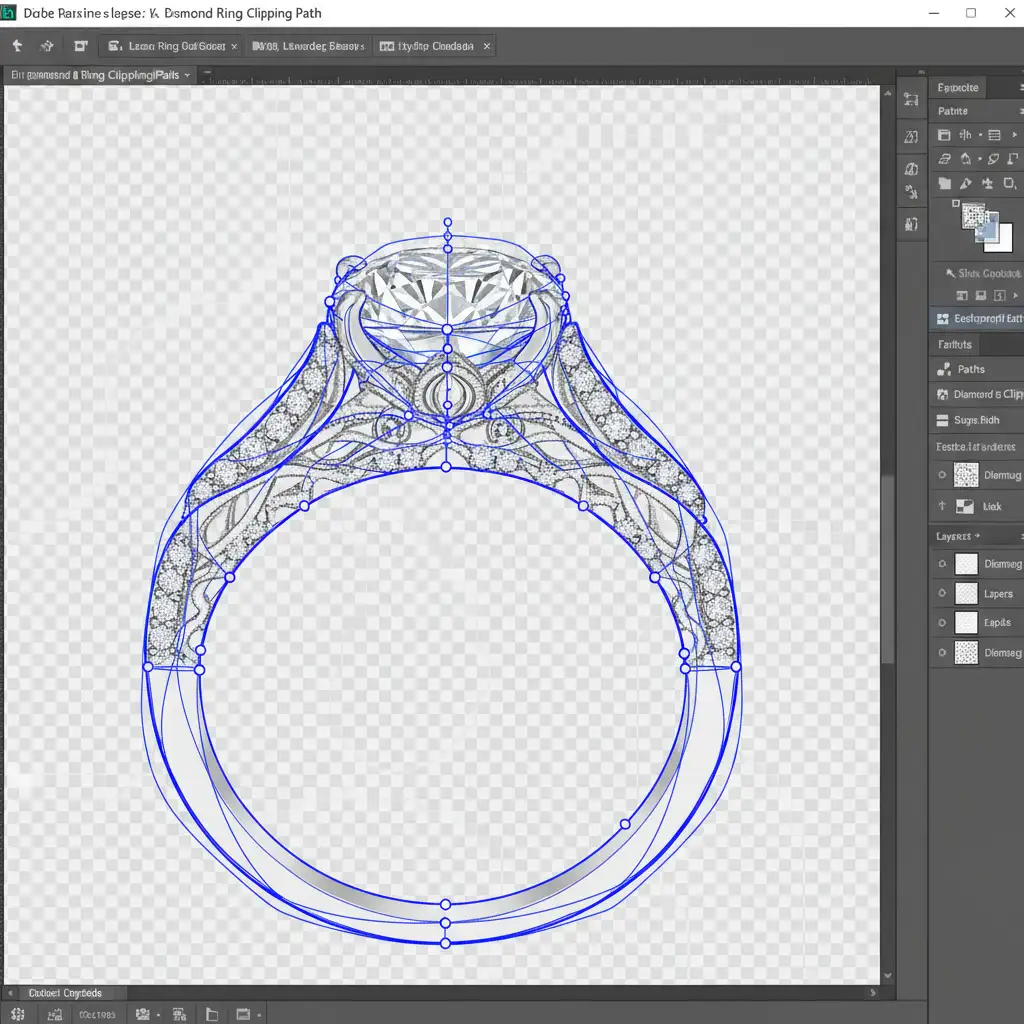
The Essential Setup: Isolation and Clipping Paths
Before you can build a realistic reflection, you need a flawless extraction. Automated background removal tools often struggle with the intricate prongs and reflective surfaces of fine jewelry.
Using the Pen Tool for Precision
Always start by creating a precise Clipping Path using the Pen Tool. This ensures crisp, hard edges around the metal and stones, which is non-negotiable for high-end e-commerce.
Step-by-Step Guide to Perfect Reflection Shadows for Jewelry E-Commerce
Depending on your time constraints and quality requirements, there are three main approaches to creating reflections. We will start with the basic method and build up to the industry-standard luxury technique.
Method 1: The Quick Fix (The “Flip-and-Fade”)
While not suitable for complex 3D angles, this method works for flat items (like earrings shot straight-on).
- Isolate your jewelry and duplicate the layer (Ctrl/Cmd+J).
- Go to Edit > Transform > Flip Vertical.
- Drag the flipped layer down until the bottom edges align.
- Add a Layer Mask to the reflection layer.
- Select the Gradient Tool (G) and apply a black-to-white linear gradient to create a Gradient Mask, fading the reflection out as it moves downward.
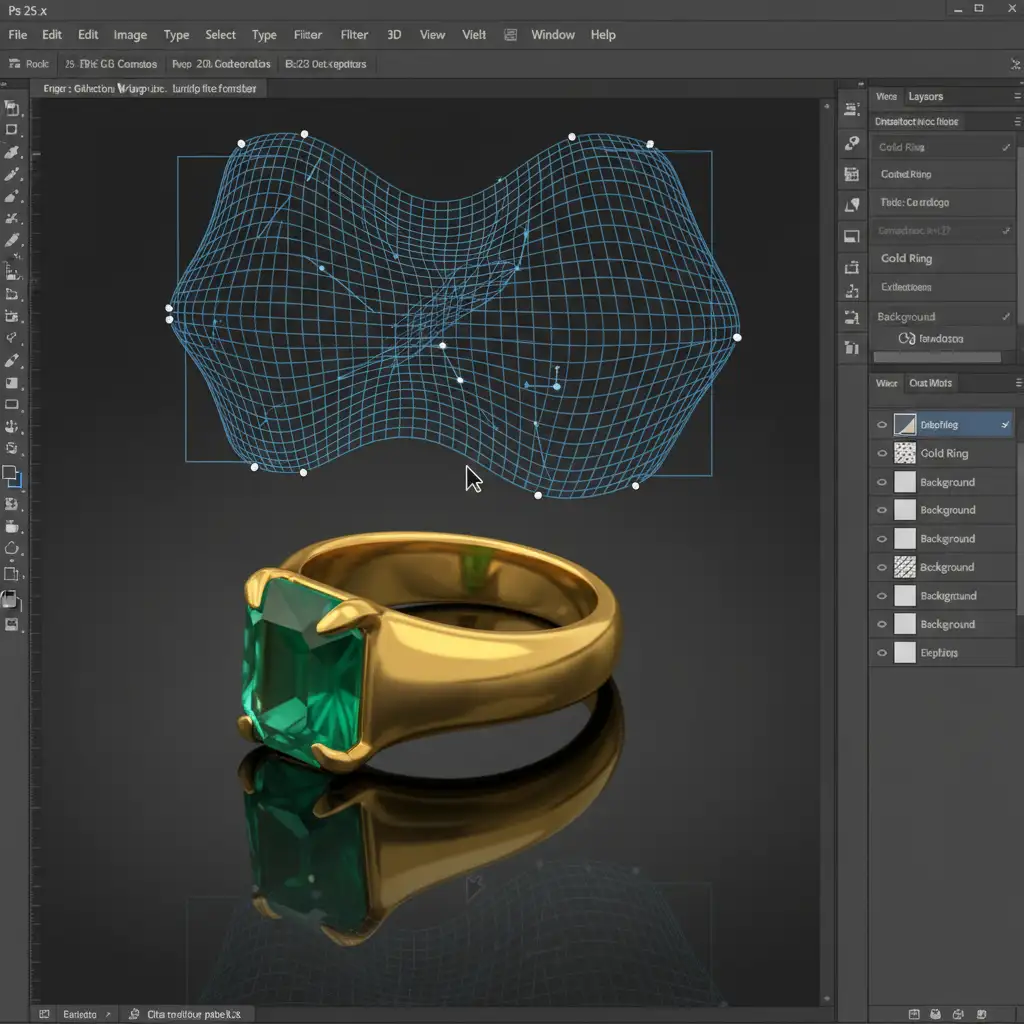
Method 2: The Pro Workaround (Perspective Warping)
When dealing with rings and curved pendants, the Quick Fix leaves a gap where the inner band reflects incorrectly. Here is how to fix the geometry.
- Duplicate your isolated jewelry layer and convert it into a Smart Object. This protects the pixel data.
- Flip it vertically and align the lowest contact point.
- Go to Edit > Transform > Warp.
- Manipulate the Warp Transform grid. Push and pull the nodes so the curvature of the reflection perfectly mirrors the resting angle of the 3D piece, closing any unnatural gaps.
- Apply a 1-2px Gaussian Blur to the Smart Object to mimic the natural optical diffusion of an acrylic or glass surface.
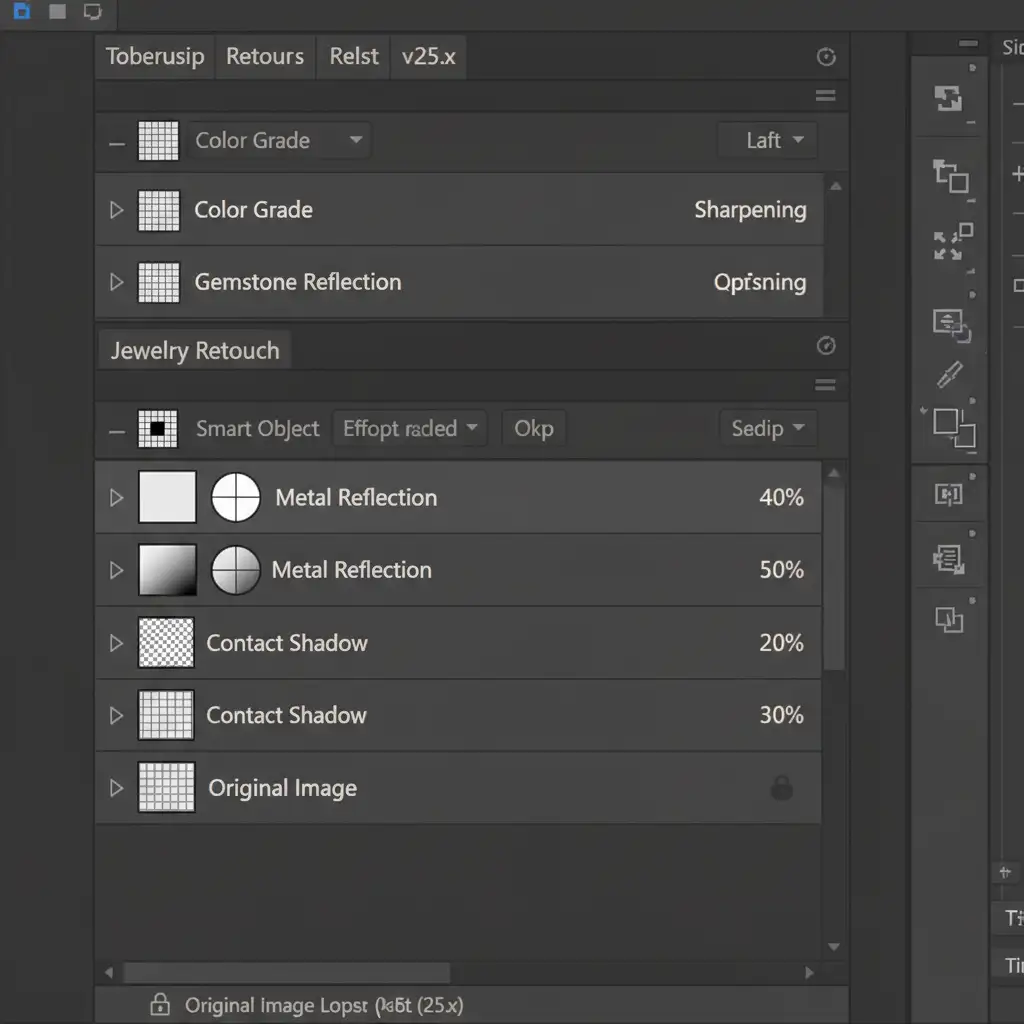
Method 3: The Technical Deep-Dive (Ultimate Luxury Realism)
For absolute high-end luxury realism, you must treat metals and gemstones differently. Gemstones refract light, while metals reflect it.
1. Separate the Elements
Separate your jewelry into two distinct layers: one for the metal band and one for the gemstones.
2. Anchor with a Contact Shadow
Before adding the reflection, build a dense, dark Contact Shadow directly underneath the resting point of the item. Use a soft black brush on a new layer, and set the Layer Blending Modes to Multiply. This grounds the piece so it doesn’t look like it’s floating above the mirror.
3. Build the Refractive Reflection
- Convert both the metal and gem reflection layers into Smart Objects and warp them into perspective (as in Method 2).
- For the gemstone reflection, apply a Displacement Map to simulate Refractive Reflection and light scattering.
- Adjust your blending modes: Set the gemstone reflection layer to Screen (to emphasize light) and the metal reflection layer to Normal.
- Drop the overall opacity of both reflection layers to 15-30 percent. Finally, apply your Gradient Mask for a smooth fade.
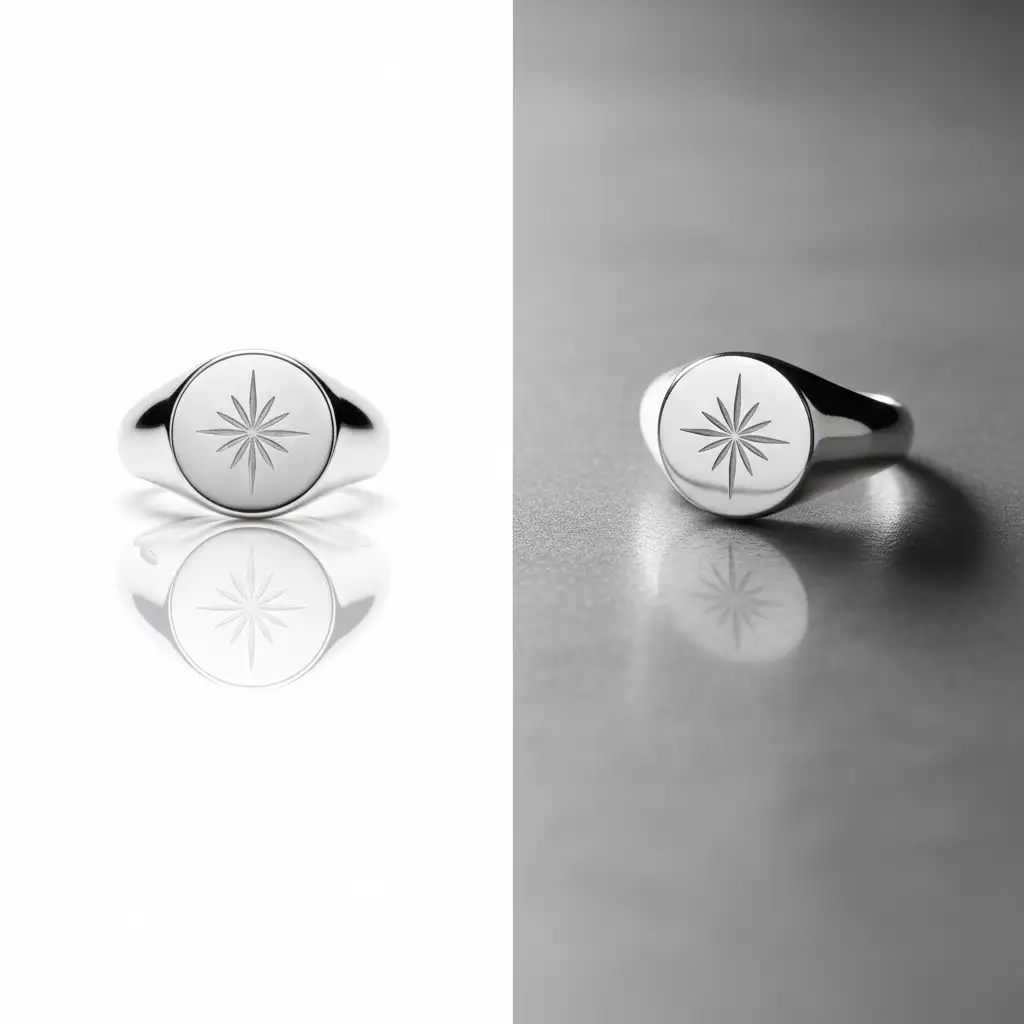
The Difference is in the Details
When you compare a standard vertical flip to a perspective-corrected, multi-layered reflection, the difference in quality is staggering. A proper reflection elevates the perceived value of the product, directly impacting e-commerce conversion rates.
Scale Your E-Commerce Output with Image Work India & Cloud Retouch
Creating flawless reflection shadows for jewelry e-commerce is a meticulous, time-consuming process. When you are dealing with a catalog of hundreds or thousands of SKUs, spending 20 minutes warping and masking a single ring simply isn’t scalable for your business.
Struggling to get pixel-perfect, luxury reflections for your entire catalog? Outsource your editing to Image Work India and Cloud Retouch. Our team of expert retouchers specializes in high-volume, flawless jewelry retouching. From precision pen tool clipping paths to advanced refractive reflection shadows and color correction, we deliver industry-leading results with rapid turnaround times.
Focus on growing your brand and making sales—let us handle the pixels. Contact Image Work India and Cloud Retouch today for a free trial and elevate your jewelry imagery to the luxury standard.


