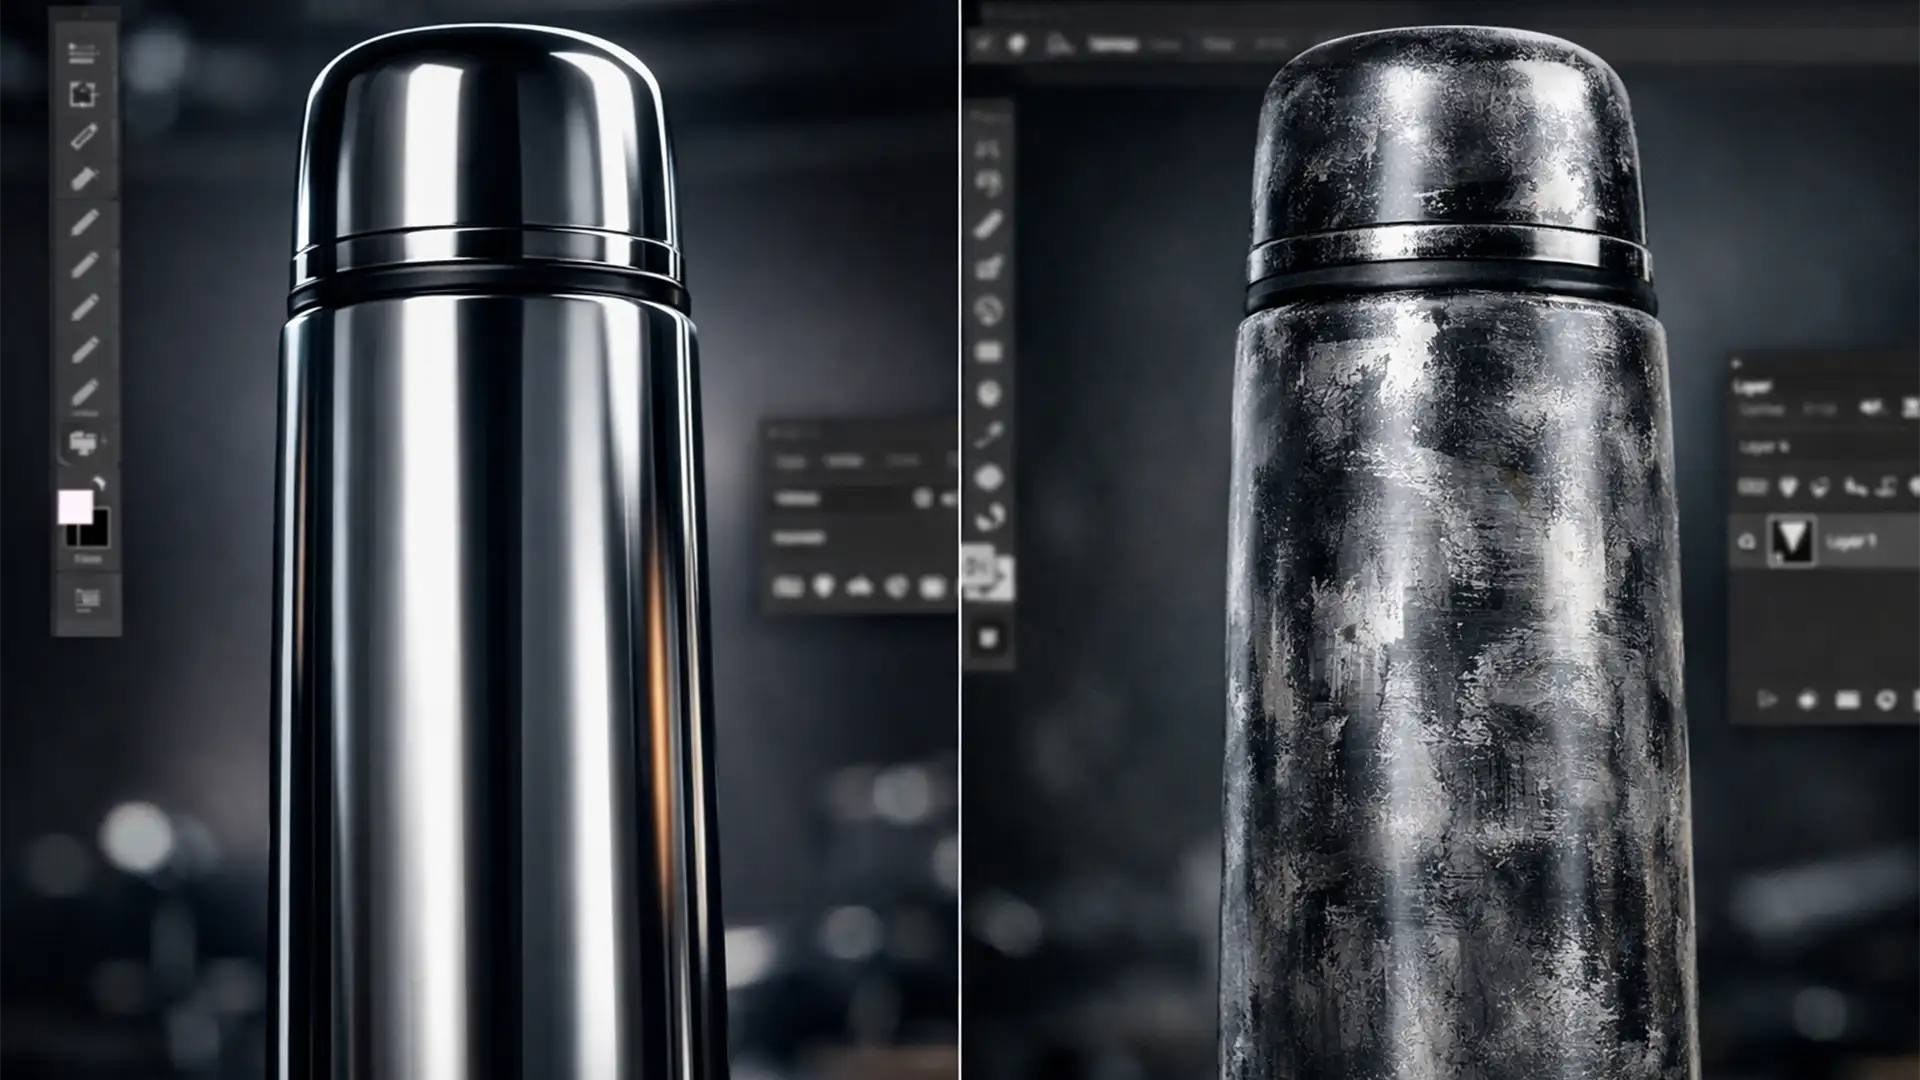
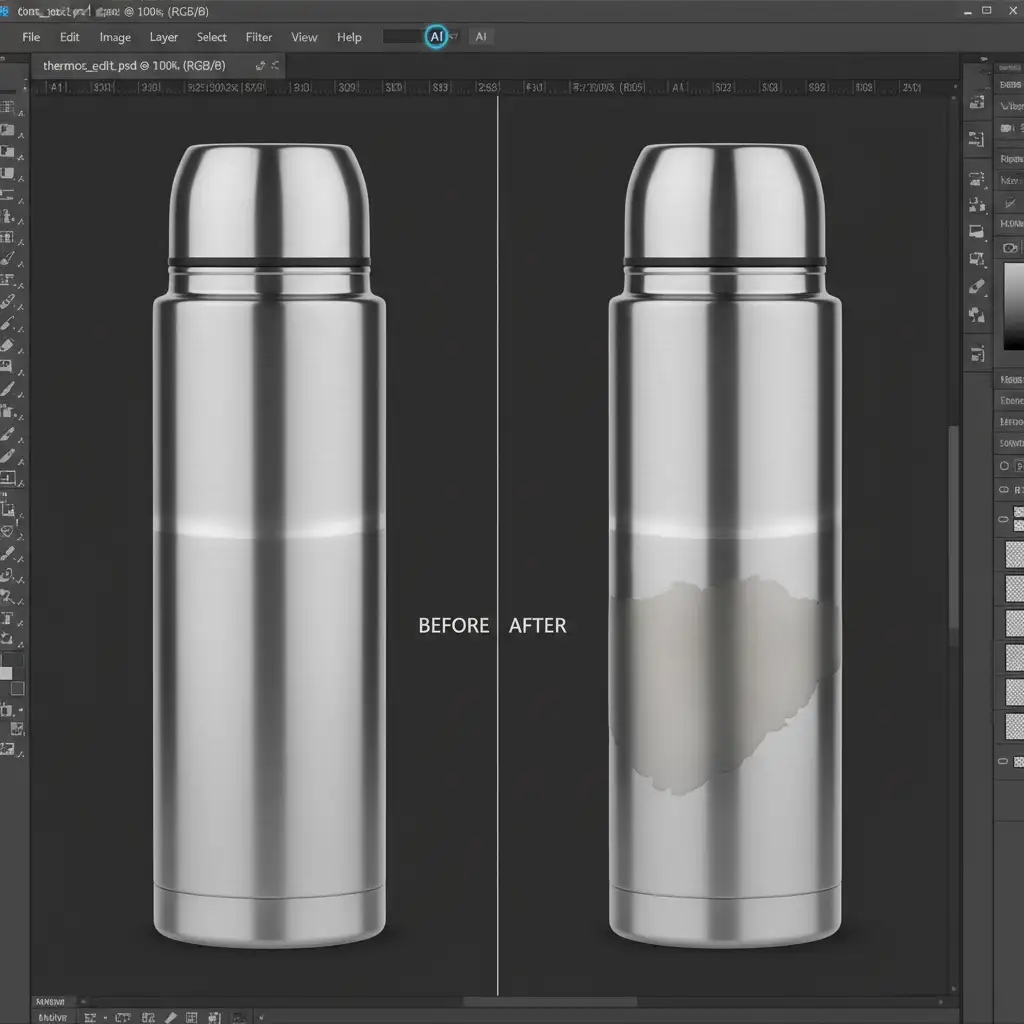
You use Generative Fill to clean up a minor scratch on a chrome thermos, and suddenly, Photoshop replaces that sleek metallic gradient with a smudged, matte blob. This is known as an AI texture hallucination in metallic product photos, and it is the absolute bane of high-end commercial retouching.
When dealing with highly reflective surfaces like cutlery, jewelry, or thermoses, relying blindly on automated tools is a recipe for disaster. In this guide, we will break down exactly why Photoshop v27.x’s AI fails on reflective surfaces and show you three professional, foolproof methods to fix these generative errors and restore photorealistic shine to your images.
Why Photoshop’s AI Struggles with Metallic Surfaces
To fix the problem, you must understand the underlying technology. Photoshop’s Generative Fill, powered by the Firefly Image 3 Model, is a diffusion model. It generates new pixels by analyzing the surrounding context.
However, metallic surfaces don’t have inherent “textures” in the traditional sense; they are entirely defined by their environment. A chrome cylinder is just a series of high-contrast reflection bands and specular highlights. When the AI Remove Tool or Generative Fill encounters the hard contrast of a chrome highlight, it often misinterprets it as an object boundary.
Instead of generating a smooth transition of luminance values, the AI panics. It attempts to average out the pixels, resulting in AI hallucination—replacing sharp metal with matte noise, smudged pixels, or warped refractive distortion.
Here is how to bypass the AI’s confusion and take back control of your pixels.
3 Methods to Fix AI Texture Hallucination in Metallic Product Photos
Method 1: The Quick Fix – Prompt Engineering & Hard Selections
The biggest mistake retouchers make is using the Lasso Tool with a soft edge and leaving the prompt box empty. To control the Firefly Image 3 Model, you must constrain it.
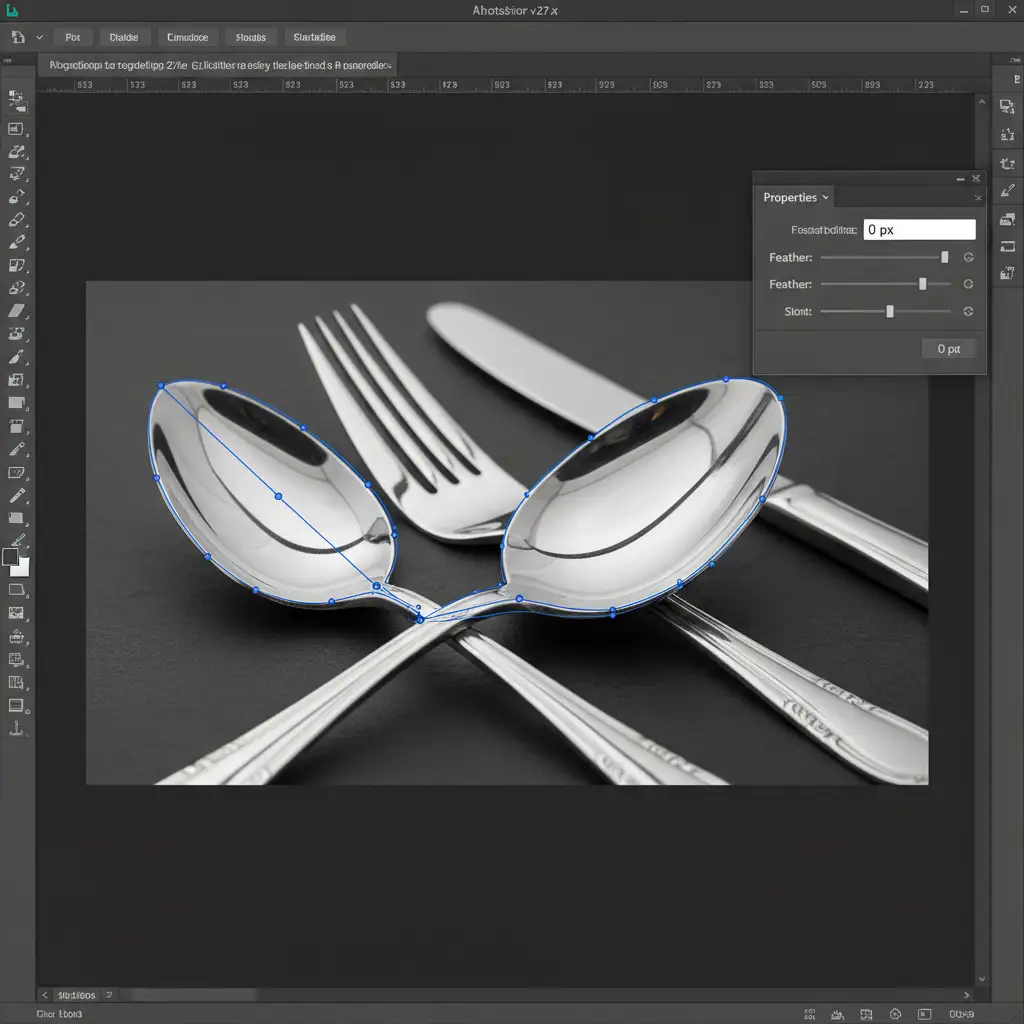
- Draw a Hard Path: Select the Pen Tool (P) and trace precisely around the hallucinated area or defect.
- Zero Feathering: Convert the path to a selection with a hard edge (0px feather). Soft edges confuse the AI on metallic surfaces.
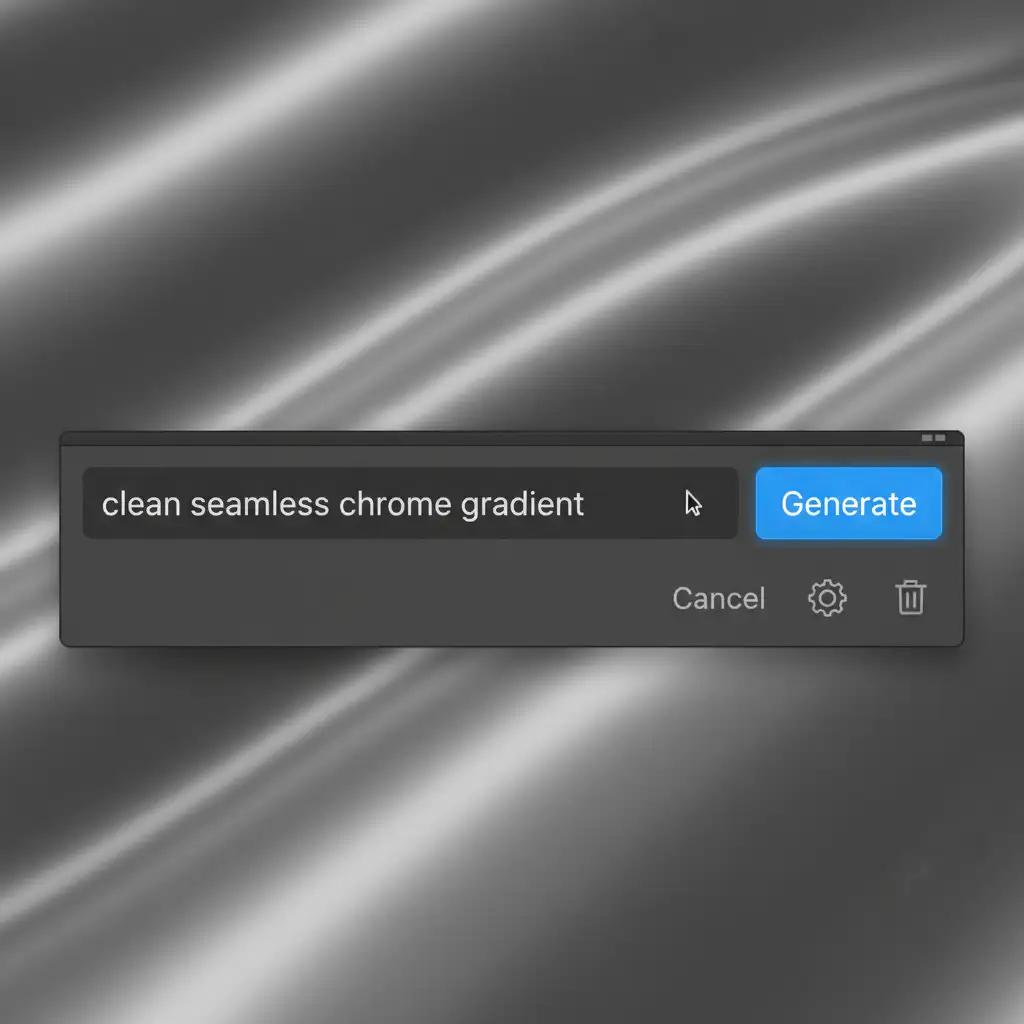
- Specific Prompting: In the Generative Fill contextual taskbar, do not use generic terms like “fix” or “remove”. Instead, dictate the exact material and lighting. Use prompts like “clean seamless chrome gradient” or “anodized aluminum reflection”.
- Generate variations until the structural geometry aligns.
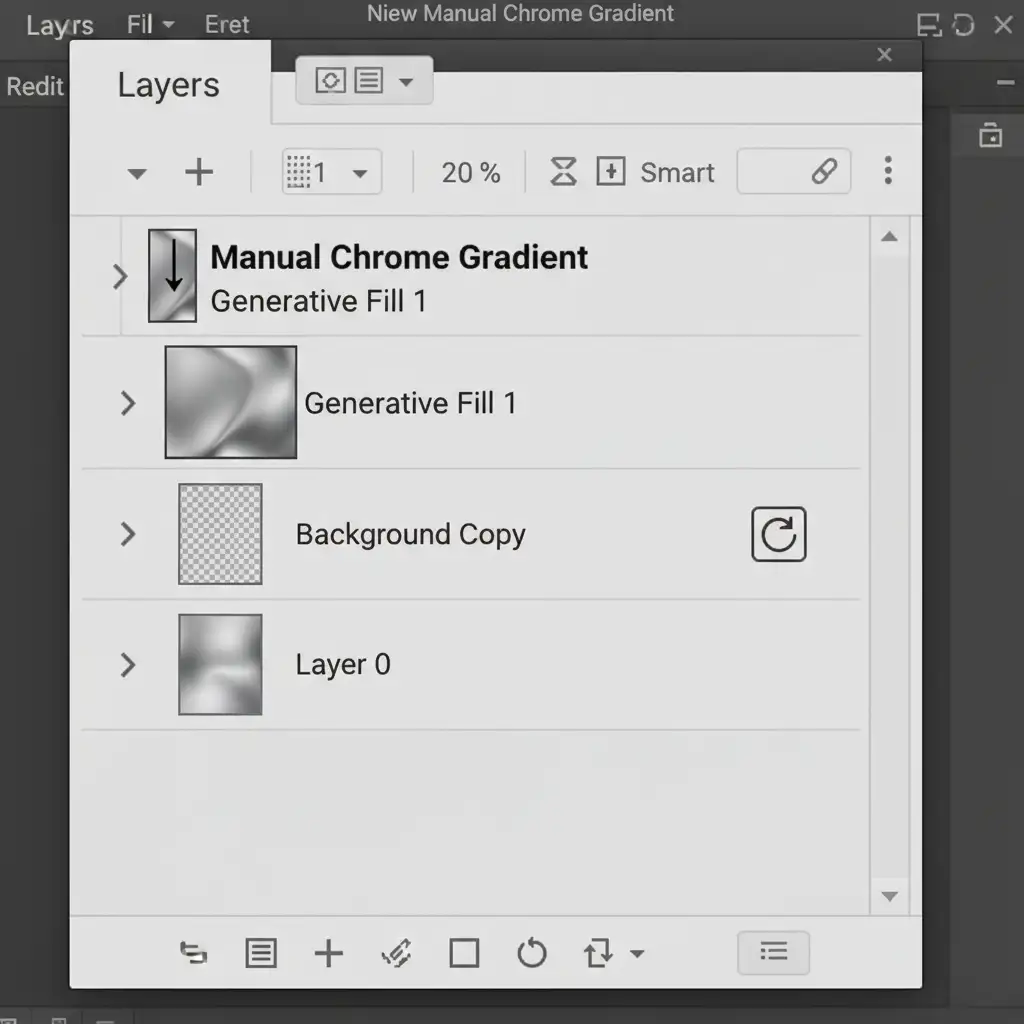
Method 2: The Pro Workaround – Gradient Mapping & Smart Objects
When AI fails to generate a believable metallic texture, you should bypass its texture generation entirely. Use the AI to fix the shape, but dictate the texture manually.
- Generate the Base: Let Generative Fill patch the physical defect, even if the texture looks matte.
- Convert to Smart Object: Right-click your AI layer and select “Convert to Smart Object” to protect the data.
- Manual Reconstruction: Create a new layer above it. Use the Gradient Tool (G) to manually redraw the metallic reflection, perfectly matching the original light falloff and gradient mapping of the product.
- Apply a Clipping Mask: Hold Alt (Windows) or Option (Mac) and click between the gradient layer and the AI layer.
Now, the AI layer acts only as a structural base, while your clipping mask forces the flawless, manual gradient to dictate the metallic texture.
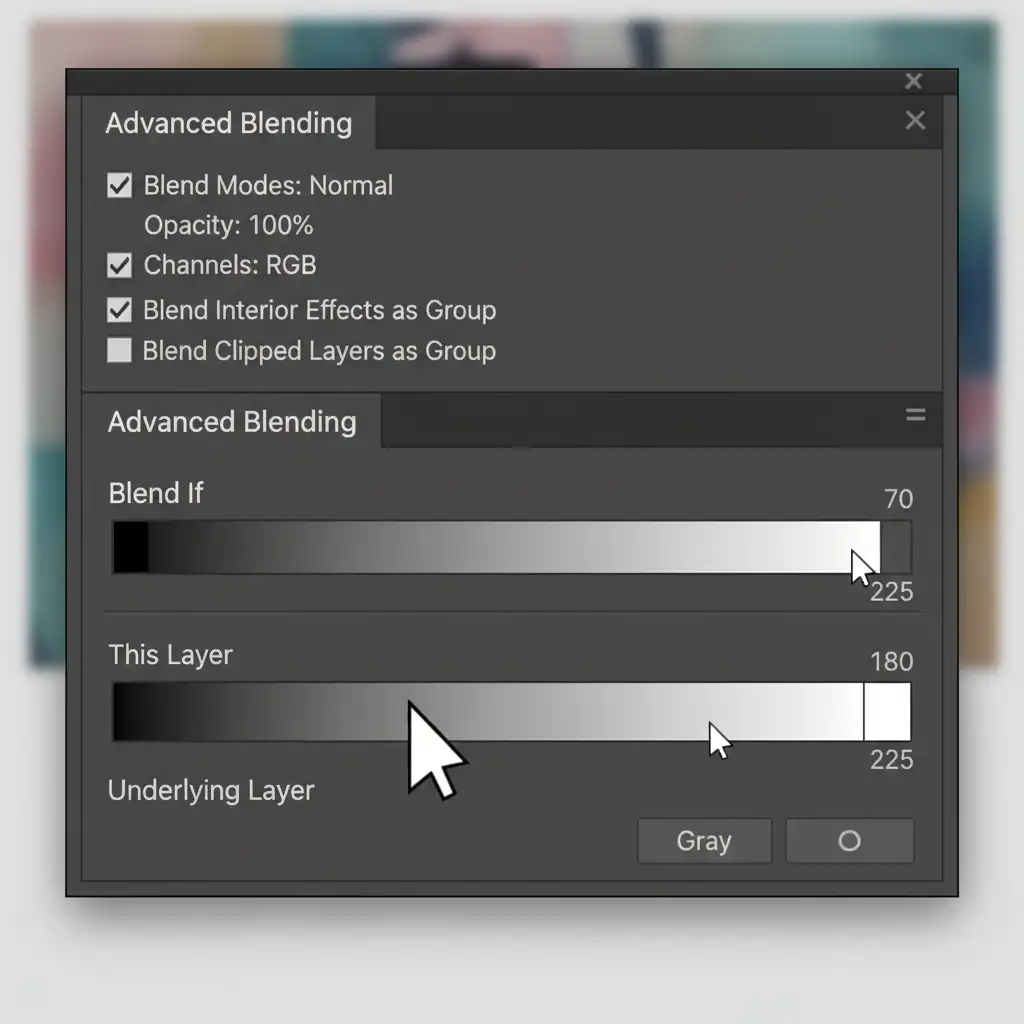
Method 3: The Technical Deep-Dive – Specular Masking via Blend If
If you want the ultimate photorealistic finish, you need to marry the AI’s structural repair with the original image’s true metallic data. We achieve this using advanced Blend If masking.
- Run the Generative Fill: Allow the AI to hallucinate the base repair over the defect.
- Open Layer Styles: Double-click the AI Generative Layer to open the Layer Style dialog box.
- Navigate to Blend If: Look at the bottom section labeled ‘Blend If: Gray’. Focus on the ‘Underlying Layer’ gradient bar.
- Split the Slider: Alt-click (Windows) or Option-click (Mac) the right-hand white slider to split it in half.
- Drag to the Shadows: Drag the left half of that white slider toward the shadows (left).
By doing this, you are forcing the original, ultra-bright specular highlight from the underlying original photo to punch straight through the matte AI hallucination. The AI fixes the midtones, but the true metallic reflection data shines through, restoring perfect realism.
When to Ditch AI Entirely
While Photoshop v27.x is powerful, sometimes traditional techniques are still king. If you are dealing with complex brushed aluminum or intricate jewelry facets, AI might still struggle even with these workarounds. In these cases, falling back on classic Frequency Separation allows you to separate the color data from the structural texture, letting you clone out defects without ever touching the delicate metallic reflections.
Stop Fighting AI—Let the Experts Handle It
Fixing an AI texture hallucination in metallic product photos takes time, precision, and a deep understanding of Photoshop’s advanced masking tools. If you are processing a handful of images, these techniques will save your project. But what if you have a catalog of 5,000 metallic products, chrome auto parts, or highly reflective jewelry pieces?
Don’t let tedious retouching bottlenecks slow down your time-to-market. At Image Work India and Cloud Retouch, our teams of elite retouchers specialize in complex surface reconstruction. We bypass automated AI errors to deliver flawless, photorealistic metallic, chrome, and jewelry retouching at scale.
Ready to make your products shine? [Contact Image Work India and Cloud Retouch today] to get a custom quote for your bulk retouching needs.


