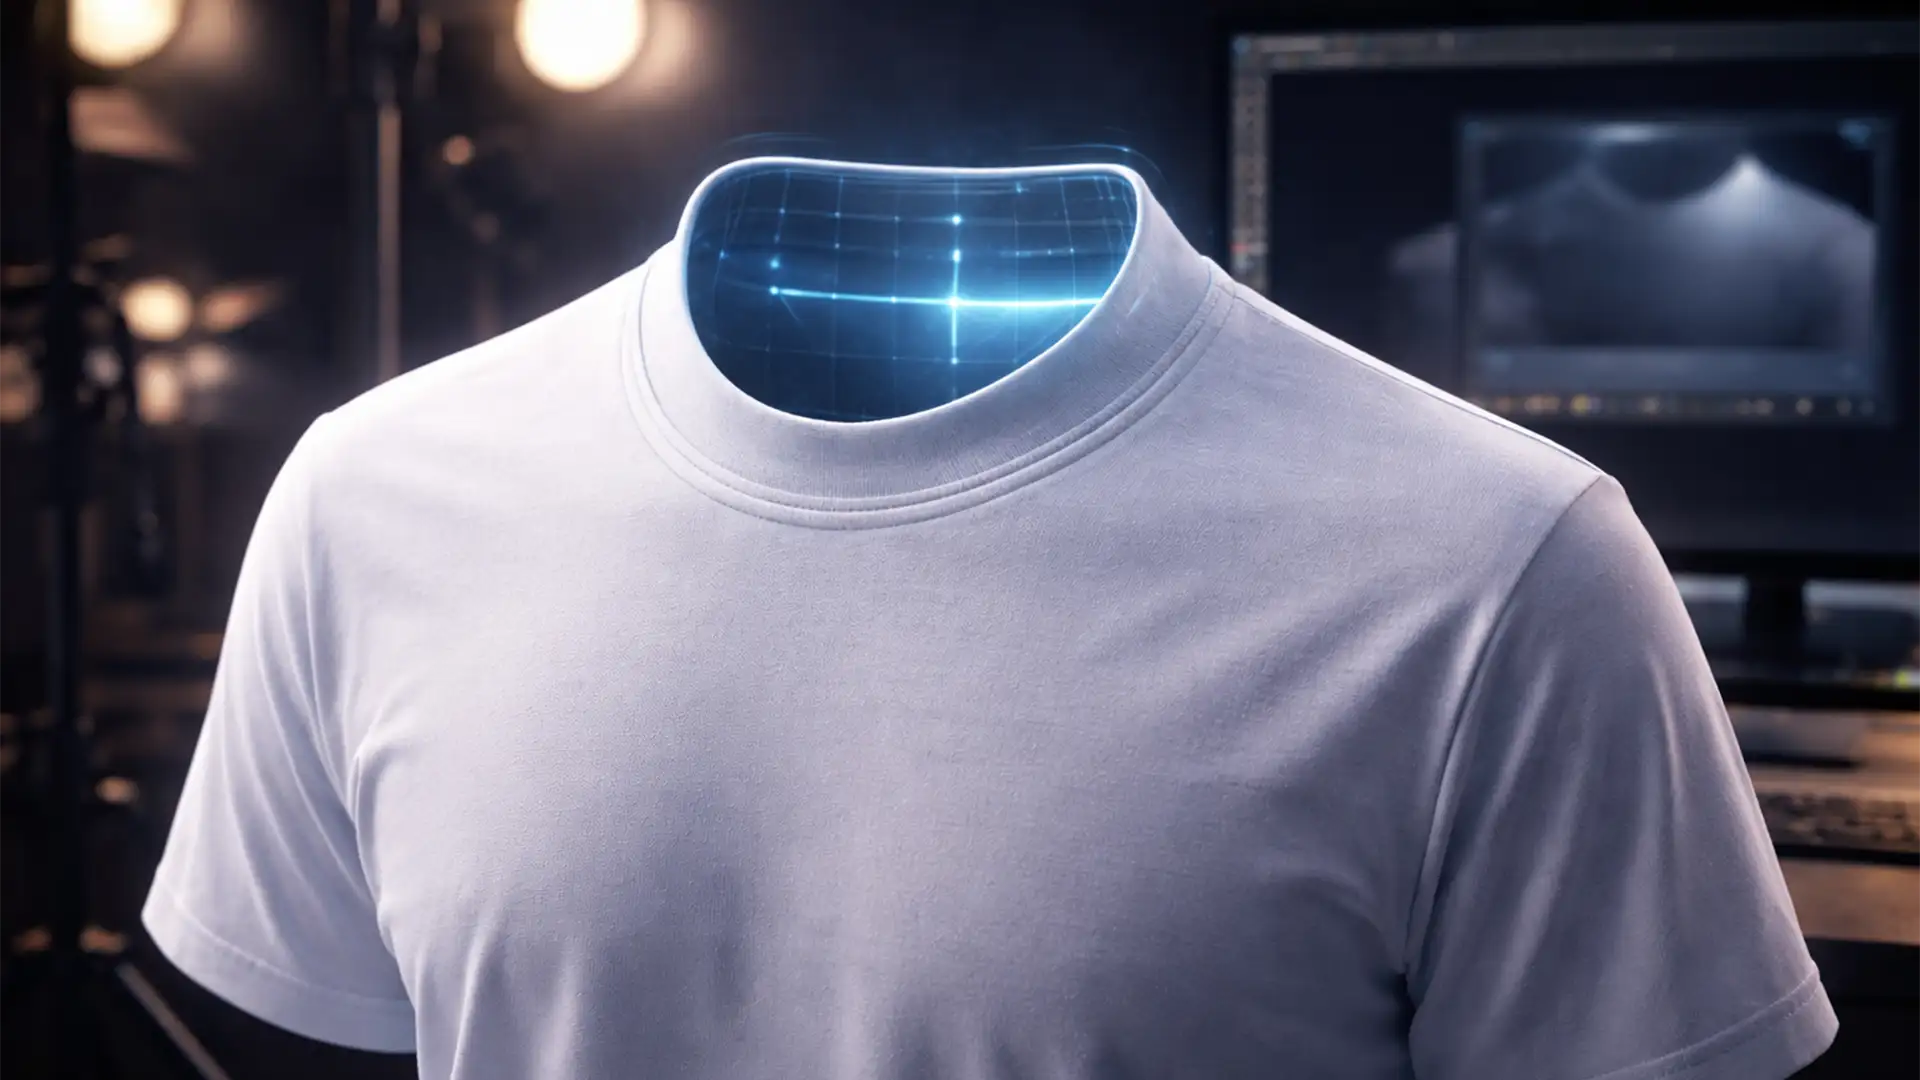
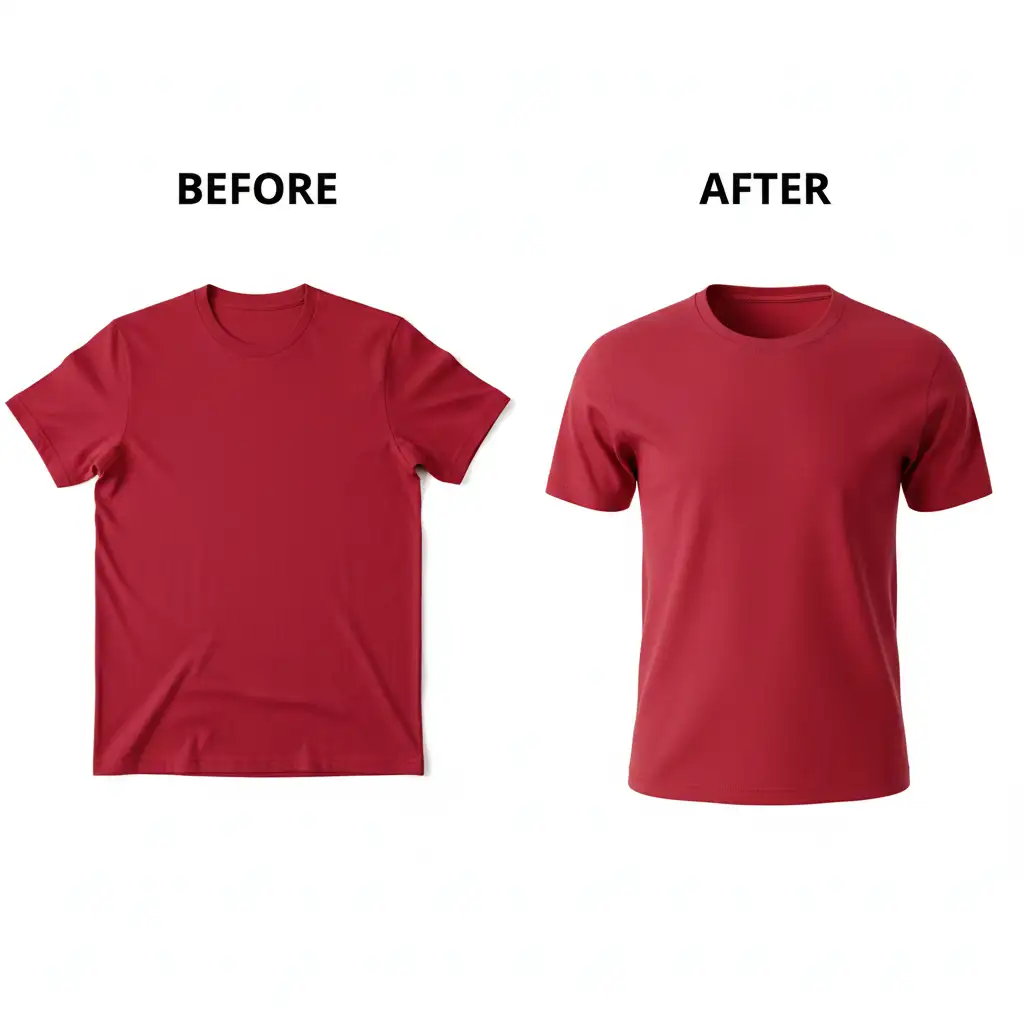
If you are an e-commerce photo retoucher using Adobe Photoshop v25.0 or later, you have likely experienced the frustration of AI hallucinations. You select the empty collar space of a garment, hit generate, and watch as Adobe Firefly inserts random brand tags, anatomical anomalies, or completely mismatched fabric textures into your image.
The ghost mannequin effect relies on flawless realism, and unpredictable AI artifacts ruin the illusion of a premium product. The root cause of these errors isn’t the AI itself, but rather a lack of pixel context and overly vague instructions.
In this guide, we will break down the exact generative fill prompt for ghost mannequin neck joint reconstruction, the critical selection techniques required to prevent texture mismatches, and the manual finishing steps needed for professional apparel retouching.
Why Photoshop’s Generative Fill Hallucinates on Neck Joints
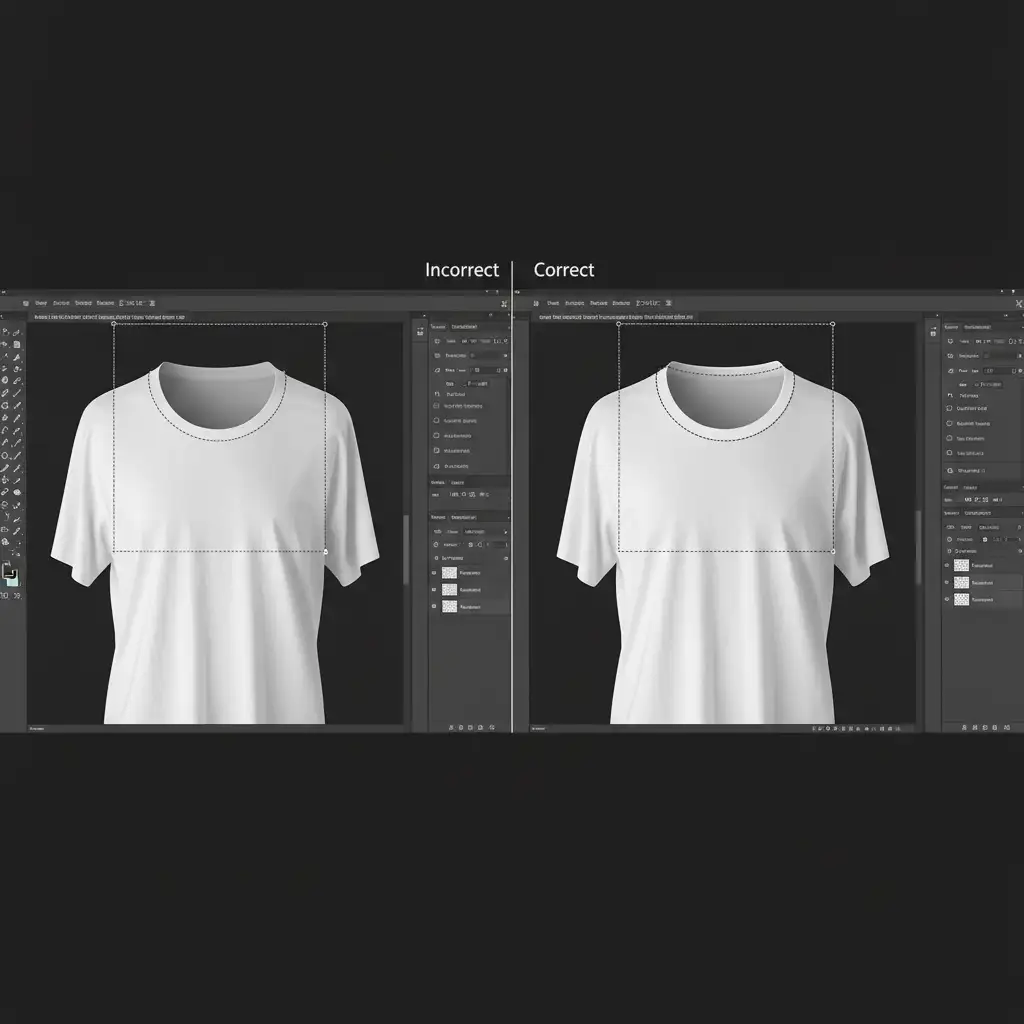
When executing a neck joint service, the goal is to seamlessly combine the front of a garment with a shot of its inner back collar. While Generative Fill speeds up this process, it often fails when users make a tight selection strictly within the empty neck cavity.
Without overlapping the existing collar edge, the AI lacks the necessary pixel context to understand lighting, fabric grain, and perspective. Consequently, Adobe Firefly attempts to guess what belongs in the void, leading to unwanted AI hallucinations. To fix this, retouchers must combine proper selection expansion with high-fidelity semantic prompting.
Step 1: The Essential Pixel Selection Technique
Before typing a single word into the software, your selection must be flawless.
Instead of selecting only the transparent background inside the collar, use the Lasso Tool to create your selection, ensuring the Marching Ants overlap the visible inner collar edge by exactly 10 to 15 pixels. This overlap forces the Generative Fill algorithm to sample the existing fabric’s color, lighting, and texture, drastically reducing the chance of rogue objects appearing.
The Perfect Generative Fill Prompt for Ghost Mannequin Neck Joints
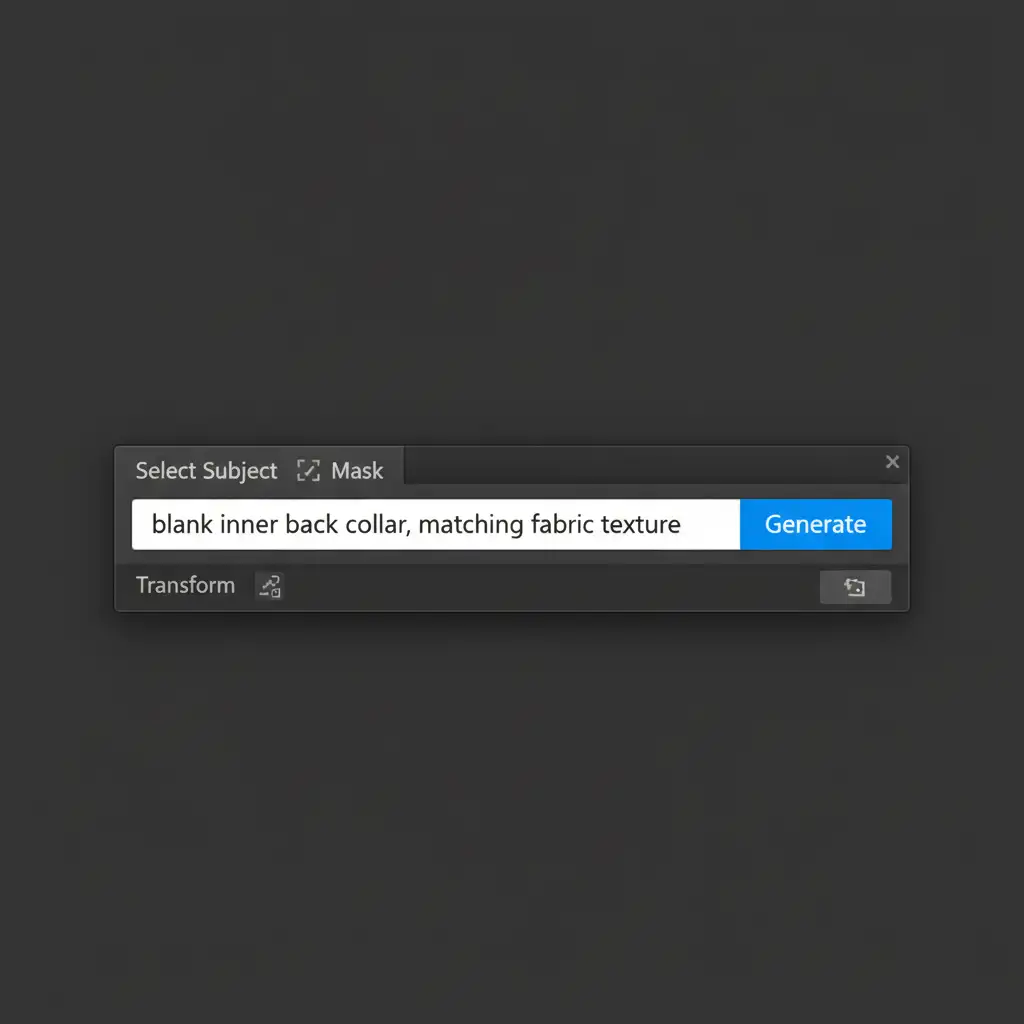
Once your selection is properly expanded, it is time to command the AI. The biggest mistake retouchers make is using vague terms like “fix neck” or “add back collar.”
Method A: The Quick Fix
To generate a clean, realistic inner collar without unwanted branding or tags, type the following exact phrase into the Contextual Task Bar:
“blank inner back collar, matching fabric texture”
This specific generative fill prompt for ghost mannequin neck joint editing tells Firefly exactly what the object is, specifies that it must be “blank” (preventing random tag generation), and commands it to match the surrounding fabric structure.
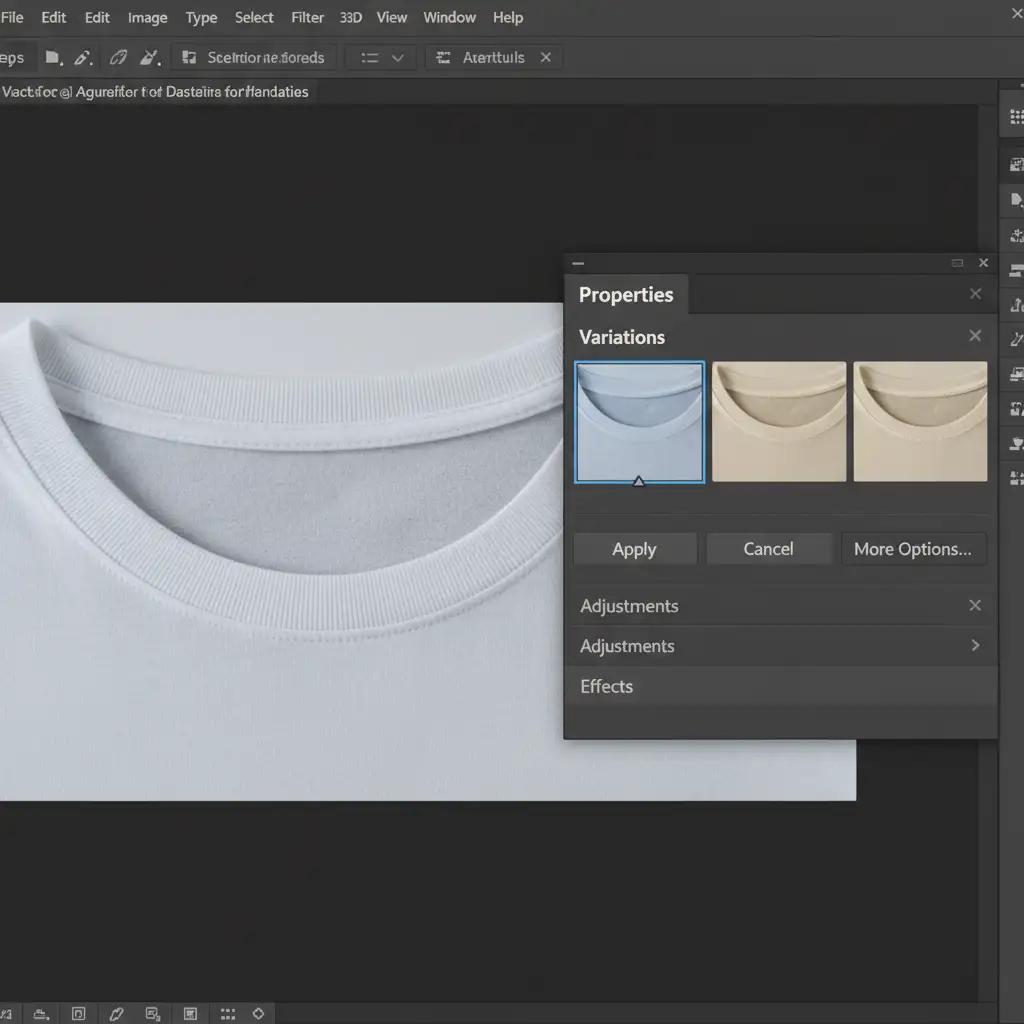
Reviewing the Variations
Photoshop will generate three options based on your prompt. Always check the Properties panel to evaluate the variations. Look for the option that best matches the directional lighting of your original product shot.
Method B: The Pro Workaround (Blending Real References)
For high-end apparel retouching, relying solely on AI generation might not pass strict brand guidelines, especially if the garment has a unique weave or pattern. In these cases, use the AI purely as a blending tool.
- Paste a real photograph of the garment’s back collar behind your main product layer.
- Align the seams as closely as possible.
- Use the Lasso Tool to select the jagged overlapping seams where the two images meet.
- Leave the Generative Fill prompt completely blank and hit generate.
By leaving the prompt blank, you force Photoshop to act as an advanced content-aware blending tool. It will seamlessly stitch the real collar to the front garment without introducing new, hallucinated elements.
Method C: The Technical Deep-Dive for Flawless Integration
Even with the perfect prompt, AI-generated pixels often look slightly too smooth or plastic compared to raw photography. To achieve a true ghost mannequin effect, you must perform manual technical refinements.
1. Fix Texture Mismatches
If the AI generation lacks the natural noise of the original photo, convert your Generative Fill layer to a Smart Object. Open the Camera Raw Filter and navigate to the Effects tab. Add a subtle amount of Grain to match the physical garment’s texture.
2. Precision Layer Masking
Never trust the AI’s default masking. Select the Layer Mask attached to your Generative Fill layer. Using a soft round brush set to 20% opacity, gently feather the edges where the AI generation meets the physical garment. This manual Layer Masking ensures the transition is imperceptible to the human eye.
Scale Your Apparel Retouching with the Experts
Mastering the generative fill prompt for ghost mannequin neck joint editing is a great way to speed up individual photo edits. However, managing this workflow across hundreds or thousands of product images requires immense time, strict quality control, and constant manual refinement to ensure bulk consistency. AI is a powerful tool, but it still requires a professional human touch to meet commercial e-commerce standards.
If you are tired of battling AI hallucinations and spending hours masking intricate neck joints, let the experts handle it. Image Work India and Cloud Retouch provide high-volume, pixel-perfect ghost mannequin and neck joint services. Our team of professional retouchers combines the latest AI technology with meticulous manual editing to guarantee brand consistency, flawless fabric matching, and rapid turnaround times.
Focus on growing your brand and shooting great products—contact Image Work India and Cloud Retouch today to streamline your post-production workflow.


