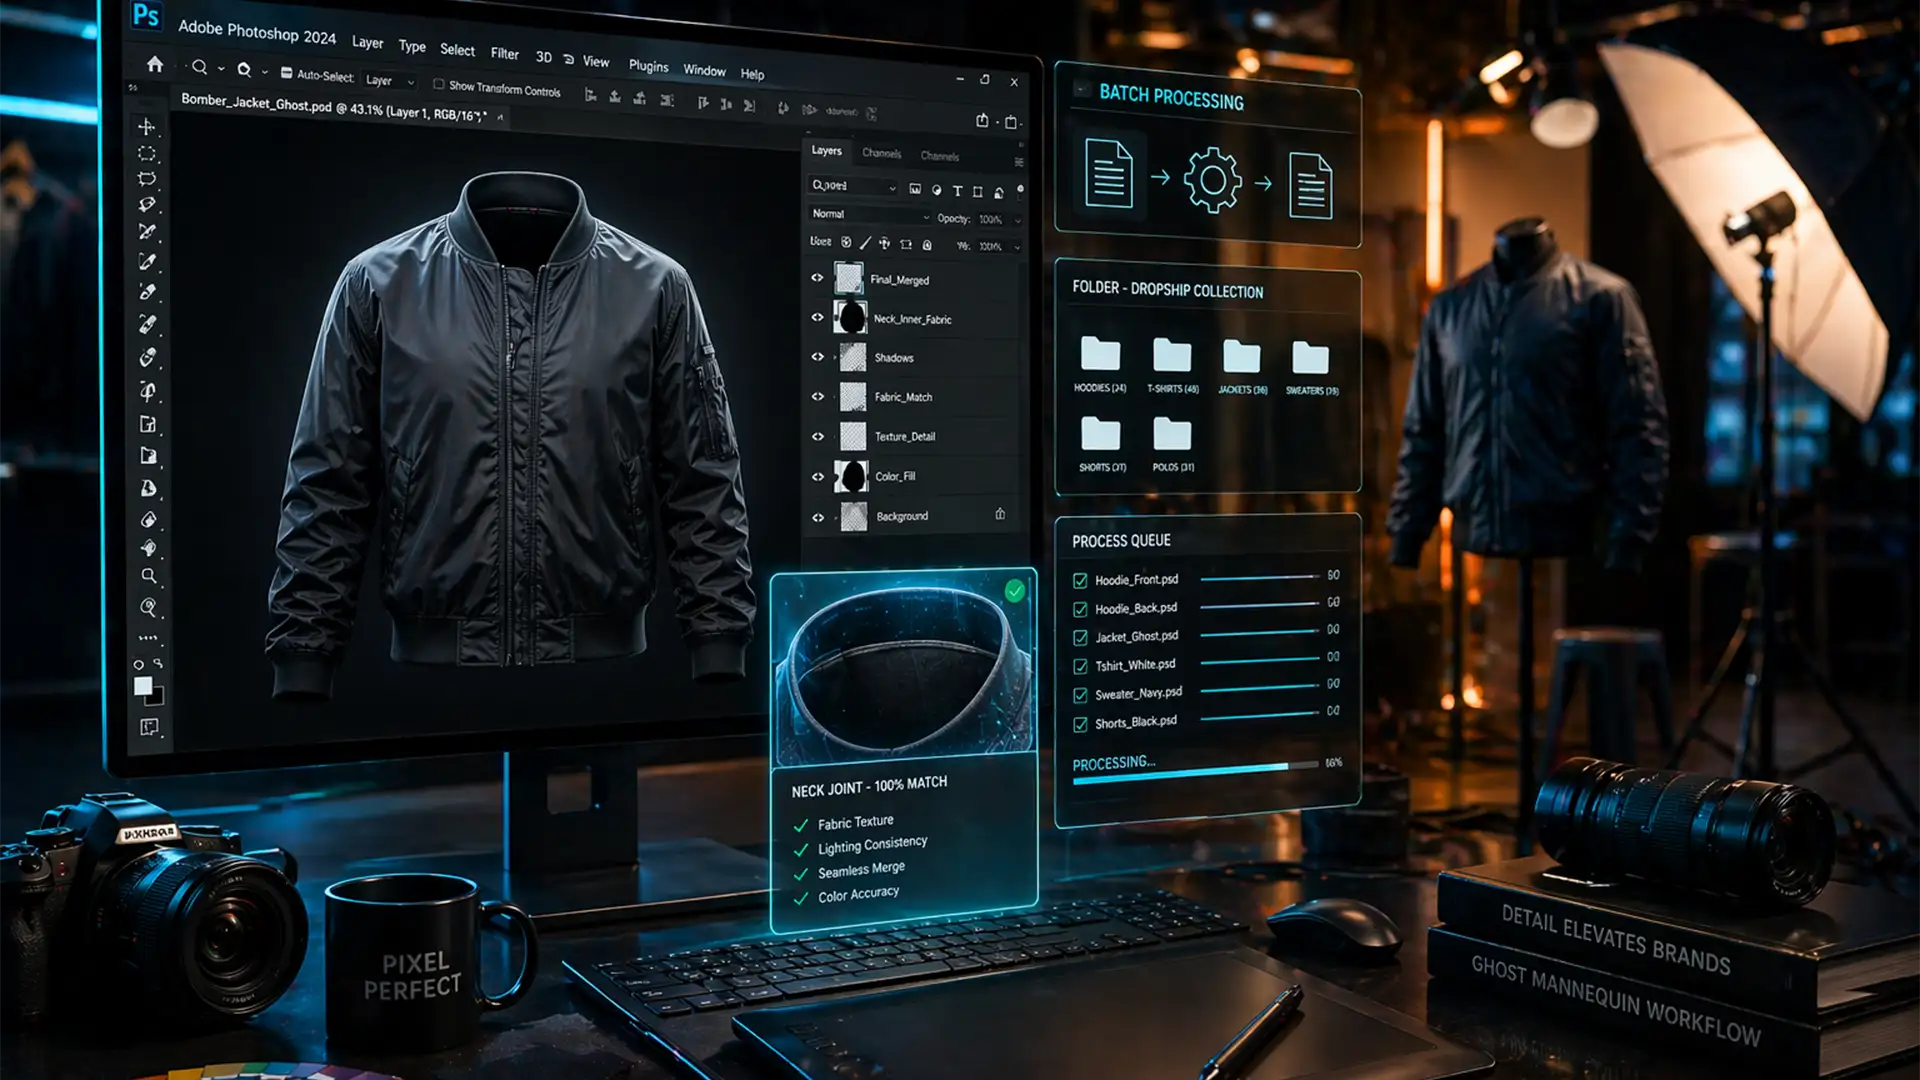
If your e-commerce studio is processing 500+ apparel shots a day, manual editing is your biggest bottleneck. Aligning the inner collar with the front garment across varying sizes takes time, and running large batch operations often triggers memory leaks or crashes in Photoshop.
Scaling an enterprise apparel catalog requires a bulletproof high volume batch ghost mannequin workflow 2024. By combining the new AI capabilities in Photoshop v25.x and v26.x with legacy Action Scripts and optimized hardware settings, you can exponentially reduce your per-image processing time.
Here is the exact technical blueprint to eliminate bottlenecks, prevent crashes, and standardize your neck joints at scale.
The Technical Deep-Dive: Crash-Proofing Your Hardware
Before setting up any automation, you must optimize Photoshop for high-volume batch processing. Running hundreds of high-resolution files through automated masking workflows will quickly consume available memory, leading to fatal crashes.
Optimizing RAM Allocation and History States
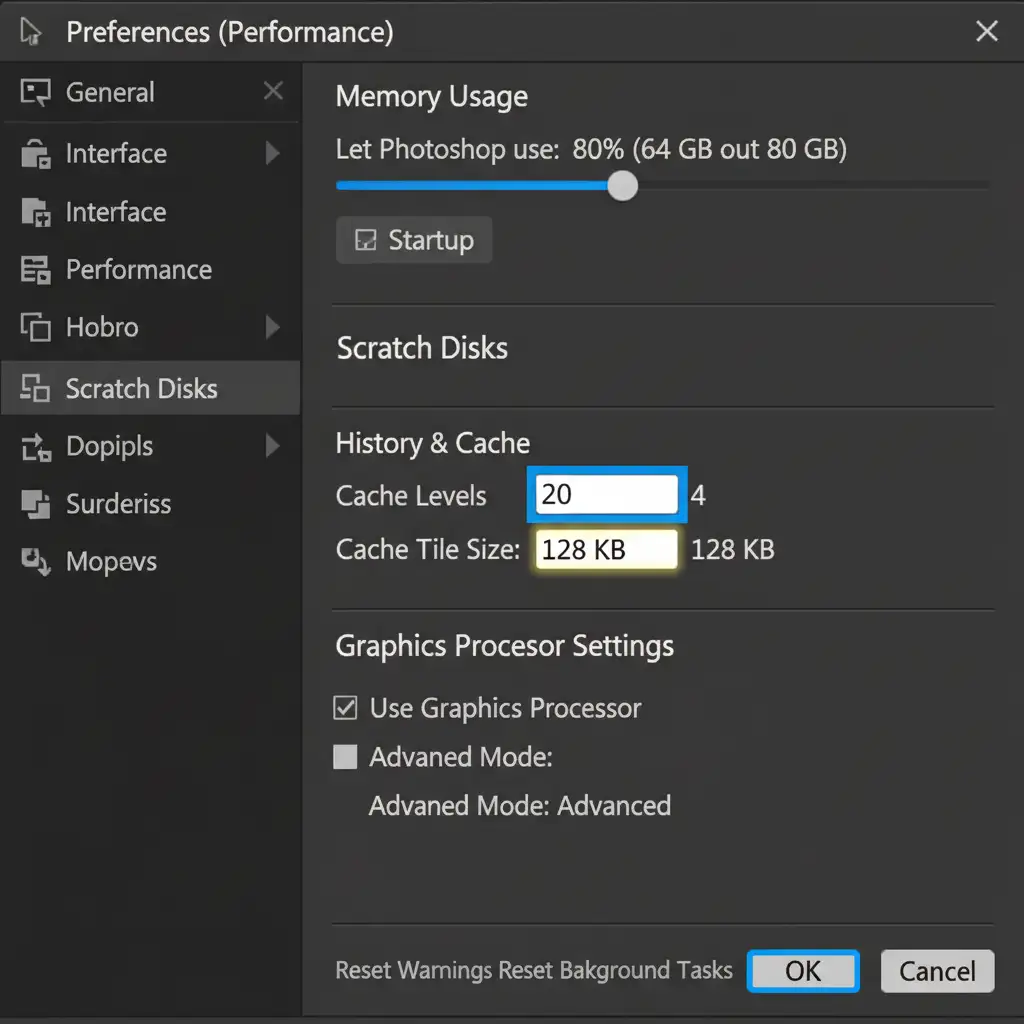
To keep Photoshop stable during massive batch exports, you need to adjust your core performance preferences.
- Navigate to Edit > Preferences > Performance (Windows) or Photoshop > Settings > Performance (Mac).
- Increase your RAM Allocation to 80%. This ensures Photoshop has the necessary resources to handle heavy files.
- Reduce your History States to 20. Storing 50+ history states for a 500-image batch will cause severe memory bloat.
Disabling Cloud Processing for the Object Selection Tool
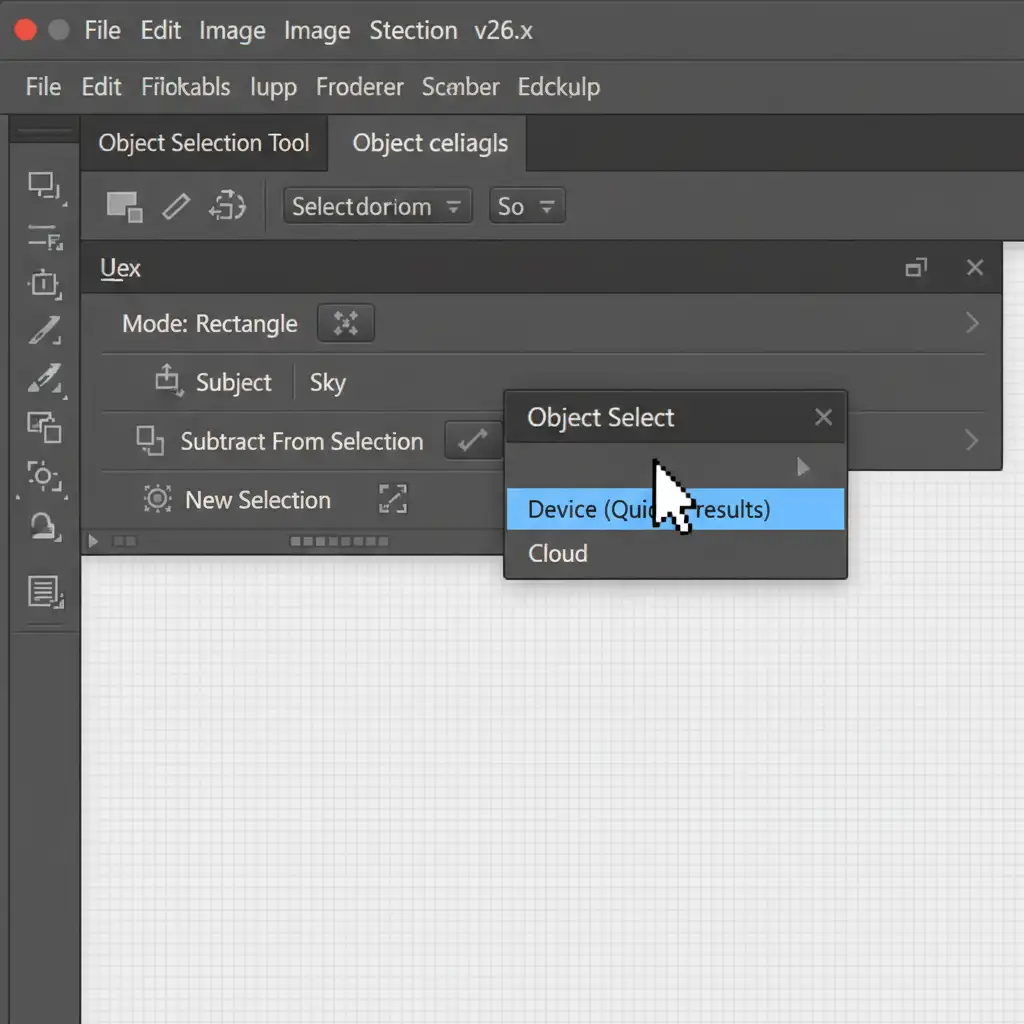
In 2024, Photoshop’s AI tools default to cloud processing. During a batch run, pinging Adobe’s servers for every single image introduces massive network latency.
To fix this, select the Object Selection Tool from your toolbar. In the top options bar, locate the processing mode dropdown and change it from “Cloud” to “Device”. This forces your local machine to handle the AI masking, resulting in instant processing.
Phase 1: Automating Subject Isolation with Photoshop Droplets
The “Quick Fix” for handling the front of the garment is to eliminate manual clipping paths where possible. We achieve this by turning Action Scripts into a Photoshop Droplet—a standalone applet that processes files dragged and dropped onto it.
Creating the Automation Action
First, record an Action that performs the following steps:
- Selects the subject using the Object Selection Tool (now running locally on your device).
- Applies a layer mask to isolate the garment.
- Standardizes the canvas size automatically (e.g., 2000x3000px) to ensure uniformity across the catalog.
Generating the Batch Droplet
Once your Action is saved, convert it into a Droplet:
- Go to File > Automate > Create Droplet.
- Choose a destination folder for your processed files.
- Check the override settings for “Action ‘Save As’ Commands” to ensure the Droplet doesn’t pause to ask for saving permissions on every file.

Phase 2: Perfecting the Neck Joint with Smart Objects
The hardest part of a ghost mannequin edit is the neck joint—the inner back collar of the garment. Manually cutting and warping this piece to fit the front garment mask for every single size variation is tedious.
The “Pro Workaround” is to build a master template utilizing Smart Objects.
The Smart Object Template Workflow
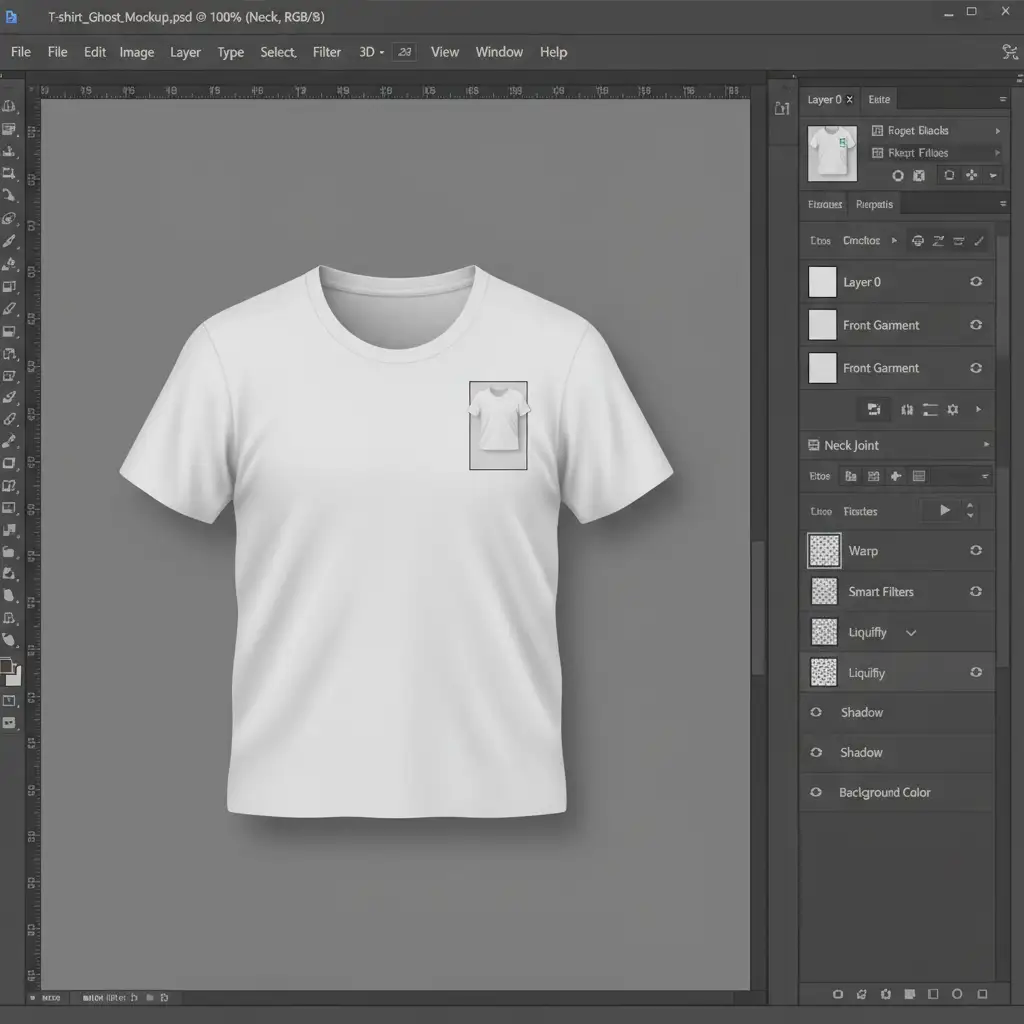
- Create the Template: Set up a layered PSD where the isolated front garment sits on the top layer.
- Insert the Smart Object: Place the inner neck/collar photograph on a lower layer and convert it to a Smart Object (Right Click > Convert to Smart Object).
- Non-Destructive Warping: Use the Warp or Liquify tools on the Smart Object to align the collar with the front garment perfectly.
Because the neck joint is a Smart Object, the transformation is entirely non-destructive. If you need to swap out the neck piece for a different size or colorway, you simply double-click the Smart Object, paste the new inner collar, and save. The new collar will automatically inherit the complex warp and alignment settings, completely eliminating pixel degradation and saving minutes per image.
Enhancing the Details with Generative Fill
For minor imperfections—such as missing fabric where the physical mannequin’s neck disrupted the collar line—you can use Photoshop’s Generative Fill. Select the missing area, leave the prompt blank, and let the AI seamlessly bridge the gap between the front garment and the neck joint.
Scale Your E-commerce Catalog Without the Headache
Building a high volume batch ghost mannequin workflow 2024 requires a deep understanding of automation, hardware optimization, and advanced masking techniques. While this workflow drastically reduces processing times, managing 500+ images daily still demands significant in-house resources, QA management, and technical oversight.
Scaling from 50 to 500 apparel shots a day requires a dedicated post-production partner. If you want flawlessly aligned neck joints, perfect clipping paths, and rapid turnaround times without managing the technical bottlenecks yourself, Image Work India and Cloud Retouch are here to help.
Hire our expert retouching teams to handle your high-volume ghost mannequin workflow seamlessly and cost-effectively. Focus on shooting your next campaign, and let us deliver the perfect, retail-ready catalog.


