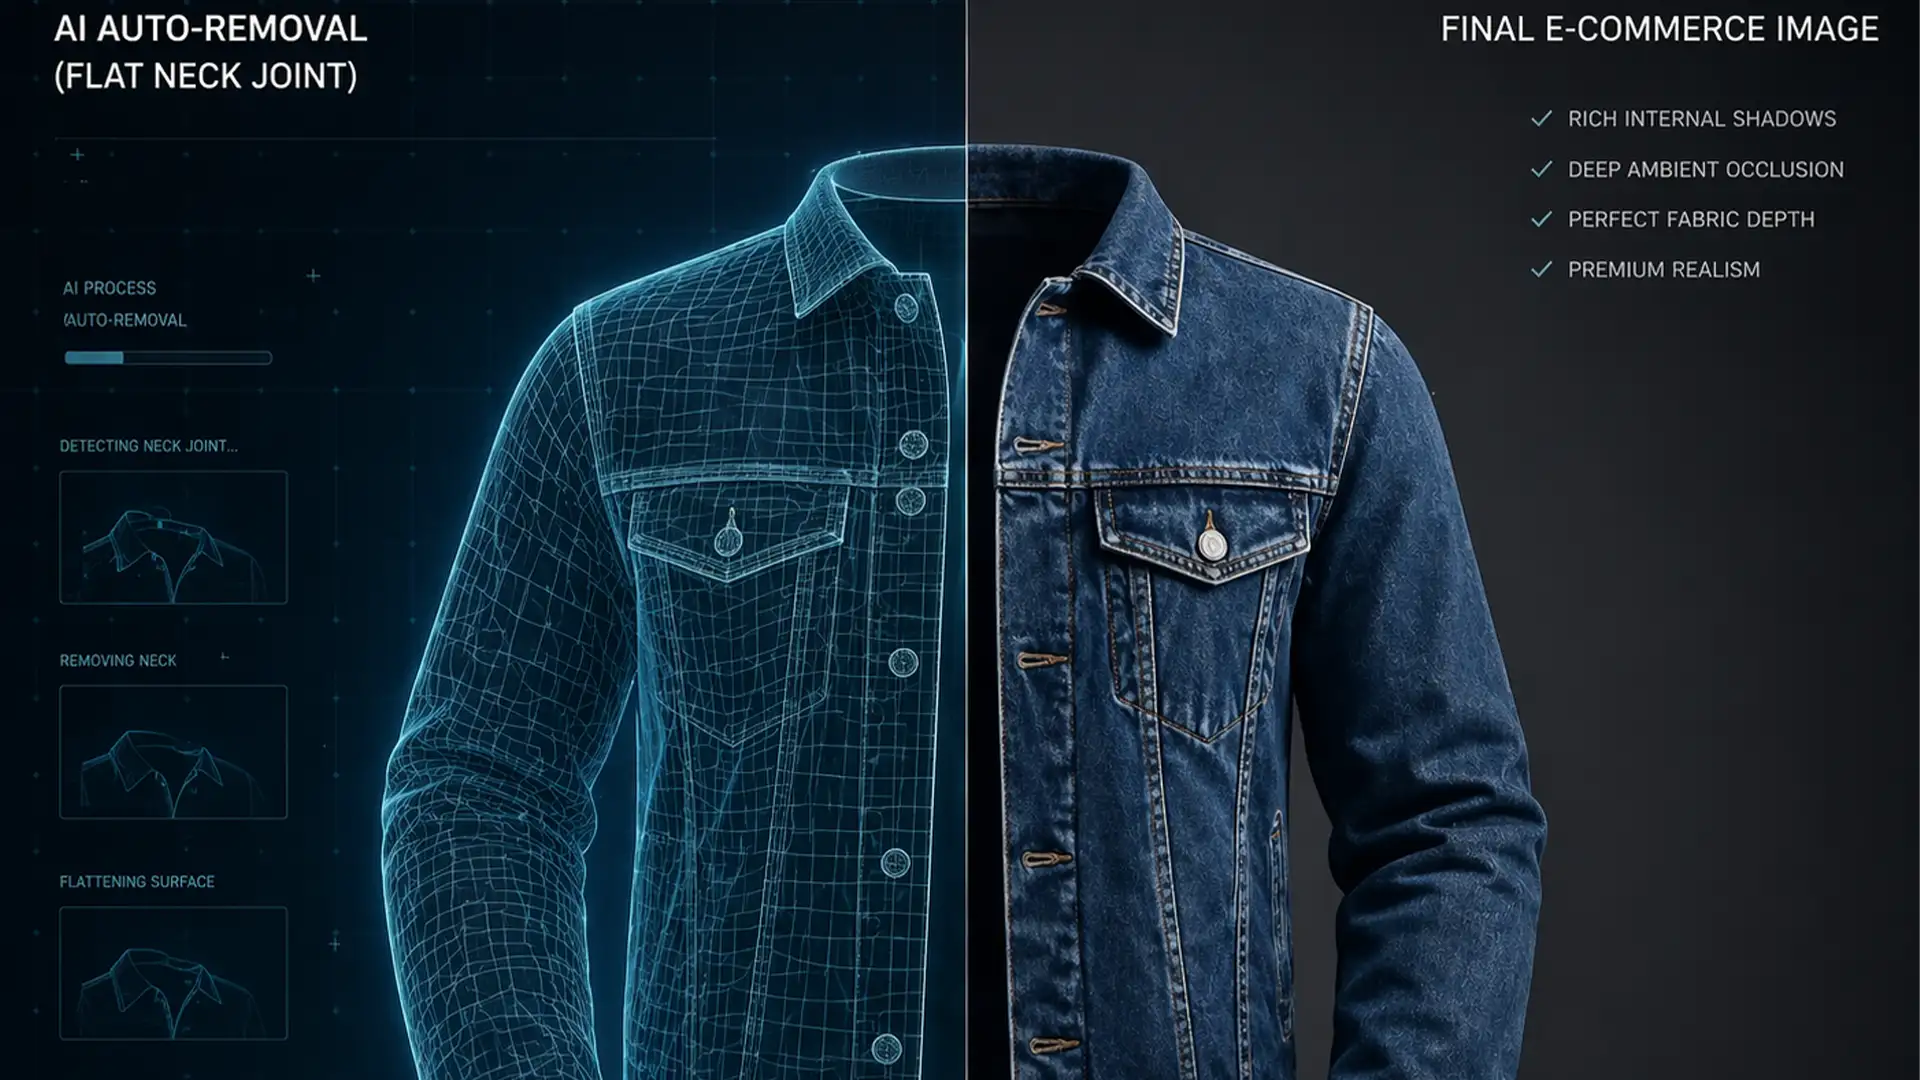
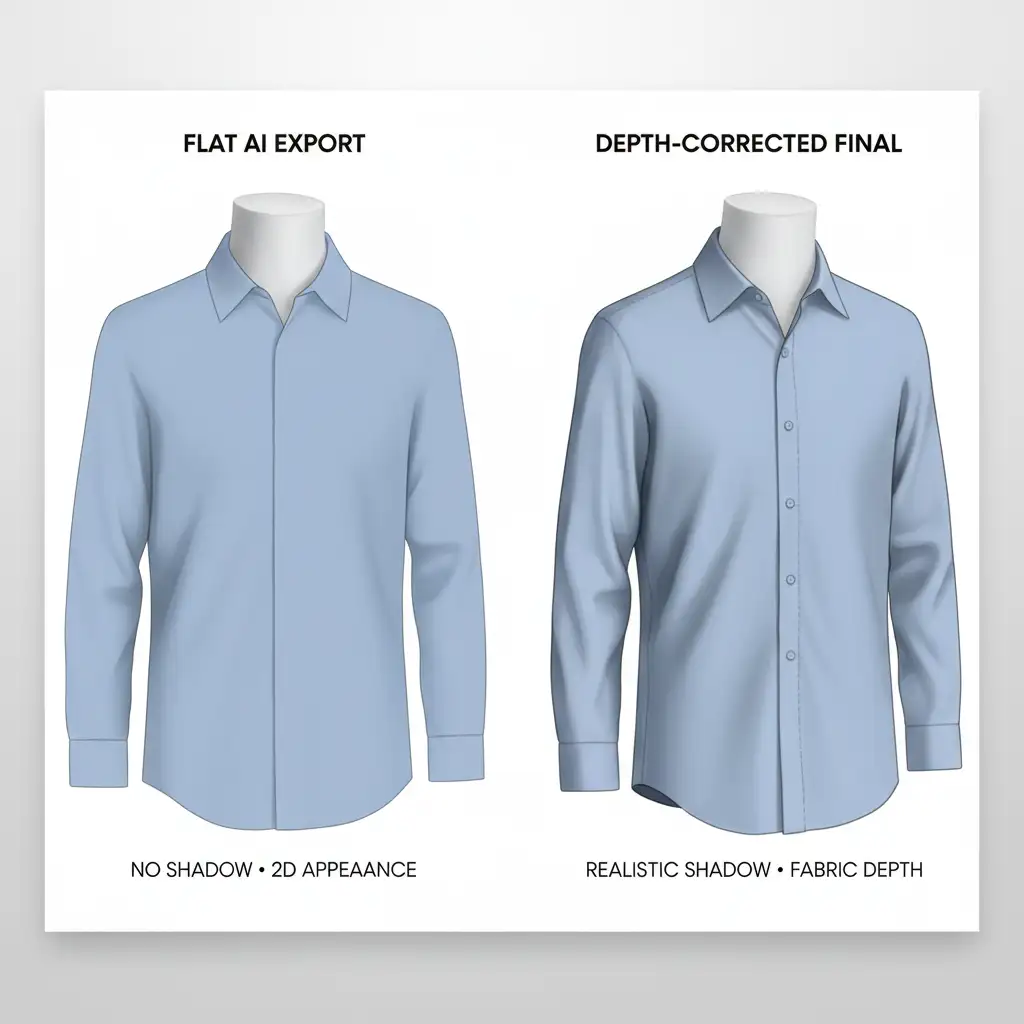
E-commerce brands love the speed of AI auto-removal tools, but there is a hidden cost: the dreaded “2D paper doll” effect. When specialized software like Photoroom or AutoRetouch strips away the dummy, it leaves behind a perfectly clean—but completely flat—garment. The AI simply cannot calculate the ambient occlusion where the front inner collar meets the back neck joint. This lack of volumetric understanding destroys fabric depth, making premium apparel look cheap and ultimately driving up return rates.
To achieve retail-ready product photos, you must master AI ghost mannequin internal shadow depth. Here is exactly how to bridge the gap between a flat AI export and a professional, dimensionally accurate e-commerce image using Adobe Photoshop.
The Problem with AI Auto-Removal at the Neck Joint
In recent versions of Adobe Photoshop (v24.0 through v25+) and dedicated AI background removal apps, subject isolation is incredibly precise. However, these algorithms lack a true understanding of clothing layering and dimensional drape.
When the front inner collar overlaps the inserted back neck piece, it should naturally cast a drop shadow. Because the AI stitches these two separate images together without rendering a 3D light environment, the intersection renders completely flat. To fix this, we have to manually reconstruct the internal shadow to restore realism.
How to Fix AI Ghost Mannequin Internal Shadow Depth
Depending on your volume and quality requirements, there are three primary ways to manually add internal shadows back into your garments.
Method 1: The Quick Fix (For Fast Turnarounds)
If you are processing hundreds of images and need a rapid improvement over the raw AI export, the Burn Tool is your fastest option.
- Select the Burn Tool from your Photoshop toolbar.
- In the top options bar, set the Range to Midtones and the Exposure to 15%.
- Select a soft round brush.
- Lightly brush along the inner edge of the front collar exactly where it overlaps the back neck piece.
Note: While fast, this method is destructive and can sometimes muddy the fabric’s true color.
Method 2: The Pro Workaround (Non-Destructive)
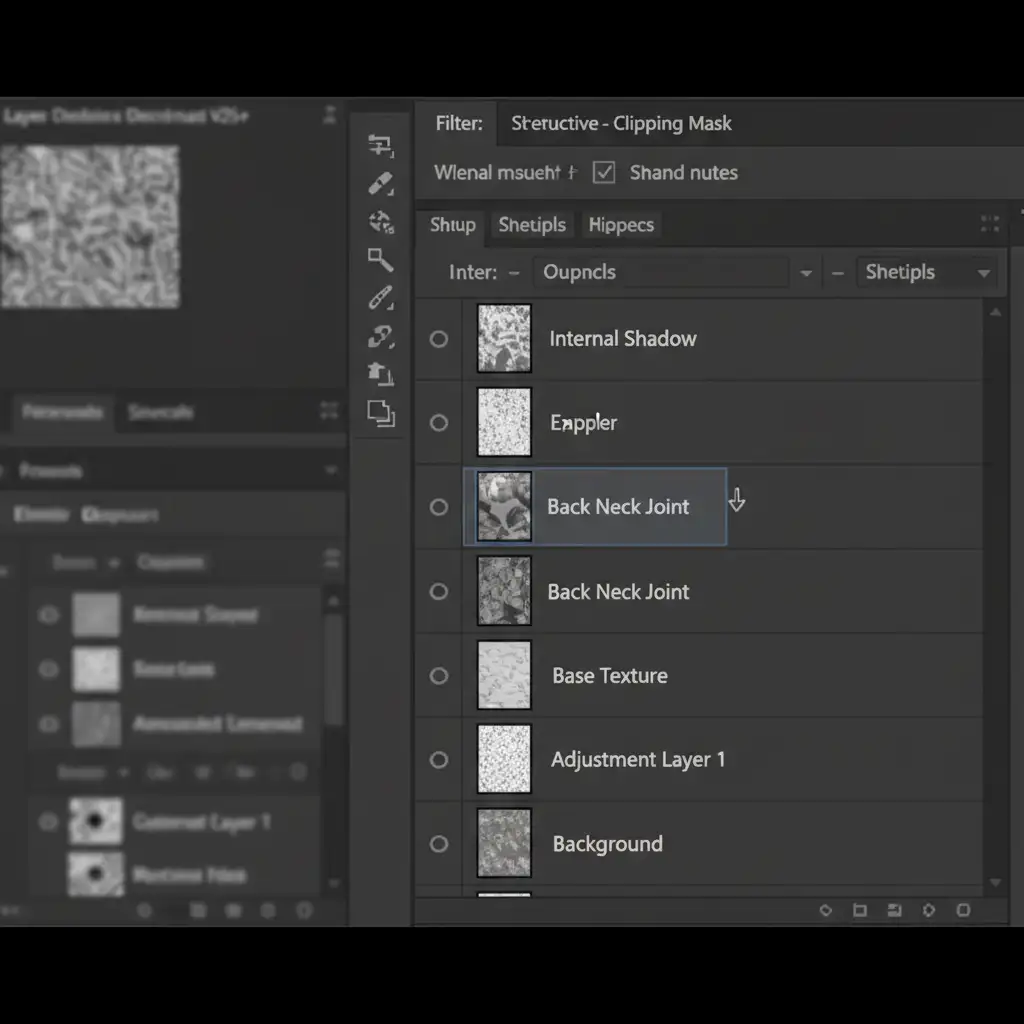
For professional ghost mannequin editing, non-destructive workflows are mandatory. This method utilizes a clipping mask to ensure your shadows never bleed outside the back neck joint.
- Create a New Layer directly above your isolated back neck joint layer.
- Right-click the new layer and select Create Clipping Mask (or hold Alt/Option and click between the layers).
- Select the Brush Tool (B) with a soft round tip, set to black, at 10% Opacity.
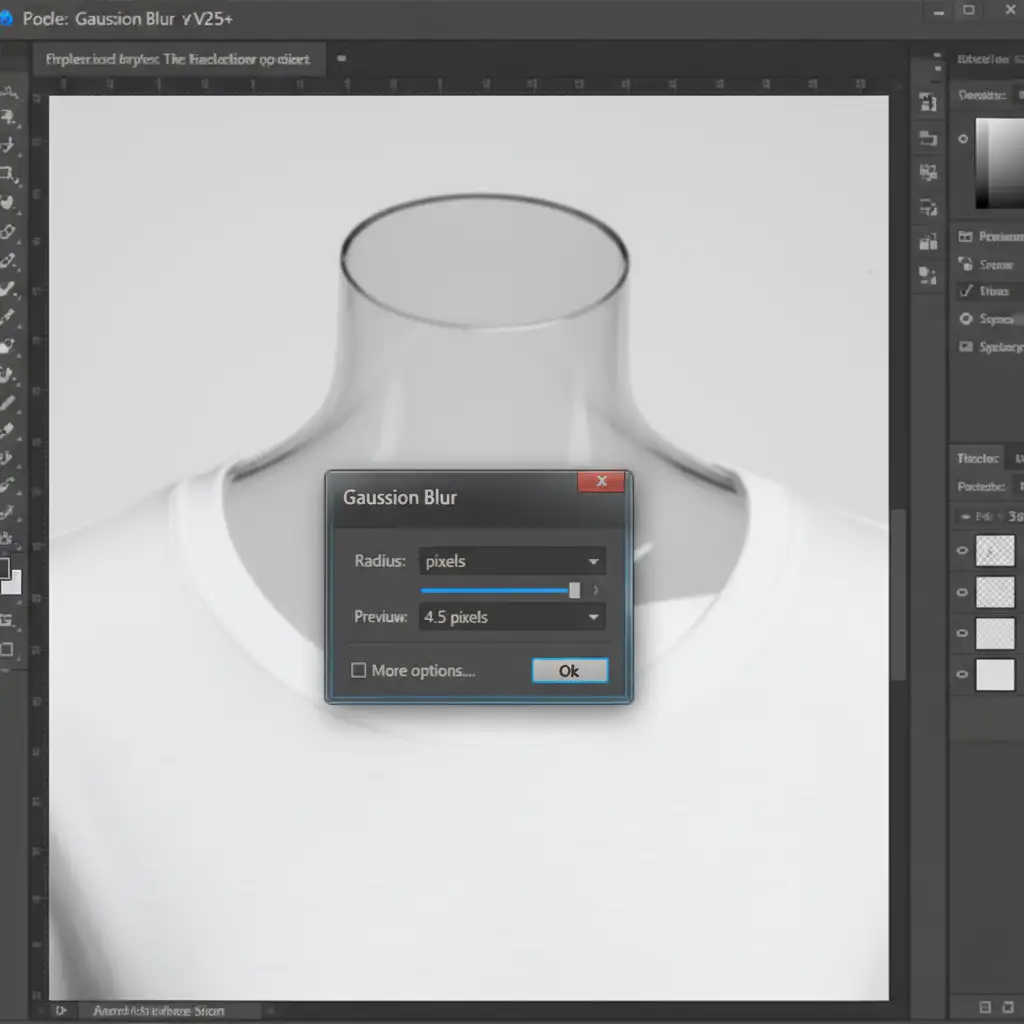
- Carefully manually paint the drop shadow cast by the front fabric onto the neck joint.
- To ensure a natural fall-off, go to Filter > Blur > Gaussian Blur and apply a slight feathering to the shadow edge.
Method 3: The Technical Deep-Dive (For Premium Retail)
When working with highly textured fabrics (like ribbed knits, tweed, or heavy denim), simply painting black over the image looks artificial. The shadow must interact with the fabric’s natural weave and highlights. This requires a Curves adjustment layer combined with advanced Blend If settings.
- Create a Curves Adjustment Layer above your neck joint.
- Click the center of the curve line and pull the mid-tones down to significantly darken the area.
- Select the Curves layer mask and press Ctrl+I (Cmd+I) to invert the mask to black, hiding the darkening effect.
- Using a soft white brush, paint over the internal shadow region to reveal the darkened curves effect exactly where the drop shadow should be.
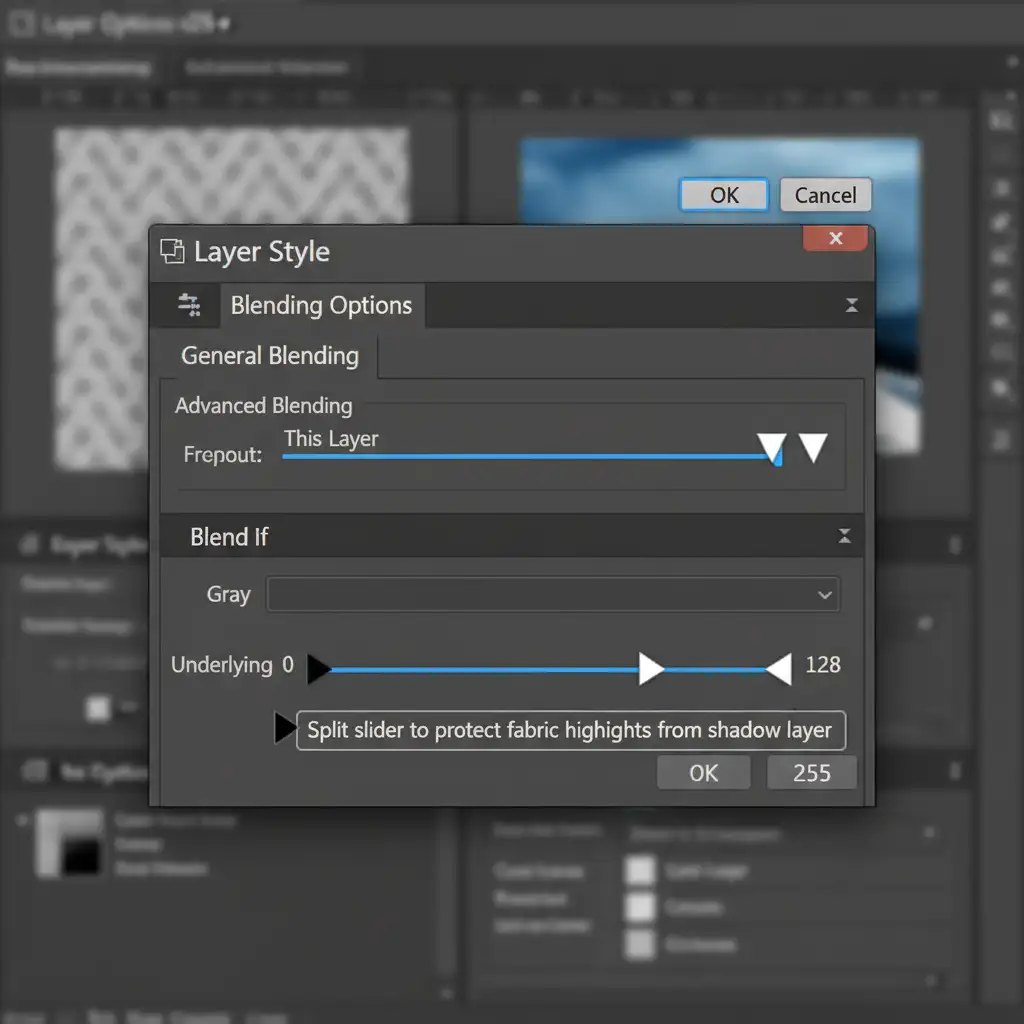
- The Secret Step: Double-click the Curves layer to open the Layer Style dialog box.
- Navigate to the Blend If section at the bottom. On the Underlying Layer gradient bar, hold Alt (Option) and click the right (white) triangle to split it.
- Drag the left half of the split triangle toward the left. This forces the shadow to sink into the darker threads of the fabric while protecting the bright highlights of the weave, ensuring it doesn’t look “painted on.”
Skip the Manual Work: Let Image Work India & Cloud Retouch Handle It
Achieving perfect AI ghost mannequin internal shadow depth is the defining factor between amateur product photos and high-converting, premium e-commerce imagery. While AI auto-removal tools save time on the initial cutout, the manual reconstruction of ambient occlusion, clipping masks, and Blend If adjustments require hours of meticulous editing.
If you are struggling to get high-quality 3D depth from automated AI tools and don’t have the time to manually edit hundreds of SKUs, let the experts handle it. Image Work India and Cloud Retouch specialize in expert manual ghost mannequin editing. We guarantee premium, retail-ready results with perfect volumetric depth, natural shadows, and flawless neck joints.
Stop losing sales to flat, unrealistic product images. Contact Image Work India and Cloud Retouch today to elevate your e-commerce catalog.


