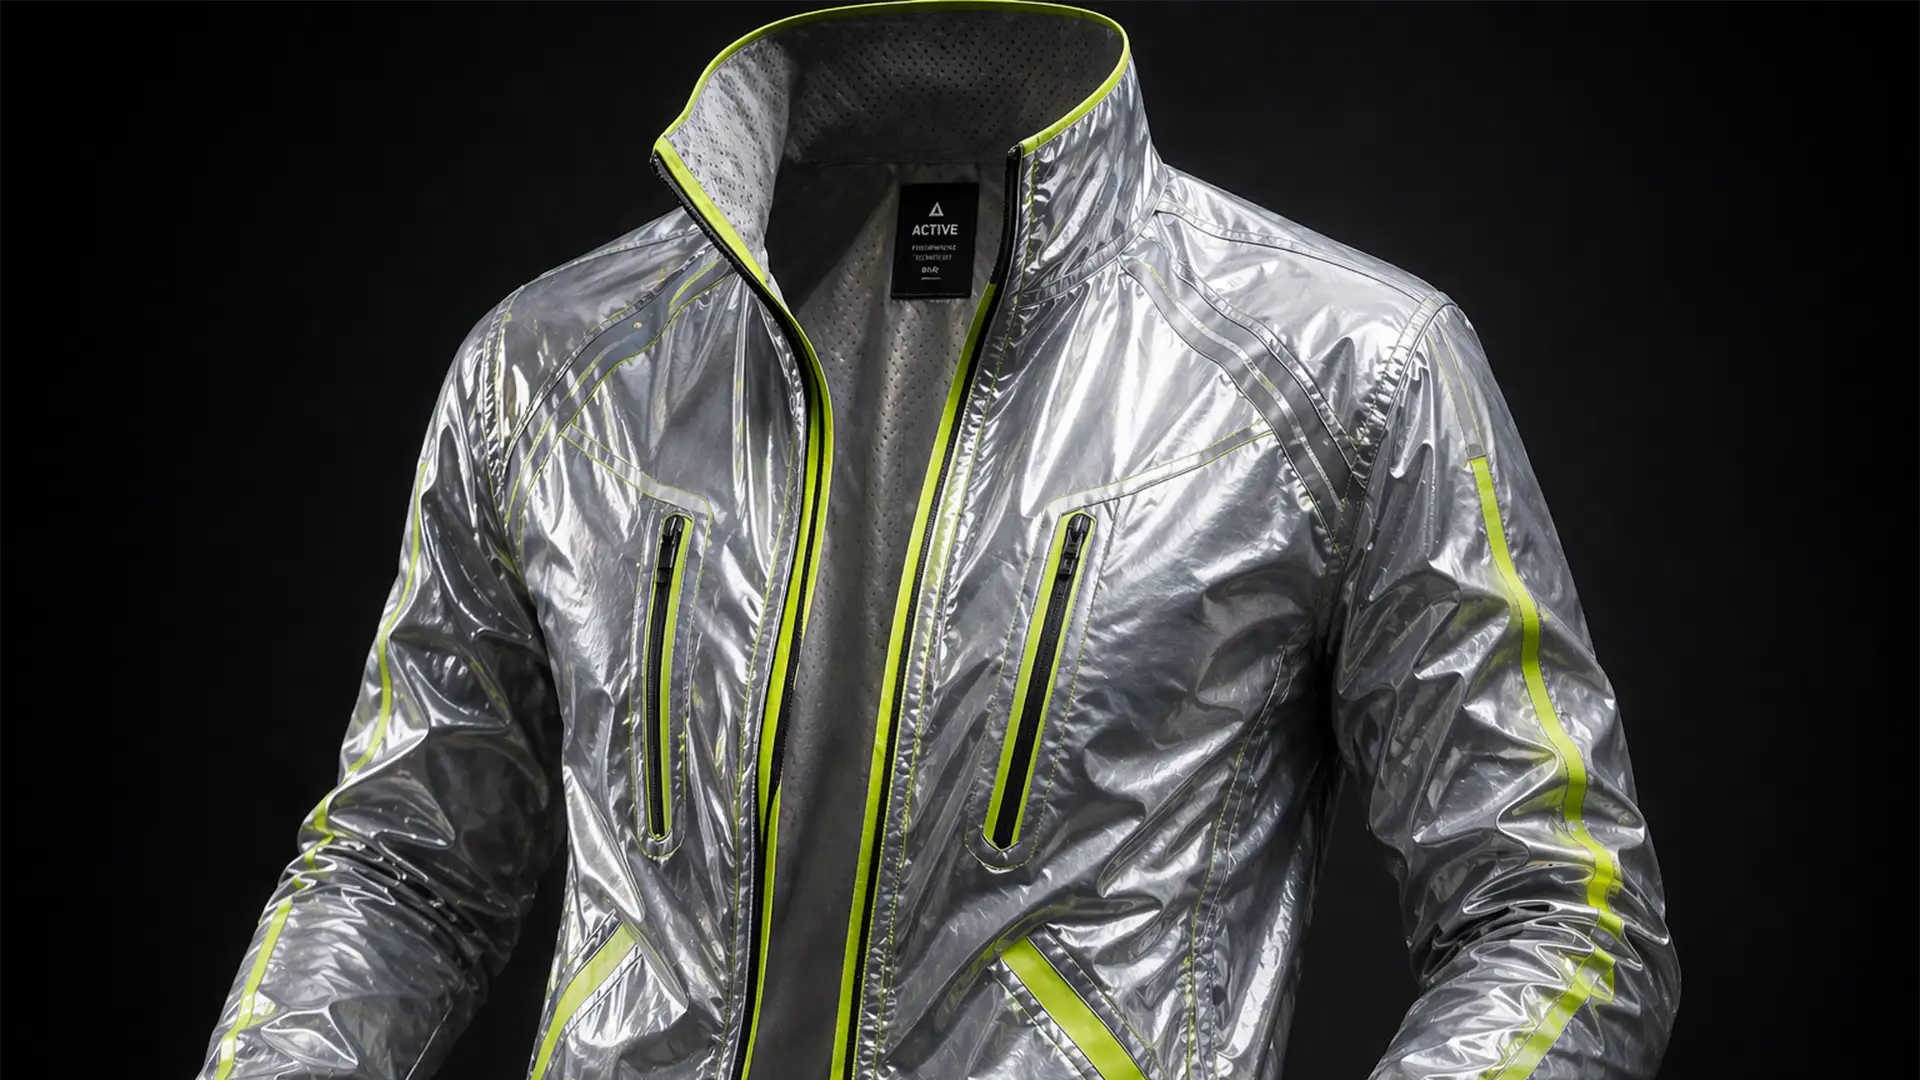
If you are retouching premium gym apparel in Adobe Photoshop CC v25.x, you already know the nightmare of creating a ghost mannequin for reflective activewear. Standard neck joint masking techniques completely flatten the reflective tape or warp the delicate metallic threading. The result? A distinctly fake, artificially rasterized composite with a harsh mismatch of specular highlights and flash bounce between the front garment and the inner lining inset. This amateur look instantly lowers your product’s perceived value. In this technical guide, we will show you how to preserve those crucial metallic highlights, avoid flat composites, and execute a flawless, high-end neck joint.
Why Reflective Activewear Defies Standard Retouching
When dealing with standard cotton t-shirts, a basic composite often suffices. However, athletic wear engineered with metallic weaves and retro-reflective safety tape reacts aggressively to studio strobes.
The core user pain point occurs during the composite phase: the front of the garment catches a harsh flash bounce, while the back inner collar (photographed separately inside-out) lacks that exact lighting environment. When you merge the two, the specular highlights clash. If you attempt to fix this with basic cloning or rely blindly on automated tools like Generative Fill, you risk destroying the high-frequency metallic texture entirely.
To achieve a photorealistic neck joint, you must separate the fabric’s texture from its color and meticulously sculpt the lighting.
Step-by-Step Fixes for Metallic and Reflective Garments
Here are three progressive methods to tackle the complexities of reflective activewear, ranging from a quick commercial fix to a high-end editorial deep-dive.
Method 1: The Quick Fix (Clipping Paths & Inner Shadows)
For high-volume e-commerce catalogs, you need a workflow that is fast but avoids the “cut-and-paste” look.
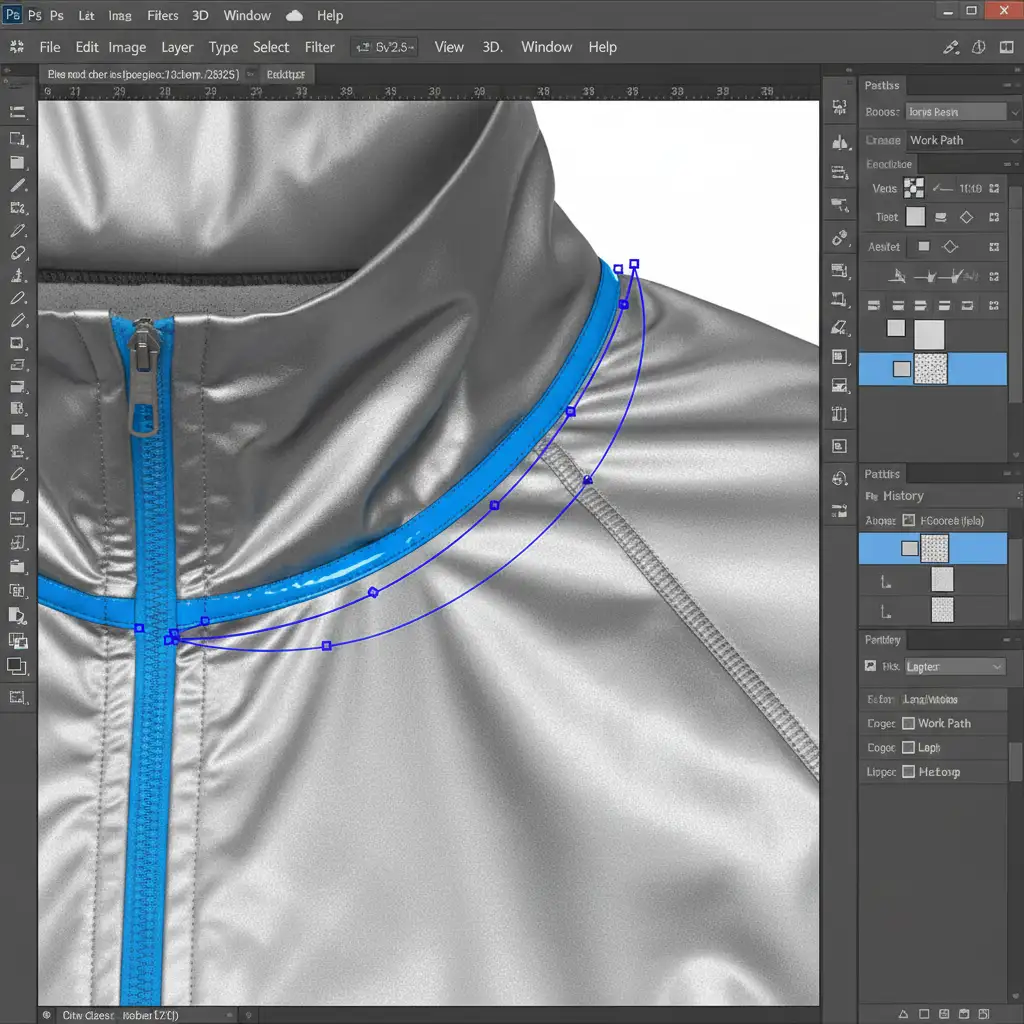
- Precision Isolation: Draw a highly accurate clipping path around the inner neck piece. Pay special attention to where the inner collar intersects with the front reflective seam tape.
- Realistic Shadowing: Drop the inner neck piece behind the front garment layer. Apply a Multiply blending mode to a new clipped adjustment layer to paint in realistic inner drop shadows, simulating the depth of the human torso.
- Highlight Recovery: Select the Dodge tool (set to Highlights, low exposure) and manually paint over the reflective strips on the inner collar to match the intensity of the front garment’s flash bounce.
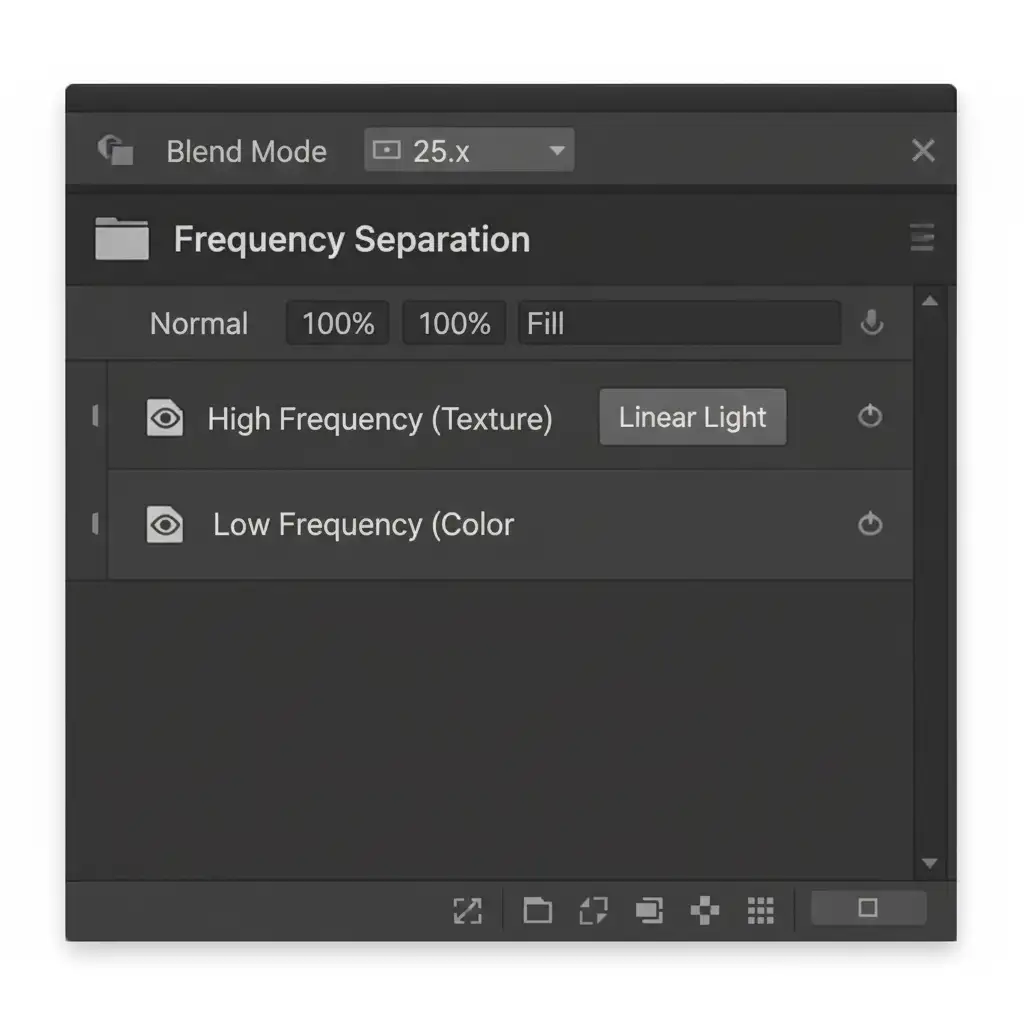
Method 2: The Pro Workaround (Frequency Separation)
When working with metallic weaves, standard blending ruins the thread texture. Frequency separation is the professional workaround to keep the original metallic weave perfectly intact while matching the neck joint colors.
- Setup the Separation: Duplicate your composite twice. Apply a Gaussian Blur to the lower layer (Low-Frequency/Color) and an Apply Image calculation to the top layer (High-Frequency/Texture).
- Blend the Color: Group these layers. Now, perform your neck joint blending strictly on the low-frequency layer using a soft mixer brush.
- Preserve the Weave: Because the high-frequency layer remains untouched, the metallic threading and reflective micro-textures bridge the gap between the front and back pieces without any rasterized blurring.
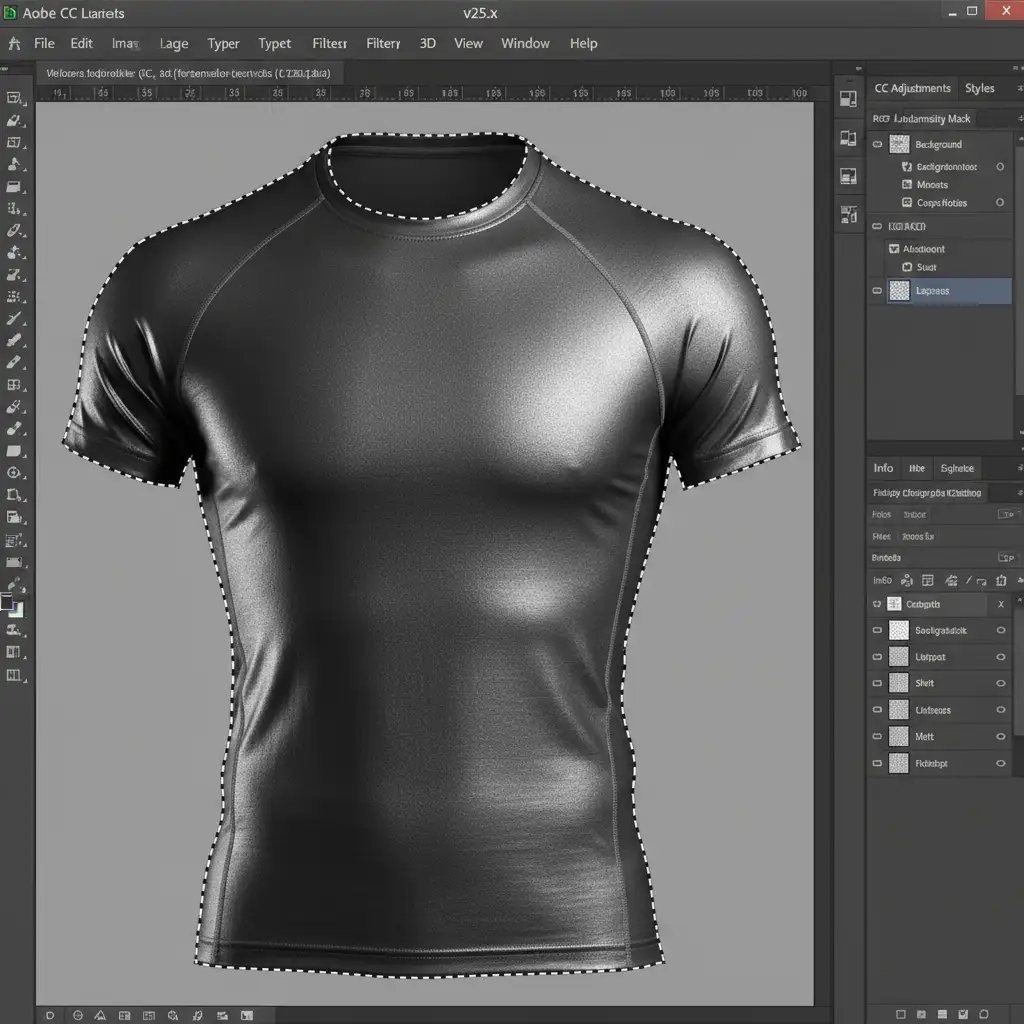
Method 3: The Technical Deep-Dive (Luminosity Masking & 3D Curvature)
For hero images and premium campaigns, the composite must be mathematically perfect. This method uses 16-bit color mode to prevent banding in smooth metallic gradients.
- Targeting Specular Highlights: Use Luminosity masks to isolate only the brightest specular highlights on the reflective tape. You will see the marching ants strictly around the flash bounce areas.
- 3D Shaping: Convert the inner collar layer into Smart Objects. This allows for non-destructive editing. Activate Puppet Warp and drop pins along the collarbone line. Gently warp the fabric to match the natural 3D curvature of an invisible human neck.
- Contrast Matching: Apply clipped Curves adjustments specifically through your luminosity mask to precisely match the exterior metallic contrast with the inner lining inset.
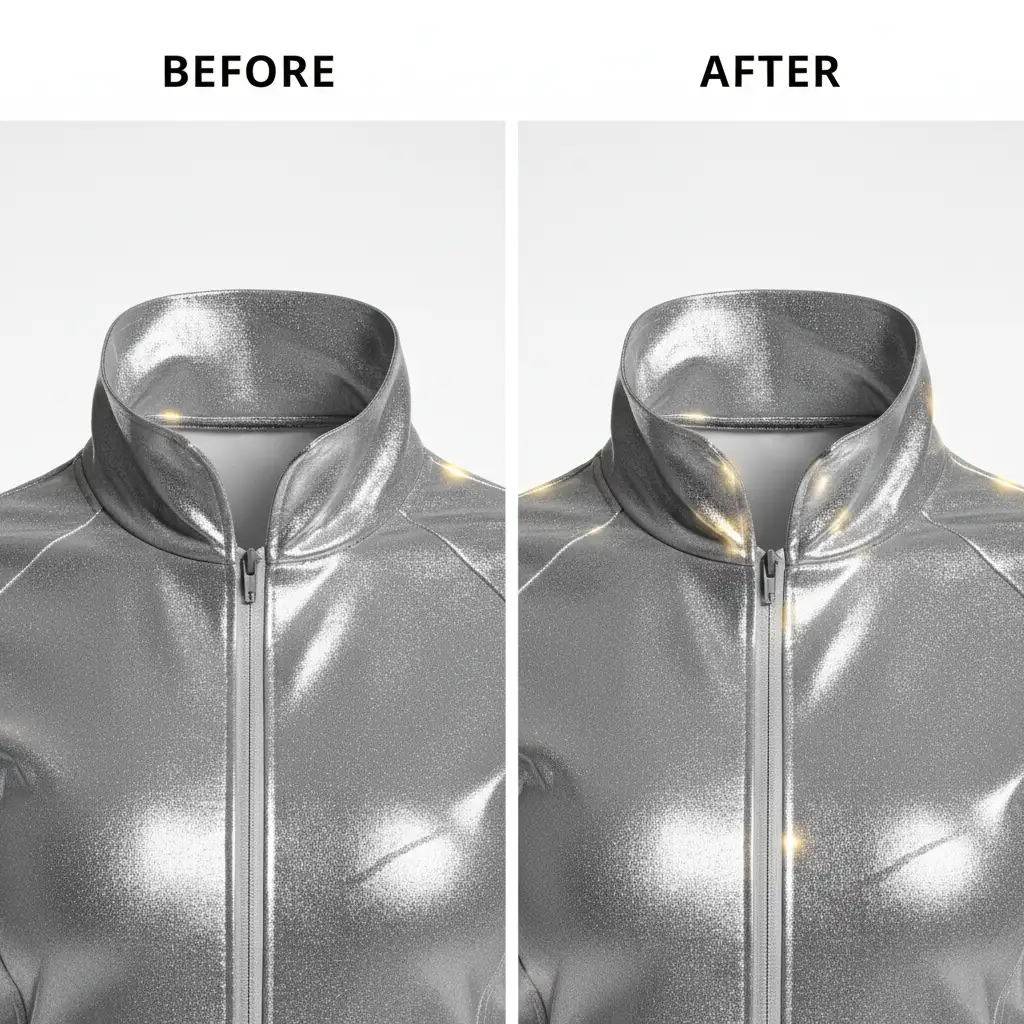
The Final Polish: Evaluating the Neck Joint
Always compare your final result against the raw files. A successful ghost mannequin for reflective activewear should exhibit continuous lighting, undisturbed metallic grain, and a natural drape.
Outsource Your Complex Activewear Retouching
Executing a flawless ghost mannequin for reflective activewear requires years of specialized Photoshop experience, deep knowledge of frequency separation, and a meticulous eye for lighting. If your in-house team is struggling with flattened textures, fake-looking composites, or agonizingly slow turnaround times, it is time to bring in the experts.
Protect the premium look of your activewear brand. Partner with Image Work India & CloudRetouch for specialized, high-end ghost mannequin editing. Our retouching professionals are masters at preserving delicate metallic weaves, matching complex specular highlights, and delivering pixel-perfect, e-commerce-ready images at scale.
Contact Cloud Retouch today to elevate your product photography and let us handle the technical heavy lifting.


