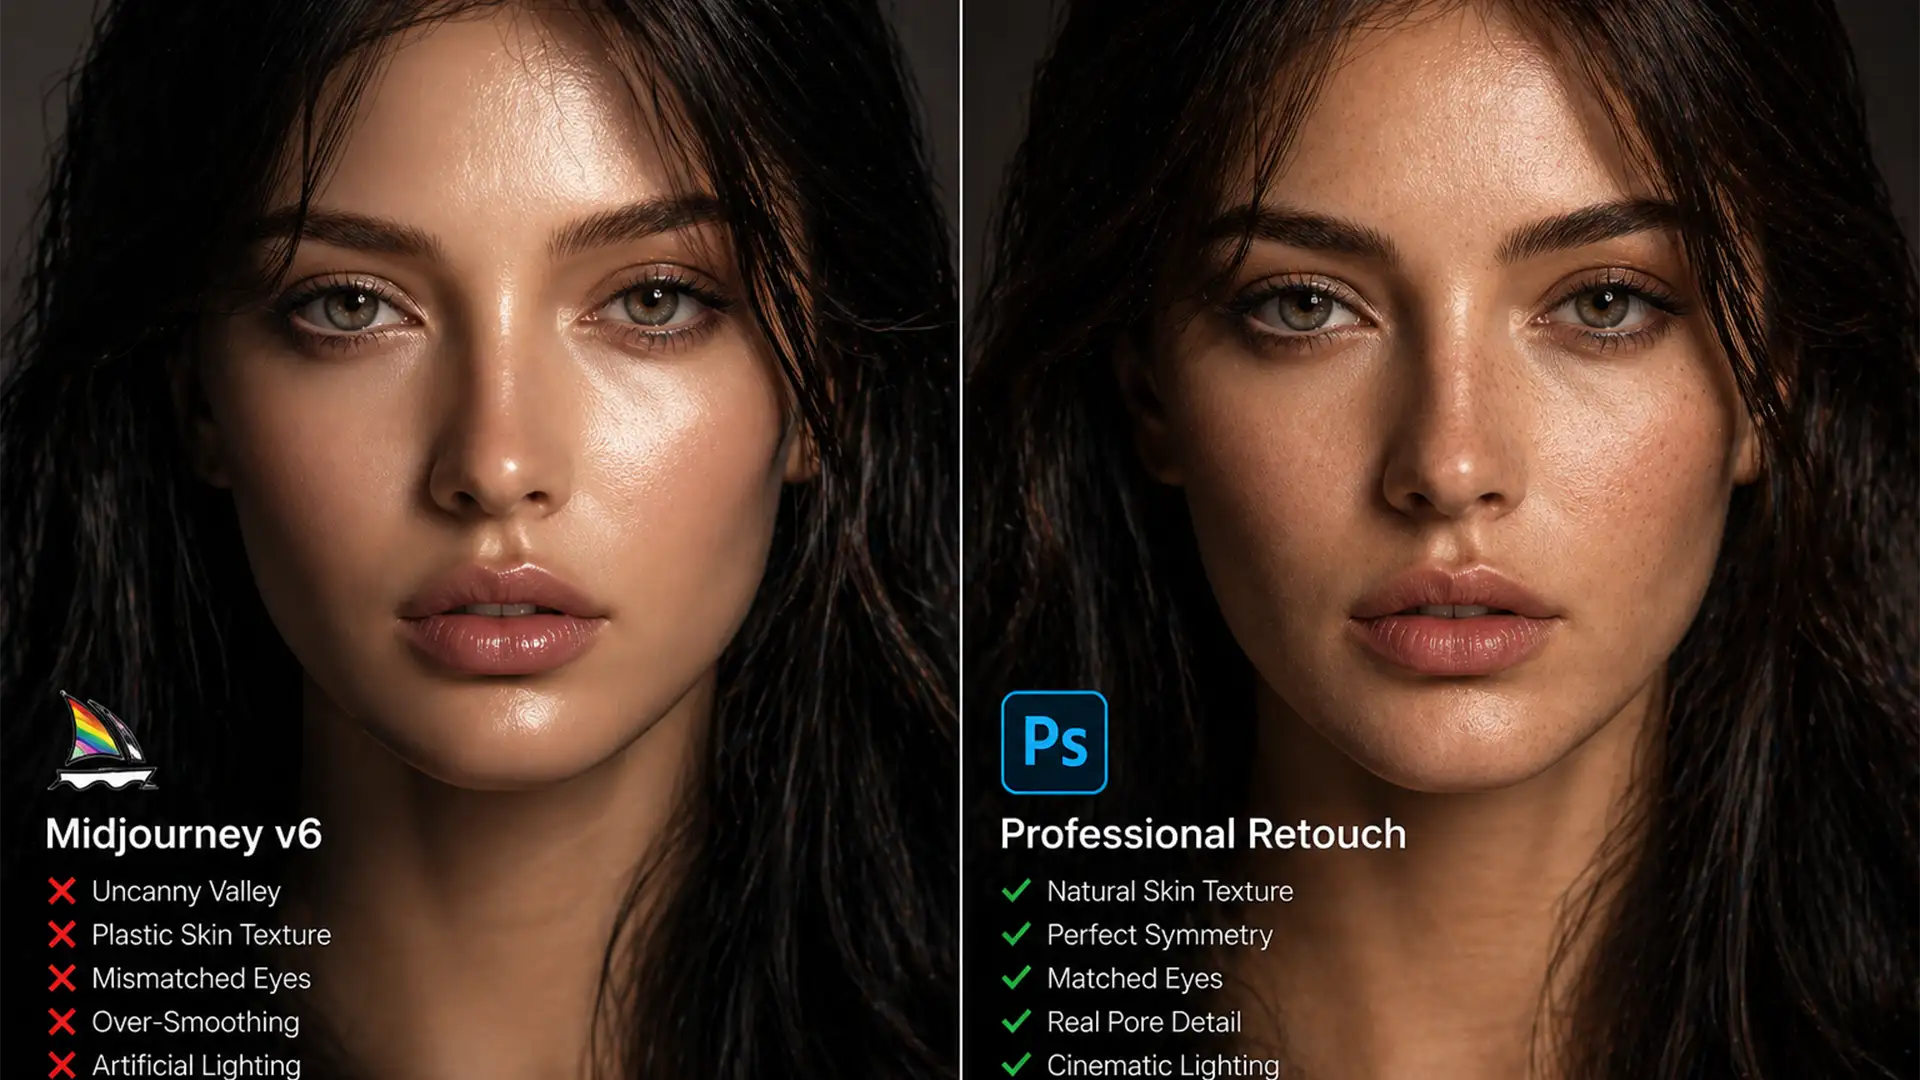
You’ve just generated a stunning portrait using Midjourney v6 or Stable Diffusion XL. At first glance, it looks like an award-winning photograph. But as you zoom in, the illusion shatters. The skin looks like plastic, the eyes have mismatched catchlights, and there’s an undeniable, unnatural vibe radiating from the subject. Welcome to the Uncanny Valley.
While AI image generators have revolutionized digital art, they consistently produce anatomical anomalies that ruin commercial viability. Fixing these requires more than just running another prompt; it requires professional, non-destructive retouching.
In this guide, we will break down exactly how professional retouchers use Photoshop v25.x to humanize AI generation. Whether you want to master these techniques yourself or are looking for an expert AI portrait cleanup service, this technical deep-dive will show you how to turn AI drafts into flawless, photorealistic studio photography.
The Core Problem: Why AI Portraits Fall into the Uncanny Valley
AI models do not understand human anatomy; they predict pixel patterns. This fundamental limitation leads to recurring artifacts in AI-generated portraits:
- Plastic Skin: A complete lack of natural skin pores, resulting in a hyper-smoothed, mannequin-like appearance.
- Asymmetrical Features: Eyes that are slightly different sizes, misaligned jawlines, or mismatched eye catchlights.
- Anatomical Anomalies: Fused fingers, extra teeth, or repeating pixel patterns in hair and clothing.
To bridge the gap between algorithmic generation and true photorealism, manual intervention is mandatory.
How to Humanize AI Images: Step-by-Step AI Portrait Cleanup
Professional retouchers tackle AI artifacts systematically, moving from basic cleanup to advanced structural and textural reconstruction.
Method 1: The Quick Fix for Surface Artifacts
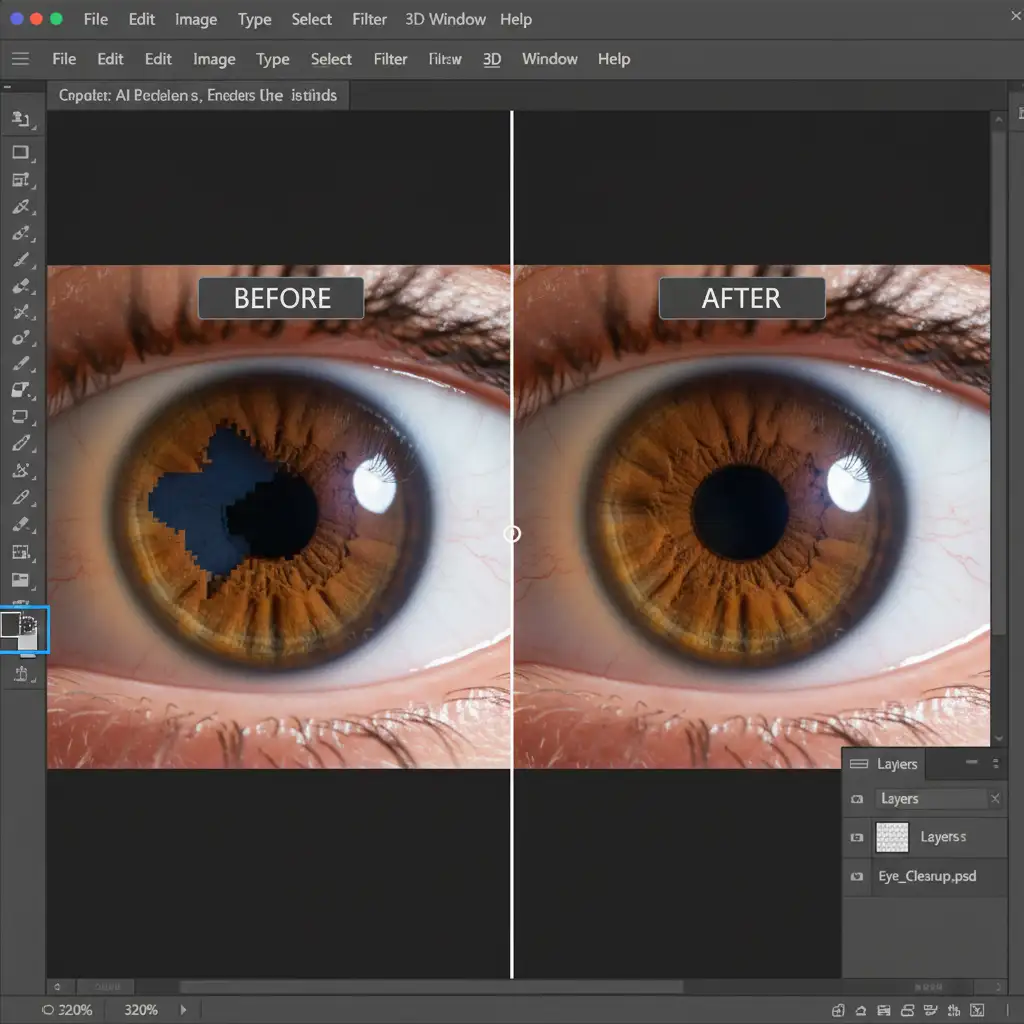
Before addressing skin texture, you must eliminate obvious generation errors. In Photoshop v25.x, the Remove Tool and Clone Stamp Tool are your first line of defense.
- Create a new blank layer to ensure non-destructive retouching.
- Select the Remove Tool (ensure “Sample All Layers” is checked).
- Brush over stray hairs, extra pupils, or background anomalies. The tool uses AI to sample adjacent clean pixels and seamlessly blend the correction.
- For repeating pixel patterns common in AI clothing generation, switch to the Clone Stamp Tool to manually break up the repetition.
Method 2: The Pro Workaround Using Frequency Separation
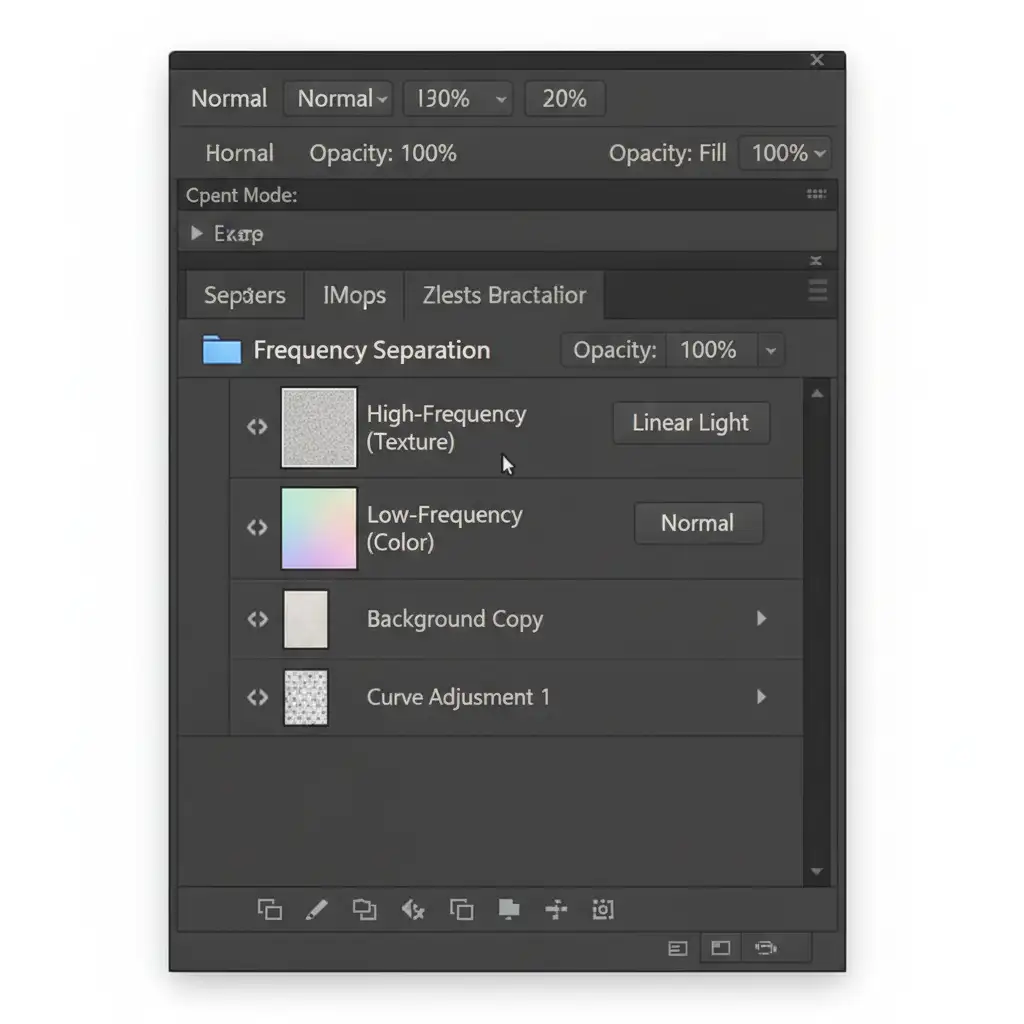
The biggest giveaway of an AI portrait is the “plastic” skin. To fix this, retouchers rely on Frequency Separation, a high-end technique that splits the image into two distinct working environments: color and texture.
- Duplicate your base image twice. Name the bottom layer “Low-Frequency (Color)” and the top layer “High-frequency (Texture)”.
- Apply a Gaussian Blur to the Low-Frequency layer until the skin texture disappears, leaving only the color tones.
- Apply the “Apply Image” command to the High-Frequency layer (subtracting the Low-Frequency layer) and set the blend mode to Linear Light.
- The Fix: You can now use the Clone Stamp on the High-frequency layer to manually reconstruct realistic skin pores from clean areas, while using a soft mixer brush on the Low-Frequency layer to smooth out the blotchy color gradients typical of Midjourney v6 outputs.
Method 3: The Technical Deep-Dive for Structural Symmetry & Texture
Once the surface and skin are corrected, it’s time to fix the underlying structural asymmetry and unify the image.
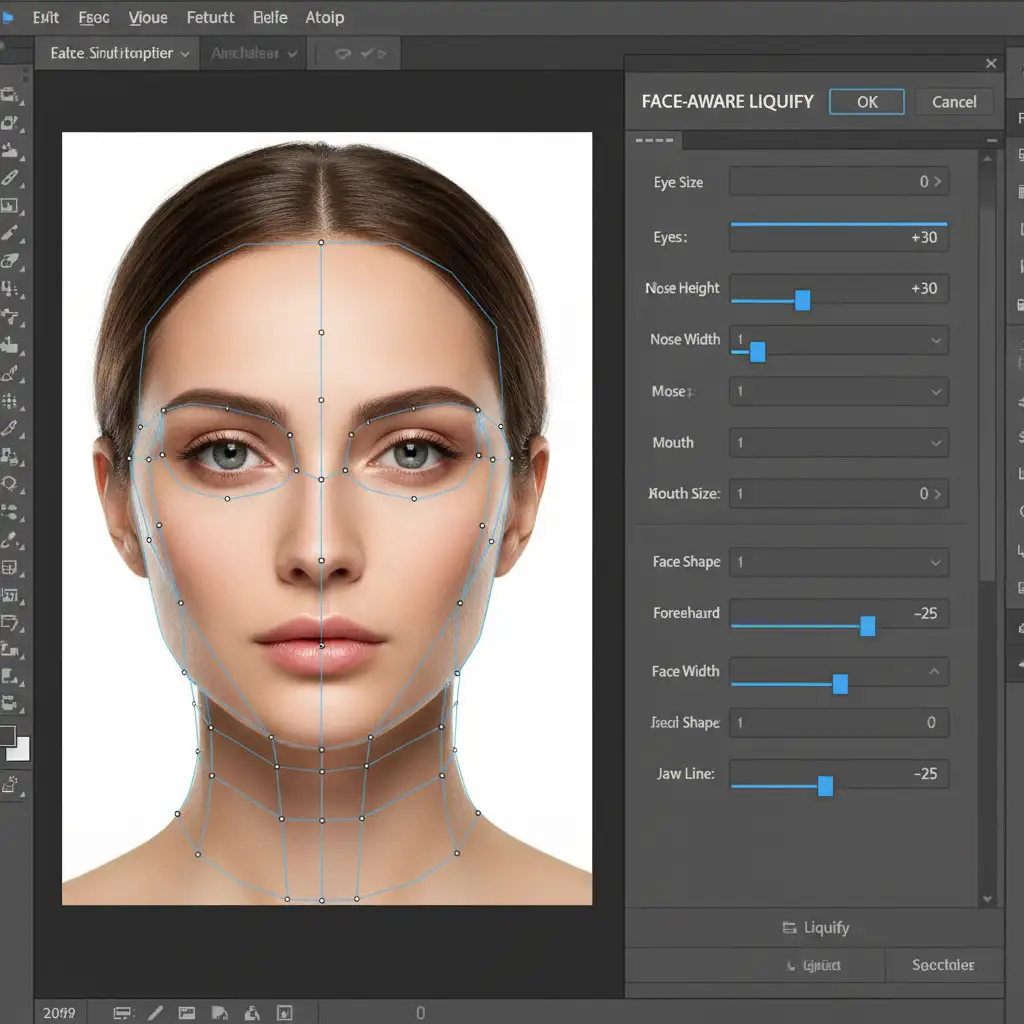
Step A: Face-Aware Liquify
AI often generates faces with subtle, unsettling asymmetry. Open the Face-Aware Liquify filter. Use the sliders to carefully match the eye sizes, align the jawline, and correct the tilt of the mouth. This step is crucial for pulling the subject out of the Uncanny Valley.
Step B: Film Grain Simulation
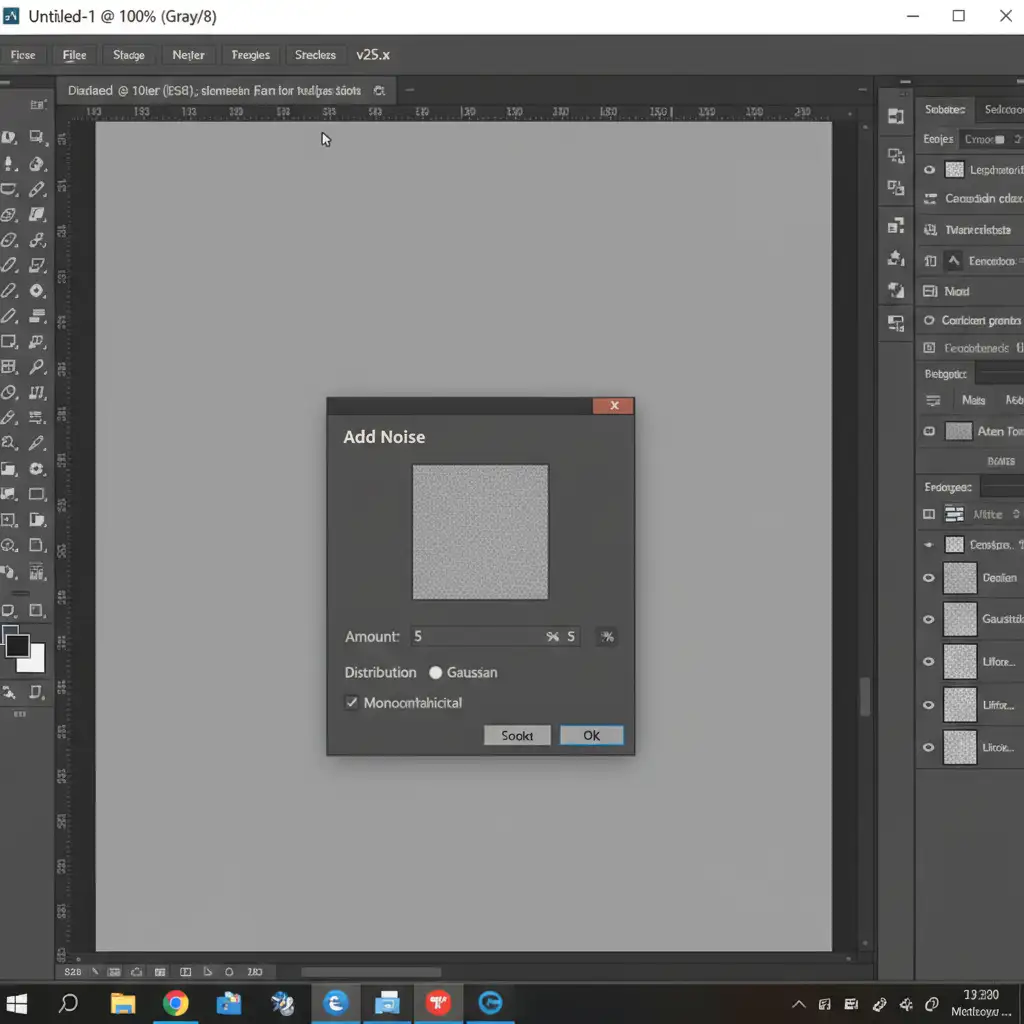
Because AI images are generated digitally, they lack the organic noise of a physical camera sensor. Adding grain unifies the original AI pixels with your retouched areas (like those edited with Generative Fill or the Clone Stamp).
- Create a new layer, fill it with 50 percent gray, and set the blend mode to Overlay.
- Go to Filter > Noise > Add Noise.
- Set the amount to 3-5%, choose Gaussian, and check “Monochromatic”.
- This film grain simulation adds a micro-texture that tricks the human eye into perceiving the image as a genuine photograph.
Why You Need a Professional AI Portrait Cleanup Service
Fixing AI anatomical anomalies is a meticulous, time-consuming process. While the steps above outline the technical roadmap, executing them with the precision required for high-end commercial, editorial, or advertising use takes years of retouching experience. One heavy-handed adjustment can easily ruin the image.
Partner with Image Work India & Cloud Retouch
Struggling with unnatural AI-generated portraits? You don’t have to spend hours wrestling with Frequency Separation and Liquify tools.
Hire Image Work India or Cloud Retouch for expert AI portrait cleanup services. Our team of senior retouchers specializes in humanizing AI outputs—correcting anatomical errors, restoring hyper-realistic skin textures, and delivering flawless results that look exactly like genuine, high-budget studio photography.
[Contact us today] to turn your AI drafts into commercial-ready masterpieces.


