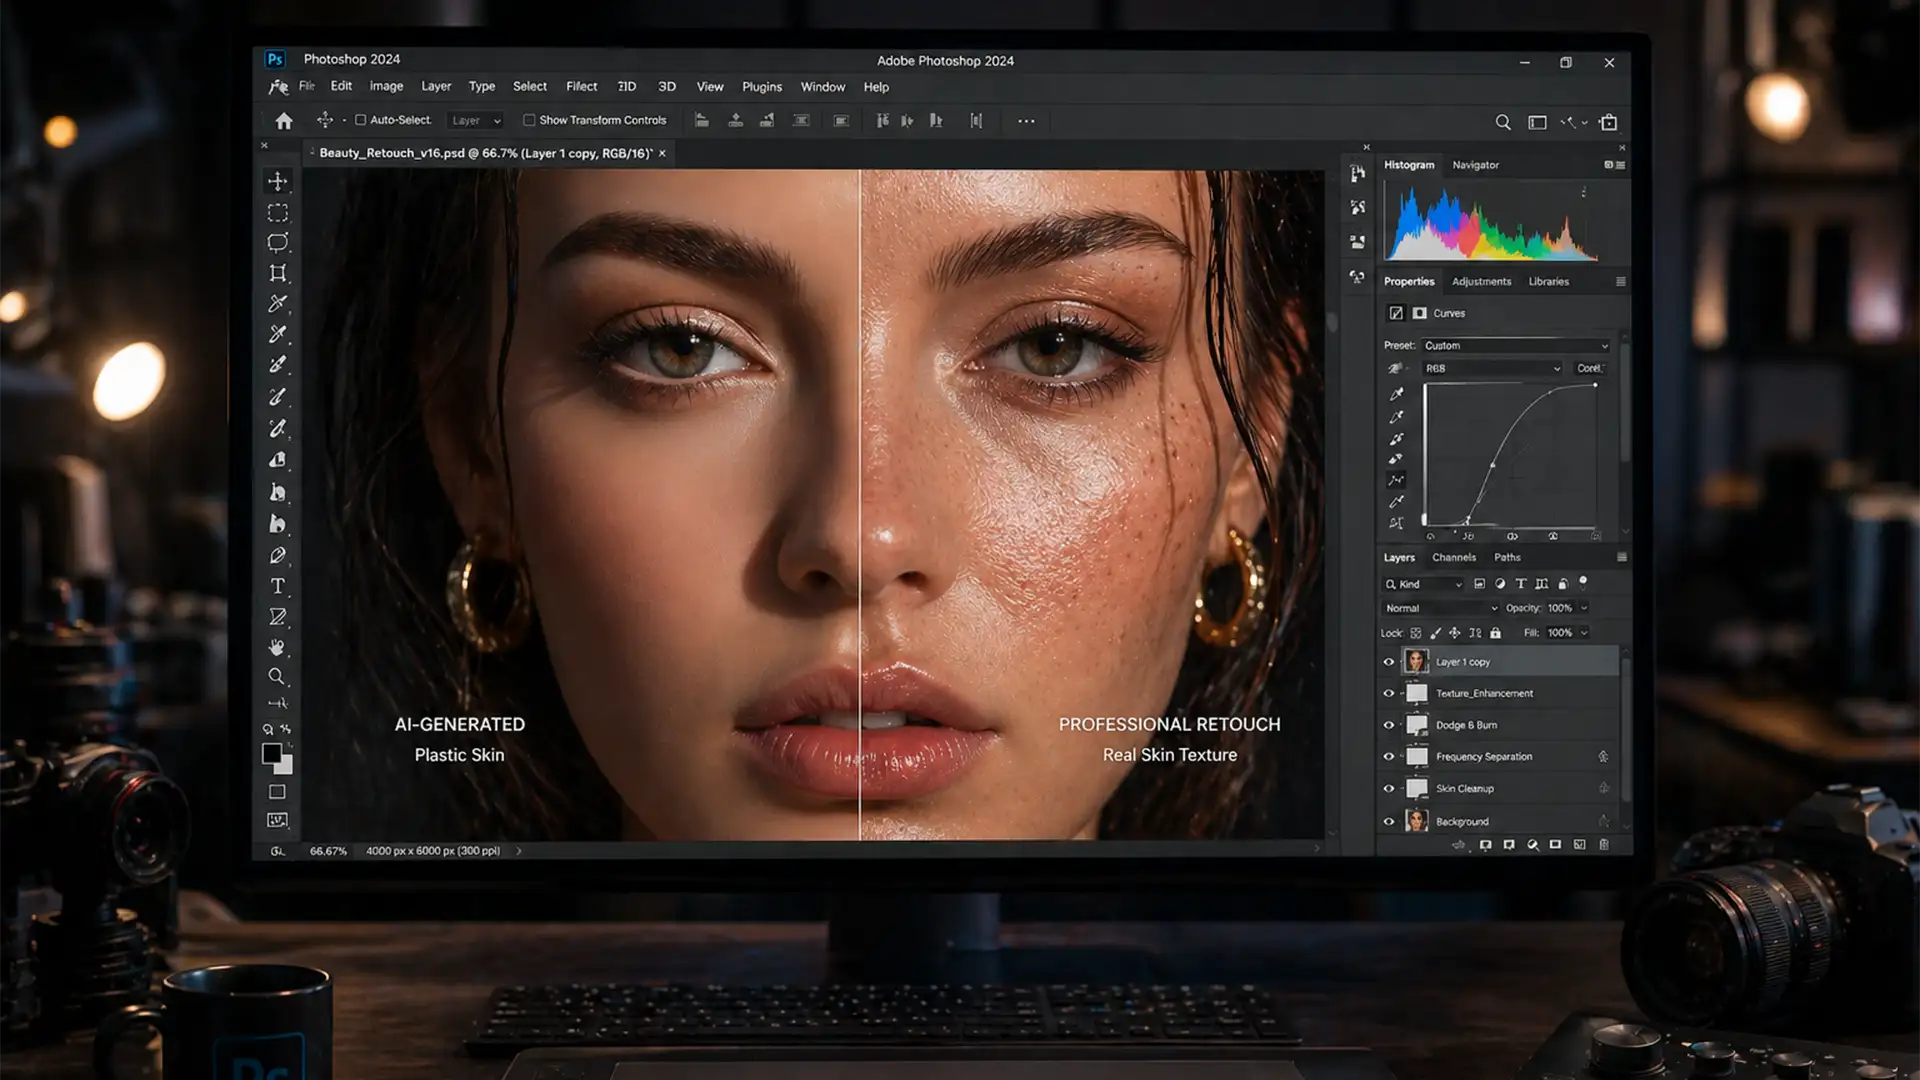
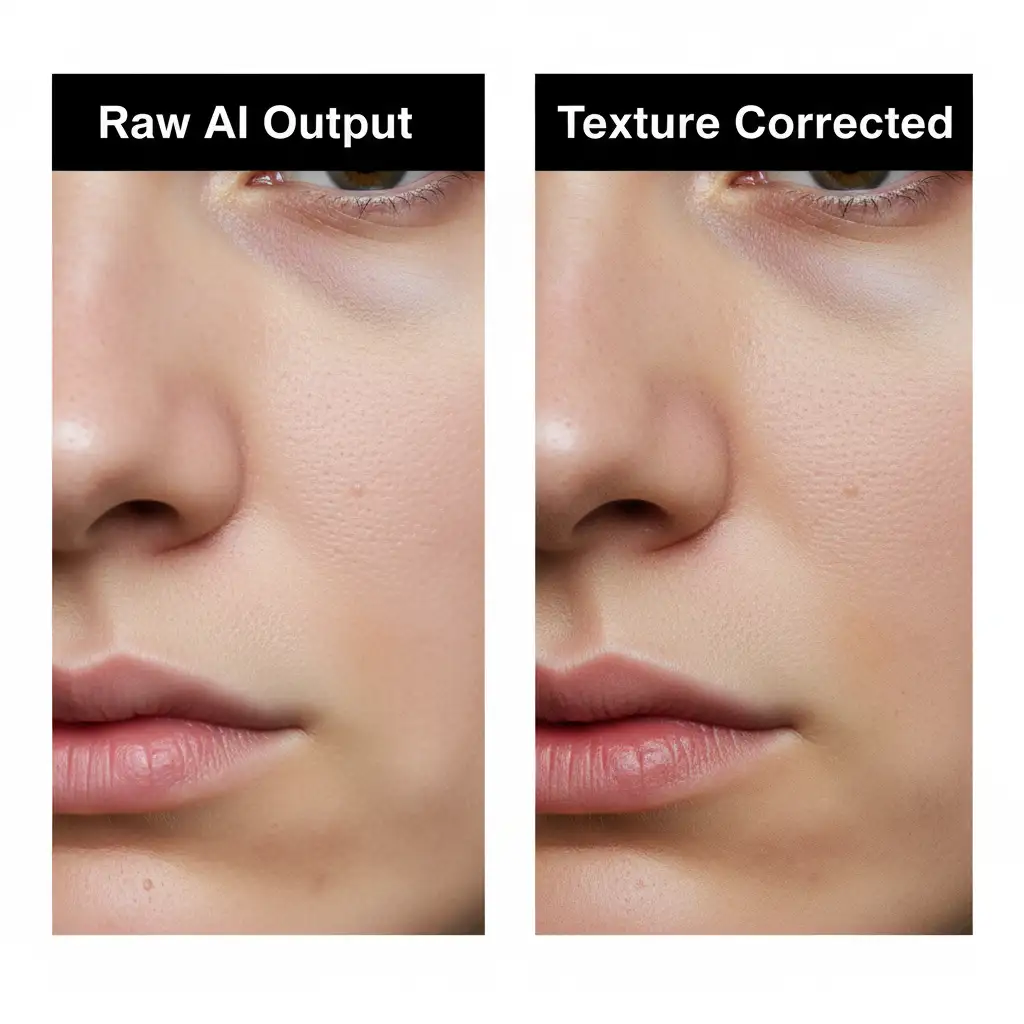
You’ve just executed what you thought was the perfect Generative Fill on a high-resolution commercial portrait, but zooming in to 100% reveals a glaring issue: the newly generated pixels look like a plastic mannequin. The organic micro-contrast is gone, the pores are missing, and the transitions are undeniably blotchy.
If you are struggling with fixing Firefly 3 skin texture artifacts, you are not alone. In Adobe Photoshop v25.x and above, the Firefly Image 3 Model excels at global structural coherence but frequently fails at micro-texture fidelity. When working on 4K+ localized edits, the AI struggles to replicate the specific camera sensor film grain and natural pore structure of the original raster plate.
Fortunately, you don’t have to settle for synthetic-looking skin. Below, we break down three professional techniques to seamlessly blend AI edits with native skin textures.
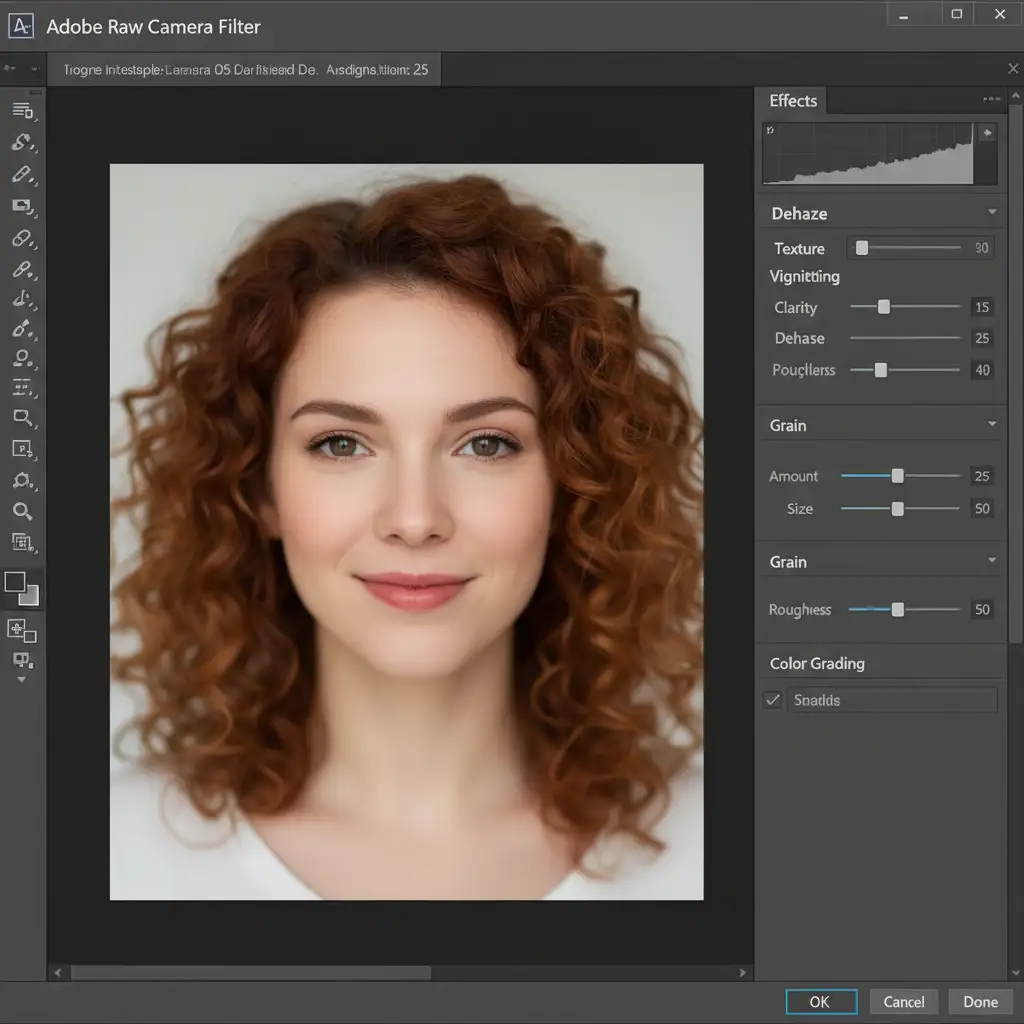
Method 1: The Quick Fix (Noise Matching)
The most immediate giveaway of an AI-generated patch is the lack of native sensor noise. By utilizing Smart Objects and the Camera Raw Filter, you can quickly introduce matching film grain to the synthetic pixels.
Step-by-Step Noise Integration
- Convert to Smart Object: Right-click your Generative Fill layer and select “Convert to Smart Object.” This ensures your noise adjustments remain non-destructive.
- Apply Camera Raw Filter: Navigate to Filter > Camera Raw Filter.
- Match the Grain: Open the Effects panel. To match a standard studio portrait, start with these baseline settings:
- Amount: 10-15
- Size: 25
- Roughness: 50
- Refine: Toggle the preview on and off to ensure the generated grain matches the underlying source image perfectly.
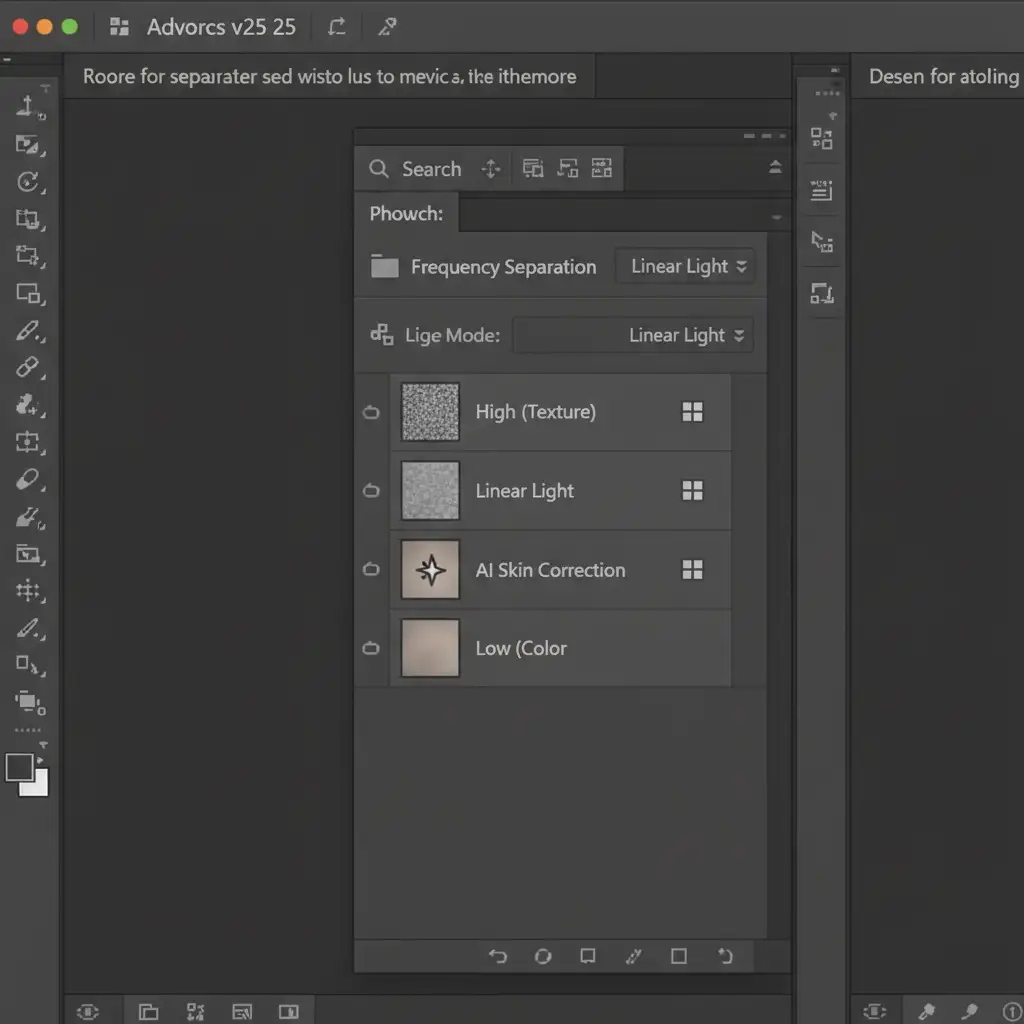
Method 2: The Pro Workaround (Frequency Separation Integration)
For high-end beauty and fashion retouching, noise alone isn’t enough. You need the subject’s actual skin pores. This is where integrating the Firefly Image 3 Model with traditional Frequency Separation becomes a game-changer.
Frequency Separation splits your image into a Low layer (color and tone) and a High layer (texture). By placing your AI edits strategically, you can fix underlying tones while preserving authentic texture.
How to Sandwich Your AI Edits
- Run your standard Frequency Separation action on the base image.
- Target the space between your Low (Color) and High (Texture) layers.
- Make your localized selection and run the Generative Fill.
- Because the AI layer sits beneath the High layer, the AI effectively fixes the underlying skin tones and blemishes, while the subject’s original, unaltered skin pores overlay it perfectly from the High layer.
Method 3: The Technical Deep-Dive (Reference Images & Blend Modes)
When dealing with complex skin grafts or larger generated areas where the original texture is entirely unusable, you must force the AI to understand the micro-texture you need. We achieve this using the Reference Image Tool, specific prompting, and advanced layer masking.
Forcing Texture Generation
- Sample Native Skin: Crop a small, highly textured patch of the subject’s natural skin and save it.
- Setup the Prompt: Make your selection and open the Generative Fill taskbar. Click the Reference Image icon and upload your skin patch.
- The Exact Prompt: Type: “natural skin texture, visible pores, unretouched”. Generate the variations.
Blending for Perfection
Even with a reference image, the AI might slightly shift the skin’s color phase. To fix this:
- Change the Generative Fill layer’s blend mode to Luminosity. This forces the layer to only inherit the AI’s lighting and texture fixes without altering the native color phase of the skin below.
- Add a Layer Mask.
- Use a soft black brush at 20% opacity to gently paint away the harsh boundaries, seamlessly blending the AI pixels into the native raster plate.

Outsource to the Retouching Experts
Mastering micro-contrast, Luminosity blend modes, and AI artifact correction takes years of technical practice. While these techniques are highly effective for fixing Firefly 3 skin texture artifacts, executing them flawlessly across a batch of hundreds of commercial images is incredibly time-consuming.
Struggling to achieve flawless skin in your commercial portraits on tight deadlines? Let the high-end retouching experts at Cloud Retouch and Image Work India handle your post-production. Our dedicated teams specialize in pixel-perfect, natural results that blend the best of advanced AI tools with meticulous, hand-crafted finishing.
[Contact us today] to elevate your portfolio and deliver flawless imagery to your clients.


