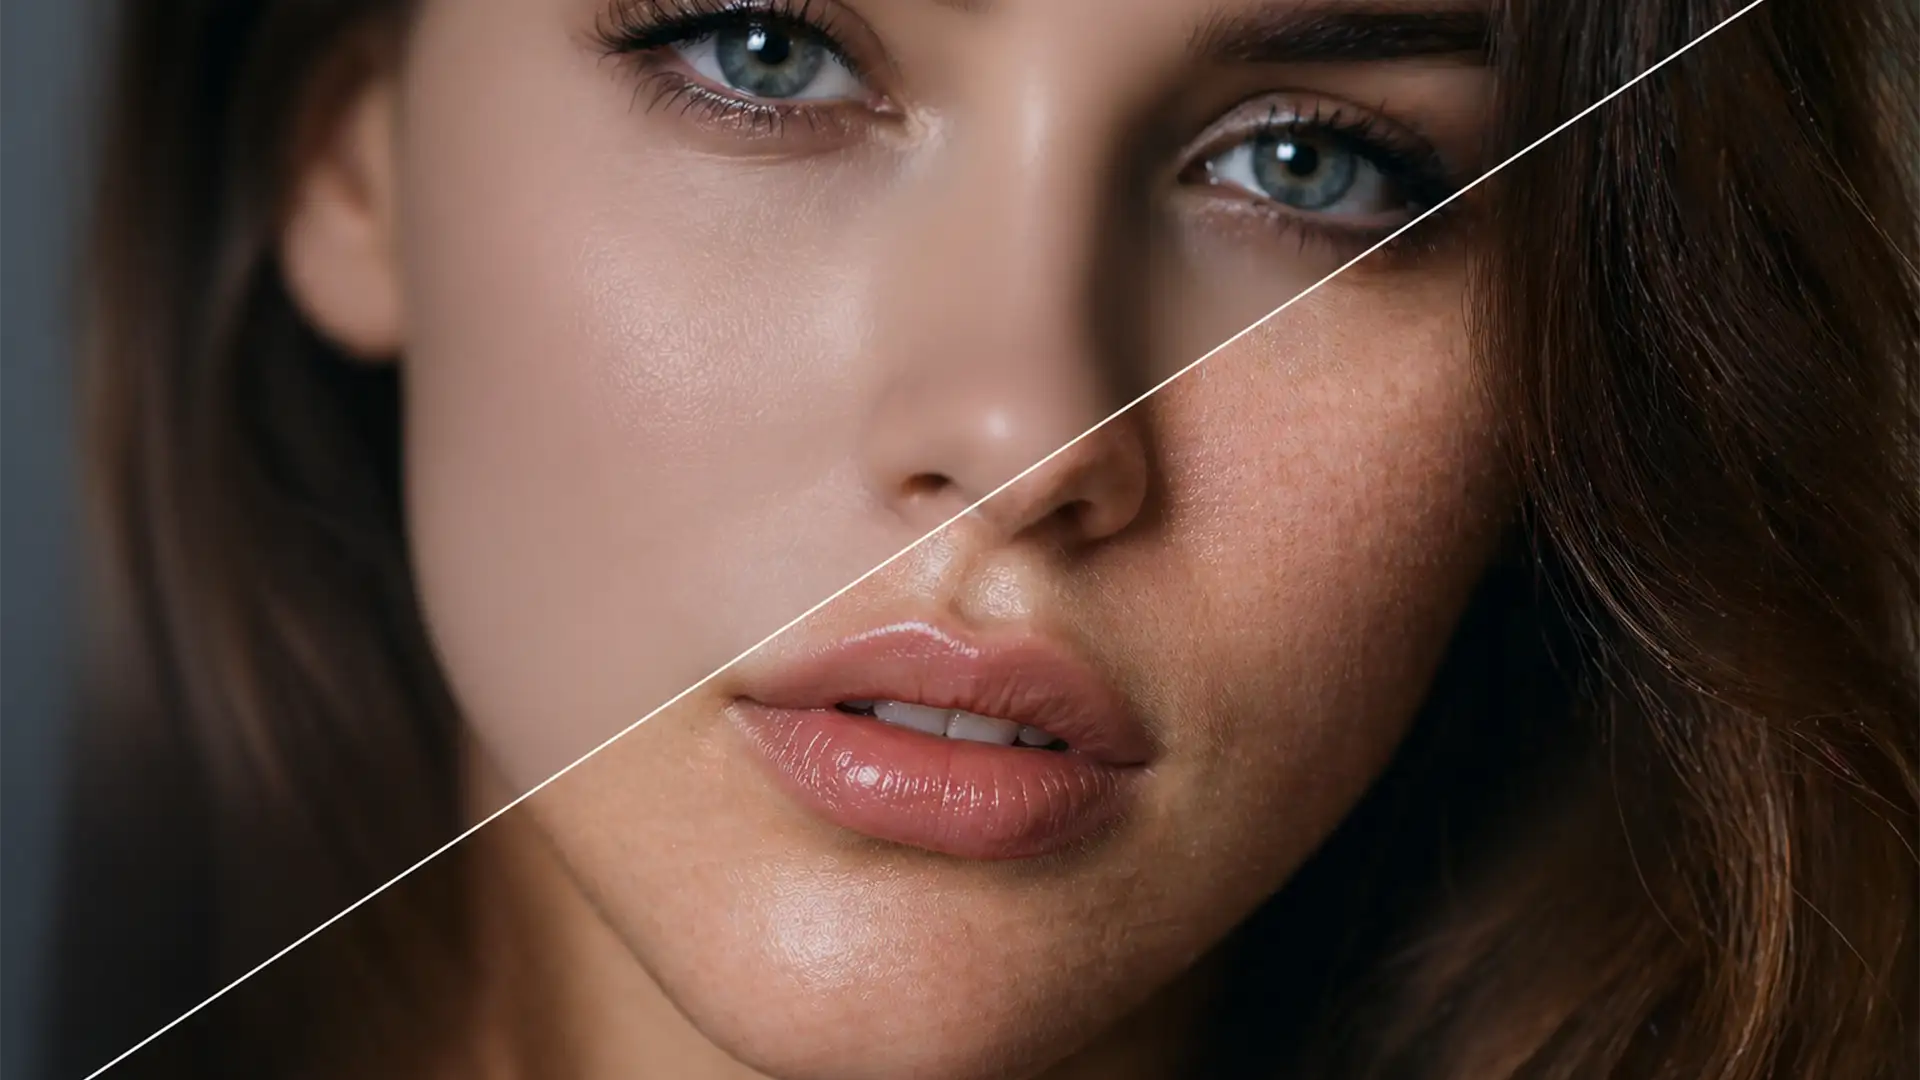
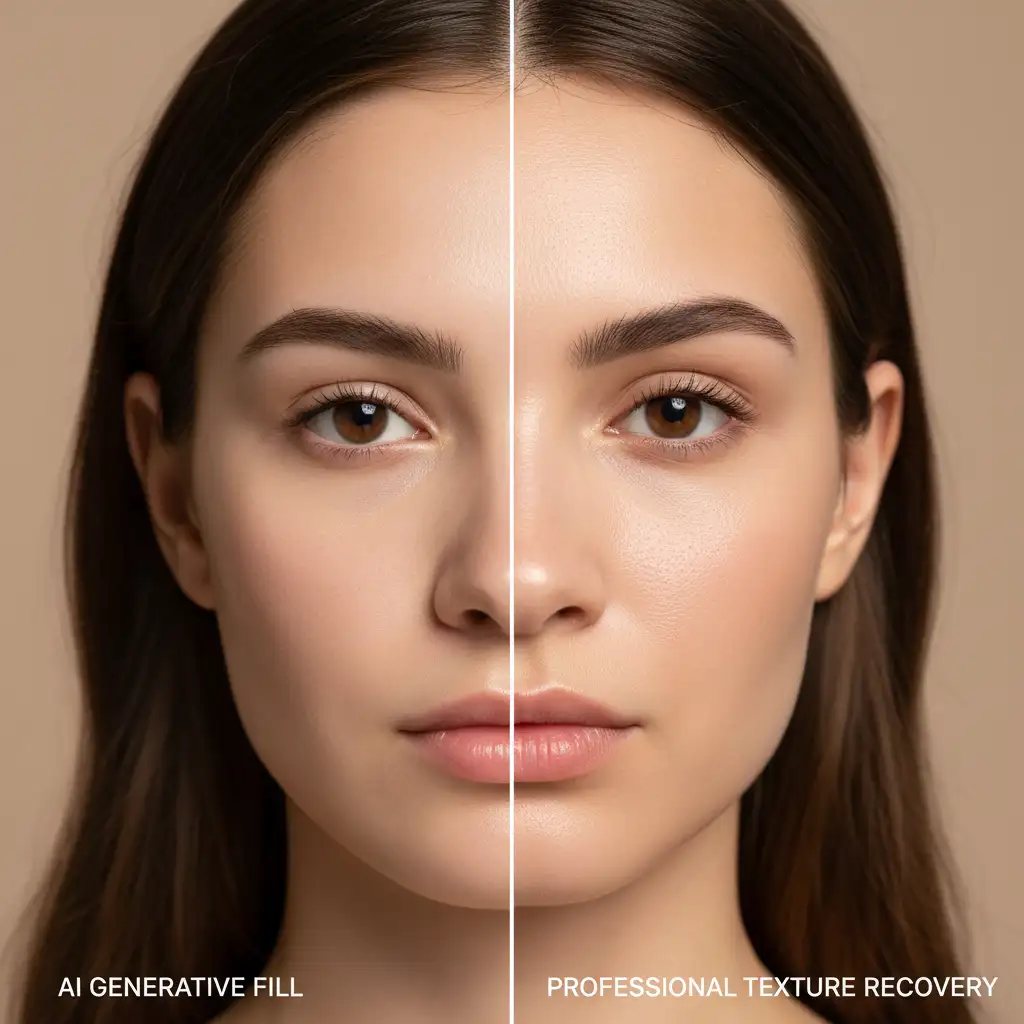
Have you noticed that Photoshop’s latest AI updates are turning your high-end portraits into mannequins? While Neural Filters and Generative Fill in Photoshop v24.x and v25.x are powerful, they frequently produce uncanny valley artifacts and “plastic” skin. The AI engine applies a heavy spatial blur that obliterates micro-contrast and natural keratin structures like pores and peach fuzz. Worse, this smoothing completely mismatches the natural film grain or digital sensor noise of your original RAW file.
If you are struggling with retouching AI skin artifacts, you are not alone. This guide will show you exactly how to rebuild authentic, organic skin texture using professional non-destructive editing techniques.
The Technical Problem with AI Skin Smoothing
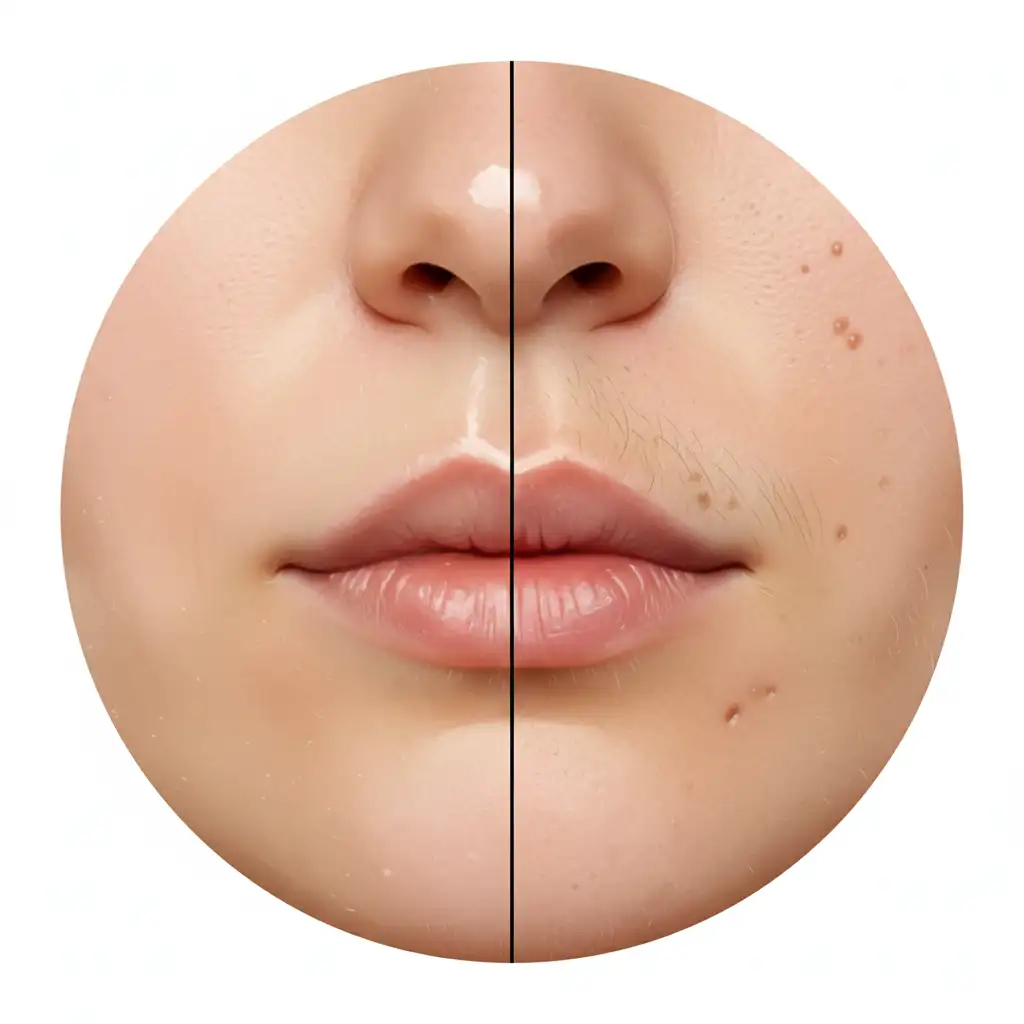
When AI engines attempt to remove blemishes or even out skin tones, they often fail to recognize the difference between a defect and essential skin topology. The result is a patchy, overly smooth area that instantly looks artificially generated to the trained eye. Fixing this requires manual texture synthesis to bridge the gap between the AI-generated pixels and the original photographic data.
How to Fix Retouching AI Skin Artifacts (3 Methods)
Depending on the severity of the AI artifacts and the required quality of the final image, you can use noise generation, frequency separation, or advanced skin texture mapping.
Method 1: The Quick Fix – Noise Generation and Blending
If the AI smoothing isn’t catastrophic but just looks slightly too clean, you can introduce artificial sensor noise to tie the edited areas back into the unedited areas.
- Create a new blank layer above your AI-edited layer.
- Fill the layer with 50 percent Gray (Edit > Fill > 50% Gray).
- Change the layer’s blend mode to Soft Light or Overlay.
- Go to Filter > Noise > Add Noise.
- Set the Amount to 2-4 percent, select Uniform, and check Monochromatic.
- Optional: Apply a very subtle Gaussian Blur (0.3px) to soften the noise so it mimics organic film grain rather than sharp digital noise.
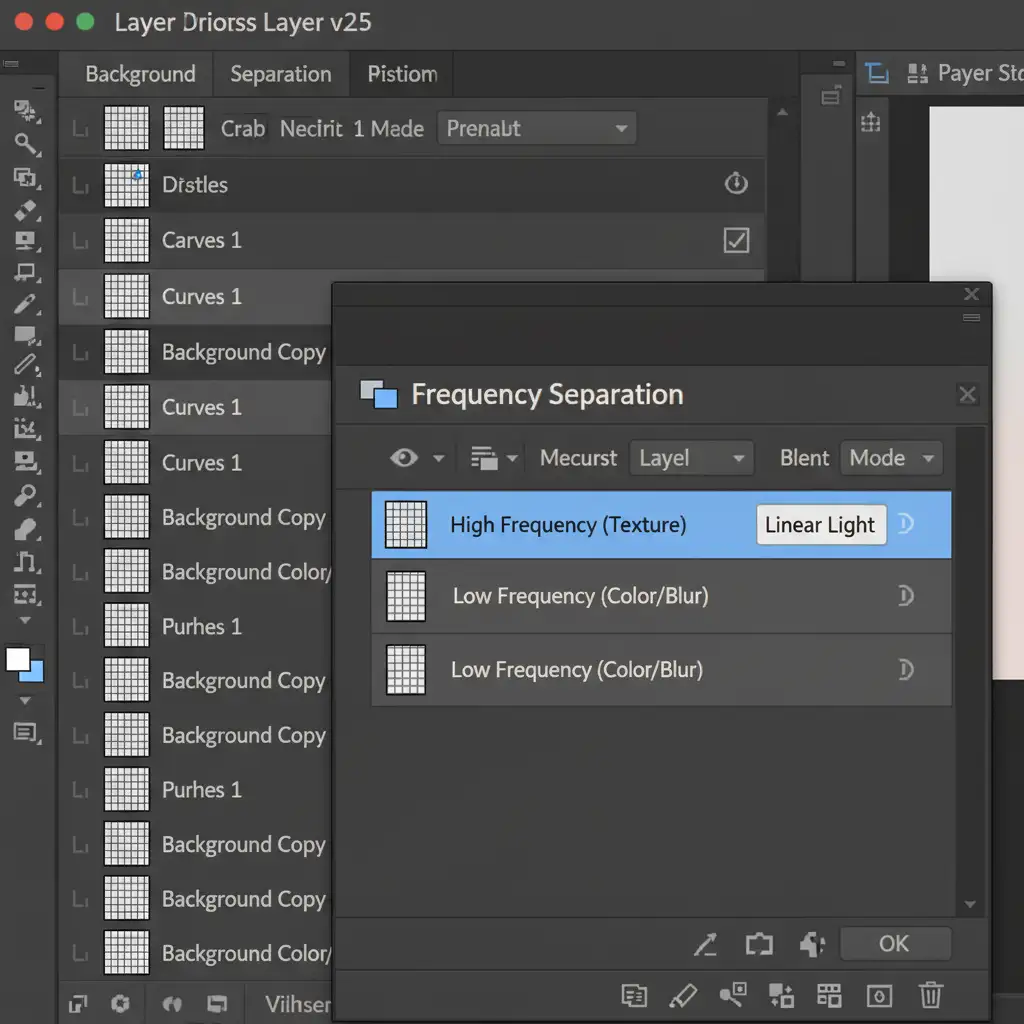
Method 2: The Pro Workaround – Frequency Separation Texture Borrowing
When AI completely destroys the pores in a specific area (like the cheeks or forehead), you can use a Frequency Separation workflow to borrow healthy texture from a non-AI-edited portion of the skin.
- Set up your standard Frequency Separation group (separating your image into a Low-Frequency color layer and a High-Frequency texture layer using the High Pass filter or Apply Image).
- Select the High-Frequency (texture) layer.
- Select the Clone Stamp tool and set the Sample mode strictly to Current Layer.
- Alt/Opt-click on an area of the skin that still has good, organic texture and pores.
- Carefully paint this texture over the plastic AI skin. Because you are only cloning the high-frequency data, the underlying skin tones and lighting created by the AI remain intact, but the natural pores are restored.
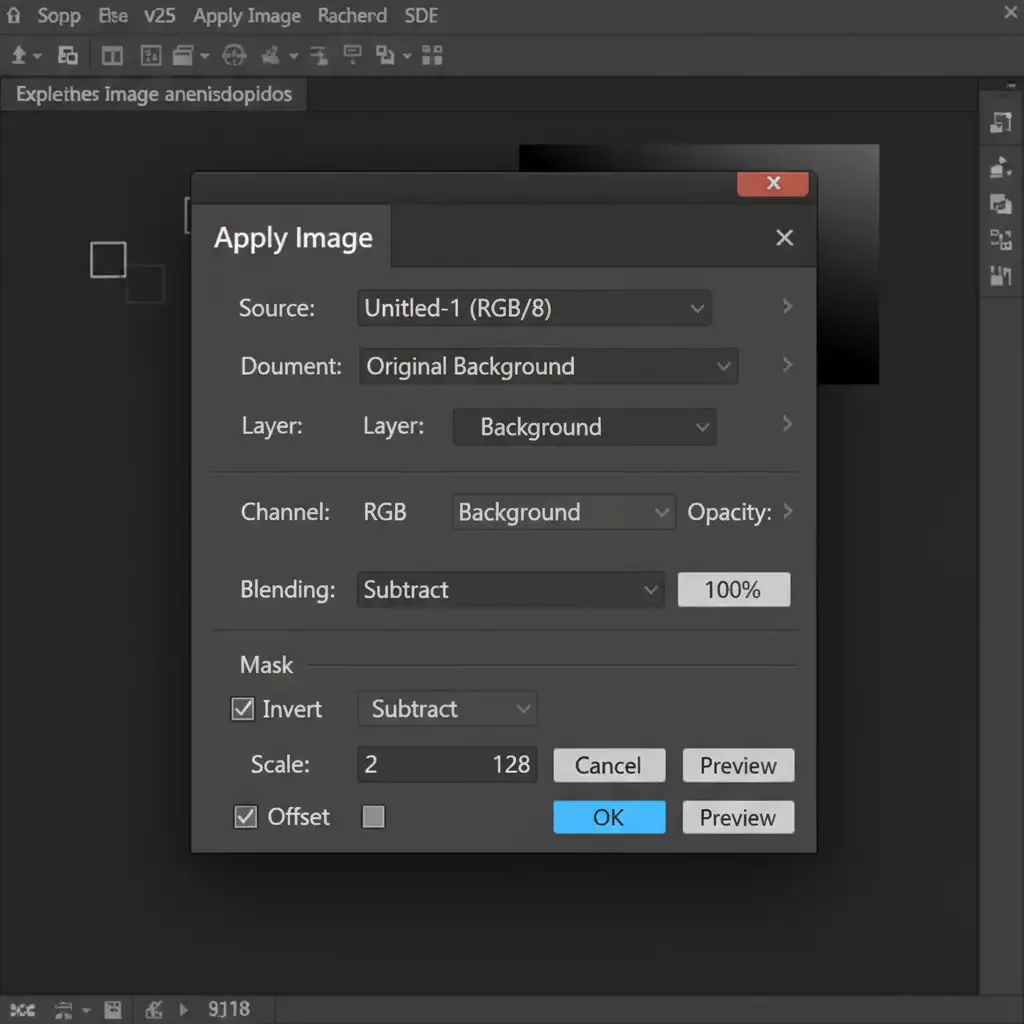
Method 3: The Technical Deep-Dive – Original Texture Mapping
For high-end beauty retouching, faking texture isn’t enough. The ultimate fix for retouching AI skin artifacts is the Texture Recovery technique, which extracts the exact original pores from the RAW file and transplants them back over the AI-smoothed base.
- Place your original unedited image at the very top of your layer stack.
- Duplicate this original layer. You should now have two copies of the original image above your AI edit.
- Select the top copy. Go to Image > Apply Image.
- In the dialog box, set the Layer to the original image directly below it.
- Set the Blending mode to Subtract.
- Set the Scale to 2 and the Offset to 128 (for 8-bit images). Click OK.
- You have now extracted a raw pore map. Change this extracted layer’s blend mode to Linear Light.
- Add an inverted (black) layer mask to hide the texture map.
- Using a soft white brush, paint over the AI-smoothed areas. You are now pasting the subject’s exact original skin pores back onto the heavily corrected AI base. (Note: For even more precise control, you can use luminosity masking to restrict the texture to midtones).
The Final Result: Authentic, Organic Beauty
By combining modern AI tools for heavy lifting with traditional, non-destructive editing techniques for texture recovery, you can achieve flawless skin that retains its organic beauty.
Save Hours on Tedious Texture Matching
Fixing AI artifacts and manually mapping high-frequency texture data requires incredible precision and hours of tedious masking. If you want the flawless look of high-end retouching without the uncanny valley effect of automated AI, let the experts handle it.
Image Work India and Cloud Retouch specialize in high-end, natural-looking portrait retouching. Our professional editing teams use advanced frequency separation and texture recovery workflows to ensure your subjects look perfect—yet entirely human.
Contact us today to elevate your portrait photography with retouching that retains true organic beauty.


