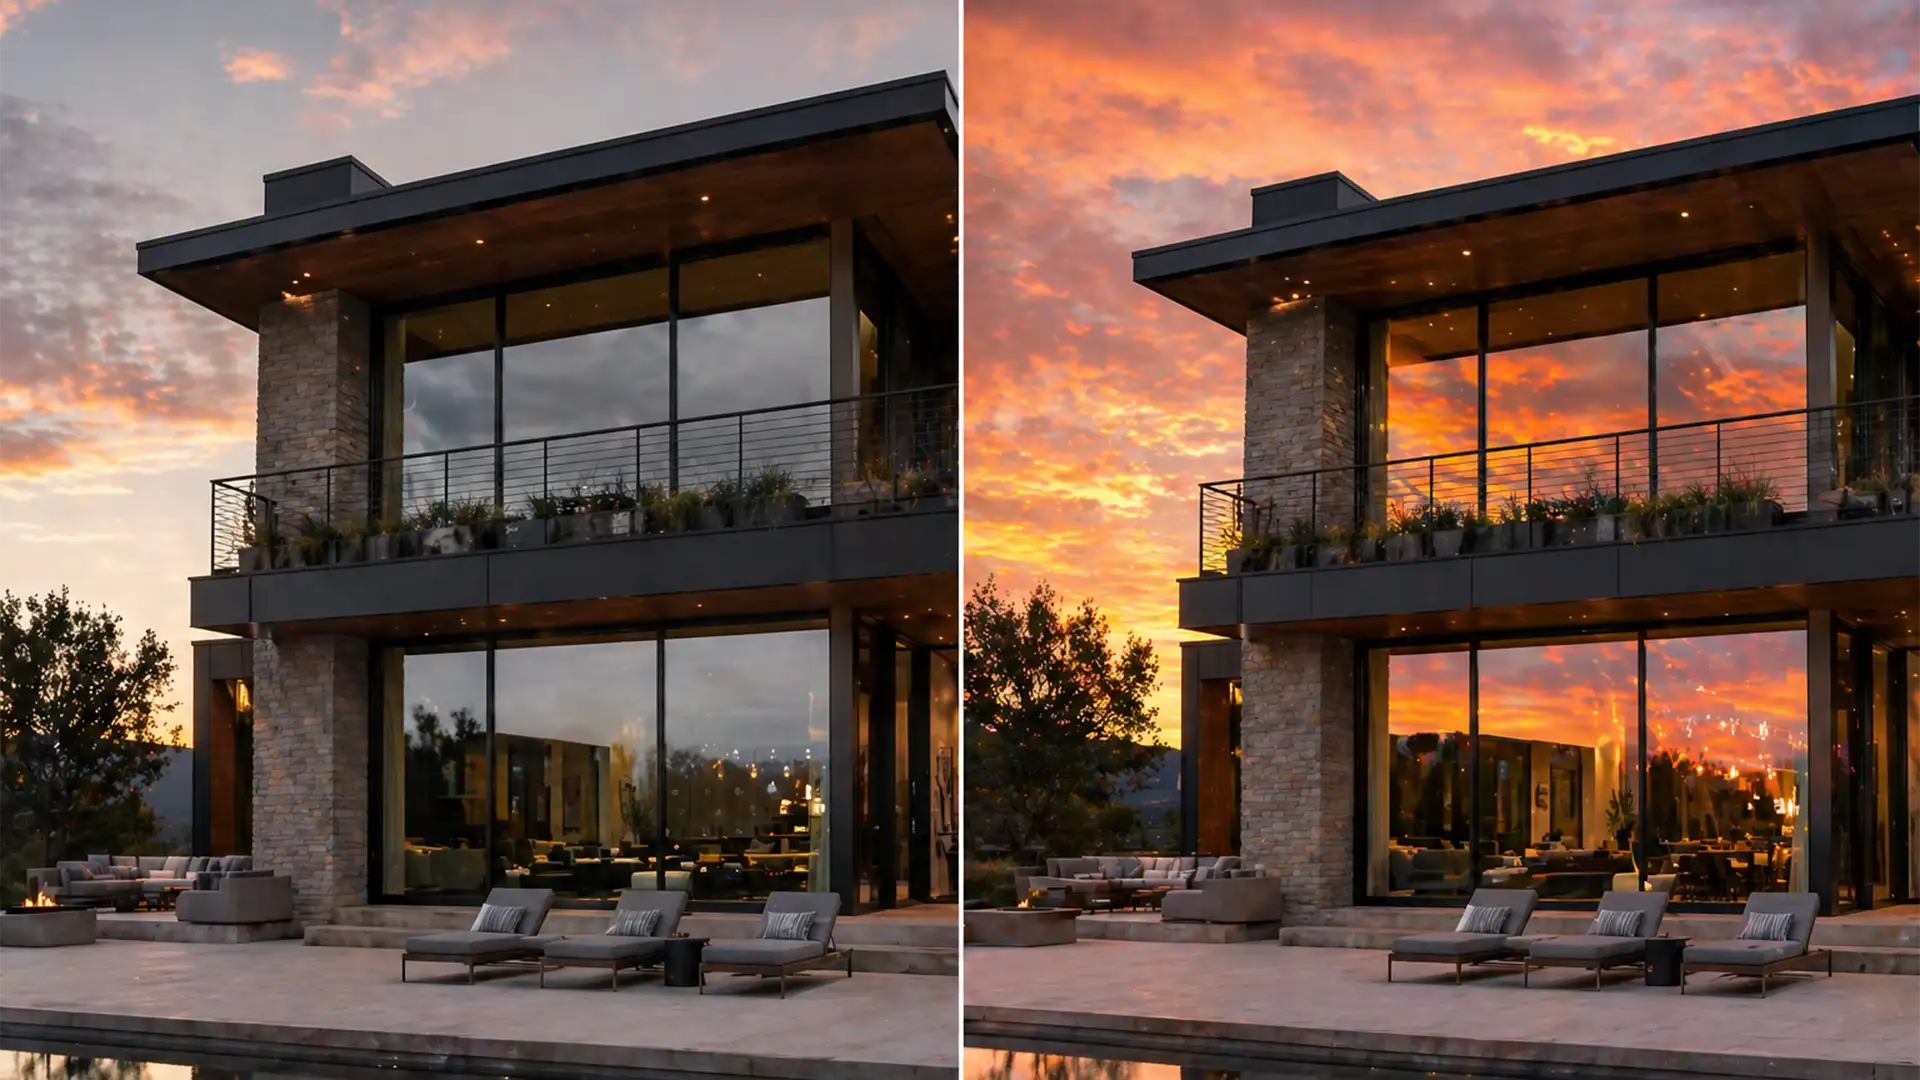
You’ve just used Photoshop’s AI Sky Replacement to swap a dull, overcast gray sky for a breathtaking sunset. The property looks incredible—until you look at the glass. The windows are still reflecting that dreary, flat gray sky. This glaring mismatch instantly screams “fake” to potential buyers and ruins the high-end feel of your imagery.
Fixing window reflections in real estate sky replacement is the ultimate separator between amateur edits and premium property marketing. If your reflections don’t match your environment, the illusion is broken. Let’s dive into exactly how to sync your architectural reflections for flawless, realistic composites.
Why Photoshop’s AI Fails at Window Reflections
In Adobe Photoshop v22.0 through v25.x, the AI Sky Replacement feature is a massive time-saver. It automatically masks complex horizons and replaces the primary sky with impressive accuracy. However, its major blind spot is reflective surfaces.
The AI completely ignores glass. It cannot map a 2D sky texture onto 3D angled architectural surfaces while maintaining the glass’s natural specular highlights, dirt, window mullions, and indoor lighting gradients. As a result, real estate photographers are left with vibrant skies and lifeless, overcast windows.
To fix this, we have to step in manually. Here are three professional workflows to achieve optical realism.
3 Methods for Fixing Window Reflections in Real Estate Sky Replacement
Depending on the complexity of the property and your time constraints, you can choose from a quick blend hack to a highly technical displacement workflow.
Method 1: The Quick Fix (Blend Mode Hack)
If you are processing a high volume of standard MLS listings and need a fast, effective solution, this method utilizes Blend Modes to quickly tint the glass.
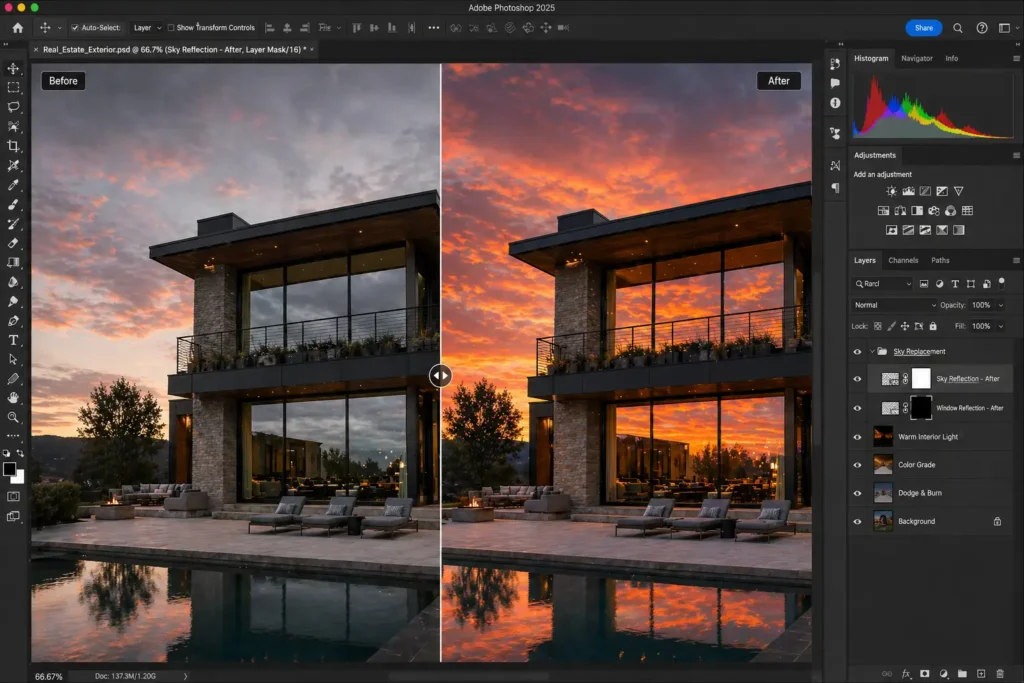
- Duplicate the Sky: After running the AI Sky Replacement, duplicate the new sky layer group.
- Flip and Position: Flip the duplicated group vertically (Edit > Transform > Flip Vertical) and drag it down over the property’s windows.
- Adjust Blend Modes: Change the layer’s Blend Mode to Multiply (for darkening) or Soft Light (for subtle color tinting).
- Reduce Opacity: Drop the layer Opacity to 20-30%. Reflections are naturally darker and less vibrant than the direct sky.
- Masking: Add a black layer mask. Use a soft white brush to quickly paint the reflection only over the glass areas, taking care to avoid window frames.
Method 2: The Pro Workaround (Vector Masking and Smart Objects)
For luxury real estate listings where precision is non-negotiable, you need exact boundaries and realistic glass distortion.
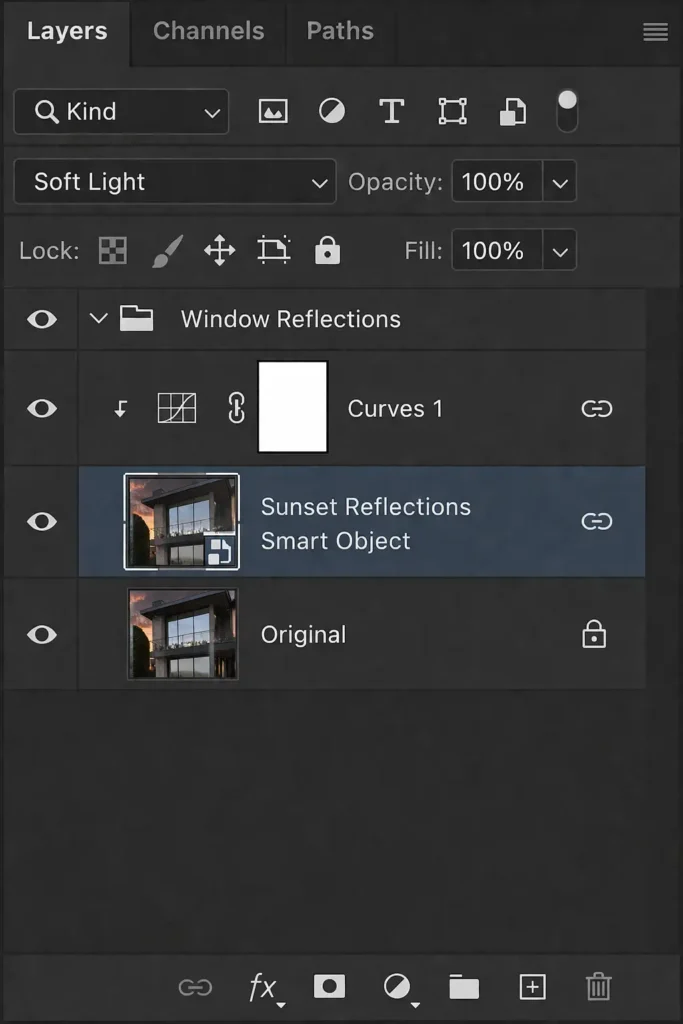
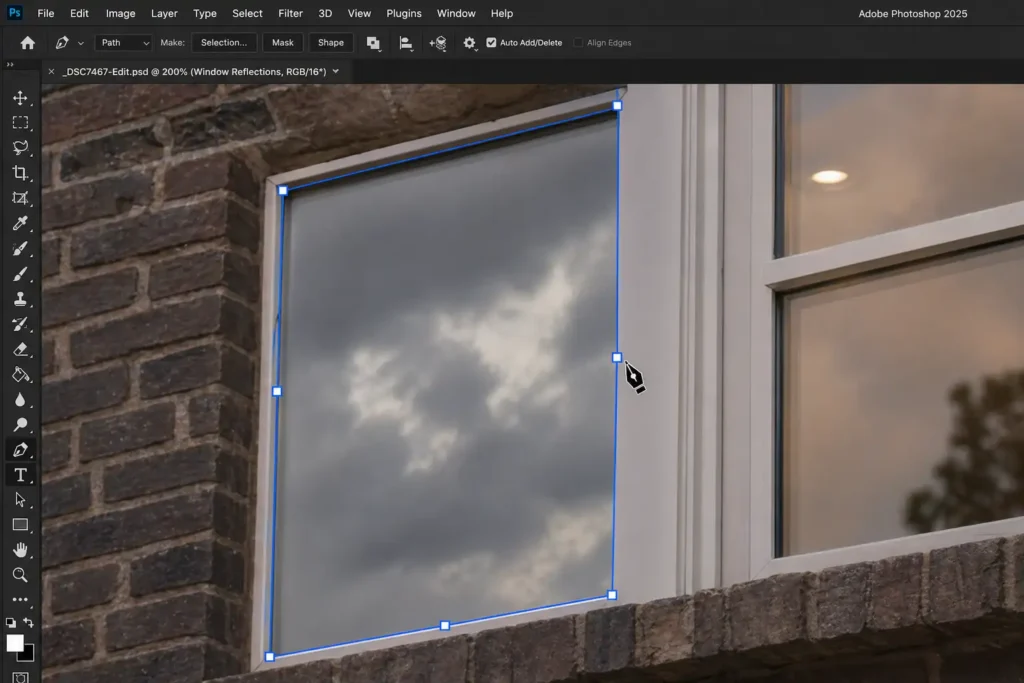
- Trace with the Pen Tool: Select the Pen Tool and carefully trace the exact window panes, excluding the mullions and frames.
- Create a Vector Mask: Convert your path into a precise Vector Mask for your duplicated sky layer.
- Convert to Smart Object: Convert the masked sky layer into a Smart Object. This allows for non-destructive editing.
- Mimic Glass Distortion: Apply a slight Gaussian Blur (around 1-2 pixels) to the Smart Object. Real architectural glass is rarely perfectly flat; a slight blur mimics this natural distortion.
- Color Correction: Create a Curves adjustment layer and use a Clipping Mask to attach it solely to your window reflection layer. Drop the exposure and adjust the color channels to match the darker, slightly tinted nature of polarized window glass.
Method 3: The Technical Deep-Dive (Perspective Warp and Displacement)
When dealing with side-angled bay windows or highly textured glass, slapping a flat sky over the area looks artificial. You must match the vanishing point of the house.
- Perspective Warp: Duplicate your sky layer. Go to Edit > Perspective Warp. Draw grids over your new sky and manipulate the pins to match the exact vanishing point and angle of the side windows.
- Create a Displacement Map: Save a desaturated, high-contrast copy of your original property image as a separate PSD file. Ensure the window mullions and subtle glass imperfections are highly visible.
- Displace the Sky: Go back to your working document. Select your warped sky layer and go to Filter > Distort > Displace. Choose the PSD you just saved.
- The Result: The Displacement Map will realistically warp the clouds around the window mullions and bends in the glass, creating an undeniably photorealistic reflection.
The Ultimate Shortcut: Let the Professionals Handle It
Mastering Vector Masks, Displacement Maps, and Perspective Warps takes years of practice. When you have a massive batch of property photos to deliver to a demanding realtor, spending 20 minutes on a single window reflection simply isn’t profitable.
Don’t let minor details ruin your property listings or eat up your valuable time. Hire Image Work India and Cloud Retouch for high-end, flawless real estate photo editing. Our team of expert retouchers specializes in advanced compositing, ensuring every specular highlight, window reflection, and sky replacement is optically perfect.
Focus on shooting more properties and closing more clients. Let us handle the pixels. Contact Image Work India and Cloud Retouch today to elevate your real estate portfolio.


