You’ve seen it all over TikTok and Instagram—the nostalgic, glowing, slightly gritty aesthetic of early 2000s point-and-shoot cameras. But when you try to recreate this CCD digital camera effect in Photoshop, slapped-on retro filters just look fake. They add generic digital grain and wash out colors, completely missing the authentic physics of vintage hardware. The secret to that true 2000s digicam look isn’t a one-click preset; it’s about recreating how early hardware poorly handled light overflow. If you’re tired of artificial-looking edits, this tutorial breaks down the exact technical workflow to simulate genuine sensor bloom, chromatic aberration, and luminance noise.
Understanding the CCD Sensor vs. Modern CMOS
Before diving into the software, it helps to understand why old photos look the way they do. Modern cameras use CMOS sensors, which process light efficiently and cleanly. Early 2000s consumer digicams utilized CCD sensors.
When a CCD sensor was exposed to bright light (like a streetlamp or camera flash), the pixels would literally overflow with electrical charge, spilling into adjacent pixels. This created distinct visual artifacts: vertical smear, glowing halos around highlights (halation), and a very specific type of luminance noise. To achieve an authentic vintage aesthetic, we must manually replicate these physical hardware limitations in Photoshop.
The Ultimate CCD Digital Camera Effect Photoshop Tutorial
Depending on how much time you have, you can approach this effect in three tiers: a quick filter adjustment, a professional bloom simulation, and a technical deep-dive into channel manipulation.
Method 1: The Quick Camera Raw Filter Fix
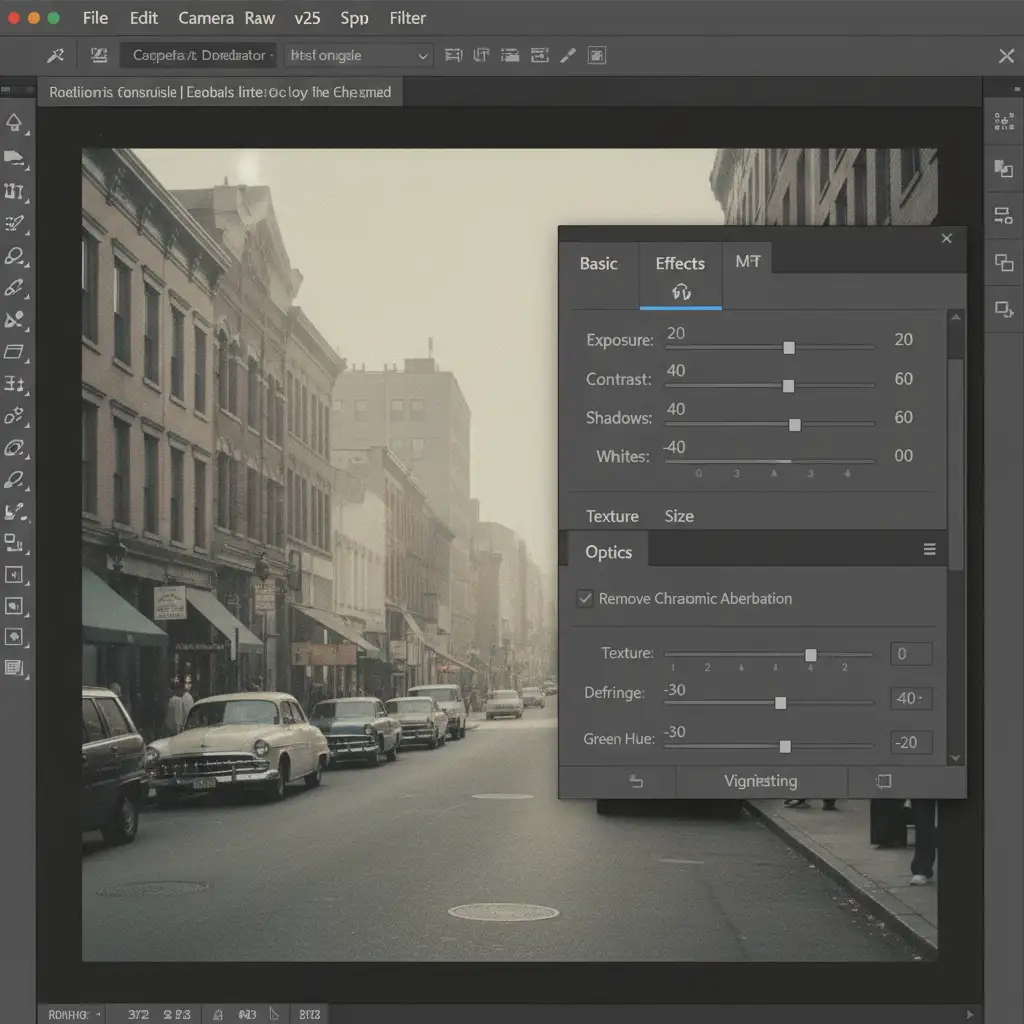
If you need a fast approximation of the 2000s digicam look, the Camera Raw Filter is your starting point. This method softens the hyper-sharpness of modern lenses and introduces basic optical flaws.
- Open your image in Photoshop (v24.x or v25.x recommended).
- Press Shift+Ctrl+A (Windows) or Shift+Cmd+A (Mac) to open the Camera Raw Filter.
- Navigate to the Effects panel. Add Grain (Size: 40, Roughness: 60) to introduce texture.
- Drop the Texture and Clarity sliders into the negatives (around -15 to -25) to simulate low-megapixel softness.
- Open the Optics panel. Add a slight purple and green chromatic aberration to mimic cheap, early-digital plastic lenses.
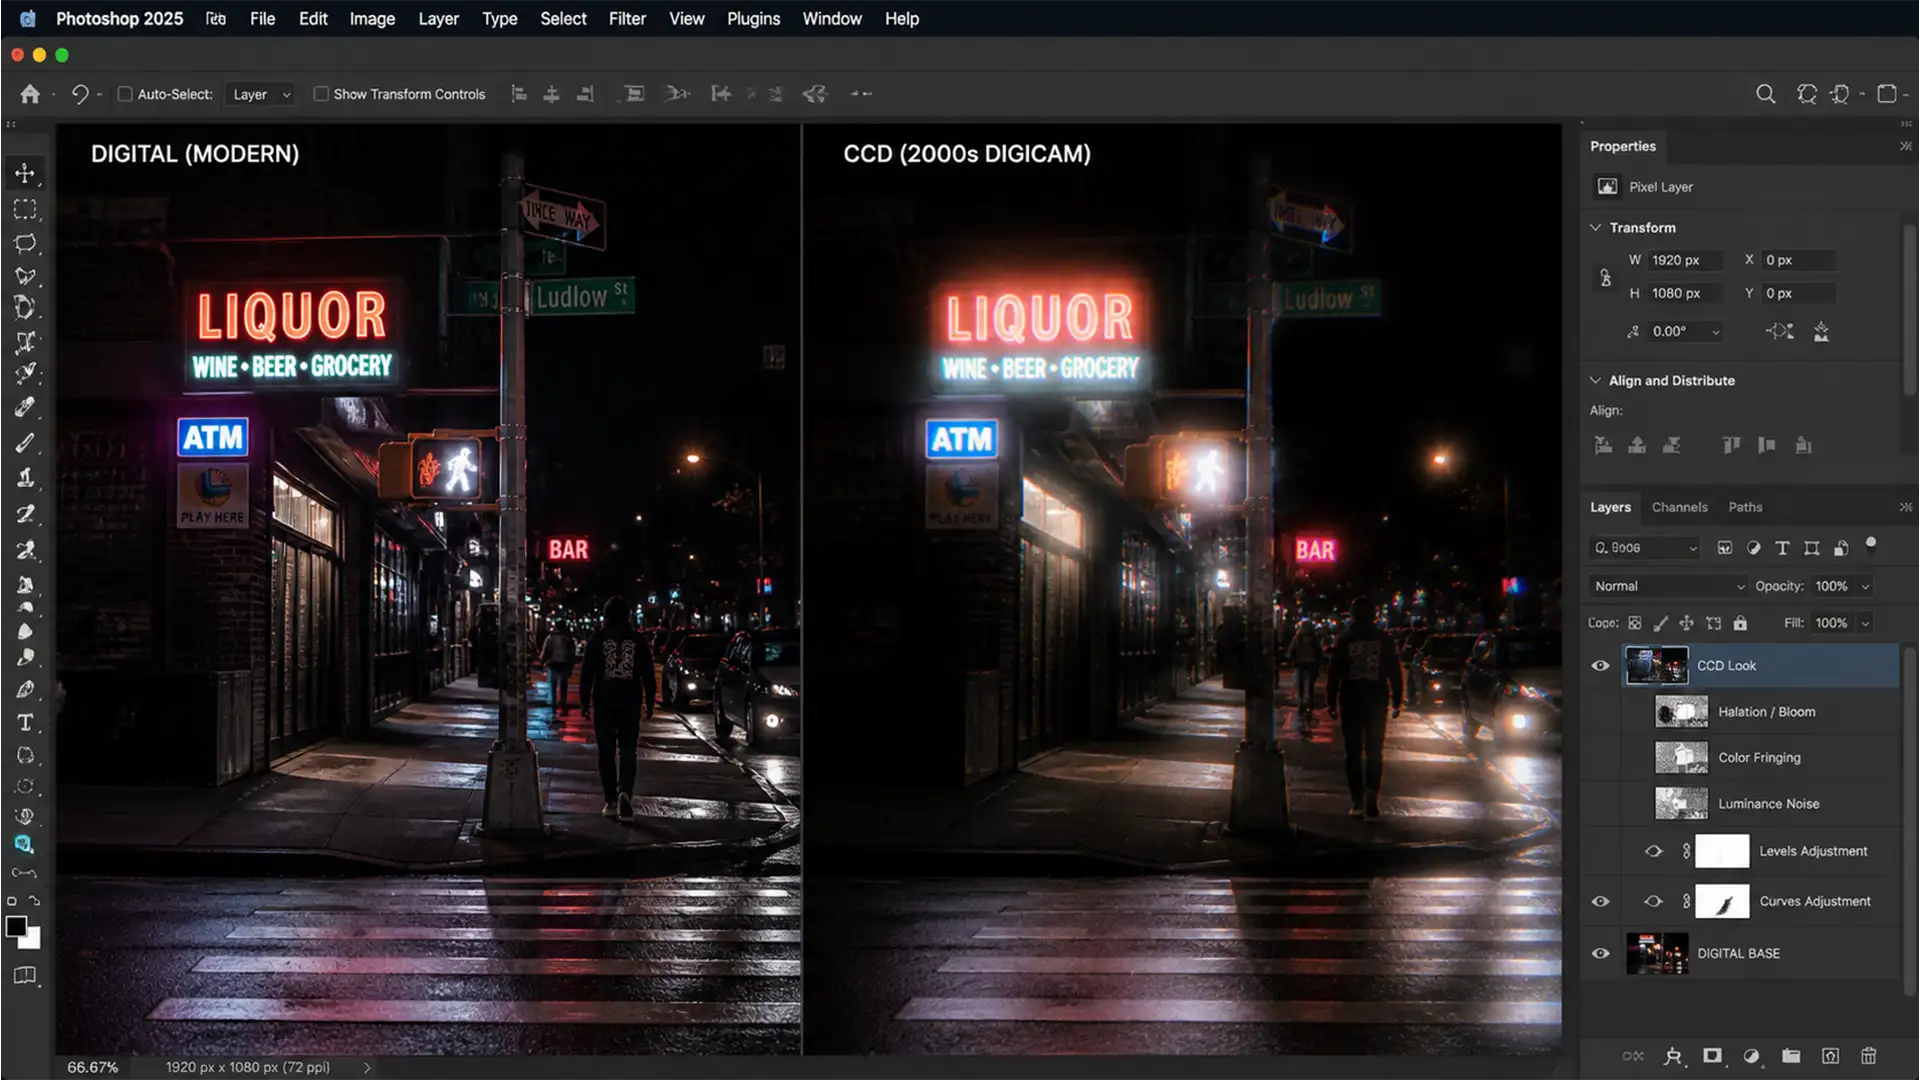
Method 2: The Pro Workaround for Authentic Sensor Bloom
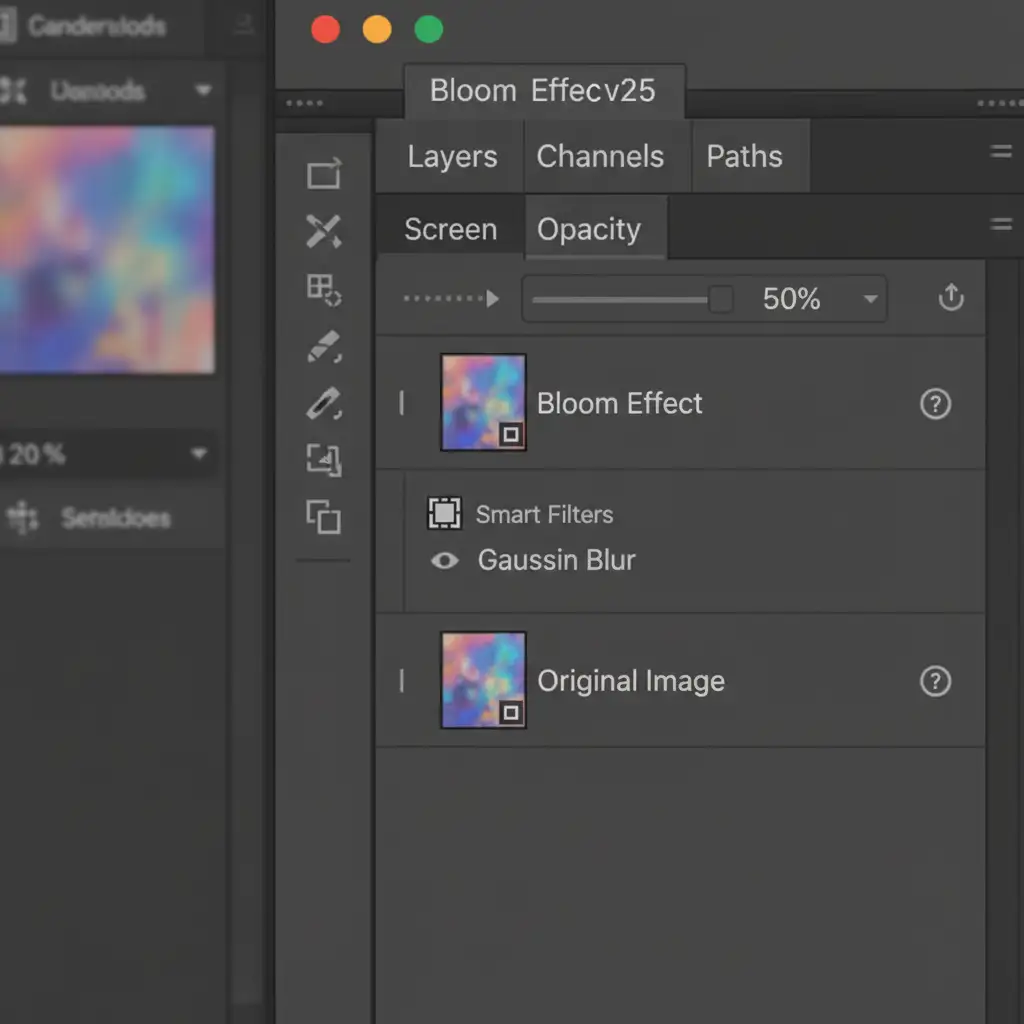
The hallmark of a CCD sensor is how highlights glow. A simple Gaussian blur isn’t enough; we need to isolate the brightest parts of the image and force them to bleed outward using Smart Objects and Blend If.
- Right-click your background layer and select Convert to Smart Object. This ensures our filters remain non-destructive.
- Duplicate the layer (Ctrl/Cmd + J).
- Select the top layer and go to Filter > Blur > Gaussian Blur. Set the Radius between 15-20px.
- Change the top layer’s blending mode to Screen (or Lighten). Drop the Opacity to 40-60%. You will immediately see a glowing effect, but it will be applied to the whole image.
To restrict this sensor bloom only to the highlights (replicating true halation):
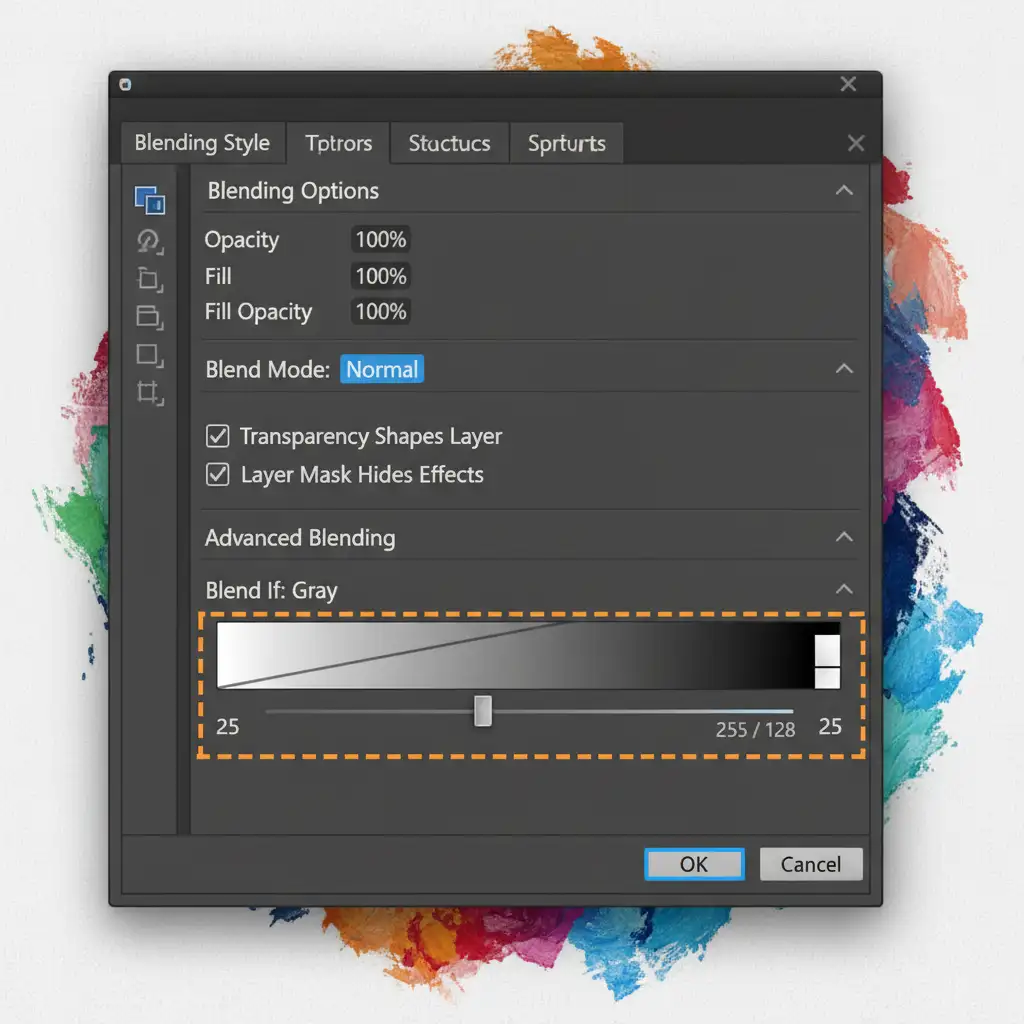
- Double-click the top layer (outside the text box) to open the Blending Options dialog.
- Look at the Blend If section at the bottom.
- On the Underlying Layer gradient bar, hold Alt/Option, click the left (black) triangle, and drag the right half of the split slider toward the right. This smoothly forces the bloom to disappear from the shadows and midtones, leaving glowing halos only on the brightest pixels.
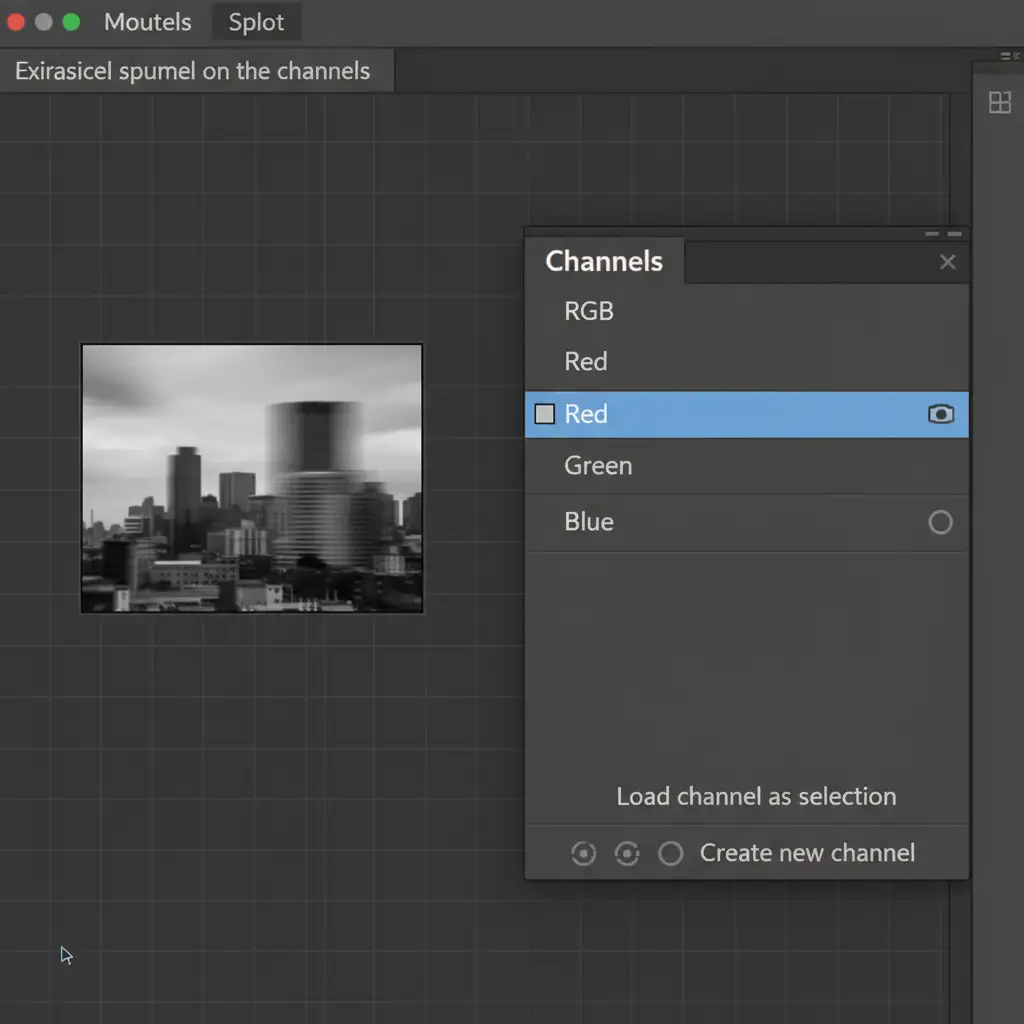
Method 3: Technical Deep-Dive into Halation and Pixel Smear
To truly master the CCD digital camera effect, we must address chromatic bleeding and authentic ISO noise. Early digital cameras often struggled with the red channel, causing red light to smear horizontally.
- Create a merged copy of all your visible layers by pressing Shift+Ctrl+Alt+E (Windows) or Shift+Cmd+Option+E (Mac).
- Open the Channels panel (Window > Channels).
- Click directly on the Red channel to isolate it.
- Go to Filter > Blur > Motion Blur. Set the Angle to 0 degrees (horizontal) and the Distance to a subtle 10-15 pixels.
- Click back on the RGB channel at the top to see the full color image. You will notice a highly authentic red chromatic smear on the edges of highlights.
Finally, to fix the noise profile: Digital grain from the Camera Raw Filter is good, but true CCD luminance noise looks different. Create a new layer, fill it with 50% Gray (Edit > Fill > 50% Gray), and set the blending mode to Overlay. Go to Filter > Noise > Add Noise. Choose Monochromatic, Gaussian, and set the amount to 3-5%. This creates a chunky, authentic noise profile that mimics an overheating early-2000s sensor.
Scale Your Aesthetic with Image Work India
Replicating the exact physics of vintage hardware—from sensor bloom to luminance noise—takes time, a deep understanding of blending modes, and an eye for detail. While this CCD digital camera effect Photoshop tutorial gives you the tools to do it yourself, processing hundreds of campaign photos or e-commerce lifestyle shots manually can drain your resources.
Need high-end photo retouching or custom vintage aesthetic editing at scale? Image Work India and Cloud Retouch provide flawless, professional-grade image manipulation tailored to your exact brand guidelines. Whether you are an agency looking to capture the viral TikTok aesthetic for a massive ad campaign, or a photographer needing reliable, high-volume retouching, our expert team delivers pixel-perfect results every time.
Contact us today to streamline your post-production workflow and let our professionals handle the heavy lifting.


