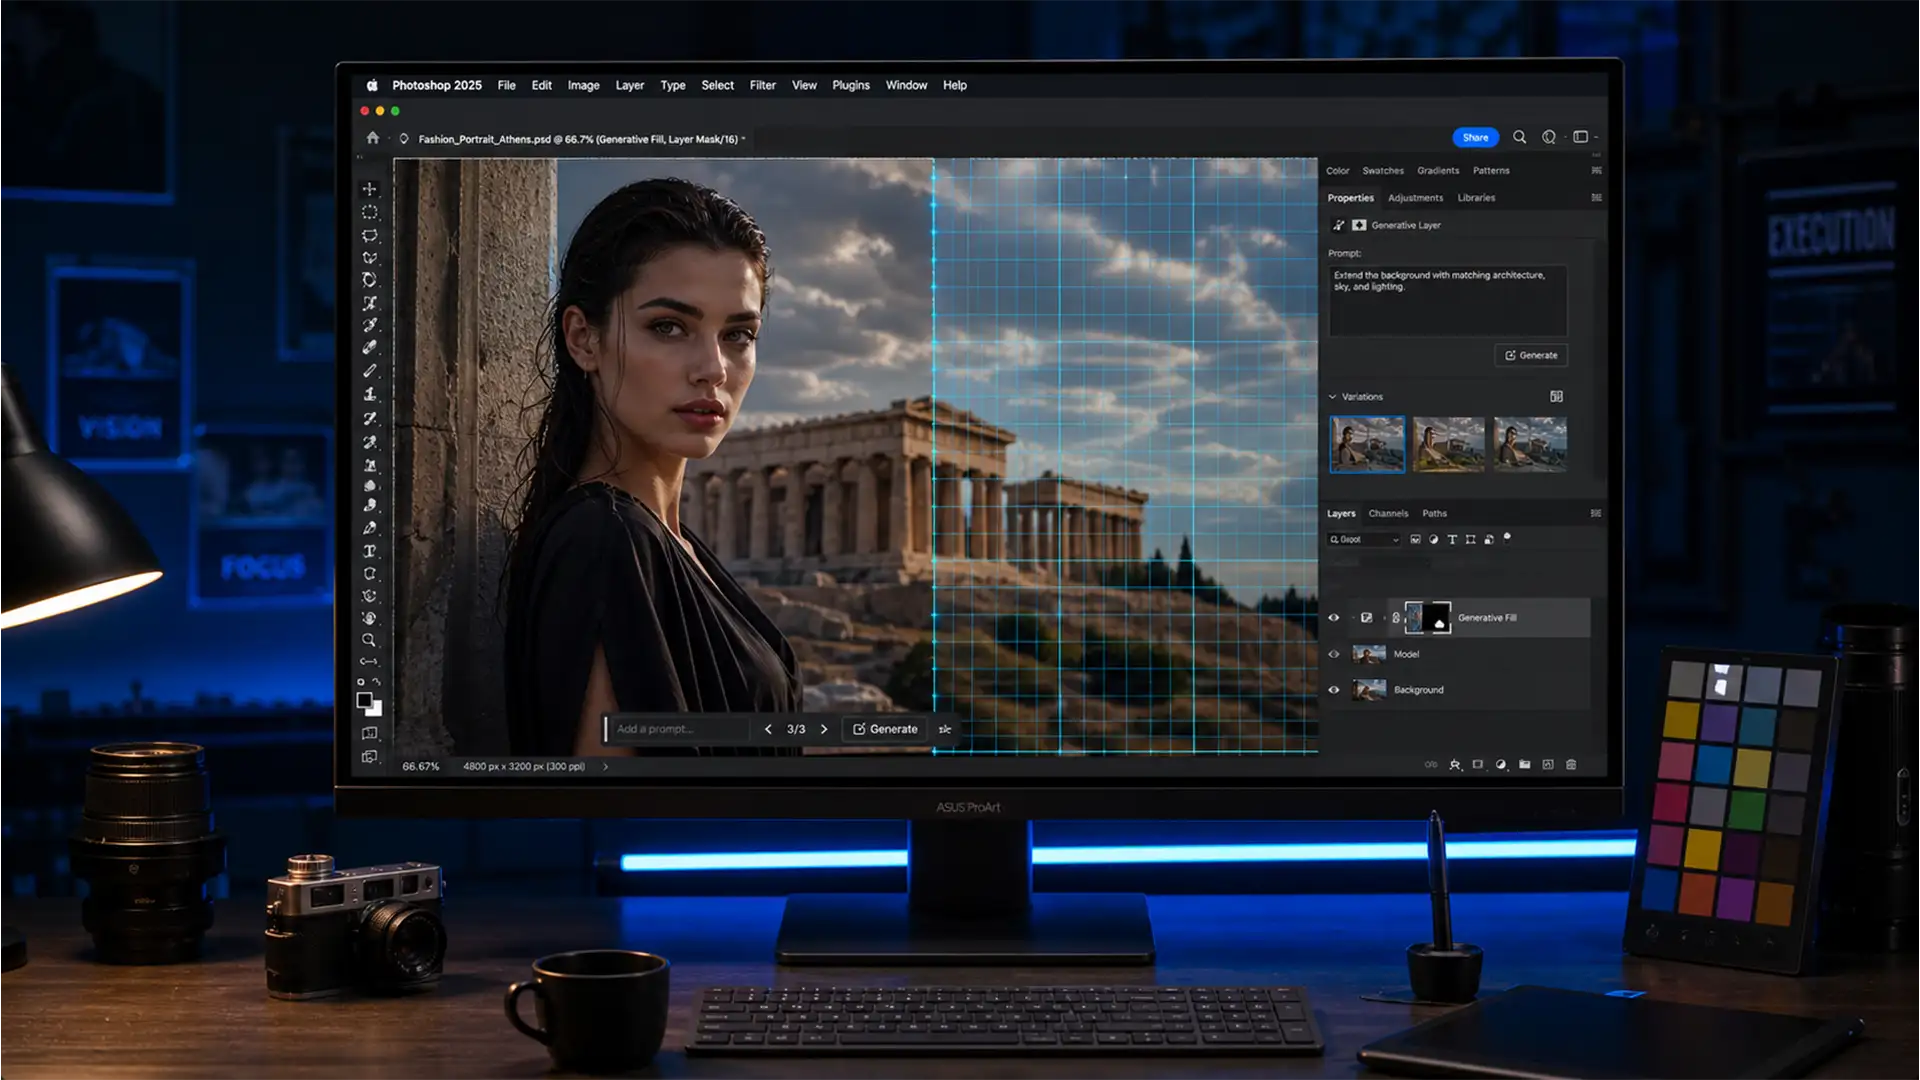
You’ve just used Photoshop’s AI to expand a background or remove a massive distraction from a 45-megapixel shot. It looks like magic from a distance. But when you zoom in? The AI-generated area is a blurry, muddy mess. If you are struggling to fix Generative Fill resolution softness, you aren’t alone. This frustrating drop in quality happens because Adobe Firefly currently limits output to a strict 1024×1024 pixels. When stretched across a high-res canvas, the AI patch loses all micro-contrast and native sensor noise. Let’s fix that blurry patch and make your edits completely undetectable.
The Root Cause: Understanding the 1024×1024 Limitation
Before diving into the solutions, it is crucial to understand why your AI edits look out of place. The engine powering these edits, Adobe Firefly (specifically models up to v25.x and v26.x), caps its generation at a maximum resolution of 1024×1024 pixels per generation.
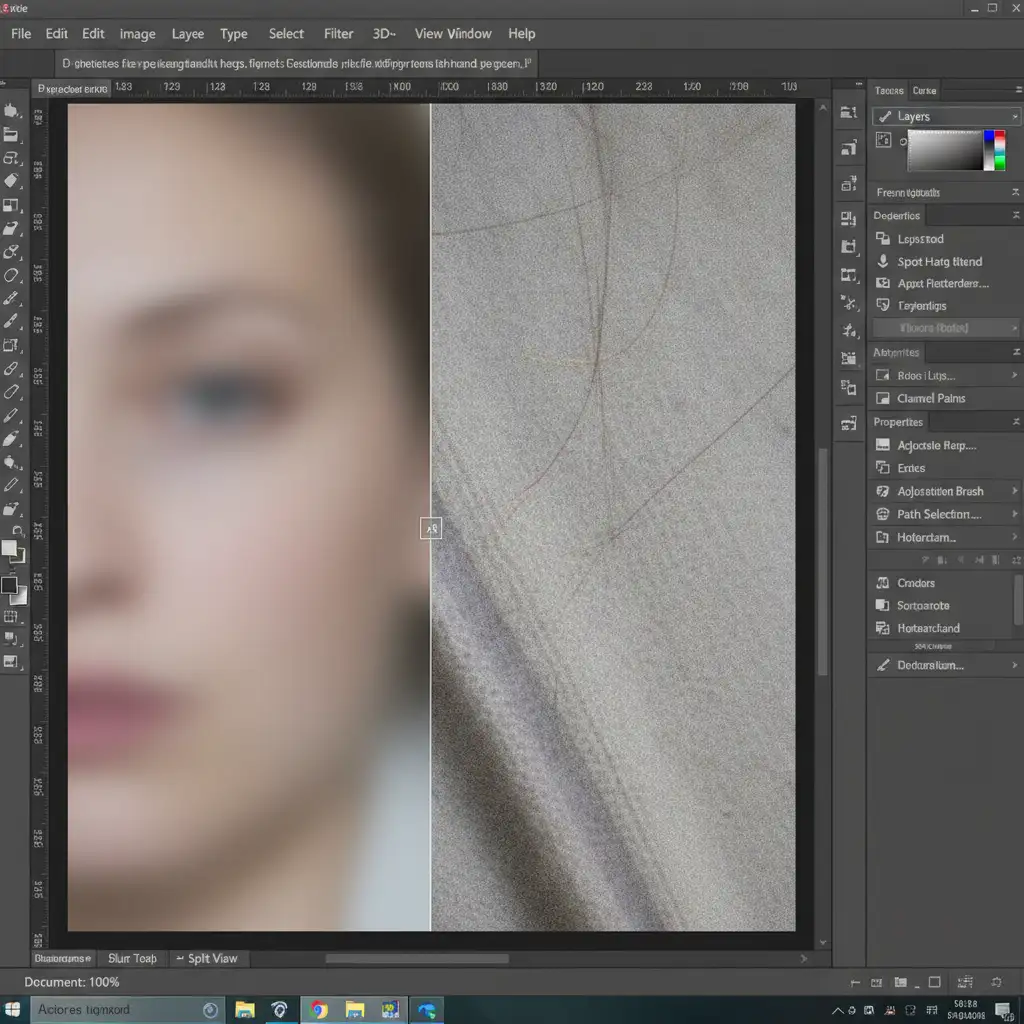
When you draw a selection larger than 1024 pixels on a high-resolution photograph, Photoshop automatically forces the generated patch to fit your marquee area. This mathematical stretching—known as interpolation—causes a severe drop in resolution. The result is a total loss of high-frequency detail and a complete lack of native camera sensor noise.
Method 1: The Quick Fix Using Tiling Selections
The easiest way to bypass the 1024×1024 limitation is to change how you select your target areas. Instead of selecting one massive chunk of your image, break the job down into smaller, bite-sized pieces.
Step-by-Step Tiling
1. Select the Rectangular Marquee Tool
Grab the Rectangular Marquee Tool (M) from your toolbar.
2. Keep Selections Small
Make overlapping selections that are roughly 1024×1024 pixels or smaller.
3. Generate Incrementally
Apply Generative Fill to these smaller patches one by one. Because the selection is under the resolution cap, Photoshop renders the AI patch at its native 1024px density without any bicubic stretching, resulting in a much sharper output.
Method 2: The Pro Workaround – Smart Object Noise Matching
If you must generate a large area and end up with a soft result, you can mathematically match the AI patch to the original image’s texture using Smart Objects and a High Pass filter. This is the industry standard for professional compositing.
Sharpening the Edges
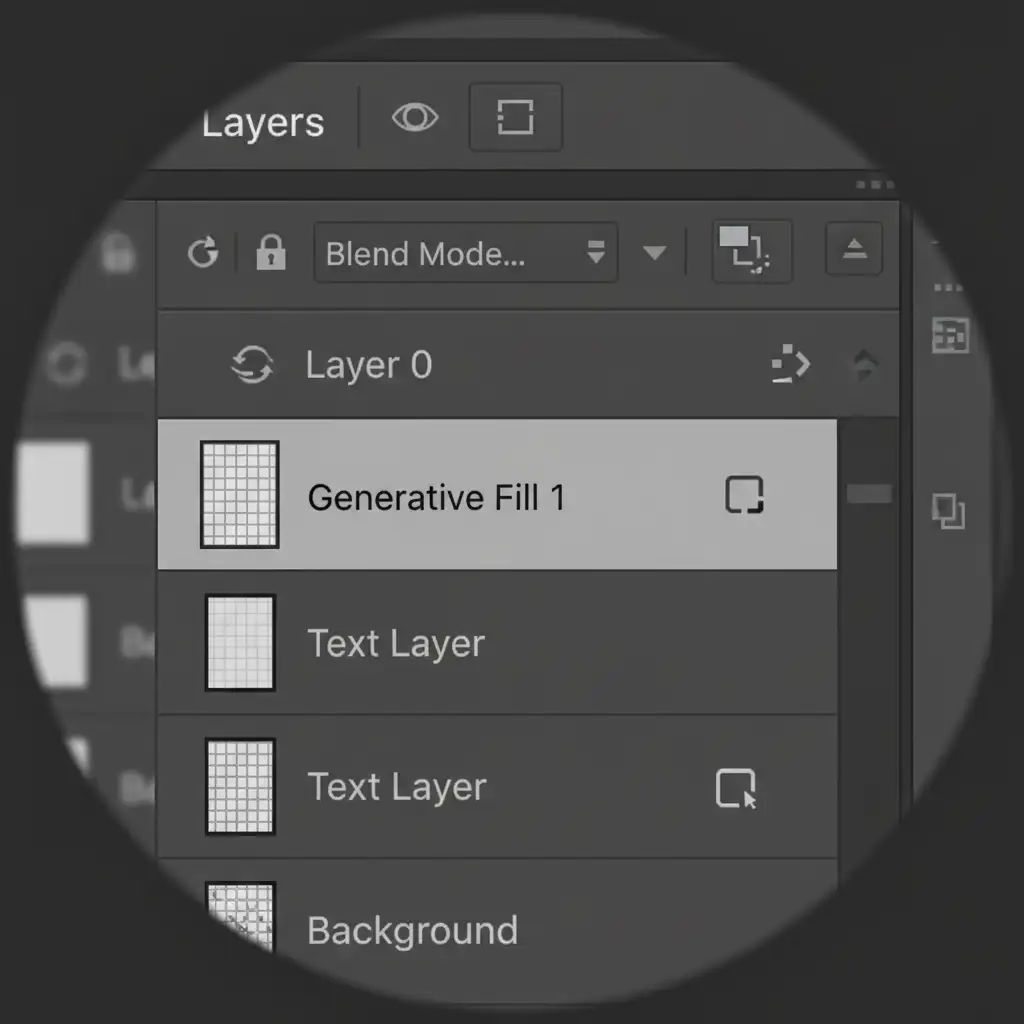
1. Convert to Smart Object
Right-click your generated layer in the Layer Panel and select “Convert to Smart Object.” This protects your AI patch non-destructively.
2. Apply High Pass Filter
Duplicate the Smart Object. On the top layer, go to Filter > Other > High Pass. Adjust the radius until you just start to see the edges of the details (usually between 1.5 to 3.0 pixels).
3. Change Blend Mode
Change the blending mode of this High Pass layer to Linear Light. This instantly injects micro-contrast back into the soft AI patch.

Adding Monochromatic Noise
Even after sharpening, the AI patch will look too “clean.” You must add grain to match the original sensor noise.
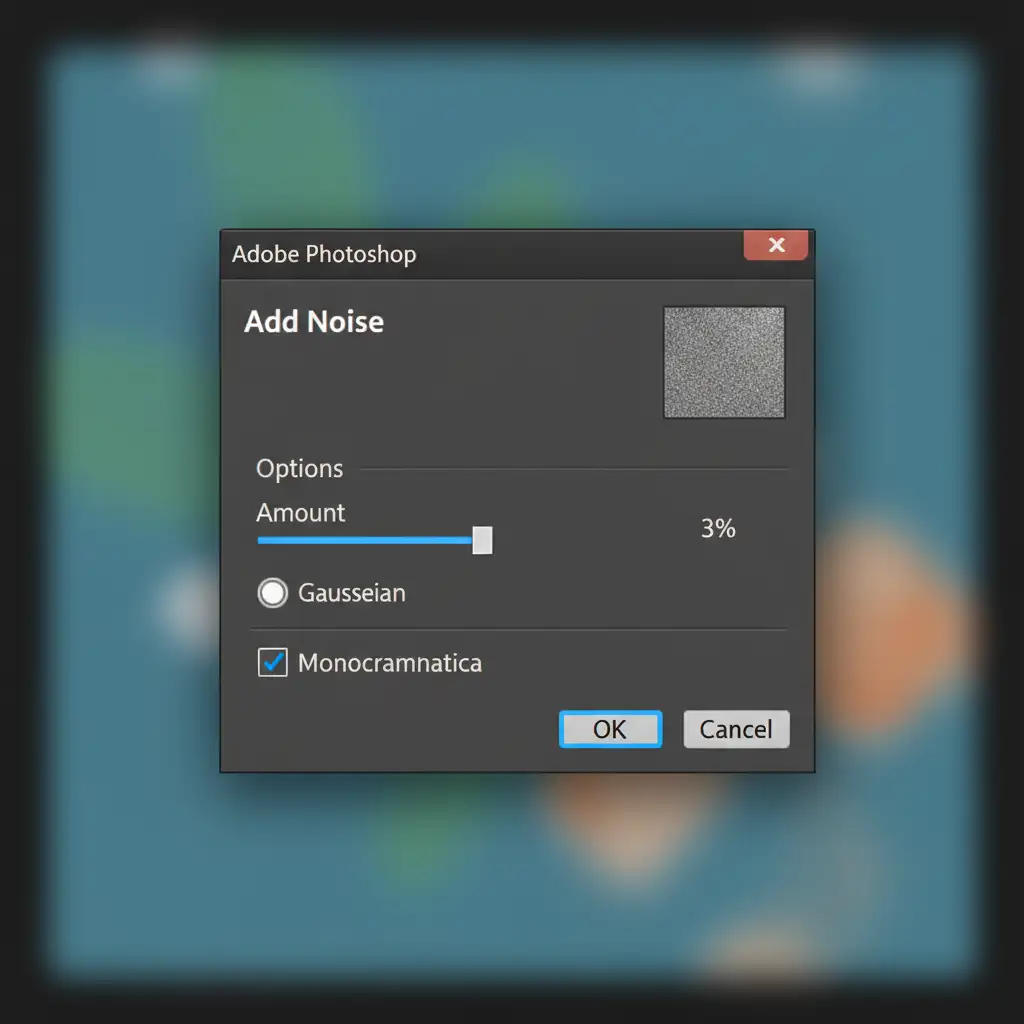
1. Open the Noise Filter
Click on your Smart Object layer and navigate to Filter > Noise > Add Noise.
2. Match the Grain
In the dialogue box, carefully adjust the amount. CRITICAL: Ensure that you check the boxes for “Uniform” and Monochromatic Noise. This ensures the grain mathematically matches digital film grain rather than introducing unwanted color artifacts.
Method 3: The Technical Deep-Dive – AI Upscaling and Masking
For the ultimate pixel-perfect finish, especially for high-end commercial retouching, you can leverage external AI upscaling.
1. Isolate and Upscale
Isolate your soft generative layer. You can use Photoshop’s built-in Neural Filters (specifically the Super Zoom feature) or export the layer to an external, dedicated upscaler like Topaz Photo AI.
2. Seamless Layer Masking
Once you have upscaled the AI patch to match the true resolution of your base image, bring it back into your document. Align the high-res patch over the original soft generation. Finally, apply a Layer Mask. Use a soft black brush to gently blend the edges through Layer Masking, ensuring the high-res AI output seamlessly merges into your original composition.
See It In Action
Need a visual walkthrough of the Smart Object Noise Matching technique? Watch the workflow below.
Outsource Your Complex Retouching to the Experts
Learning how to fix Generative Fill resolution softness can save a photo, but implementing these multi-step technical workarounds—from managing interpolation to balancing High Pass filters—takes significant time away from your actual photography and creative direction.
Struggling with inconsistent AI edits, soft image patches, or complex background expansions? Don’t let technical limitations slow down your workflow.
Outsource your complex image retouching to Image Work India & CloudRetouch. Our team of expert retouchers specializes in pixel-perfect, flawless, and undetectable professional manipulation. Whether it’s high-end fashion, real estate, or e-commerce, we ensure every pixel is perfectly matched. Contact Cloud Retouch today to elevate your imagery to a truly professional standard.


