
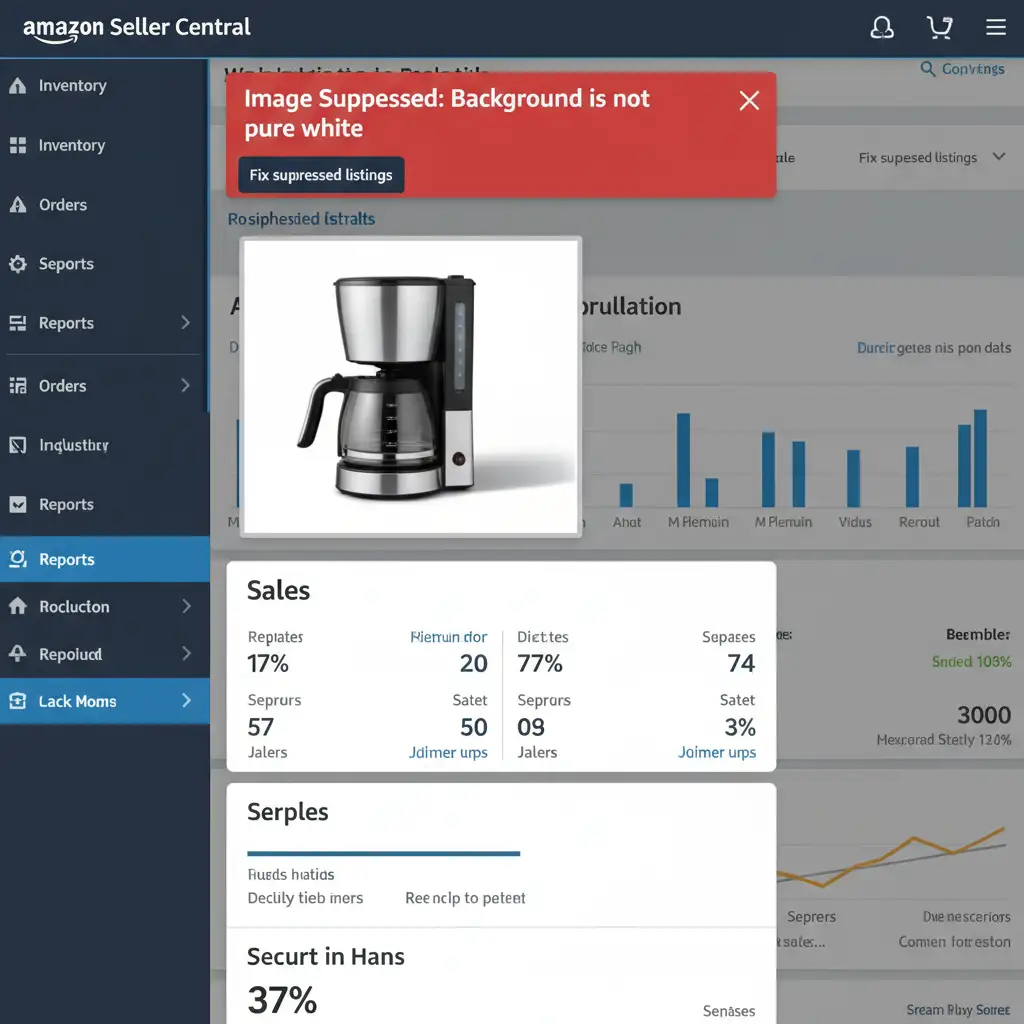
You wake up to a dreaded email from Amazon Seller Central: your top-selling product listing has been suppressed. The culprit? Your main image violates the platform’s strict background requirements.
If your product photos feature natural reflections or artificial drop shadows, you are likely a victim of “shadow bleeding.” This occurs when the shadow extends too far outward, touching the edge of the image canvas and failing Amazon’s automated pure white background check.
Fixing this requires a delicate balancing act. You must retain a realistic grounding shadow while ensuring the product meets Amazon’s strict 85 percent frame-fill rule—without the shadow touching the boundary. Here is the definitive Photoshop workflow for an Amazon main image shadow bleeding fix.
What is Shadow Bleeding on Amazon?
Amazon’s automated bots constantly scan the perimeter of your main product images. To pass their checks, the extreme edges of your canvas must read as a pure white background—specifically, RGB 255, 255, 255.
In modern photo editing (Photoshop v25.x and newer), shadow bleeding happens when pixel values at the canvas borders fall below pure white because a shadow extends too far. Even a nearly invisible shadow edge reading at RGB 253 will trigger an automatic suppression.
3 Ways to Execute the Amazon Main Image Shadow Bleeding Fix
To prevent listing takedowns, you need to control your shadow spread. Here are three professional methods to ensure your shadows fade completely before touching the image boundaries.
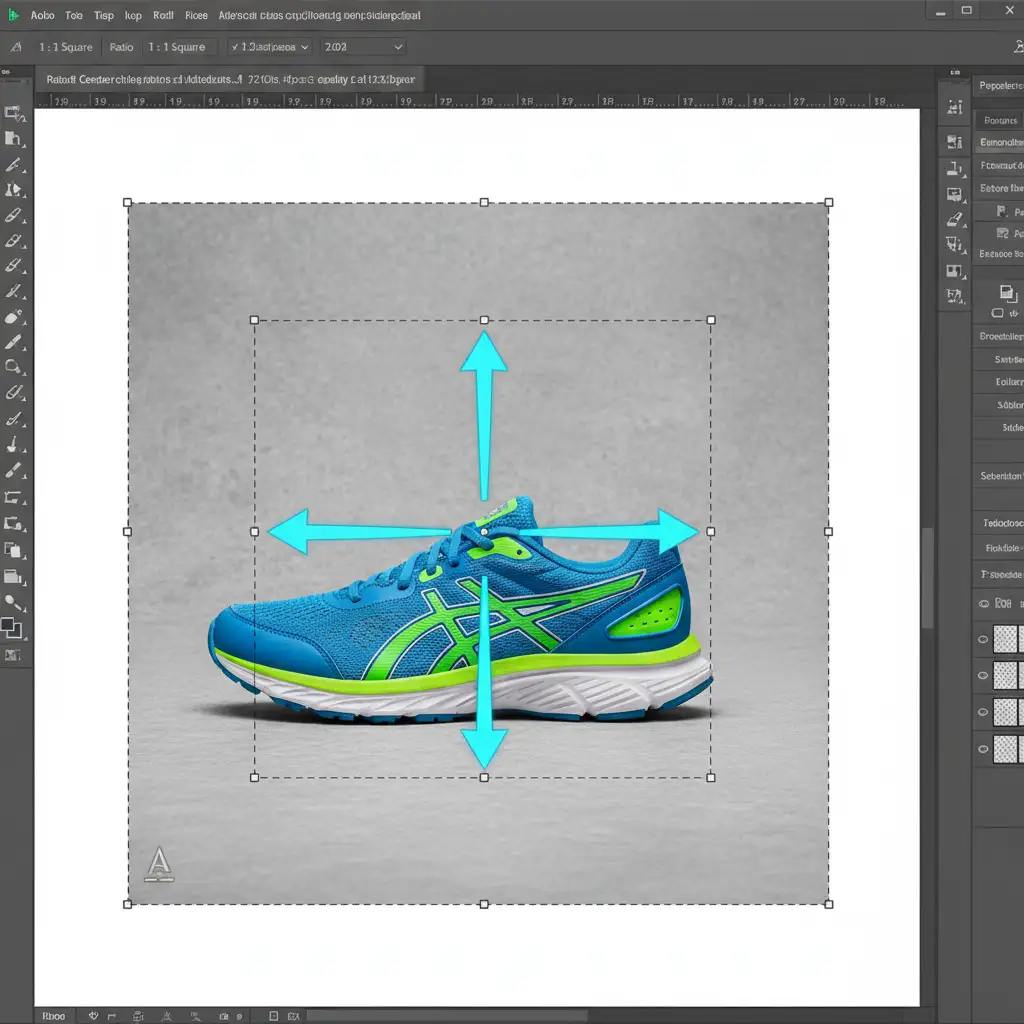
Method 1: The Quick Fix (Canvas Scaling)
If your shadow is already well-rendered but just slightly clipping the edge, adjusting your canvas size is the fastest solution.
- Open your image in Photoshop.
- Select the Crop Tool (C).
- In the top options bar, set the aspect ratio to 1:1 Square (Amazon’s preferred format).
- Hold the Alt (Windows) or Option (Mac) key and click and drag the crop box outward.
- This scales the canvas from the center, adding a pure white border around the product so the shadows end well before the edge.
Note: Be careful not to shrink the product too much, or you will violate the frame-fill rule, which dictates the product must occupy at least 85% of the image frame.
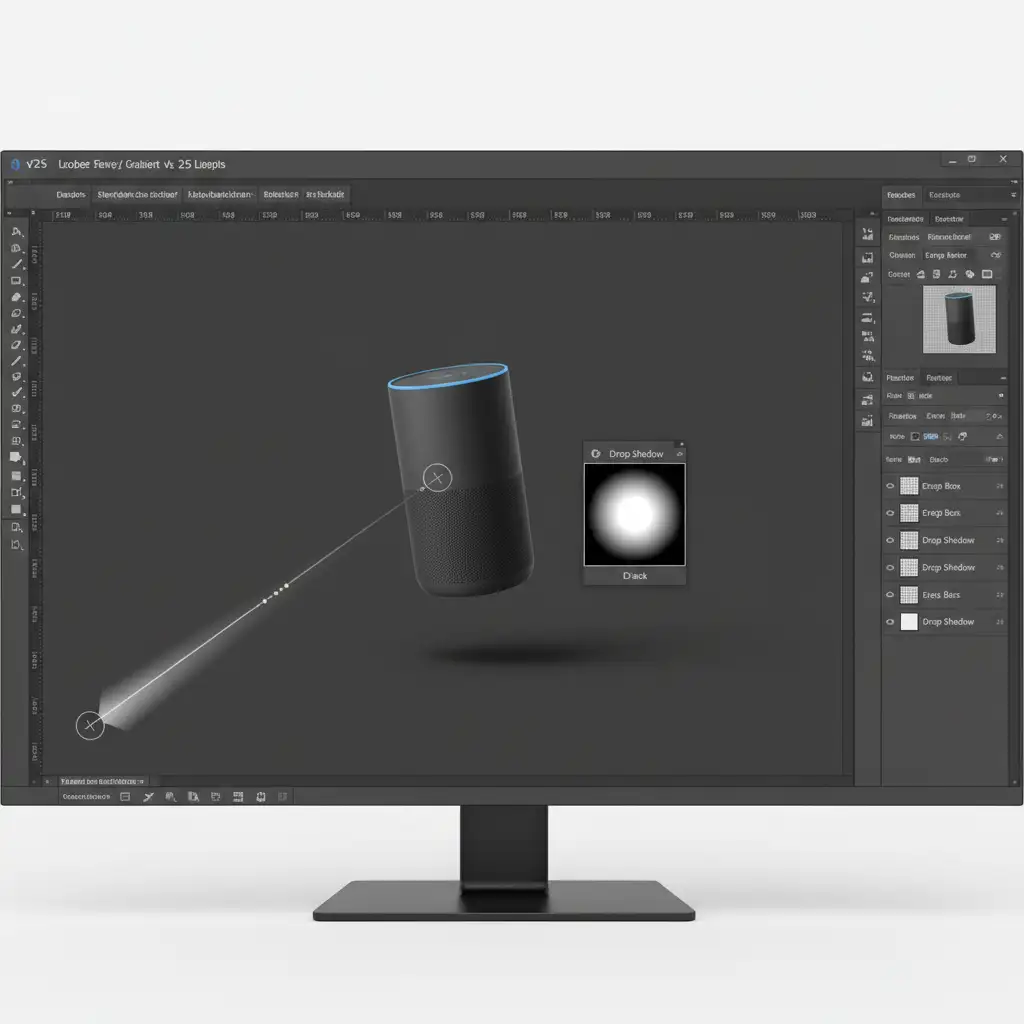
Method 2: The Pro Workaround (Opacity Gradient Masking)
When you need to keep the product as large as possible to meet the frame-fill rule, you cannot simply expand the canvas. Instead, you must fade the shadow manually.
- Ensure your shadow is on a separate layer beneath your product.
- Select the shadow layer and click the Layer Mask icon at the bottom of the Layers panel.
- Select the Gradient Tool (G) and set it to a Black-to-White opacity gradient.
- Click near the edge of the canvas and drag slightly inward toward the product.
- This creates a smooth, invisible fade, ensuring the shadow dissipates into 100 percent pure white well before it reaches the border.
Method 3: The Technical Deep-Dive (Rasterize Layer & Clipping)
If you generated your shadow using Layer Styles rather than painting it manually, you need to convert it into editable pixels to ensure absolute compliance.
- Locate the layer containing your drop shadow fx.
- Right-click the small “fx” icon on the layer and select Create Layer. This will rasterize layer effects, turning the algorithmic shadow into a standard pixel layer.
- Add a layer mask to this newly separated shadow layer.
- Using the Marquee Tool, isolate a “safe area” a few dozen pixels away from the canvas edge.
- Invert the selection and fill the outer edge of the mask with solid black. This acts as a hard stop for any rogue shadow pixels.
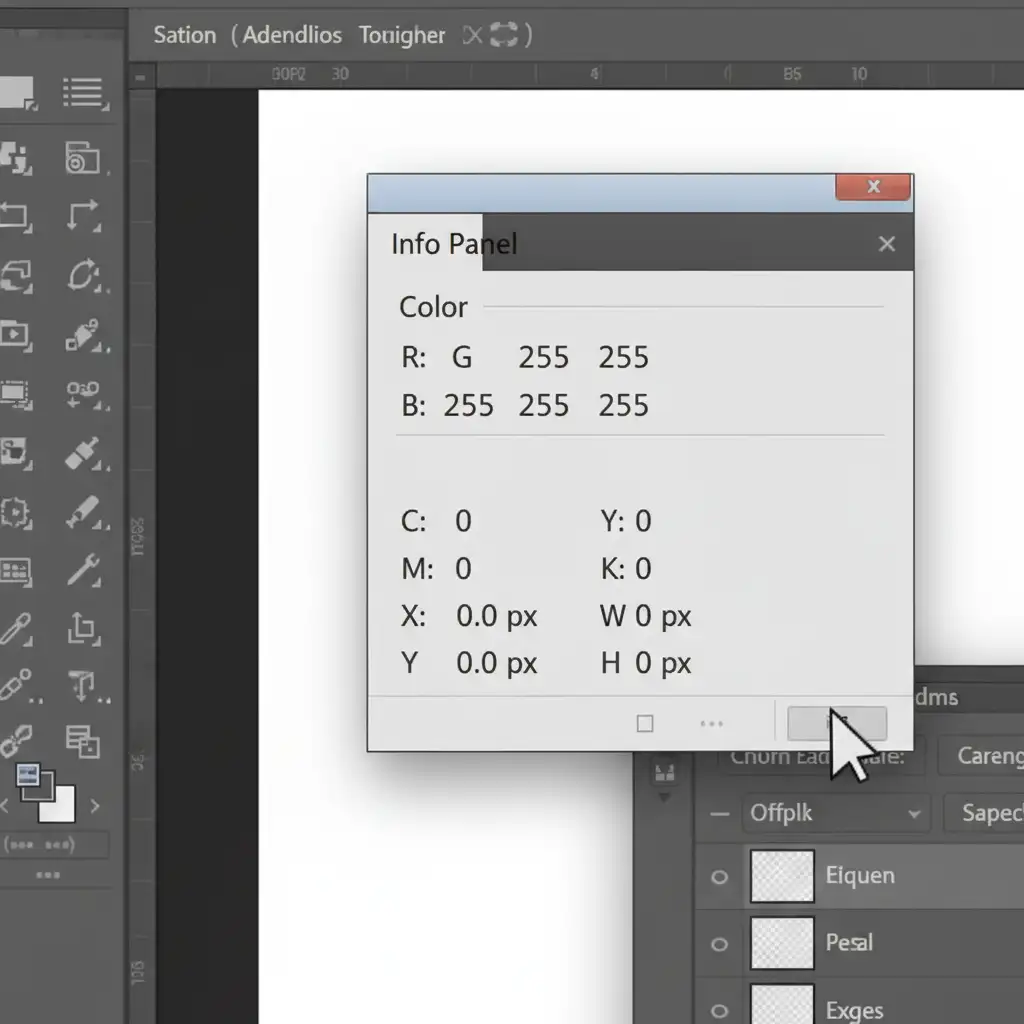
- The Final Verification: Open the Info Panel (F8). Hover your cursor along the extreme edges of your canvas. The RGB values must read exactly RGB 255, 255, 255. If you see 254 or lower, your shadow is still bleeding.
The Role of a Precise Clipping Path
None of these shadow fixes work if the product itself isn’t perfectly isolated. Before dealing with shadows, you must use the Pen Tool to create a flawless clipping path around your product. Relying on automated background removal tools often leaves behind a halo of grey pixels, which Amazon’s bots will flag just as quickly as a bleeding shadow.
Stop Stressing Over Amazon Suppressions
Managing Amazon’s strict image guidelines—from the 85% frame-fill rule to RGB 255 background checks—takes up valuable time that you should be spending scaling your brand.
Tired of Amazon listing suppressions? Let Image Work India and Cloud Retouch handle your e-commerce photo editing. Our expert retouchers specialize in marketplace compliance, utilizing precise clipping paths and advanced shadow control to guarantee your images are 100% Amazon-ready upon delivery.
Stop fighting with Photoshop and let us perfect your product catalog. Contact Image Work India today for flawless, high-converting product photography editing.


