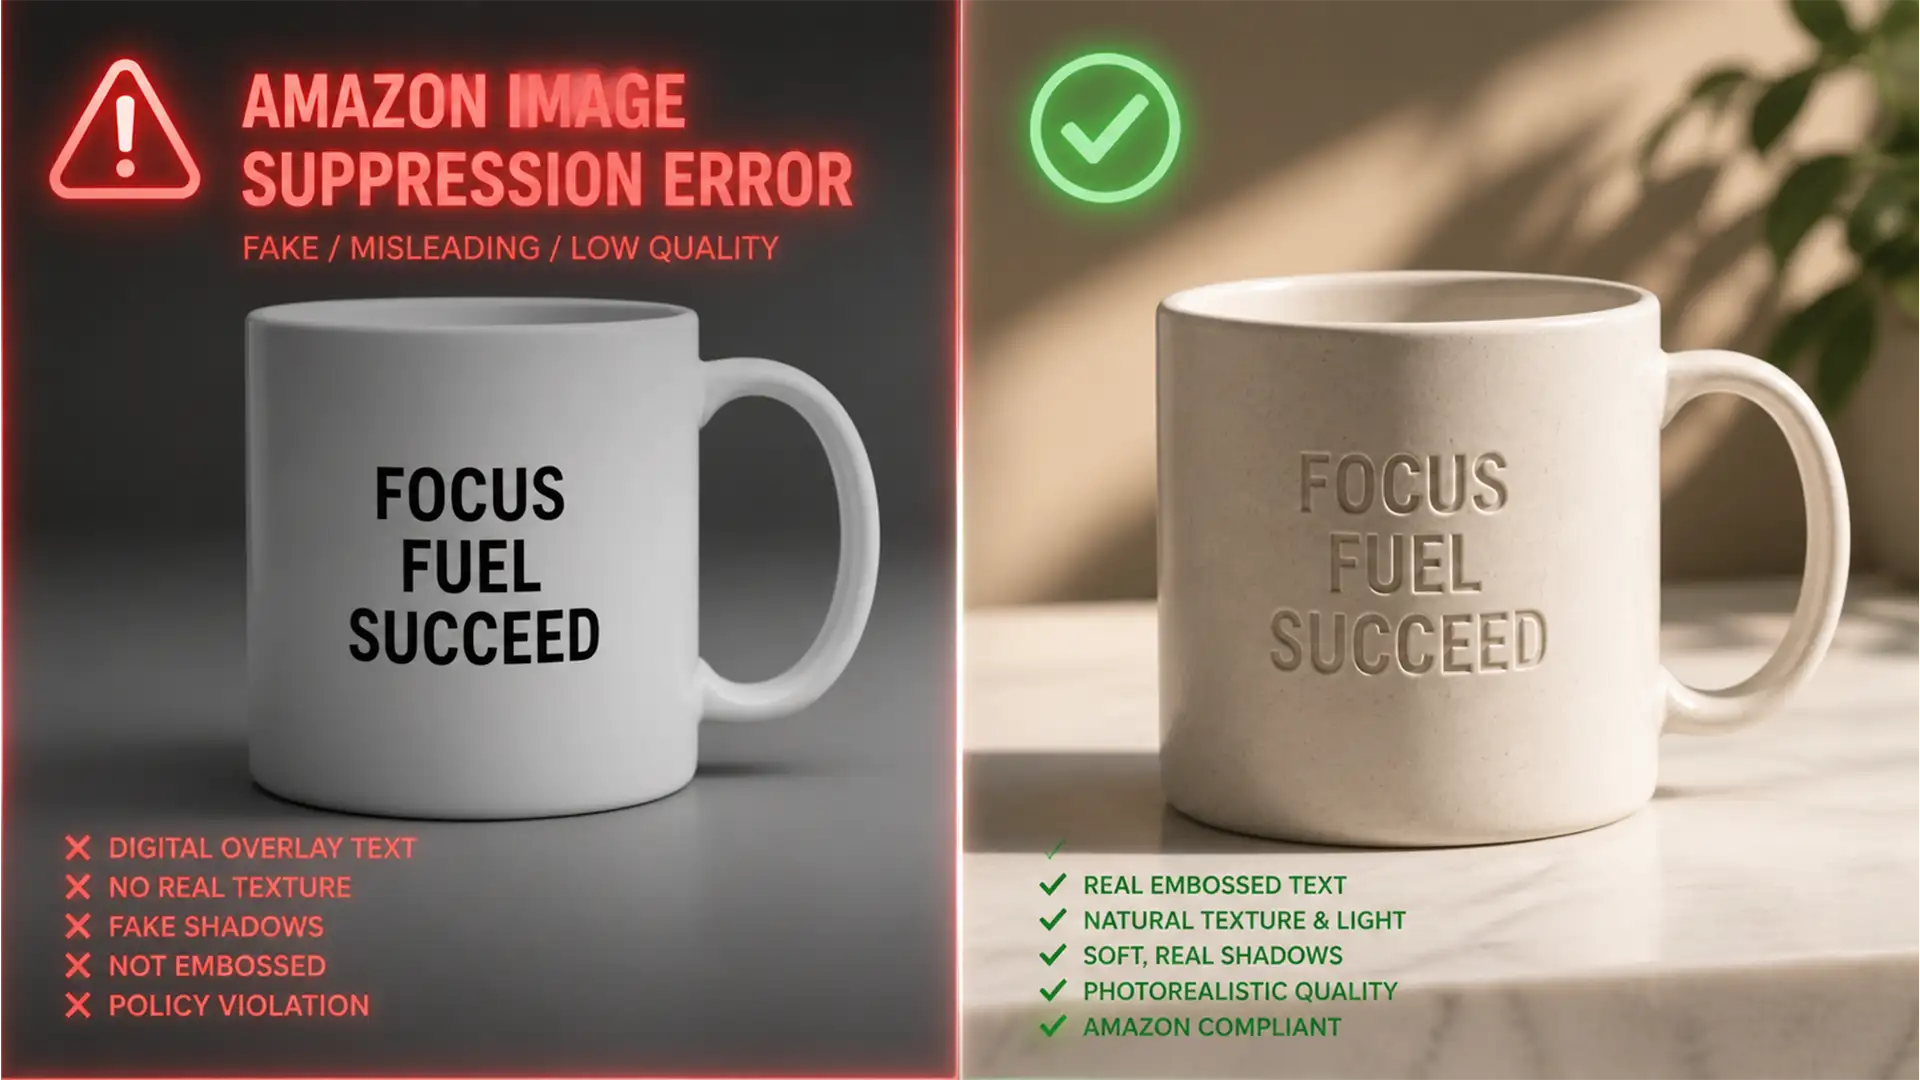
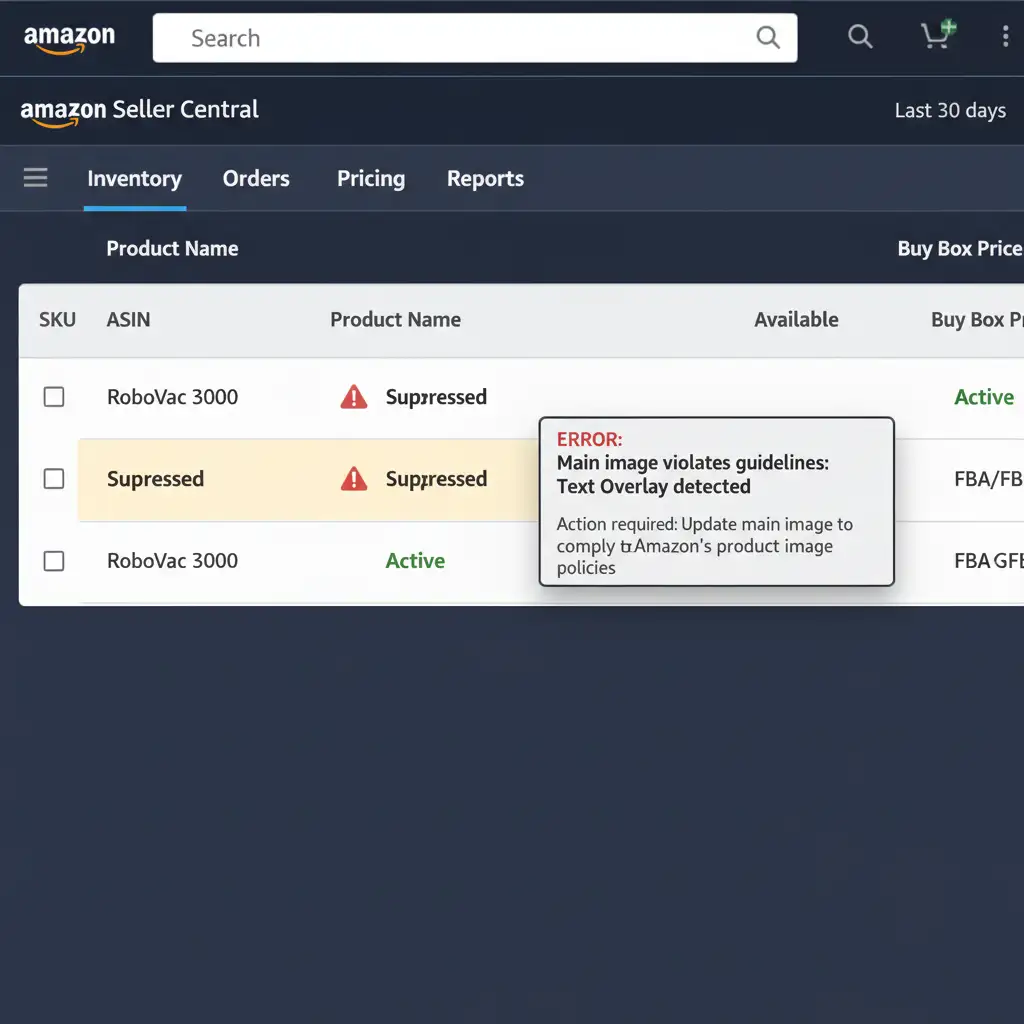
You wake up, check your Seller Central account, and your heart sinks. Your best-selling personalized product listing has been suppressed. The culprit? Amazon’s A9 algorithm and its relentless image recognition bots have flagged your main image for a “Text Overlay” violation.
If you sell custom items, you know the struggle. Flat, digitally pasted text lacks texture conformity and environmental lighting, triggering automated bans. But what if you could outsmart the bots? In this guide, we’ll show you exactly how to bot-proof custom text product photos for Amazon using advanced Photoshop techniques, ensuring your text looks 100% real and stays online.
Why Amazon’s A9 Algorithm Flags Custom Text
Amazon’s main image guidelines strictly prohibit text overlays, logos, and watermarks. While this rule is meant to keep search results clean, it creates a massive headache for sellers offering personalized products (like engraved jewelry, custom mugs, or printed apparel).
When you simply drop a text layer onto a product photo in Photoshop, the pixels are too perfect. The image bots scan for:
- Lack of Texture Conformity: The text doesn’t warp around the physical shape of the object.
- Unnatural Sharpness: Vector-sharp edges that don’t match the camera lens’s focal softness.
- Missing Environmental Lighting: Text that ignores the highlights and shadows of the room.
To bypass these checks, you must trick the bot into registering your text pixels as organic object textures rather than overlaid vectors. Here is how to do it in Photoshop v25.x+.
How to Bot-Proof Custom Text Product Photos on Amazon
Depending on the complexity of your product’s surface, you can use one of three methods to integrate your text seamlessly.
Method A: The Quick Fix (Layer Blending Modes)
If your product has a relatively flat surface with minimal texture, you can use basic Layer Blending Modes to force the underlying shadows to interact with your text.
- Place your text over the product.
- Right-click the text layer and select Rasterize.
- Duplicate your base product photo layer and drag it above the rasterized text layer.
- Change the blending mode of this duplicated product layer to Multiply.
- Drop the opacity of this Multiply layer to 30%.
This instantly forces the natural shadows of the object over the text, grounding it in the environment.
Method B: The Pro Workaround (Displacement Maps and Blend If)
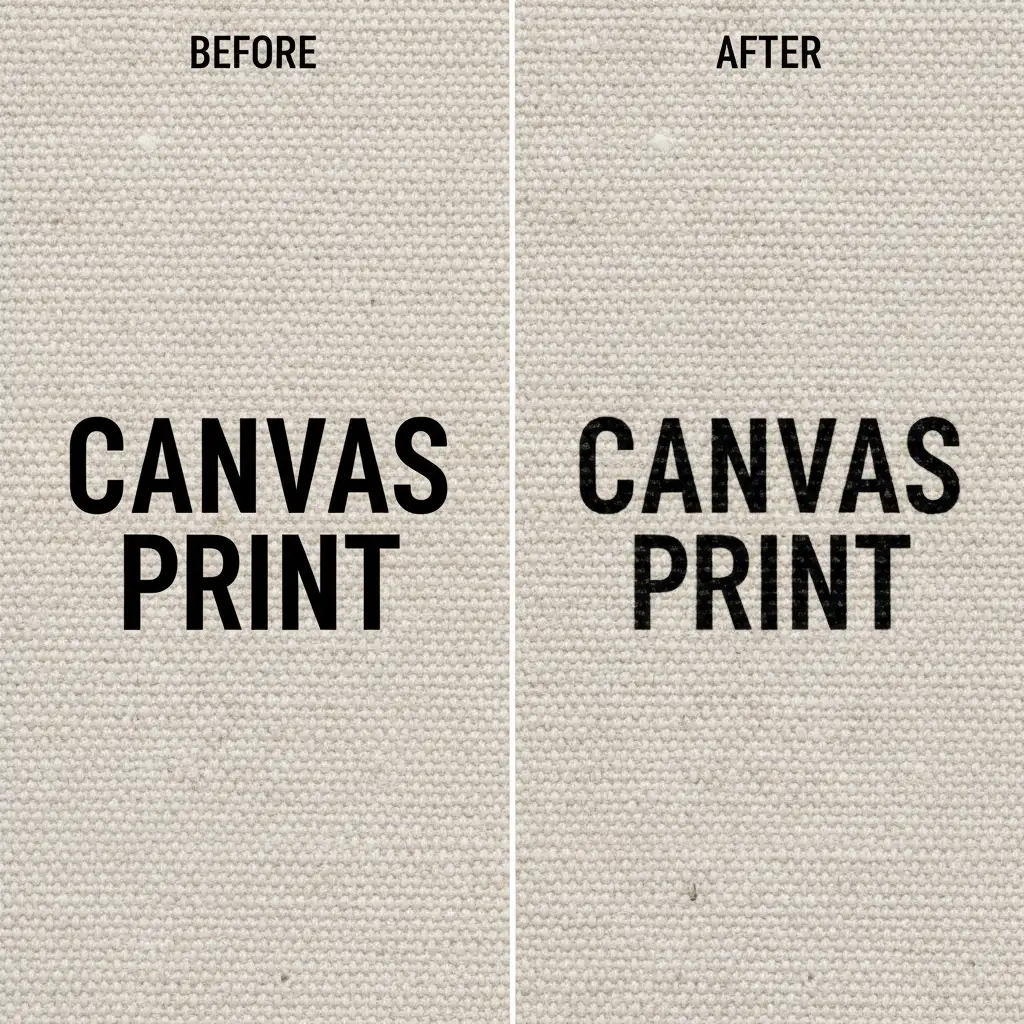
For curved surfaces (like mugs or bottles) or heavy textures (like canvas or wood), a quick blending mode isn’t enough to fool the A9 algorithm. You need a Displacement Map.
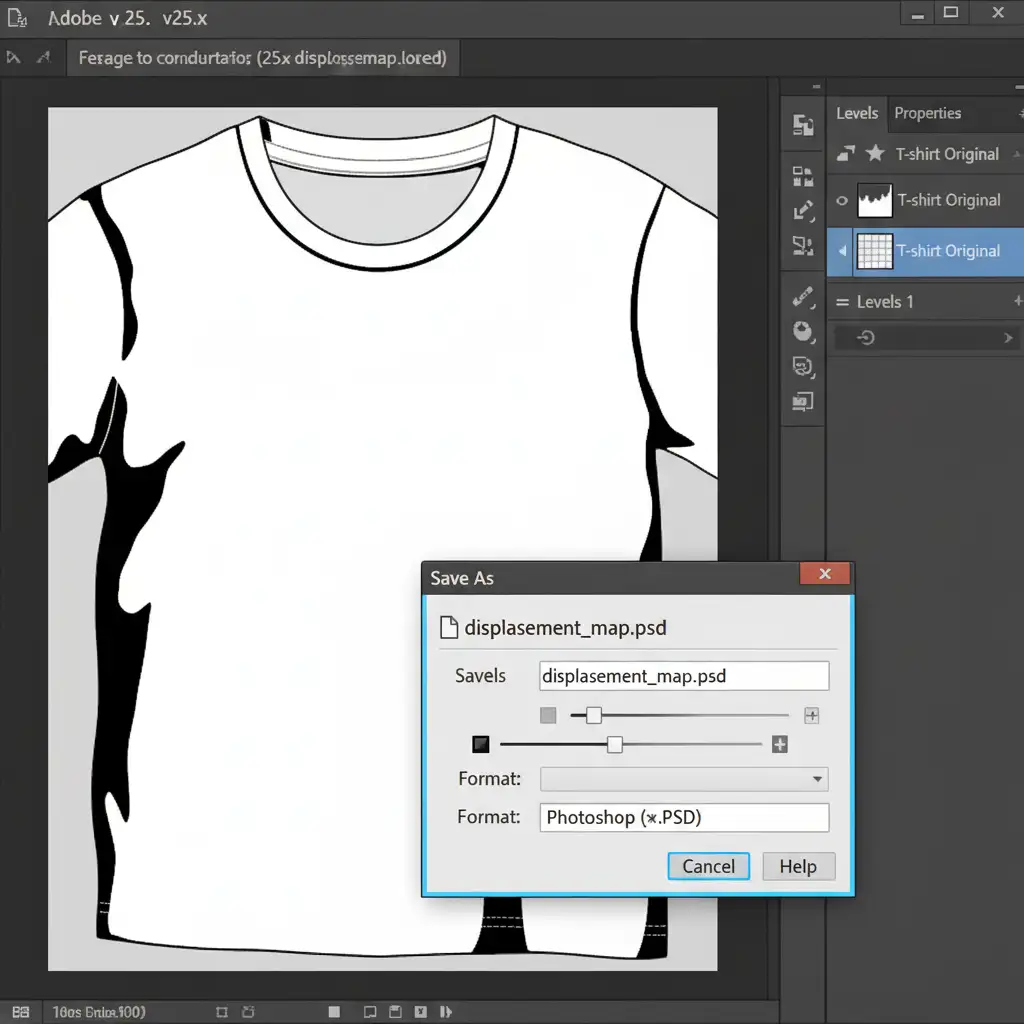
Step 1: Create the Displacement Map
A Displacement Map uses a black-and-white image to tell Photoshop how to warp your text around the 3D topography of your product.
- Duplicate your main product image into a new document.
- Desaturate it to make it completely black and white.
- Use Curves or Levels to create high contrast—make the shadows very dark and the highlights very bright.
- Save this file as a .psd (e.g., map.psd).
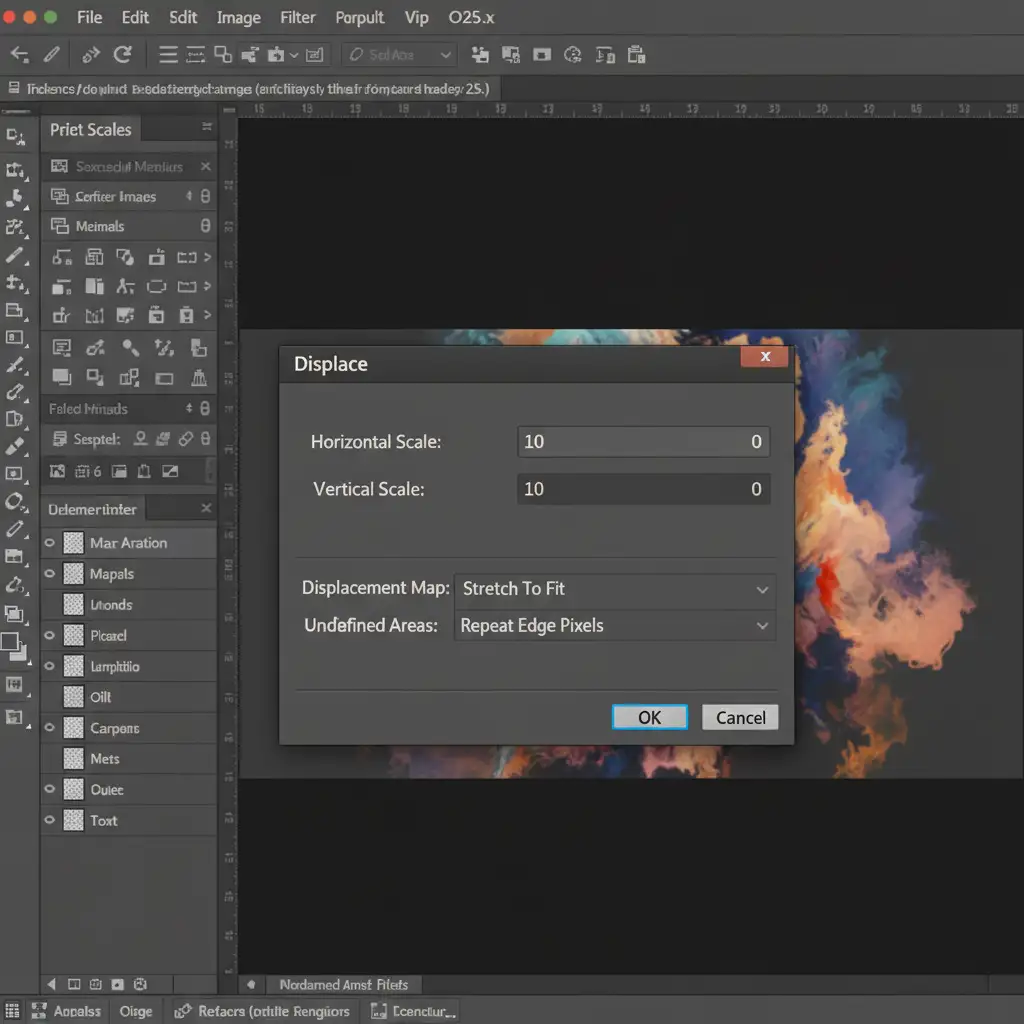
Step 2: Apply the Displacement Map
- Go back to your original document. Convert your text layer into a Smart Object.
- Go to Filter > Distort > Displace.
- Set the Horizontal and Vertical scales (start with 10 for both, but adjust based on your image size).
- Click OK, and select the map.psd file you just saved. Watch your text warp perfectly to the object’s curves!
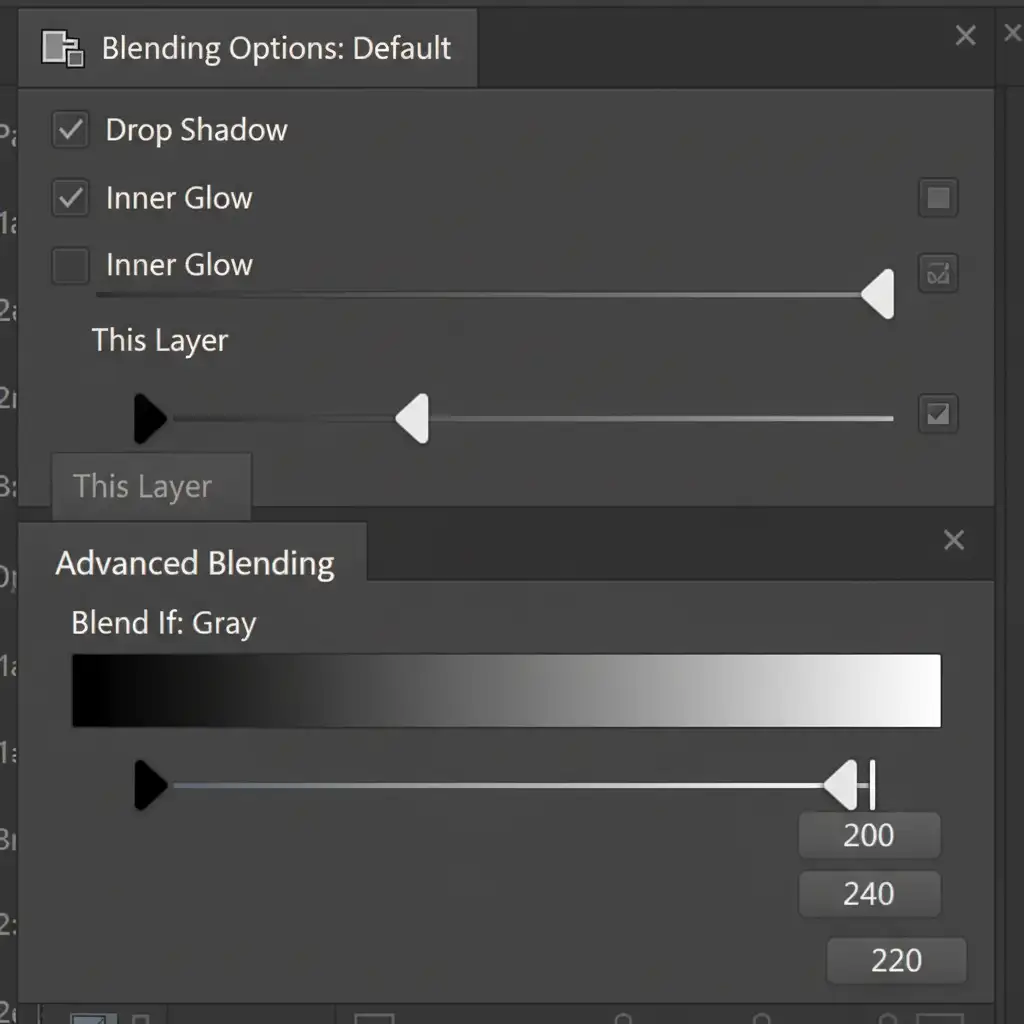
Step 3: Master the ‘Blend If’ Sliders
Now that the text is warped, it needs to sit inside the texture, not just on top of it.
- Double-click your text Smart Object layer to open the Layer Style panel.
- Look at the Blend If section at the bottom, specifically the Underlying Layer slider.
- Hold down the Alt/Option key and click the white triangle on the right side of the slider. This splits the toggle.
- Drag the left half of the split toggle toward the center. You will see the product’s natural highlights begin to shine through the text.
- Repeat this process with the black triangle on the left to bring the natural shadows through the text.
Method C: The Technical Deep-Dive (Lighting Effects & Gaussian Blur)
To guarantee your image survives Amazon’s bot scrutiny, you must finalize the illusion by matching the camera’s physical limitations.
- Lighting Effects: Go to Filter > Render > Lighting Effects. Adjust the digital light source to match the exact angle and intensity of the studio lights used in the original photograph. This ensures the text casts microscopic shadows in the correct direction.
- Gaussian Blur: Digital text is perfectly sharp; photographs are not. Select your text layer and apply Filter > Blur > Gaussian Blur. Set the radius to 0.5px. This incredibly subtle softening matches the focal softness of a camera lens, eliminating the pixel-perfect sharp edges that scream “digital overlay” to an image bot.
Why Risk It? Let the E-Commerce Image Experts Handle It
Bot-proofing custom text product photos for Amazon requires a deep understanding of the A9 algorithm, advanced Photoshop techniques, and a meticulous eye for detail. While Displacement Maps and Blend If sliders are powerful tools, executing them flawlessly across hundreds of product variations is incredibly time-consuming. One mistake, and your top-selling listing could be suppressed for days, costing you thousands in lost revenue.
You shouldn’t have to choose between scaling your business and spending hours tweaking Gaussian Blur settings.
Image Work India and Cloud Retouch specialize in high-volume, photorealistic e-commerce image editing. Our expert retouchers know exactly how to bypass automated image suppression by creating flawless, compliant personalized product renderings that look 100% real.
Avoid costly Amazon listing suspensions and save hours of editing time. Contact Image Work India today to ensure your product listings are striking, compliant, and ready to convert.


