You’ve just used Adobe’s latest AI tools to smooth out a distracting crease on a high-end fashion shoot, but instead of a flawless garment, you are left with a muddy, plastic-looking blur. If you are struggling with Generative Fill clothing wrinkle artifacts, you are not alone.
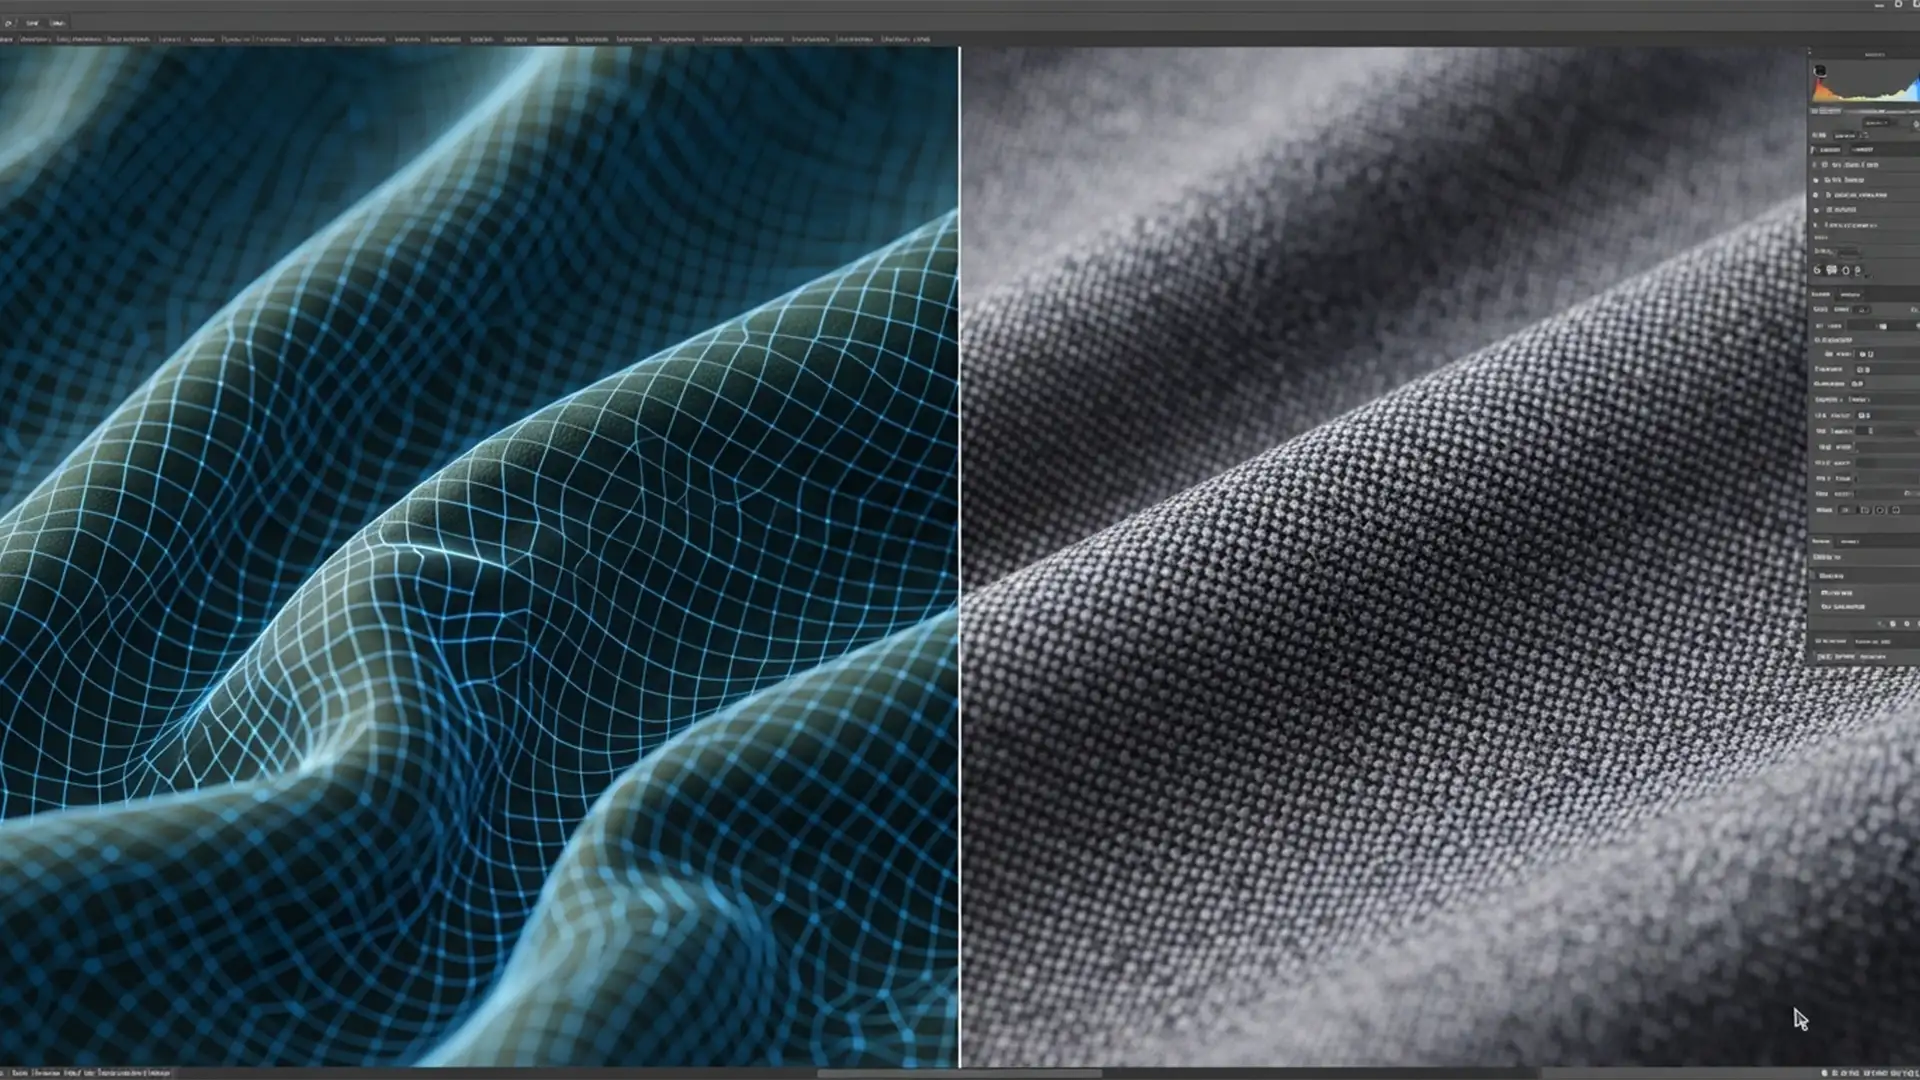
While AI has revolutionized photo editing, Photoshop v25.x through v27.x still struggles with high-frequency details like intricate fabric weaves. When you attempt to remove clothing wrinkles, the software’s inherent 1024px resolution limit often destroys the native garment texture, creating a mismatched patch that ruins the realism of the shot.
In this guide, we will break down the technical reasons behind these blurry AI artifacts and show you three professional workflows to fix them, ensuring your fashion retouching remains crisp, realistic, and pixel-perfect.
Why Generative Fill Destroys Fabric Texture
The core issue lies in how Generative Fill processes image data. When you make a selection, Photoshop sends that data to the cloud, but it is currently capped by a 1024px resolution limit.
If you are working on a high-resolution commercial file (e.g., a 50-megapixel raw image), replacing a large section of a garment forces the AI to stretch a 1024px patch over a much larger area. The result? The underlying color and lighting might be correct, but the high-frequency detail-the actual fabric weave-is obliterated. This creates a smooth, plastic-like anomaly that stands out against the untouched, high-resolution fabric surrounding it.
To solve this, professional retouchers use a combination of AI generation and traditional texture synthesis techniques.
Method A: The Quick Fix (For Minor Wrinkles)
Before relying on heavy AI generation, evaluate the severity of the crease. For minor wrinkles, the best way to avoid AI artifacts is to bypass Generative Fill entirely.
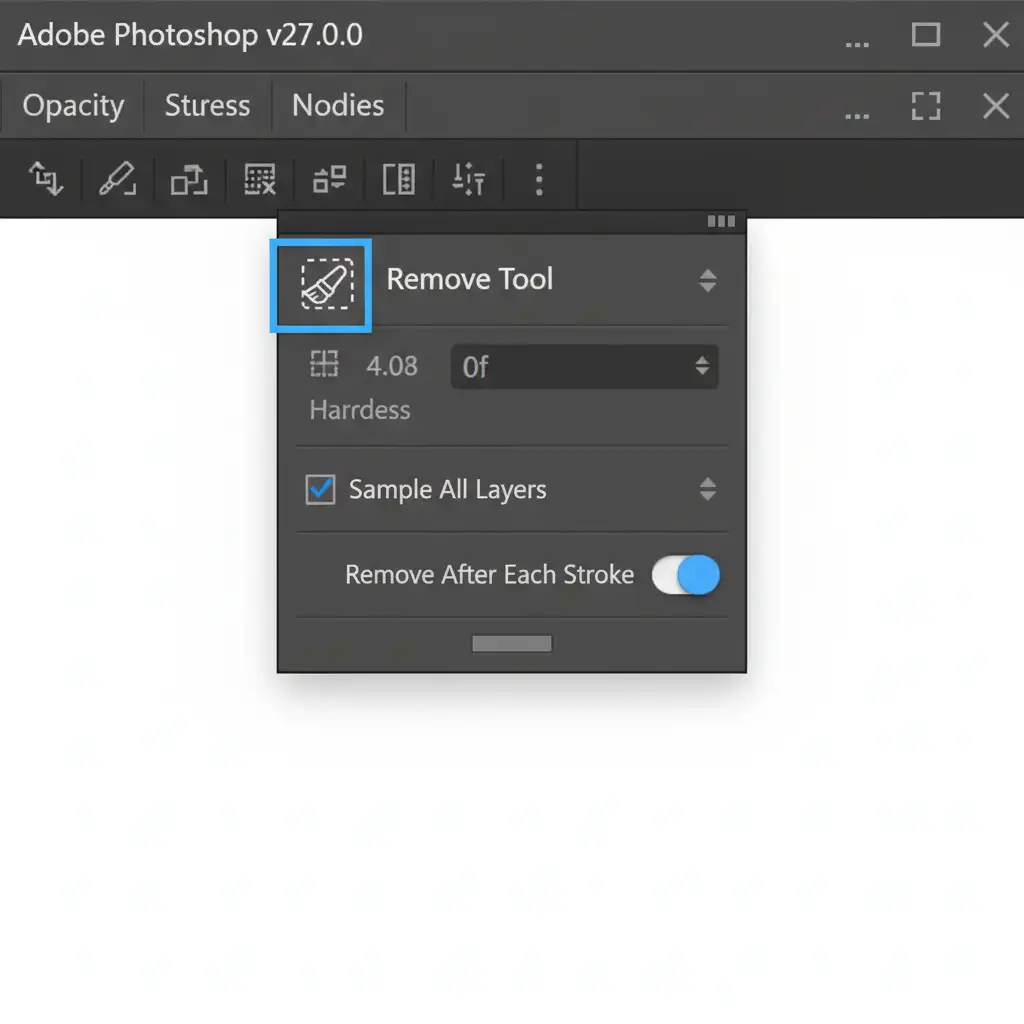
Instead, utilize the Remove Tool. Unlike Generative Fill, the Remove Tool is highly adept at borrowing nearby high-frequency textures without defaulting to a low-resolution cloud generation.
Step-by-Step:
- Create a new blank layer above your image.
- Select the Remove Tool (J).
- In the top options bar, ensure Sample all layers are checked.
- Brush over the minor wrinkles. The tool will seamlessly blend the lighting while maintaining the native fabric weave.
Method B: The Pro Workaround (Texture Synthesis)
When dealing with deep, complex folds that alter the garment’s silhouette, Generative Fill is excellent for rebuilding the underlying color and lighting. However, to fix the resulting AI artifacts, we must reintroduce the original texture using a High Pass filter. Think of this as a targeted frequency separation technique.
Step 1: Generate the Base Correction
Select the wrinkled area and use Generative Fill to smooth the garment. Leave the prompt blank to allow the AI to match the surrounding context.

Step 2: Extract the Original Texture
- Turn off the visibility of your new Generative Fill layer temporarily.
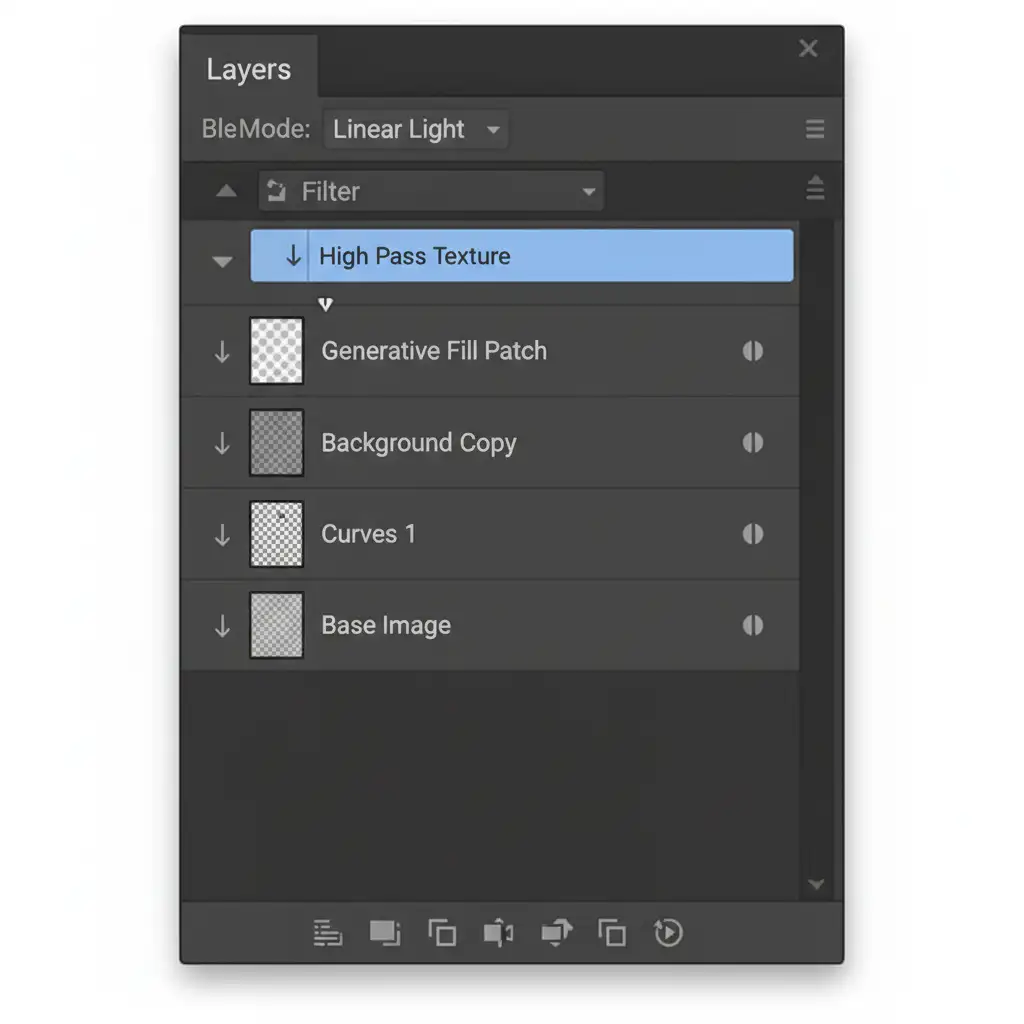
- Select your original background layer, duplicate it (Ctrl/Cmd + J), and drag this duplicate to the very top of your layer stack.
- Turn the Generative Fill layer back on.
- With the duplicated original layer selected, go to Filter > Other > High Pass.
- Adjust the radius until you can just see the sharp details of the fabric weave (usually between 1.5px and 3.0px), but no color or shading. Click OK.
Step 3: Blend and Clip
- Change the blending mode of your High Pass texture layer to Linear Light blending. This drops out the neutral gray and applies only the sharp texture.
- Hold Alt/Option and hover between your High Pass layer and the Generative Fill layer below it. Click to create a clipping mask.
Now, the crisp, original fabric weave is overlaid exclusively onto the blurry AI patch, completely eliminating the low-res artifact.

Method C: The Technical Deep-Dive (Bypassing the 1024px Limit)
If you are working on massive files (like billboards or high-end print editorials) and need to rebuild large sections of a garment, applying a High Pass filter might not be enough if the underlying AI generation is too degraded.
To bypass the 1024px resolution limit entirely:
- Split the Selection: Instead of selecting the entire wrinkled area at once, slice the problem area into smaller, overlapping squares (under 1000×1000 pixels each).
- Batch Generation: Process each small square with Generative Fill separately. Because the selection is small, Photoshop will render the AI generation at a 1:1 pixel ratio, preserving much more native detail.
- Blend and Match Noise: Group the generated layers. Add a Layer Mask to gently blend the overlapping edges with a soft brush. Finally, add a uniform layer of fine grain (Filter > Noise > Add Noise) set to 1-2% to unify the generated patches with the camera’s original sensor noise.
Scale Your Fashion Retouching with Image Work India
Fixing Generative Fill clothing wrinkle artifacts manually is highly effective, but it is also incredibly time-consuming. When you are processing hundreds of images for an e-commerce catalog or a seasonal lookbook, spending 10 minutes per image rebuilding fabric weaves simply isn’t scalable.
That is where we step in. At Image Work India and Cloud Retouch, we specialize in high-volume, pixel-perfect apparel retouching. Our team of expert retouchers combines cutting-edge AI workflows with advanced manual techniques-like custom frequency separation and texture synthesis-to deliver flawless garments that retain every single thread of their original quality.
Stop struggling with inconsistent AI retouching and blurry artifacts. Let us handle the heavy lifting so you can focus on shooting. Contact Image Work India today to discuss your project and discover how we can elevate your brand’s visual standards.


