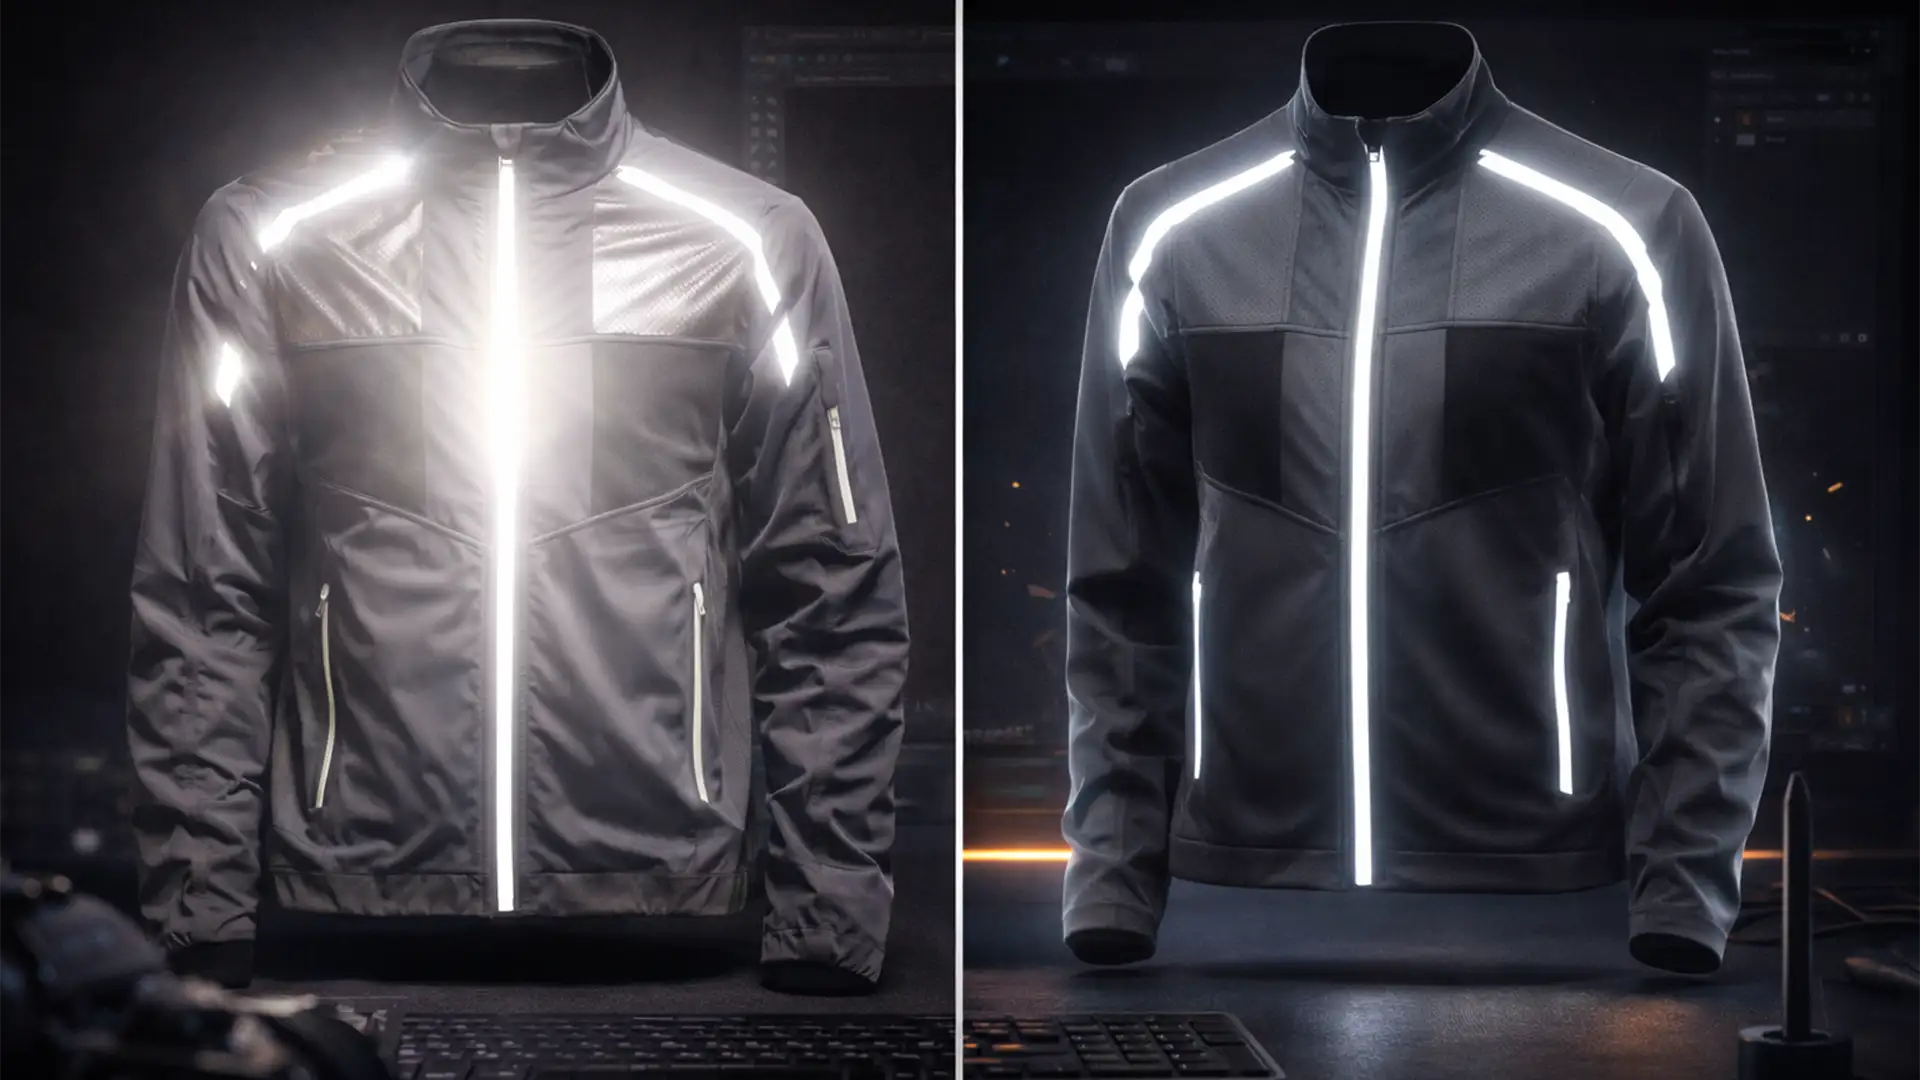
E-commerce retouchers know the nightmare: you run an automated AI background removal tool on a high-end activewear jacket, and the results are disastrous. The 3M Scotchlite reflective strips bounce the studio flash, creating blown-out highlights that blend directly into the white background. Worse, sheer mesh panels expose the physical plastic mannequin underneath, ruining the illusion of a floating garment. While one-click AI tools are great for basic apparel, they cannot differentiate sheer fabric from a dummy. To achieve a flawless invisible mannequin service for reflective activewear, you must ditch the automation and rely on advanced manual compositing techniques.
Here is exactly how to edit the impossible.
Why Automated AI Tools Fail on Complex Activewear
Automated selection tools like “Select Subject” rely on edge contrast. When shooting reflective activewear, the flash bounces off safety strips, blowing out the edges and matching the exact luminosity of your pure white (RGB 255) e-commerce background.
Furthermore, sheer mesh—a staple in modern athletic wear—is semi-transparent. AI cannot separate the foreground mesh texture from the background plastic mannequin. The result? Jagged edges, lost reflective details, and a visible dummy that requires complete manual reconstruction.
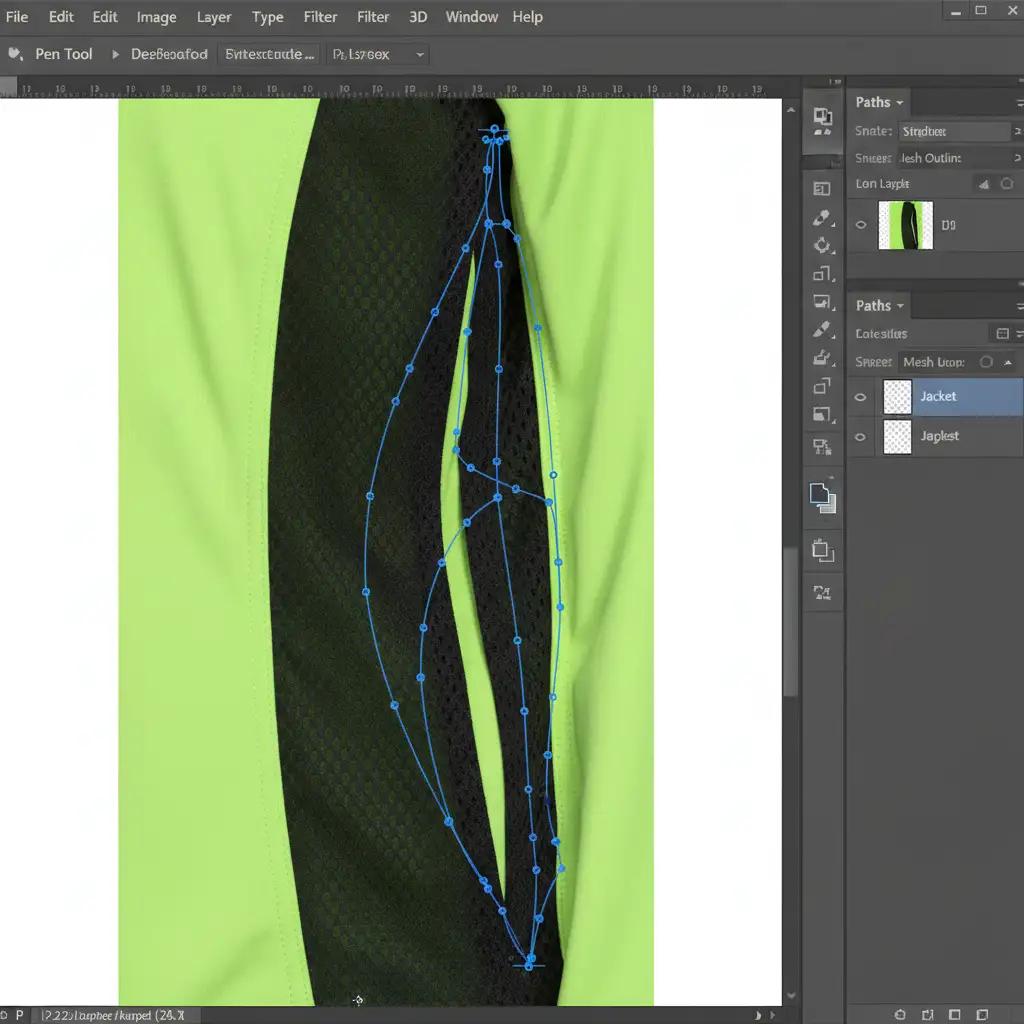
Method A: The Quick Fix Using Strict Clipping Paths
When dealing with glowing reflective trims, automated masking will leave you with a glowing, haloed mess. The first step to a clean ghost mannequin composite is taking manual control.
- Abandon Automated Selections: Select the Pen Tool (P) in Photoshop.
- Draw a Strict Clipping Path: Trace the outline of the garment, but bring your anchor points 1 to 2 pixels inside the edge of the fabric.
- Cut the Spill: By cutting slightly inside the garment, you completely avoid capturing the background spill or the jagged, blown-out light flares caused by the reflective strips.
Method B: The Pro Workaround for Sheer Mesh Panels
When the mannequin is visible through sheer mesh, you cannot simply erase the dummy—you must rebuild the garment’s interior.
Step 1: Extracting the Mesh Texture
Use Luminosity Masking to isolate the intricate weave of the mesh from the plastic dummy behind it. By targeting the specific highlight values of the fabric, you can create an Alpha Channel that holds only the thread details.
Step 2: Rebuilding the Inner Lining
Shoot a separate image of the garment inside-out to capture the inner lining.
- Place this inner lining layer behind your mesh layer.
- Change the mesh layer’s Blending Modes to Multiply. This drops out the lighter tones (the shiny plastic mannequin) and beautifully merges the dark mesh texture with the inner fabric layer.
- If the texture looks uneven, use Frequency Separation to smooth out the underlying lighting without destroying the fabric’s weave.
Method C: The Technical Deep-Dive – Multi-Exposure Compositing
For the highest tier of e-commerce imagery, a single exposure rarely captures both the matte fabric and the highly reflective 3M strips perfectly.
Recovering the Reflective Details
You need to create a Composite Image using two distinct studio shots:
- Frame 1 (Normal Exposure): Expose correctly for the activewear fabric.
- Frame 2 (Underexposed): Drop your studio strobes to capture the precise, glowing detail of the reflective tape without blowing out the highlights.
Bring both exposures into Photoshop and use layer masks to brush in the perfectly exposed reflective strips over the normally exposed fabric.
Reconstructing the Invisible Neck Joint
The final hallmark of a premium ghost mannequin edit is the neck joint. When inserting the back collar into the front chest curve, the alignment must be mathematically perfect.
Instead of stretching the image blindly, activate Puppet Warp. Drop pins on the corners of the collar and the center tag. Gently manipulate the mesh grid to curve the back insert so it aligns flawlessly with the front collar seam. For ultra-realistic draping, apply a subtle Displacement Map so the inner fabric naturally follows the lighting contours of the front chest.

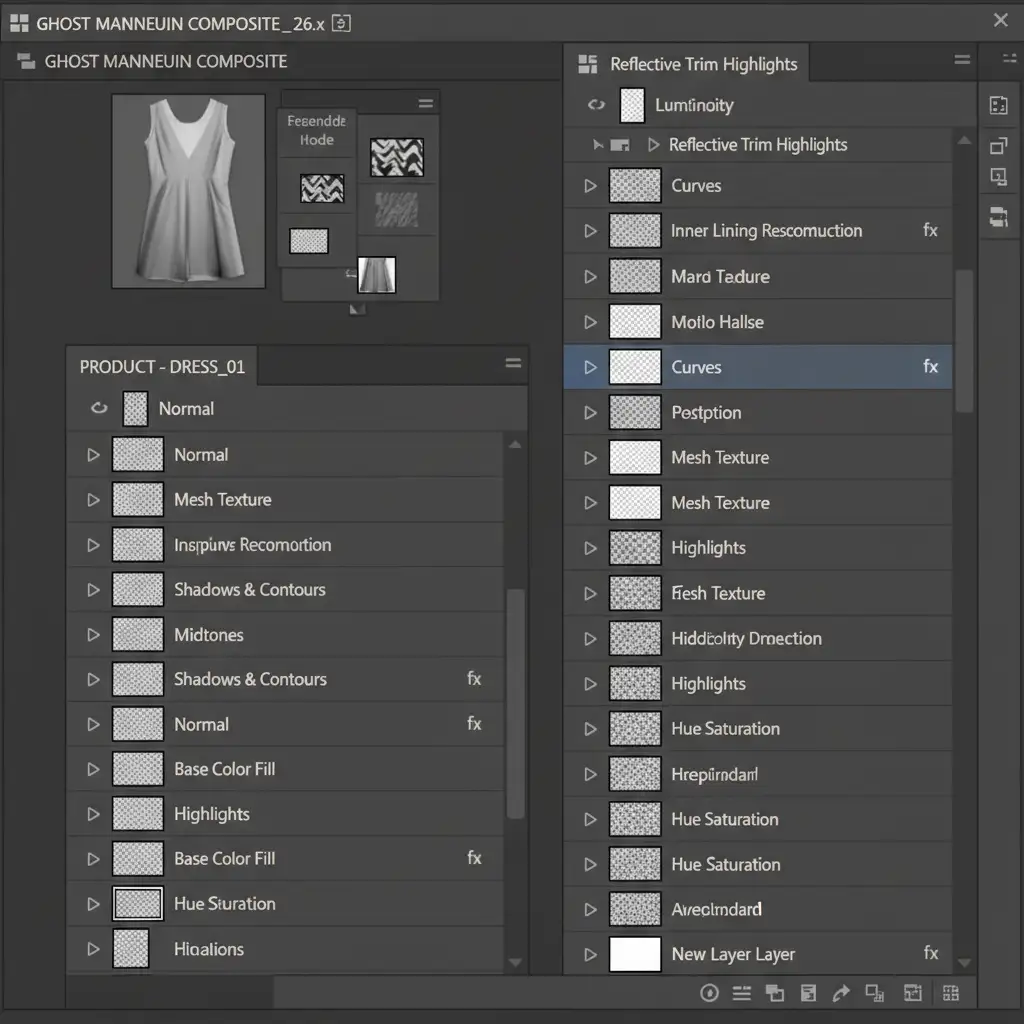
The Ultimate Solution for High-Volume E-Commerce
Editing complex athletic wear requires deep technical knowledge, precise pen tool skills, and a mastery of advanced compositing. When you are processing hundreds of SKUs per season, spending 30 minutes on a single mesh jacket simply isn’t scalable.
Struggling to get clean results with complex athletic wear? Let Image Work India and Cloud Retouch handle your high-volume, highly complex photo editing needs. We provide the industry’s leading invisible mannequin service for reflective activewear. Our expert retouchers guarantee pixel-perfect clipping paths, flawless mesh reconstruction, and perfectly balanced reflective trims—delivered on time, every time.
[Contact Image Work India today to get a free trial on your most difficult activewear images!]


