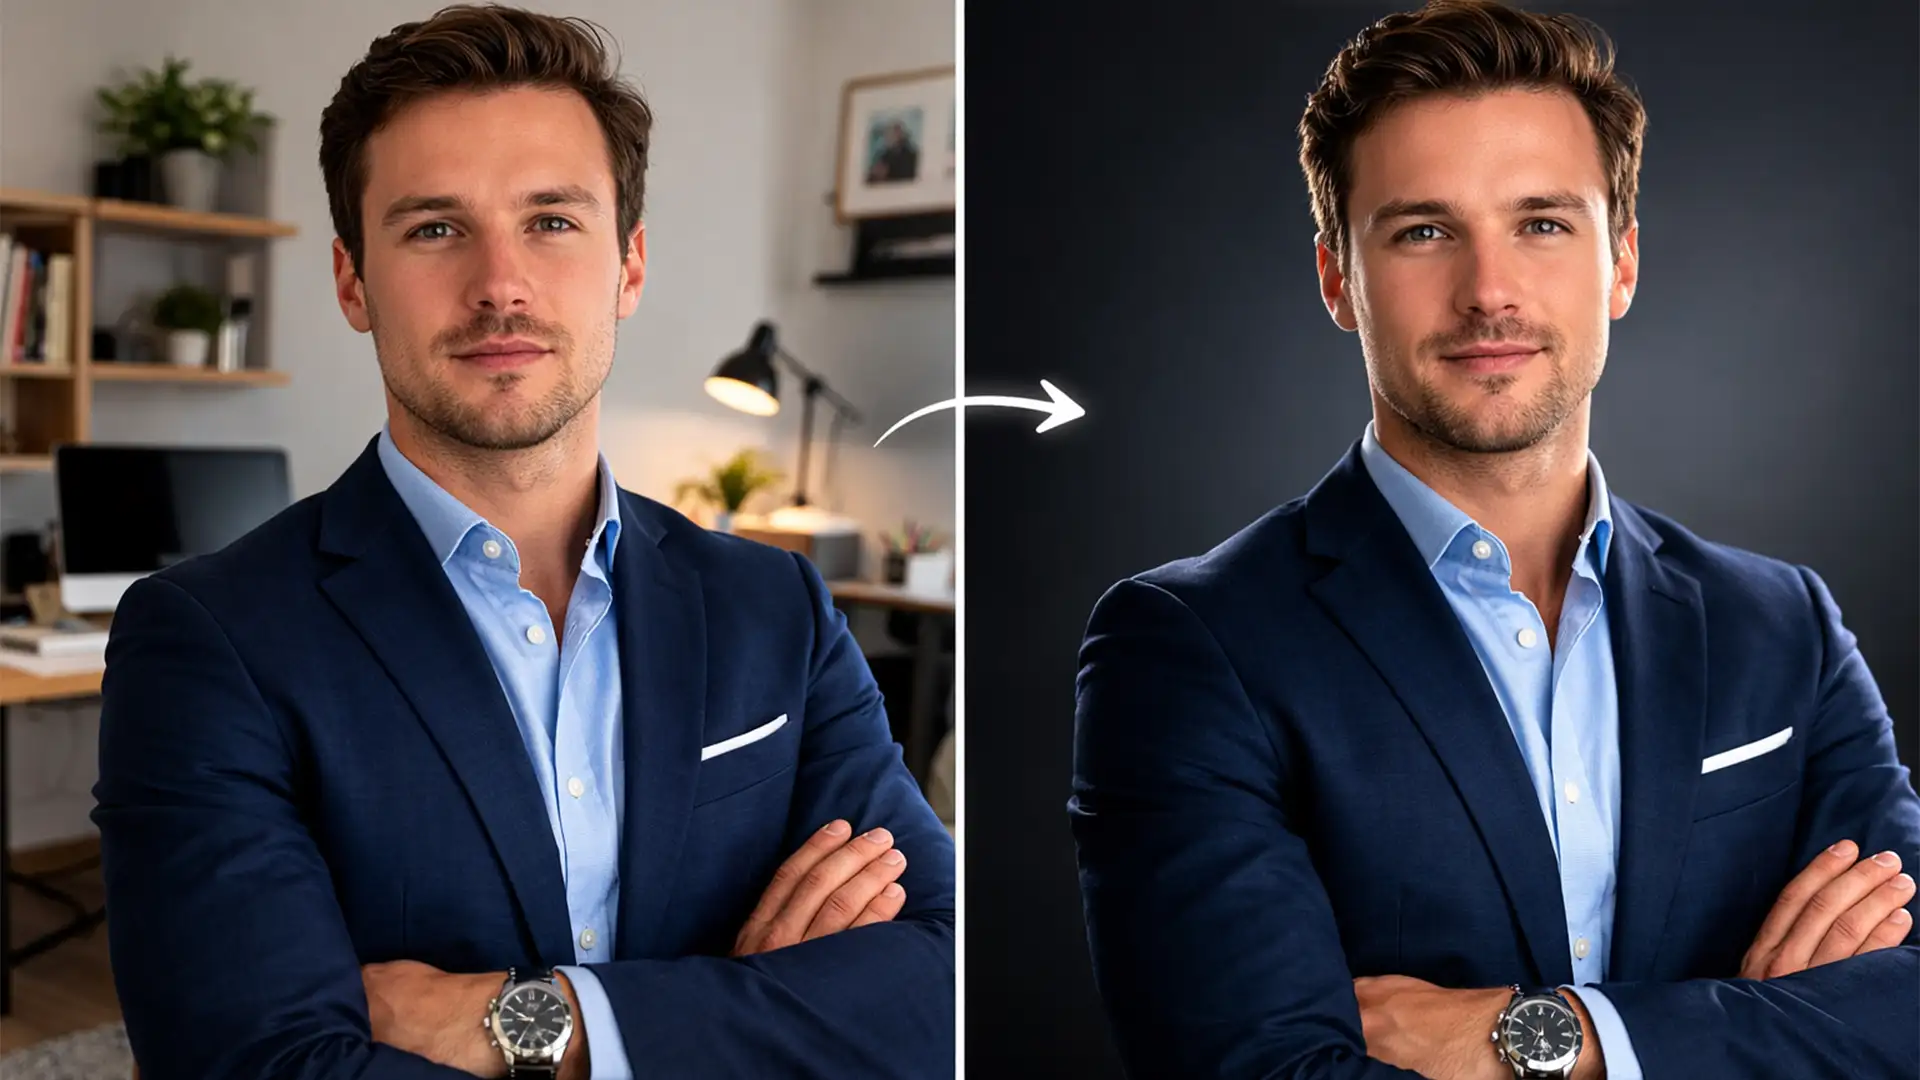
Managing a remote team is great for productivity, but it is a logistical nightmare for your company directory. When remote employees submit headshots taken in flat, mixed ambient lighting, pasting them onto a professional corporate studio background often results in a fake, “floating” look. The culprit? Mismatched global illumination, contrasting color temperatures, and conflicting shadow angles. You cannot realistically put everyone in the same physical studio, but you can fix the lighting digitally.
In this guide, we will show you exactly how to match home headshot lighting to a corporate studio background in Adobe Photoshop CC 2024 (v25.x). Whether you need a quick automated fix or a professional manual sculpt, these techniques will ensure your team directory looks cohesive and on-brand.
The Core Problem: Flat Home Lighting vs. Studio Strobes
The fundamental issue with compositing remote headshots lies in the lighting environment. A typical home environment uses flat ambient lighting-often a mix of window light and warm overhead bulbs-resulting in a low contrast ratio and a mixed color temperature.
Conversely, a corporate studio background implies directional strobe lighting, which features distinct highlight fall-off, deep shadows, and specific global illumination parameters. To bridge this gap, a retoucher must digitally sculpt the flatly lit subject to mirror the exact artificial lighting conditions of the new background.
Step-by-Step: How to Match Home Headshot Lighting to a Corporate Studio Background
Depending on your time constraints and quality requirements, Photoshop offers three distinct workflows to integrate your subject seamlessly.
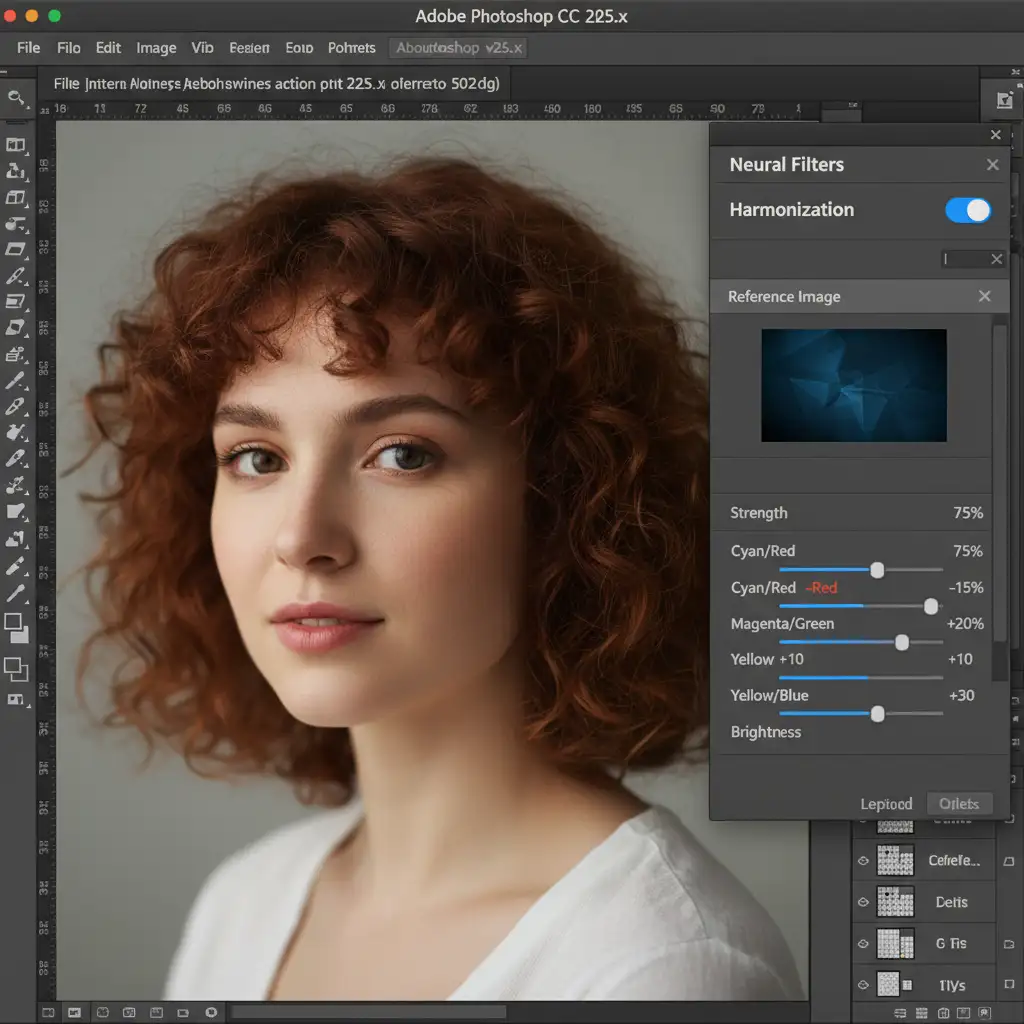
Method 1: The Quick Fix Using Neural Filters
If you are processing a large batch of employee photos and need a fast, automated baseline, Adobe’s AI-powered Harmonization filter is your starting point.
- Extract the Subject: Use the Object Selection Tool to mask the remote employee and place them onto your corporate studio background layer.
- Open Neural Filters: Navigate to Filter > Neural Filters.
- Apply Harmonization: Toggle on the Harmonization filter.
- Select the Reference: In the right-hand panel, select your corporate studio background layer as the Reference Image.
- Refine: Adjust the Strength, Brightness, and Saturation sliders until the ambient color of the subject matches the background.
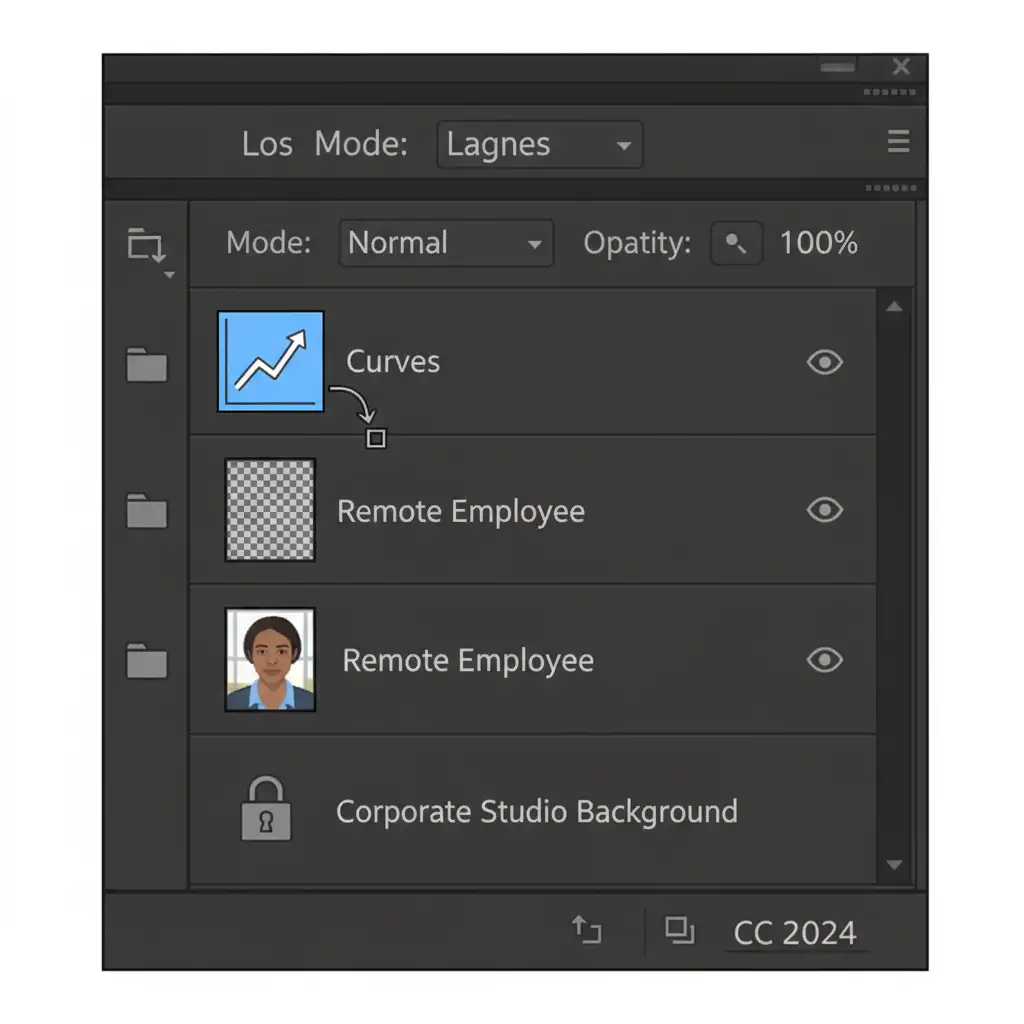
Method 2: The Pro Workaround Using Curves Adjustments
For precise control over contrast ratios and color grading, manual adjustment layers are superior to automated filters.
- Create a Curves Layer: Add a Curves adjustment layer directly above your extracted subject.
- Clip to Subject: Right-click the Curves layer and select “Create Clipping Mask” (or Alt/Option-click between the layers). This ensures your color adjustments only affect the employee, not the background.
- Sample the Background: Open the Curves properties panel. Select the Black Point eyedropper and click the darkest shadow on your studio background. Select the White Point eyedropper and click the brightest highlight. Finally, use the Gray Point eyedropper to sample a neutral midtone.
- Equalize: This process mathematically equalizes the contrast ratio and color temperature of the subject to match the studio environment.
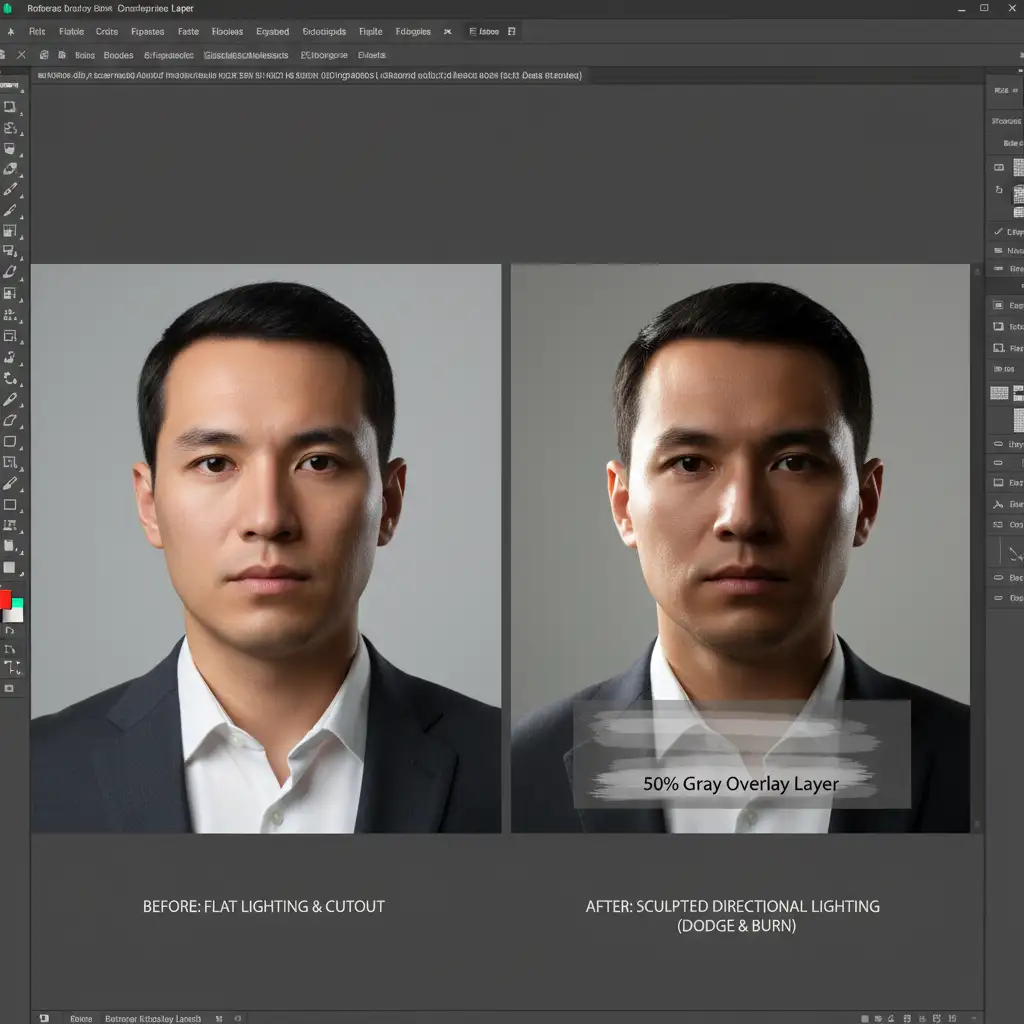
Method 3: The Technical Deep-Dive (Dodge and Burn Sculpting)
Even with perfect color matching, a flatly lit subject will still look pasted if the directional lighting doesn’t match. To fix this, we must manually sculpt the light.
- Create a 50% Gray Layer: Add a new blank layer above your subject. Go to Edit > Fill, choose 50% Gray, and click OK.
- Set Blend Mode: Change this layer’s blending mode to Overlay. Apply a clipping mask to the subject layer.
- Analyze the Light: Look at the studio background. Where is the light coming from? If the background has a bright spot on the left, the light source is on the left.
- Dodge and Burn: Select the Dodge and burn tools. Set the tool exposure very low (around 5%).
- Sculpt: Paint highlights (Dodge) on the side of the face and shoulders facing the light source. Paint shadows (Burn) on the opposite side. This non-destructive technique perfectly mimics artificial strobe lighting angles.
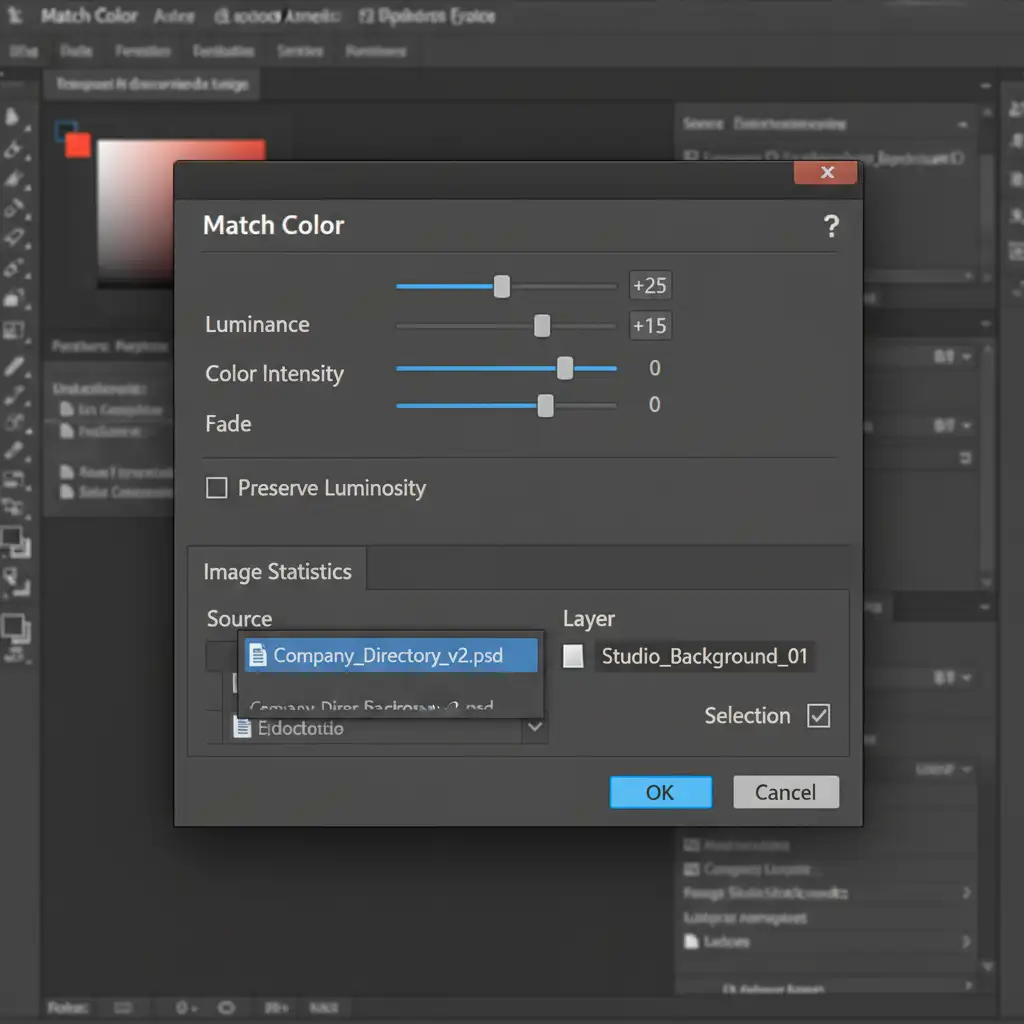
Perfecting the Details: Match Color and Catchlights
To finalize the integration, pay attention to the micro-details.
If your Curves adjustment left a slight color cast, utilize the Match Color tool. Navigate to Image > Adjustments > Match Color. Select your current working document as the Source, and choose the studio background layer as the Target. Adjust the Luminance and Color Intensity to fine-tune the blend.
Finally, zoom in on the subject’s eyes. Flat home lighting often lacks distinct catchlights (the reflection of the light source in the eye). To simulate a studio softbox, use a small, soft white brush on a new layer to paint a subtle, curved reflection in the upper quadrant of the iris, matching the direction of your newly sculpted light.
Scale Your Corporate Headshot Retouching with Image Work India
Learning how to match home headshot lighting to a corporate studio background is an invaluable skill, but executing this highly technical process across a directory of 50, 500, or 5,000 remote employees is incredibly time-consuming.
If you need a flawless, uniform company directory without the bottleneck of manual editing, let the experts handle it. Image Work India and Cloud Retouch specialize in high-volume, premium corporate headshot retouching. Our team of professional retouchers handles precise background replacements, advanced color temperature matching, and non-destructive lighting harmonization to ensure your remote teams look like they were photographed in the exact same high-end studio.
Contact Image Work India today to streamline your corporate image and guarantee flawless consistency across your brand.


