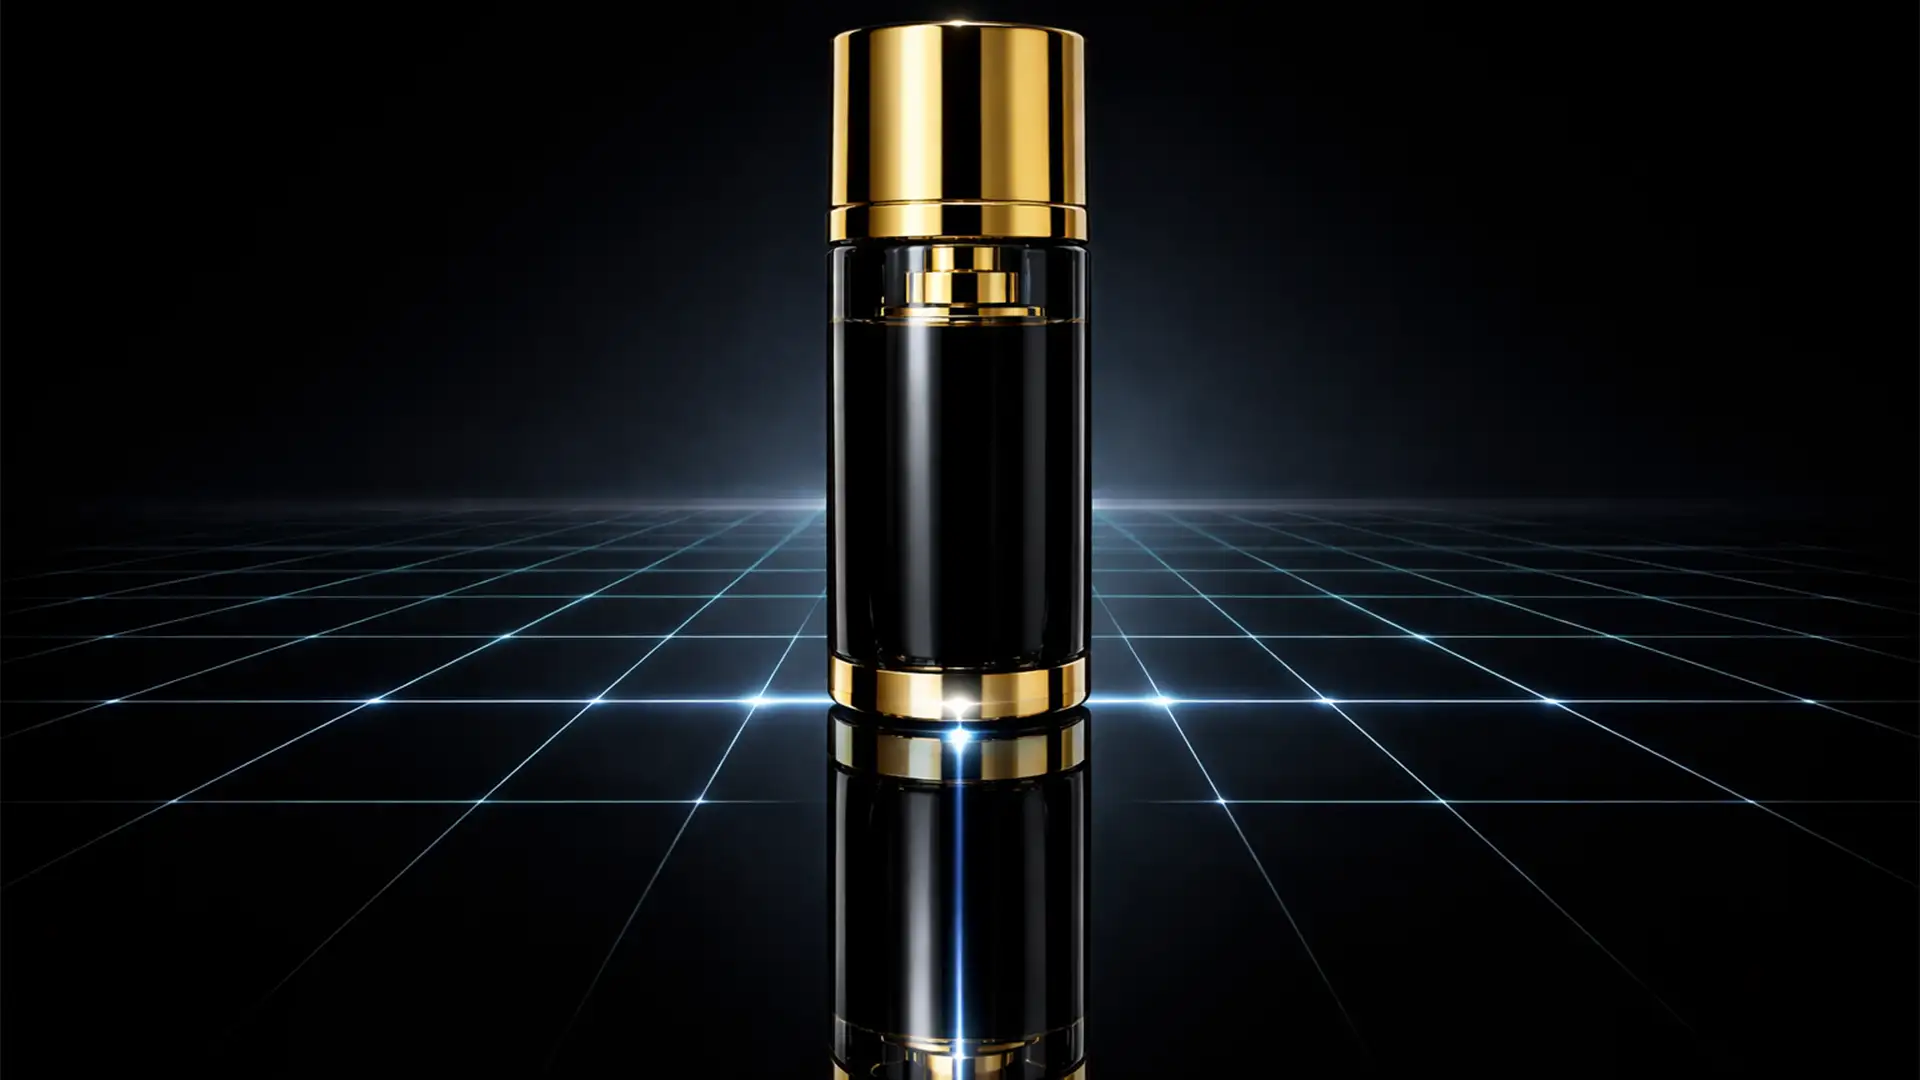
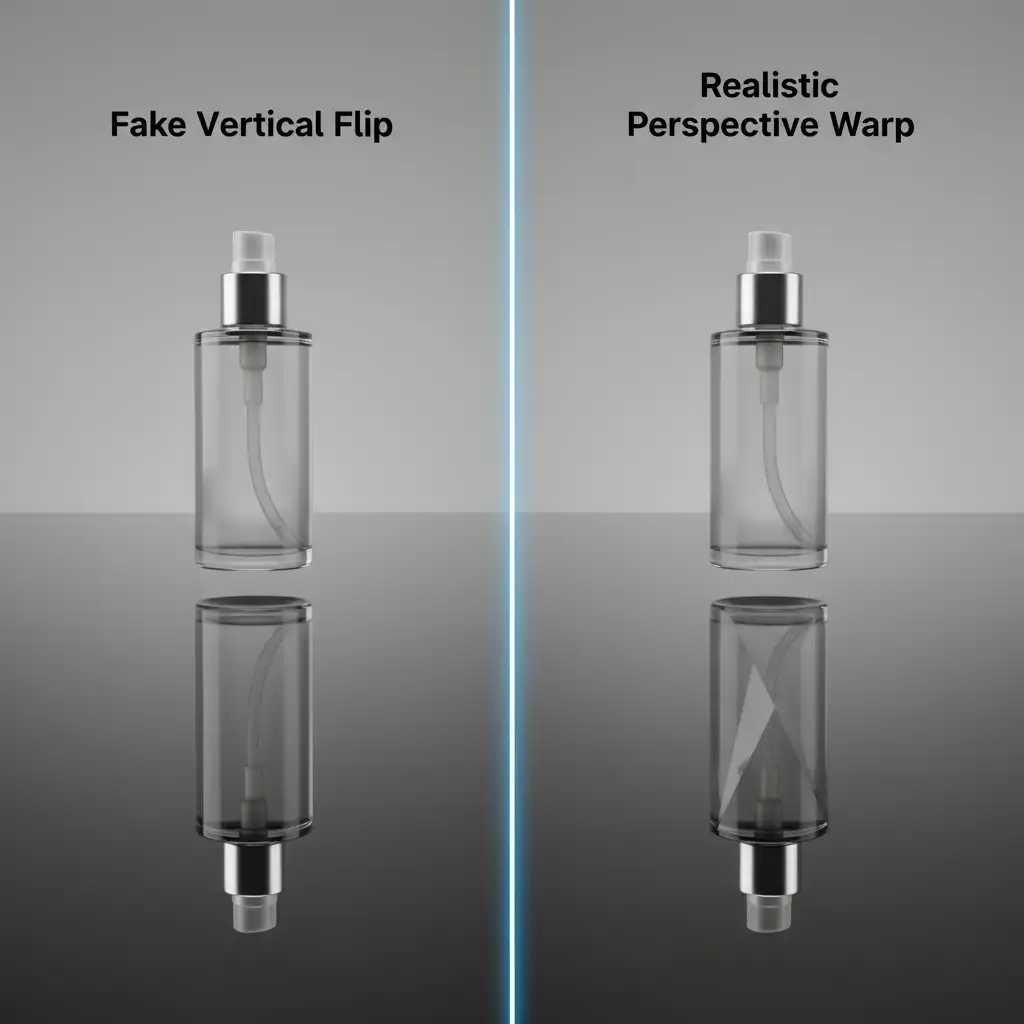
If you are retouching products for an e-commerce catalog, you have likely duplicated a product layer, hit “Flip Vertical,” and instantly realized something was wrong. The reflection looks detached, floating, and mathematically incorrect. Why? Because a simple vertical flip completely ignores the camera’s original angle and lens perspective. When applied to 3D objects like cylindrical cosmetics bottles or boxy electronics, a flipped reflection breaks the illusion of realism, making your high-end imagery look amateurish.
To fix this, professional retouchers don’t rely on basic transform tools. Instead, they use Photoshop’s Perspective Warp to accurately manipulate reflection planes, matching the exact floor perspective and vanishing point of the shot. Here is the definitive guide to creating flawless, realistic product reflections in Adobe Photoshop CC v24.x and v25.x.
Why the Standard “Vertical Flip” Fails for 3D Objects
When you photograph a product, the camera looks slightly down at it, capturing the top and front planes. If you simply flip that image upside down to create a reflection, you are mirroring an angle that physically cannot exist on the ground plane. The bottom of the product won’t align with the reflection, creating a visual gap.
Method A: The Quick Fix (And Why It’s Limited)
For completely flat objects (like a piece of paper or a flat-facing smartphone), you can sometimes get away with standard transform tools.
To do this, duplicate the layer, flip it vertically, press Ctrl/Cmd+T, right-click, and select Distort Transform. By pulling the bottom corners up and inward, you can fake a basic perspective shift. However, the moment you apply this to complex 3D shapes, the geometry distorts unnaturally. For true e-commerce retouching, you need a more robust solution.
Method B: The Pro Workaround Using Perspective Warp
To achieve high-end, realistic product reflections, you need to define the actual geometry of the object. This is where Photoshop’s Perspective Warp tool becomes essential.
Step 1: Convert to a Smart Object
Never warp rasterized pixels directly. Duplicate your isolated product layer, right-click the duplicate, and select Convert to Smart Object. This preserves your image data, allowing you to edit the warp non-destructively later. Flip this Smart Object vertically and drag it below the original product.
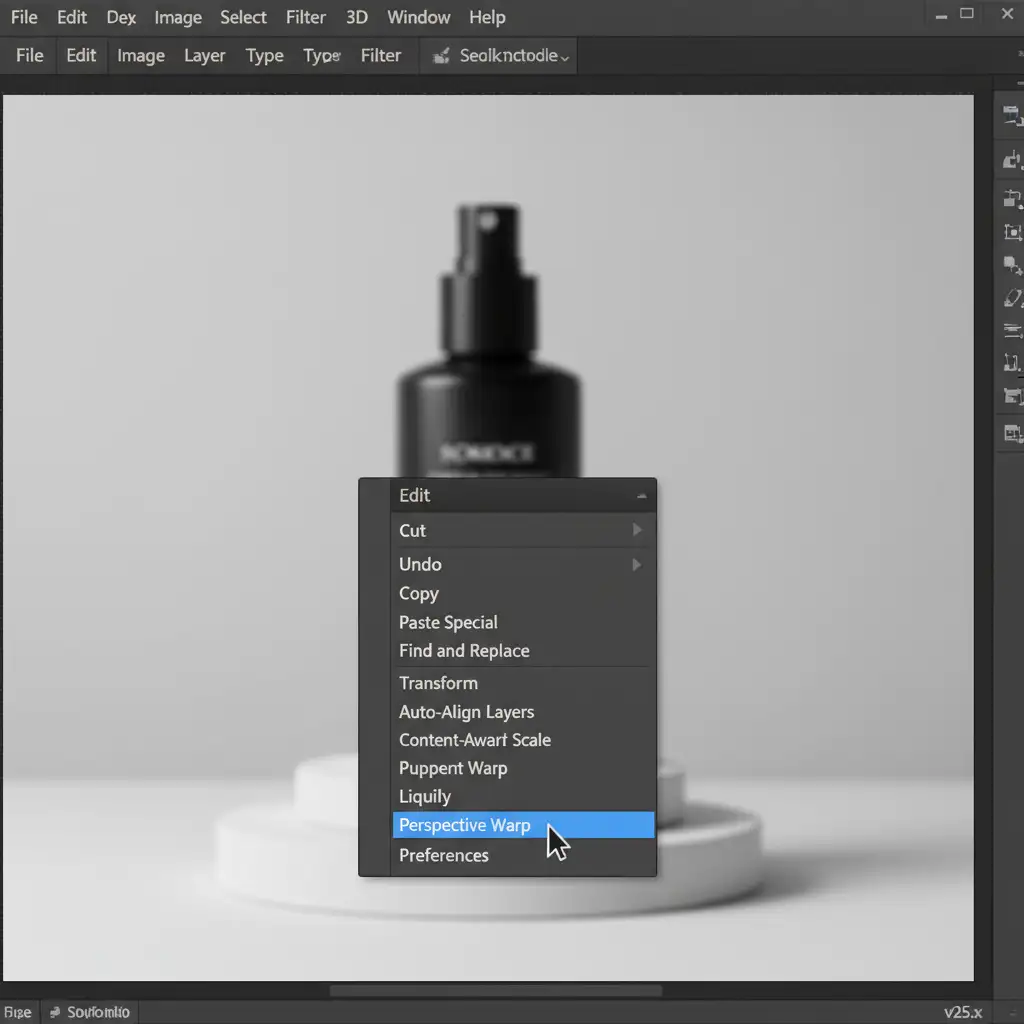
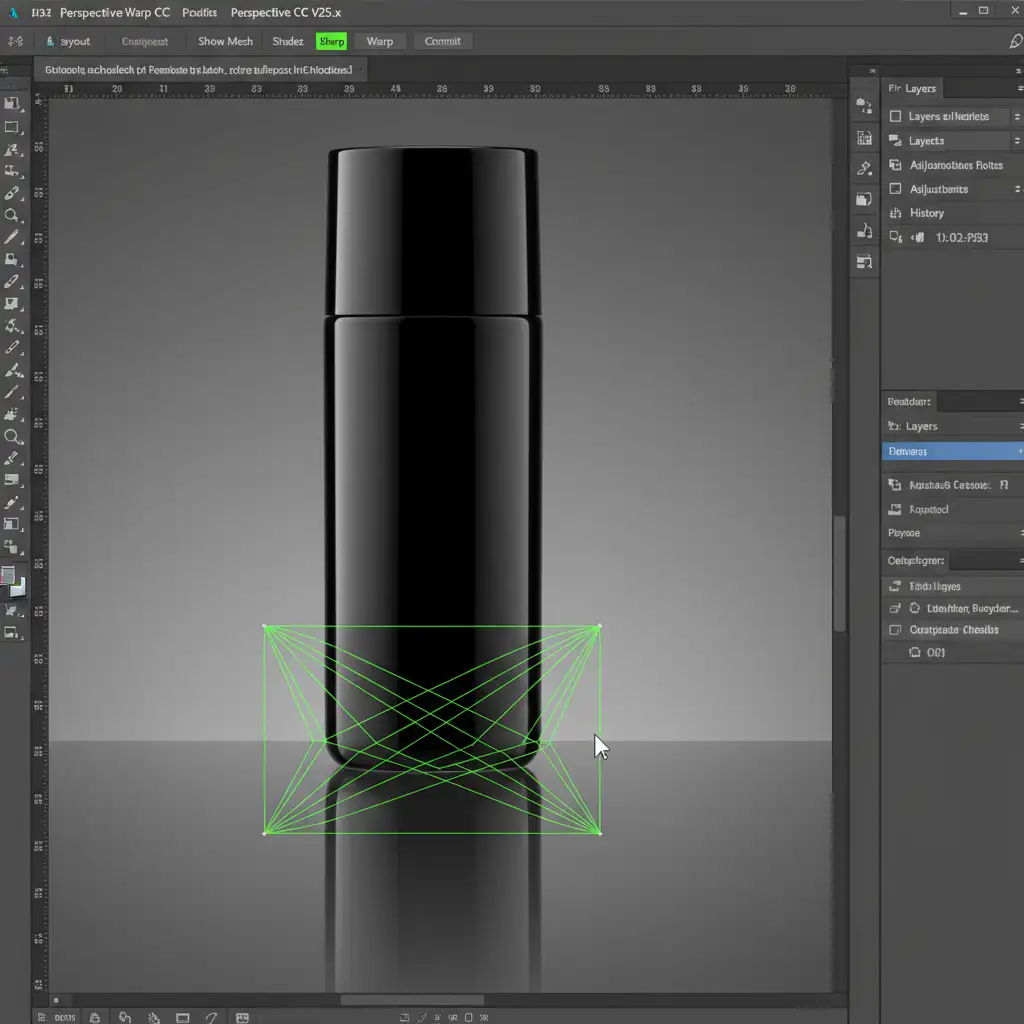
Step 2: Define Planes in Layout Mode
Navigate to Edit > Perspective Warp. By default, the tool opens in Layout mode. Click and drag to draw grids over the distinct planes of your flipped product. For a box, draw one grid for the left side and one for the right side, allowing them to snap together at the center edge.
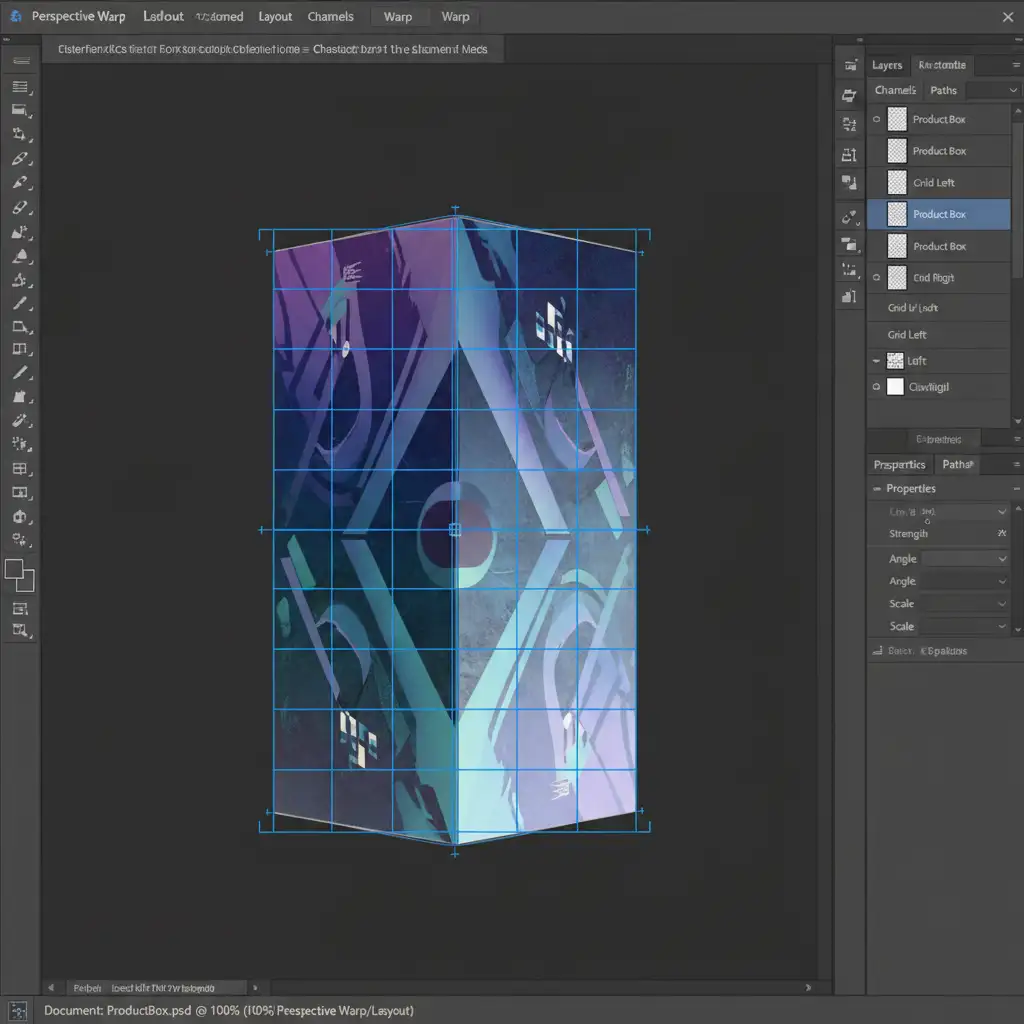
Step 3: Adjust the Vanishing Point in Warp Mode
Switch from Layout mode to Warp mode in the top options bar. Now, click and drag the corner pins. Your goal is to compress the bottom of the reflection (the part furthest away) and align the top edges perfectly with the base of the actual product above it. Follow the natural vanishing point of the ground plane. Hit Enter to apply.
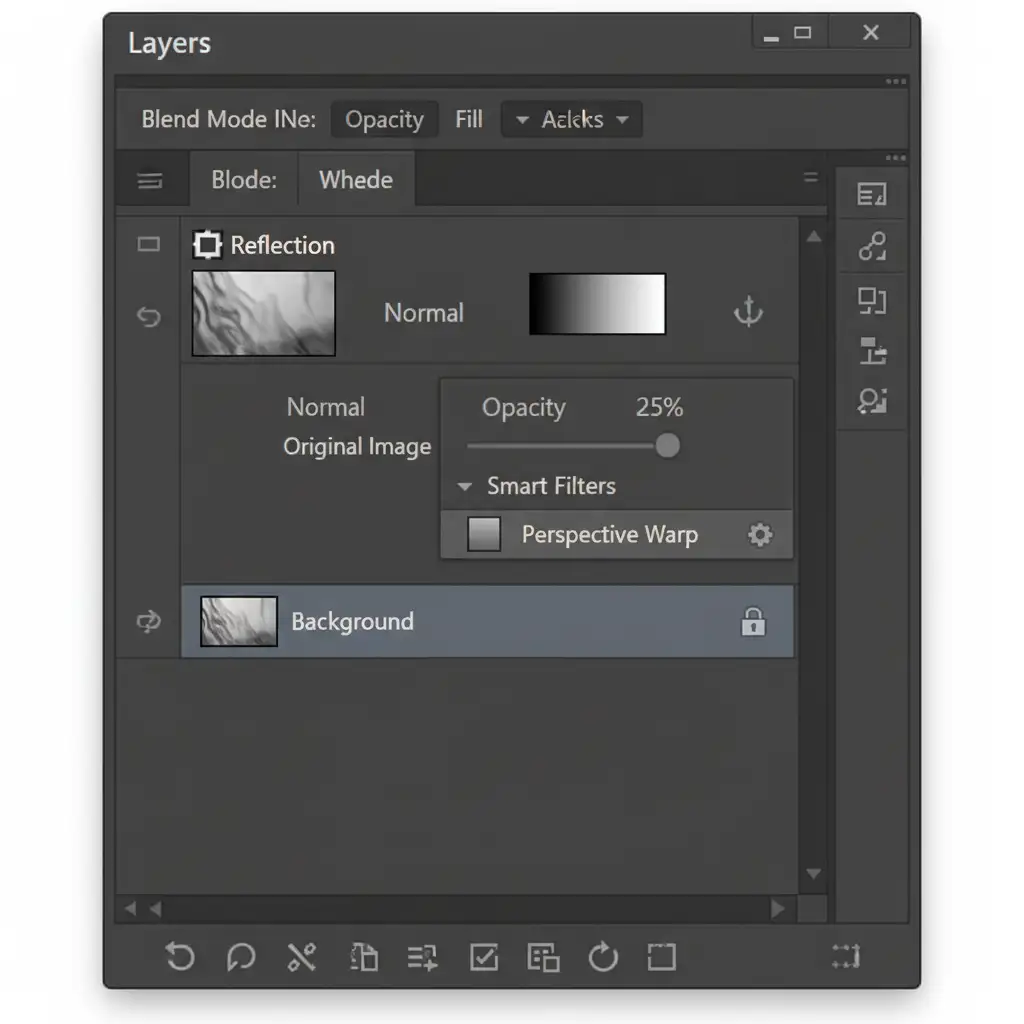
Step 4: Blend with a Gradient Mask
A realistic reflection naturally fades as it moves further from the object. Add a Layer Mask to your Smart Object. Select the Gradient Tool (G), choose a black-to-white linear gradient, and draw from the bottom of the reflection upwards. Finally, drop the overall Layer Opacity to around 15-30% for a subtle, natural finish.
Method C: The Technical Deep-Dive for Complex Surfaces
For premium e-commerce retouching, a perfectly smooth reflection isn’t always enough. If the product is sitting on a textured surface (like wood, frosted glass, or concrete), the reflection must interact with that texture.
- Multi-Planar Mapping: For highly complex products (like a multi-faceted perfume bottle), draw multiple connected grids in Layout mode to map the side, front, and angled planes independently before switching to Warp mode.
- Displacement Maps: To make the reflection interact realistically with the floor, apply a slight Gaussian Blur to the reflection layer, then use a Displacement Map (Filter > Distort > Displace) based on a high-contrast, black-and-white version of your floor texture. This slightly bends the reflection around the microscopic bumps of the surface.
Troubleshooting: Perspective Warp Greyed Out?
If you go to the Edit menu and find Perspective Warp is unclickable, it is almost always a GPU Acceleration issue. Perspective Warp relies heavily on your graphics card.
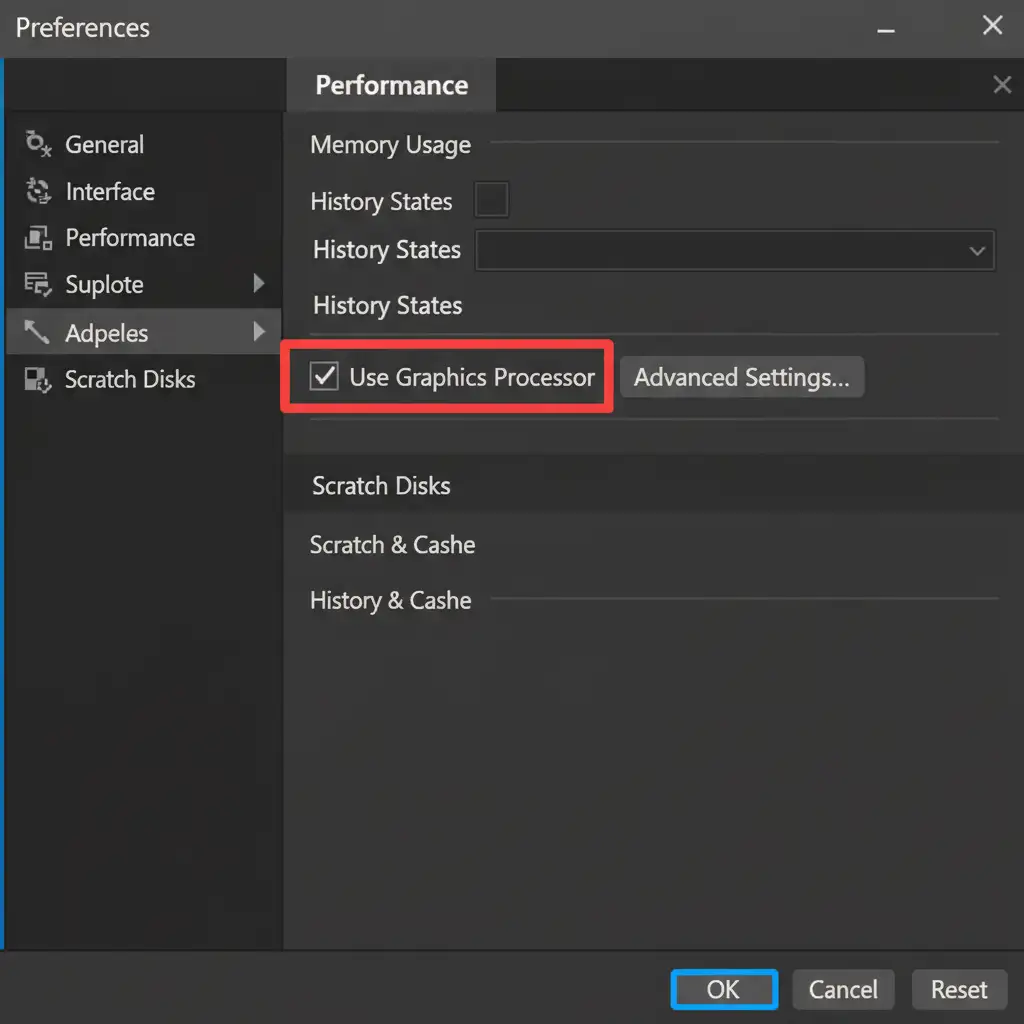
To fix this, go to Edit > Preferences > Performance (or Photoshop > Settings > Performance on Mac) and ensure Use Graphics Processor is checked. Restart Photoshop, and the tool will be active.
Elevate Your E-commerce Retouching with Image Work India
Mastering the nuances of reflection planes, vanishing points, and displacement maps takes time—time that high-volume e-commerce studios simply don’t have.
Struggling to achieve high-end, realistic reflections for your product catalog? Let the expert retouchers at Image Work India and Cloud Retouch handle complex perspective corrections and shadow generation for you. Our dedicated team specializes in advanced e-commerce retouching, ensuring every product in your catalog looks mathematically flawless, perfectly grounded, and ready to convert browsers into buyers. Contact us today to scale your post-production workflow.


