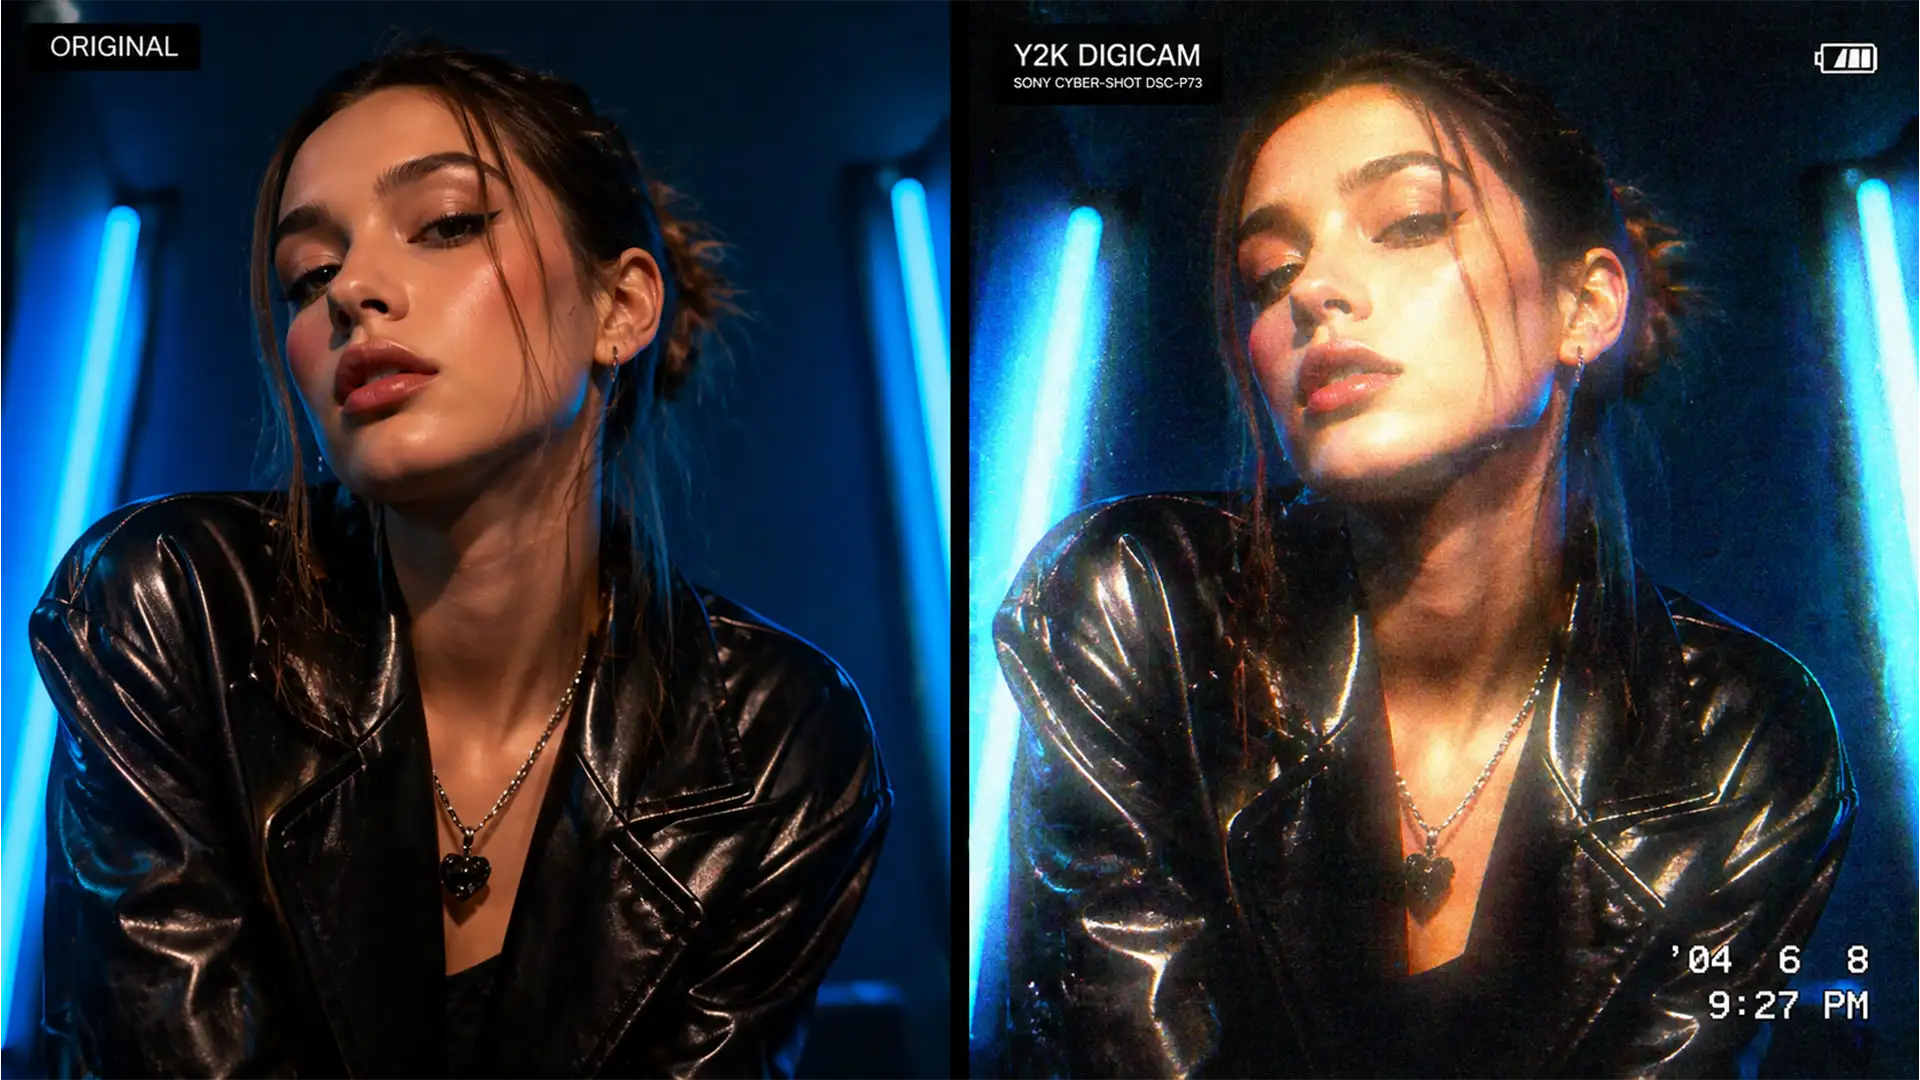
The “2000s digicam glow” is dominating TikTok and high-end fashion campaigns alike. Brands are clamoring for that nostalgic Y2K aesthetic—characterized by harsh highlight bloom, cheap lens halation, and chunky ISO noise. But here is the problem: most designers and photographers rely on low-quality mobile app filters to get this look. These apps permanently degrade your professional high-resolution assets, destroying the master file quality needed for print or premium digital campaigns.
If you want to achieve the authentic 2000s digicam glow photoshop effect non-destructively, you need to understand how to emulate early CCD sensors professionally. Let’s break down how to introduce historically “destructive” elements into your workflow while preserving your master files.
The Anatomy of the Y2K Aesthetic
Before applying adjustments, it is crucial to understand what we are simulating. The Y2K digital camera look does not stem from analog film; it is born from the technical limitations of early digital CCD sensors found in point-and-shoot cameras from the late 90s and early 2000s.
These cameras suffered from:
- Highlight Bloom: Cheap lenses and limited dynamic range caused bright areas to overexpose and “bleed” into darker areas.
- Halation and Chromatic Aberration: Fringing and glowing red/orange edges around extreme highlights.
- Severe ISO Noise: Unlike film grain, early digital cameras produced chunky, colorful digital noise in low-light situations.
- Poor Auto-White Balance: Resulting in unnatural magenta or green color shifts.
Here are three ways to recreate these technical imperfections in Adobe Photoshop (v24.x to v25.x) non-destructively.
Method 1: The Quick Fix (Highlight Bloom)
If you need a rapid turnaround for a social media campaign, this method creates an instant glow reminiscent of cheap plastic lenses.
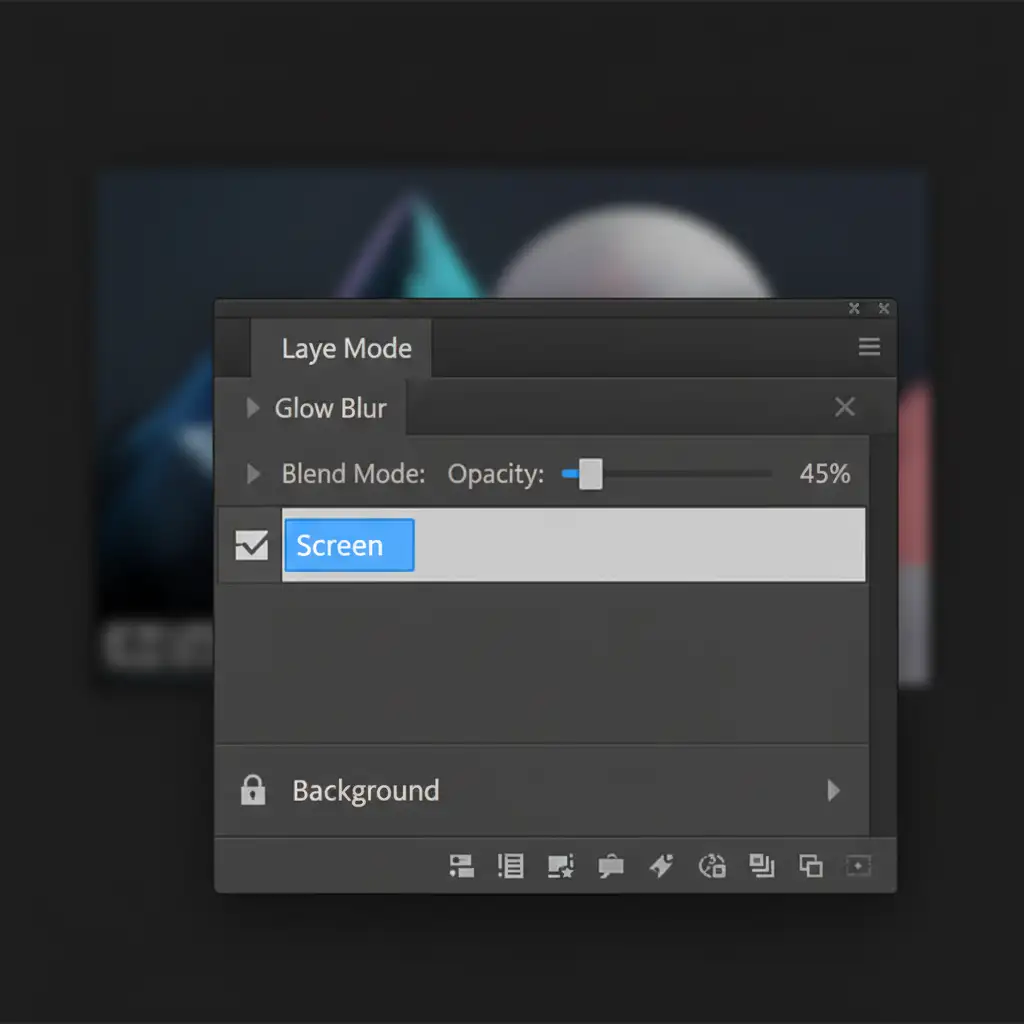
- Open your image in Photoshop and duplicate your background layer (Ctrl/Cmd + J).
- Navigate to Filter > Blur > Gaussian Blur. Apply a radius of roughly 15-25 pixels (adjust based on your image’s megapixel count).
- In the Layers Panel, change the Blend Mode of this blurred layer to Screen or Lighten.
- Reduce the layer opacity to 30-50%.
This immediately forces the highlights to bleed over the midtones, creating a synthetic bloom without destroying the underlying base layer.
Method 2: The Pro Workaround (Camera Raw Filter)
To accurately simulate the degraded quality of an early 2000s CCD sensor, we need to manipulate the raw data structure using Smart Objects.
- Right-click your background layer and select Convert to Smart Object. This ensures all upcoming filters remain non-destructive.
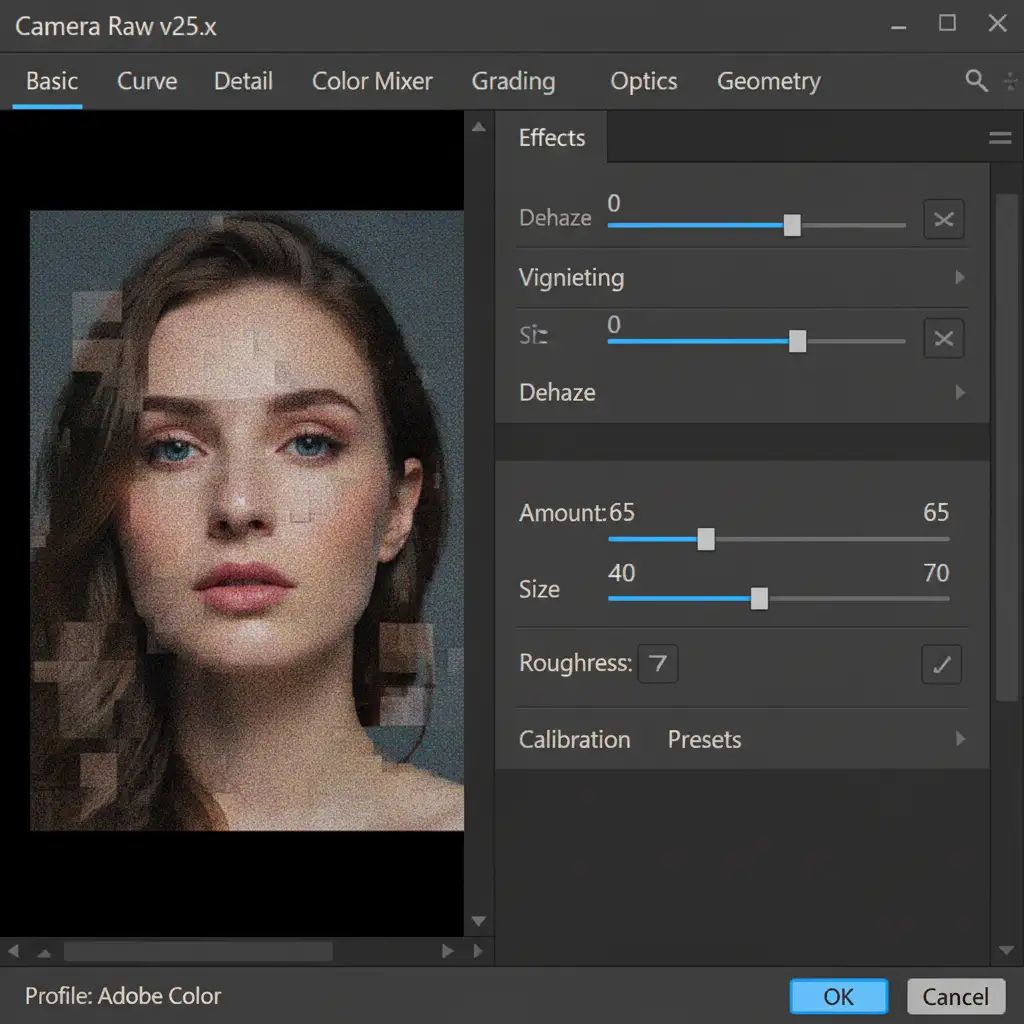
- Go to Filter > Camera Raw Filter.
- Under the Light panel, aggressively push the Highlights and Whites sliders to the right to simulate harsh sensor clipping. Lift the Blacks slightly to mimic low dynamic range.
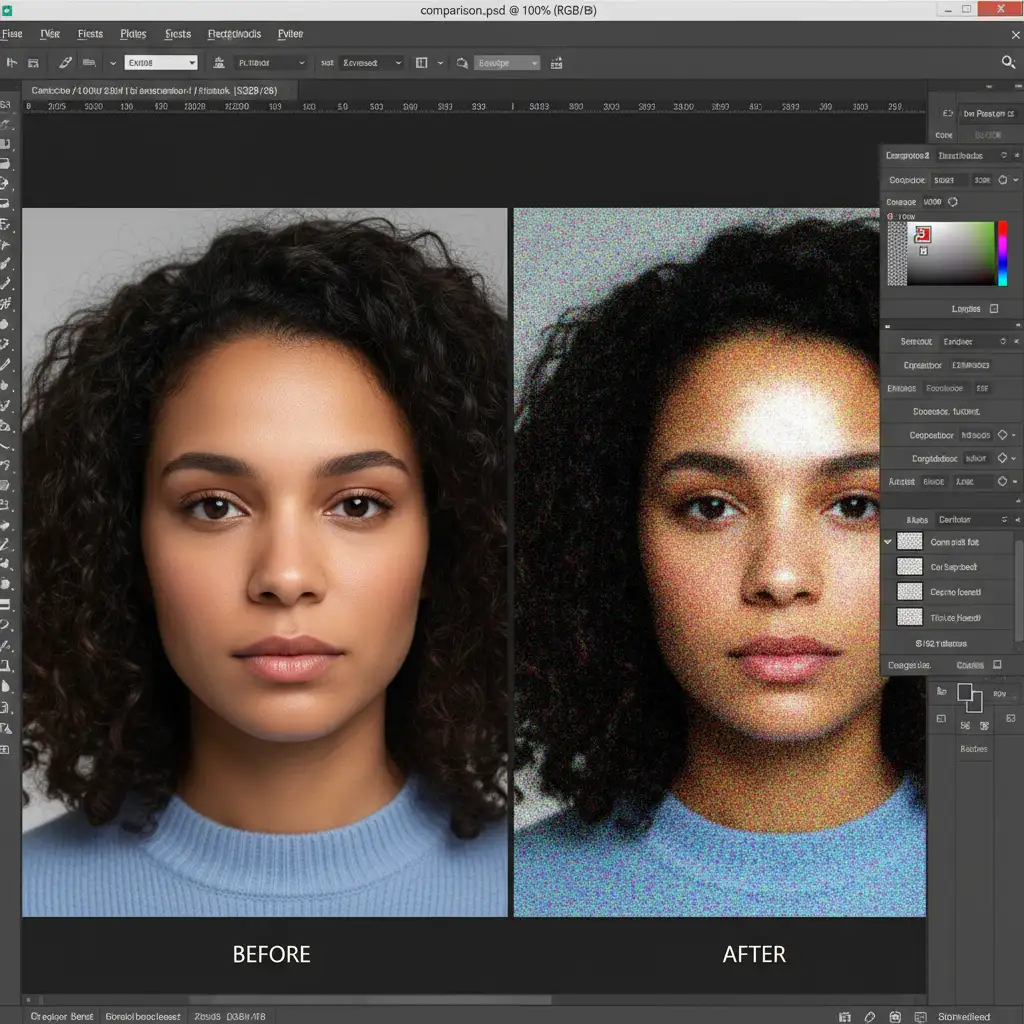
- Navigate to the Effects tab. To emulate early digital artifacting, add heavy ISO noise. Increase the Grain amount, and push the Size and Roughness sliders higher than you would for traditional film grain.
- Open the Color Mixer or Color Grading panels. Introduce slight green or magenta color shifts in the shadows to mimic the notoriously poor auto-white balance of early point-and-shoots.
Method 3: The Technical Deep-Dive (True Halation)
For high-end digital campaigns where you need granular control over the effect, luminosity masks are the industry standard for isolating extreme highlights and creating true halation.
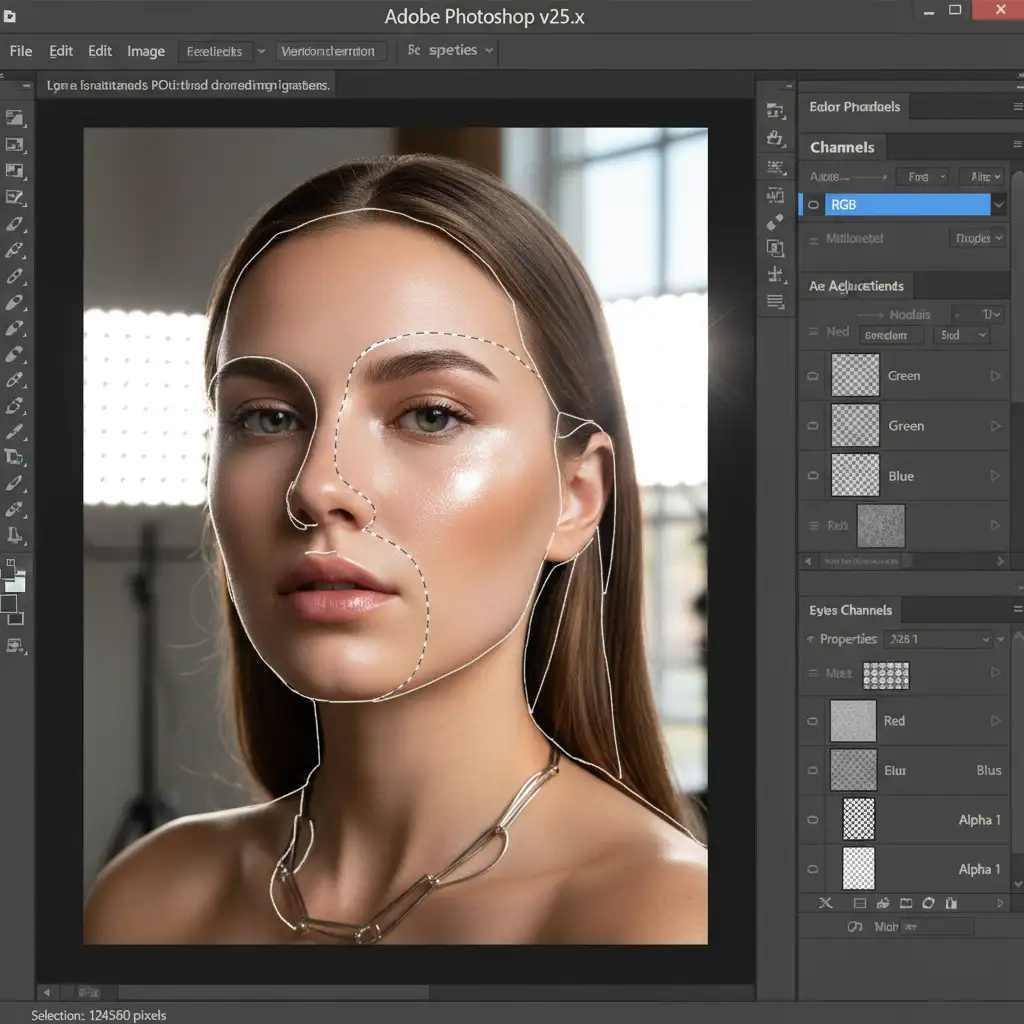
- Navigate to your Channels panel. Hold Ctrl/Cmd and click on the RGB channel thumbnail. This creates a selection of the brightest 50% of your image.
- To isolate only the extreme highlights (the brightest 10%), hold Ctrl/Cmd + Alt/Opt + Shift and click the RGB channel thumbnail again to intersect the selection. Repeat this one more time. You will now see “marching ants” around only the brightest light sources.
- With this selection active, create a new solid color adjustment layer (choose a pure white) or duplicate your image and mask it.
- Apply a heavy Gaussian Blur to this masked layer.
- To create authentic halation, clip a Hue/Saturation adjustment layer directly to your blurred highlight layer (Ctrl/Cmd + Alt/Opt + G). Check the “Colorize” box, and adjust the Hue to a deep red or orange, pushing the Saturation up.
This workflow accurately simulates sensor overloading without destroying the contrast and detail in your midtones and shadows.
Scale Your Brand’s Visual Aesthetic
Recreating the 2000s digicam glow photoshop effect on a single image is a great technical exercise. But what happens when your brand needs this exact Y2K aesthetic applied uniformly across an e-commerce catalog of 5,000 images, or a global campaign with hundreds of deliverables?
Manual editing bottlenecks your creative pipeline.
At Image Work India and Cloud Retouch, we specialize in professional, high-volume creative retouching and batch processing services. Our expert retouchers understand the exact technical specifications required to emulate analog and retro digital aesthetics non-destructively, ensuring your master files remain print-ready while delivering the trendy visuals your audience demands.
Don’t let post-production slow down your creative vision. Contact Image Work India and Cloud Retouch today to scale your brand’s unique visual aesthetic flawlessly.


